Using SSH and WinSCP
SSH and WinSCP are basic tools if you want to play more with the mini router.
Secure Shell (SSH) is a cryptographic network protocol for operating network services securely over an unsecured network. The best known example application is for remote login to computer systems by users. Sometime you need to have basic tools to ssh to the server (e.g. When you need to set up Shadowsocks server ). This guide is how to SSH login to the GL.iNet routers.
WinSCP is the windows tool which runs on top of SSH to connect and edit files on the router. In Linux you can use scp. But WinSCP is the best tool on windows.
SSH to the Router for Windows Users
1. Download and install a PuTTY
Go to the following webpage to download the latest PuTTY version:
https://www.chiark.greenend.org.uk/~sgtatham/putty/latest.html
2. Install PuTTY


3. Launch PuTTY
Click PuTTY in Start Menu

You will see the following Configuration Window:

Input Host Name (or IP address) 192.168.8.1, Keep Port as default 22, select connection type: SSH,
Input Your Session in saved sessions, and Save your content.

Click Open at the bottom

A security alert will pop-up, click Yes.
login as:root
Then input your admin password
Note: You need to use your password which you set up the router at the first time

When you see above picture, that means you are now ssh login the router successfully.
WinSCP
WinSCP is a much easier tool to edit files on the router if you are using Windows.
1. Download WinSCP
Download WinSCP from here: https://winscp.net/eng/download.php and install in your Windows.
2. Connect to the router
Run WinSCP, choose SCP as the protocol. If you didn't change the IP of the router it should be 192.168.8.1. Please use your real IP of the router. Port number should be 22. Please root as the username and input your real password. Then click Login button.

After login you have full control of the router now.
You can choose view, edit or transfer files from/to the router.

For example, if you want edit firewall config, you can go to /etc/config and find firewall file. Then click your right key of your mouse, then Edit.

Now you can edit the file content freely. Be careful not to mess up the settings.

SSH to the router for Linux/Mac User
The process on Linux and Mac OS are generally the same. Below we use Ubuntu as as example.

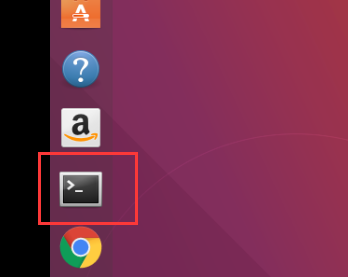
1. Launch Terminal
Click the Terminal icon to launch Terminal. Then, input the following command:
SSH root@192.168.8.1
If you have ever connected to another router, host key verification failed may displayed as follow:

If this happens, run the command in the red box. Please copy the exact command which is displayed in your terminal.
ssh-kengen -f "~/.ssh/known_hosts" -R "192.168.8.1"

2. Log In Router
retry the ssh login command:
ssh root@192.168.8.1

Type "yes"

Input your router password: (you can set this password when you first connect to your router)

Finally, you login the router when the above message displayed.