Dynamic DNS
Dynamic Domain Name Service (Dynamic DNS or DDNS) is a service used to map a domain name to the dynamic IP address of a network device. With Dynamic DNS, you can access your router remotely. An Internet public IP address is required for this functionality.
Enable DDNS
On the left side of the web Admin Panel, go to APPLICATIONS -> Dynamic DNS.
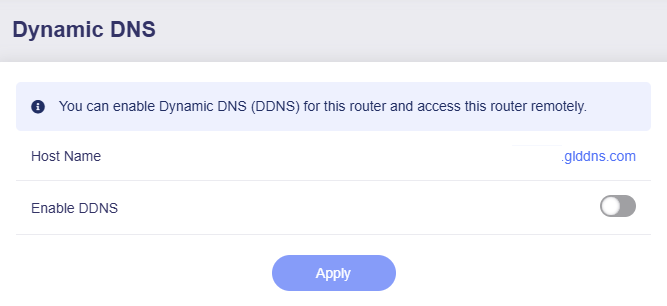
Toggle on Enable DDNS, agree to the Terms of Services & Privacy Policy, then click Apply.
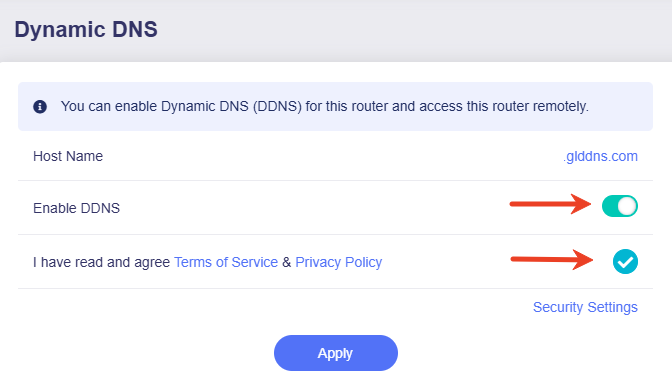
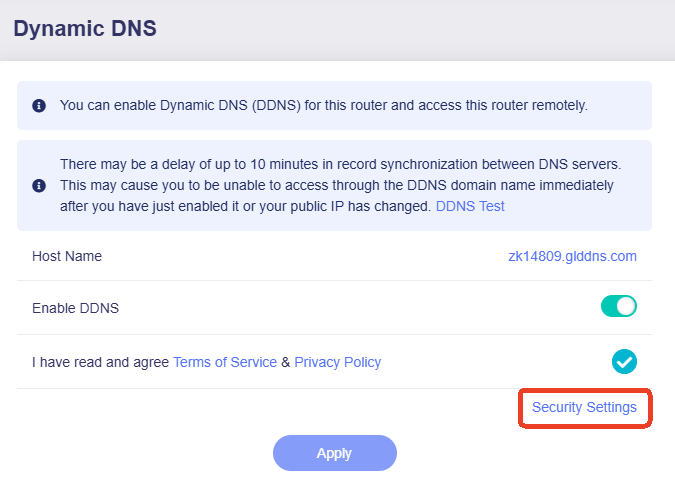
Click on Security Settings in the bottom right corner.
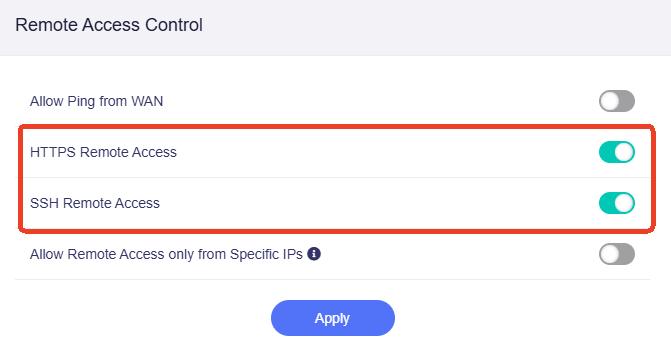
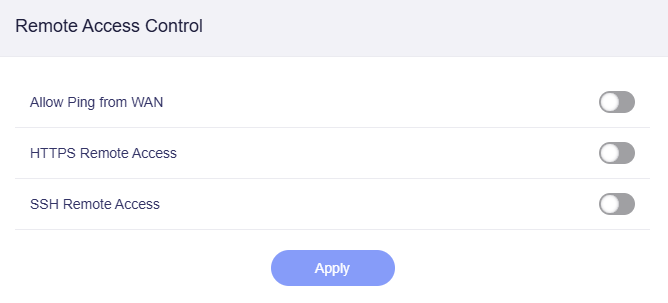
In the pop-up window, check if the remote access protocol you want to apply is enabled. If not, go to SYSTEM -> Security -> Remote Access Control to enable it.
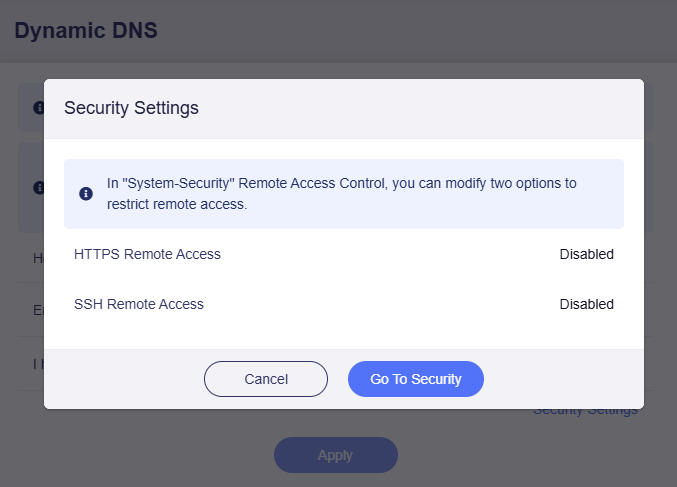
Enable the remote access protocol you want, and click Apply.
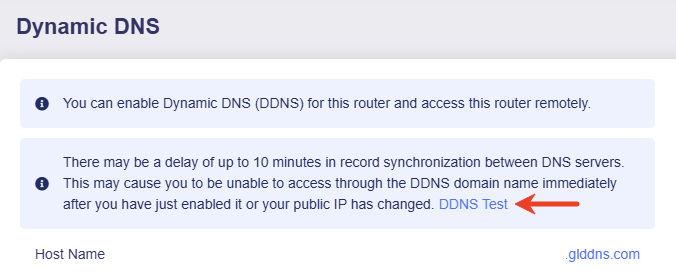
There may be a delay of up to 10 minutes in record synchronization between DNS servers. This may prevent you from accessing through the DDNS domain name immediately after enabling it or when your public IP changes.
Note: If you enable DDNS and VPN Client at the same time, make sure that Services From GL.iNet Use VPN is disabled. This feature can be found in the VPN Client Options of the VPN Dashboard.
Check If DDNS Works
You can check if DDNS works using the DDNS test tool or check it manually using commands.
In the Dynamic DNS page, click the DDNS Test
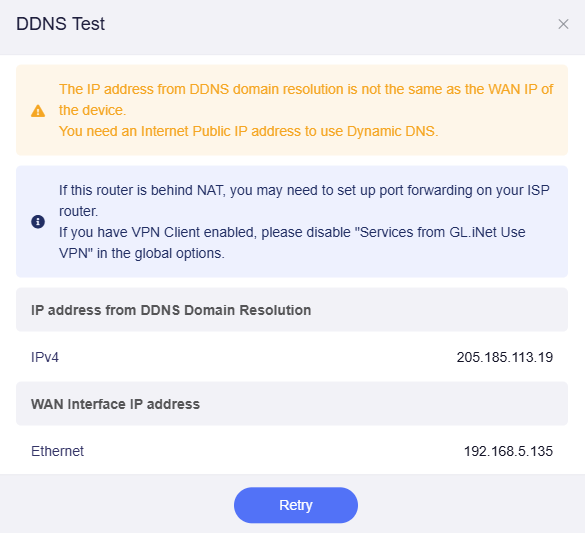
Make sure the IP address from DDNS domain resolution matches the router’s WAN IP.
If not, a yellow prompt will appear at the top, indicating that the router might be behind NAT, and you need to set up port forwarding on the upstream router.
-
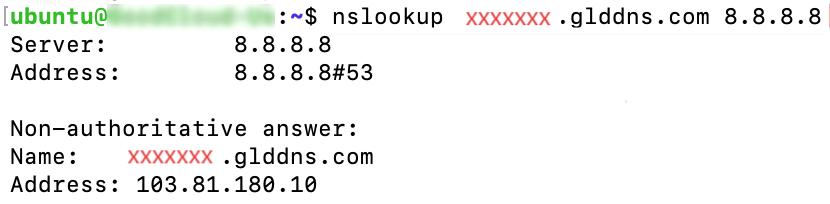
Use
nslookupcommand to obtain the mapping between domain name and IP address, as shown below.
Replace the "xxxxxxx.glddns.com" in the image above with your Host Name.
The "8.8.8.8" in the image above is the Google DNS. Use it or replace it with other DNS, then press Enter.
-
If you get a public IP address as an output, such as "103.81.180.10" in the image below, it indicates that your DDNS domain has been successfully mapped to a public IP address.
On a device connected to the router, search for "what is my ip address" in a browser, or visit a website like What Is My IP Address. You will get your public IP address. Compare the two IP addresses obtained from Step 1 and 2. If they are the same, the DDNS is in effect, otherwise it is not.
-
If you get a message
** server can't find xxxxxxx.glddns.com: NXDOMAIN, as shown below, it indicates that domain resolution failed, and your DDNS domain has not been successfully mapped to a public IP address.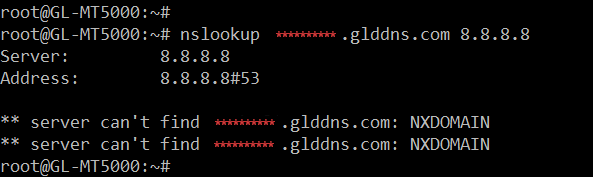
HTTPS Remote Access
Note
-
A Public IP address is required for HTTPS remote access.
Click here to check if your Internet Provider Service (ISP) assigns you a public IP address.
-
If your router is behind NAT, configure port forwarding (port 443) on the upstream router for HTTPS access.
Follow the steps below to enable HTTPS remote access for your router.
-
On the Dynamic DNS page, toggle on Enable DDNS, agree to the Terms of Services & Privacy Policy, then click Apply.
-
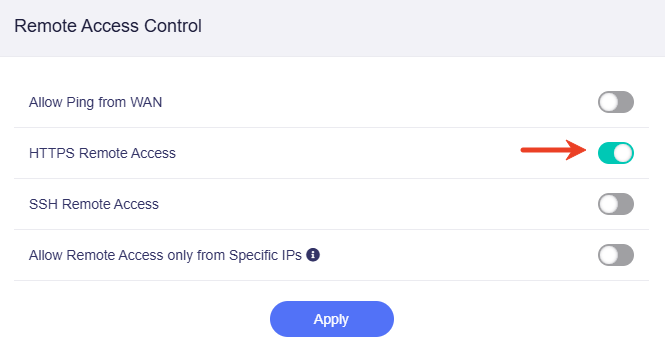
In the web admin panel, go to SYSTEM -> Security -> Remote Access Control.
-
Enable HTTPS Remote Access, and click Apply.
Once enabled, you can access the router’s admin panel from anywhere using the DDNS host name over HTTPS (e.g., https://xxxxxxx.glddns.com).
If port forwarding is configured, access it as https://xxxxxxx.glddns.com:external_port(replace the external_port with your actual port number).
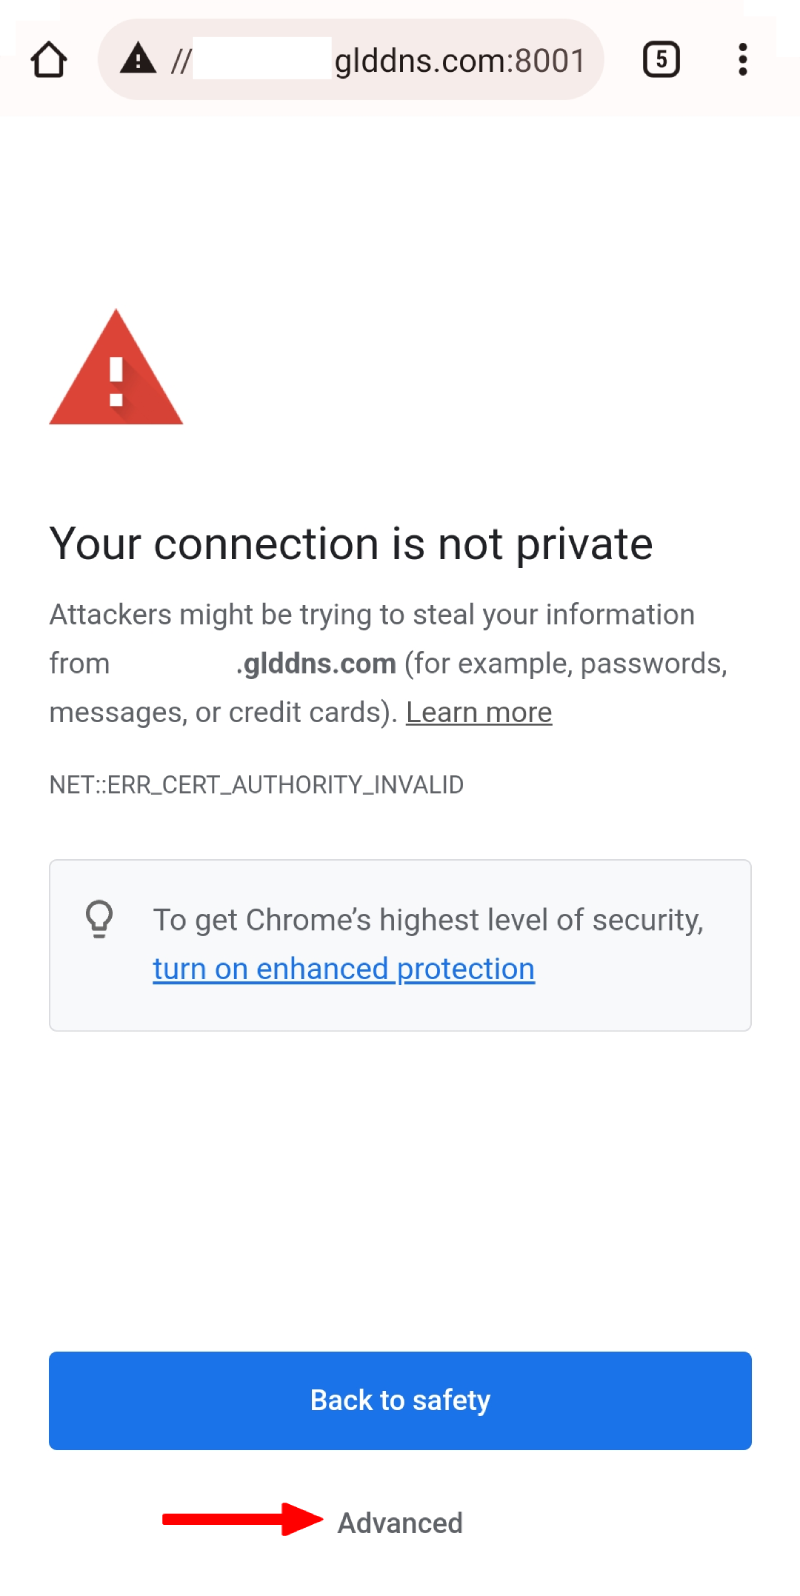
Note: This function uses self-signed certificates, therefore the browsers will indicate Your connection is not private when accessing the router's admin panel via the DDNS host name over HTTPS, as shown below (port 8001 is used below as an example).
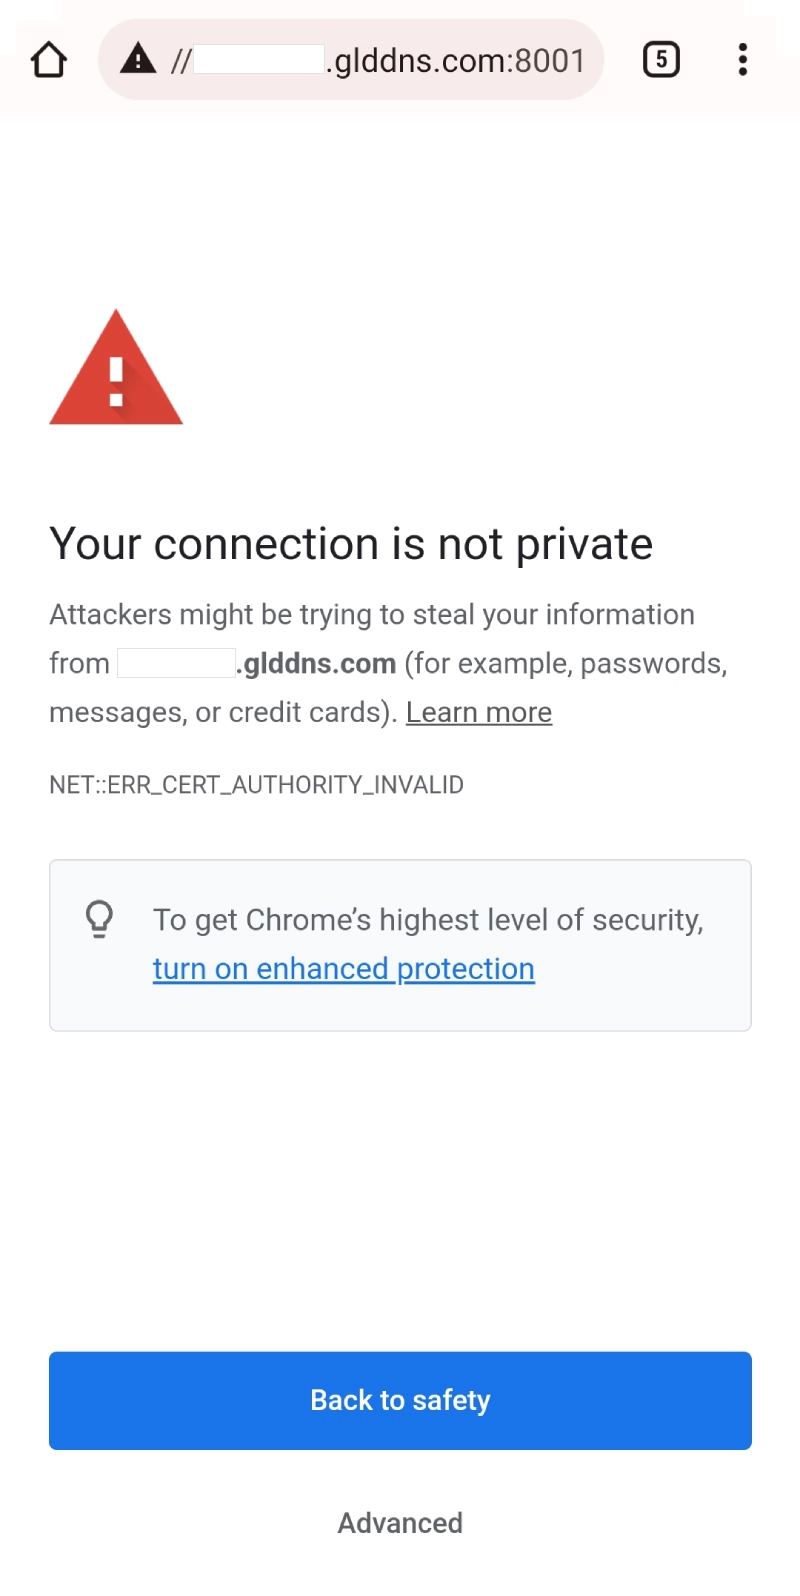
To proceed the HTTPS remote access, click Advanced at the bottom.
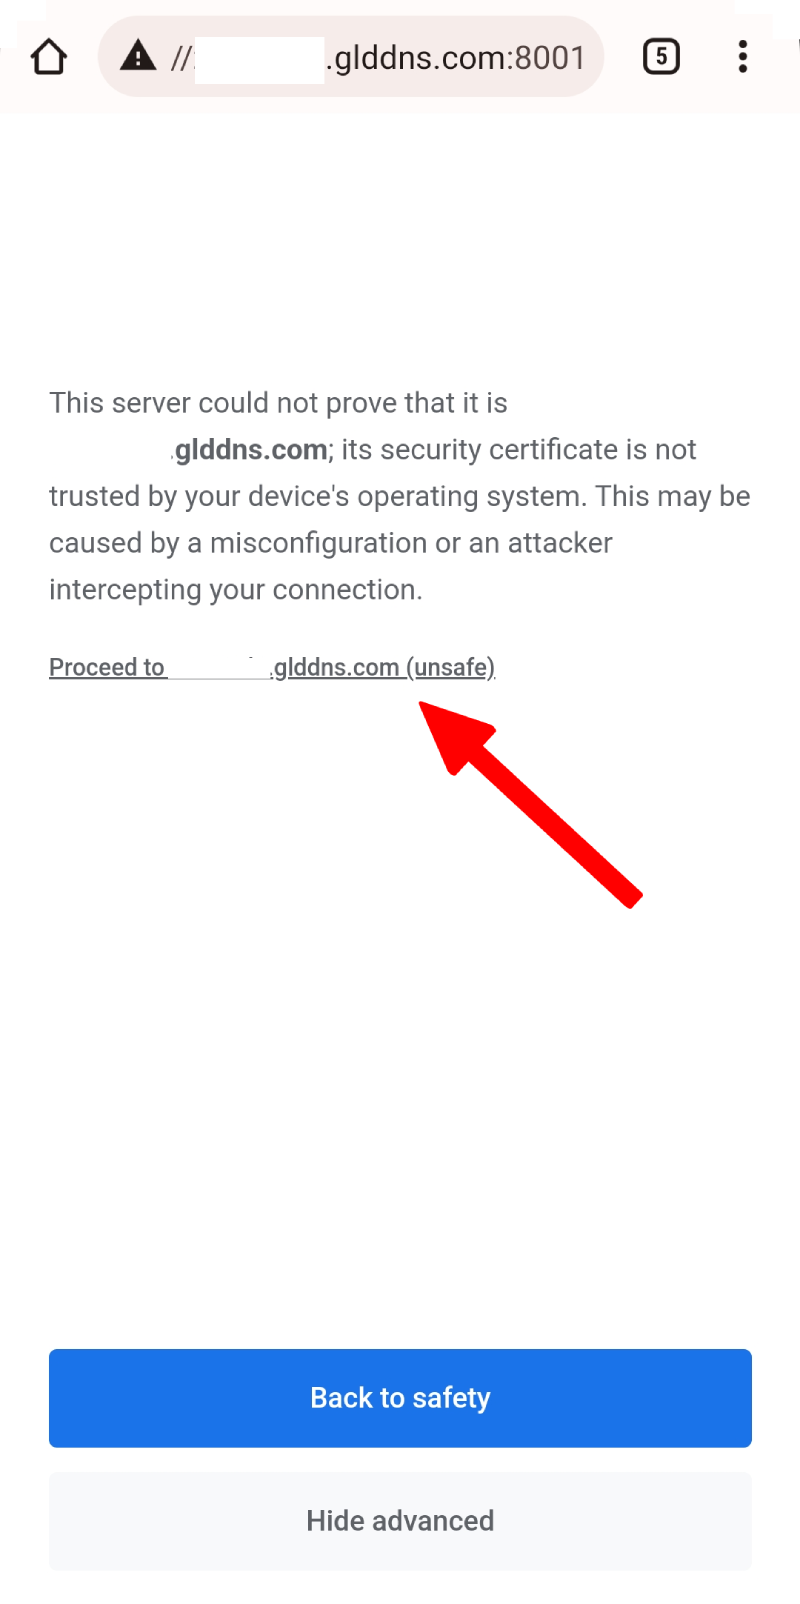
Then click Proceed to xxxxxxx.glddns.com to continue.
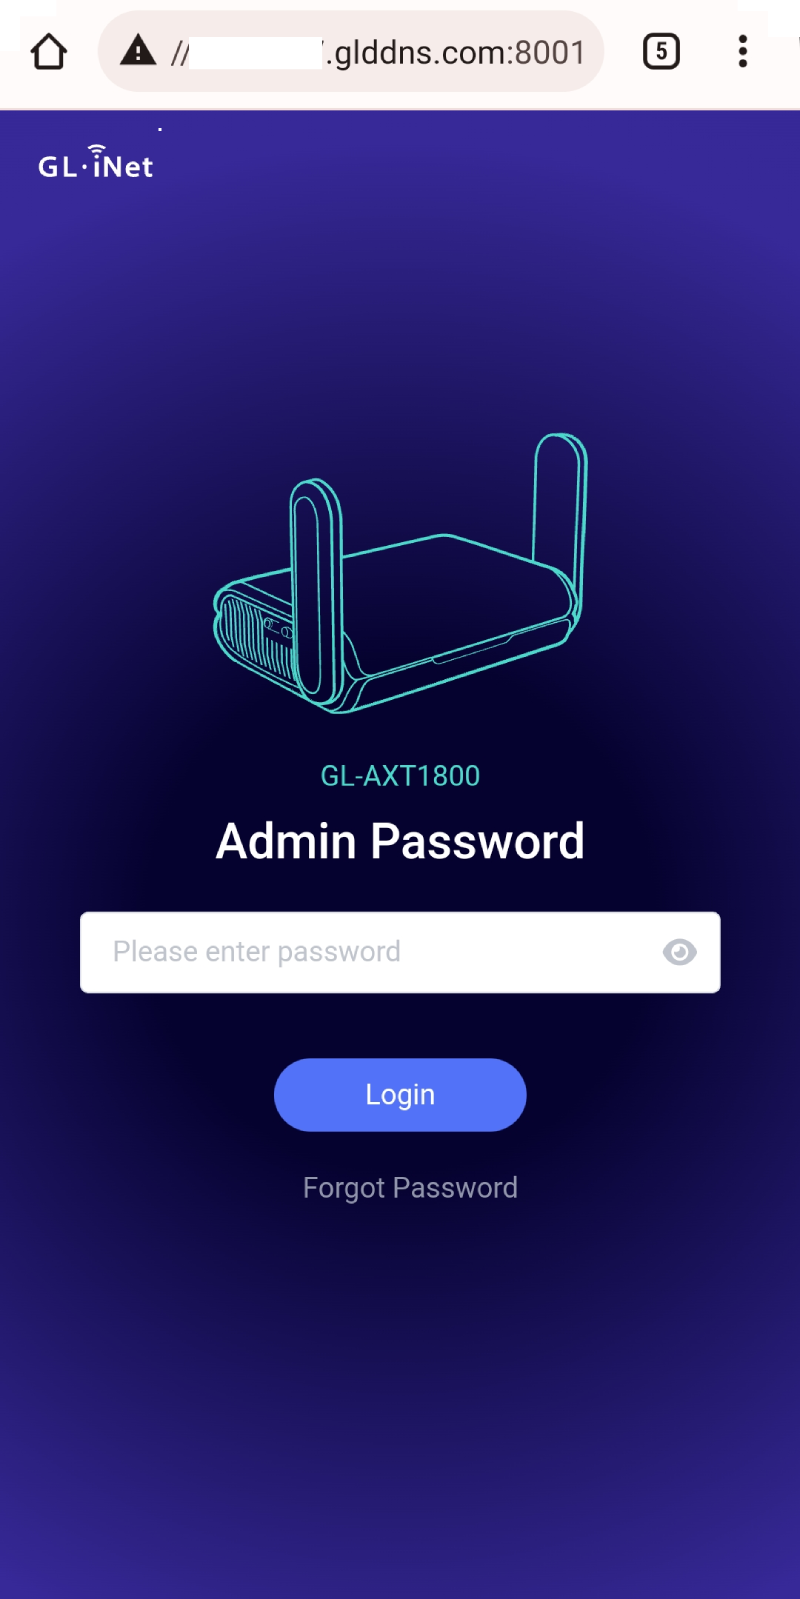
You will then be able to access the web admin panel using the DDNS host name over HTTPS.
SSH Remote Access
Note
-
A Public IP address is required for SSH remote access.
Click here to check if your Internet Provider Service (ISP) assigns you a public IP address.
-
If your router is behind NAT, configure port forwarding (port 22) on the upstream router for SSH access.
Follow the steps below to enable SSH remote access for your router.
-
On the Dynamic DNS page, toggle on Enable DDNS, agree to the Terms of Services & Privacy Policy, then click Apply.
-
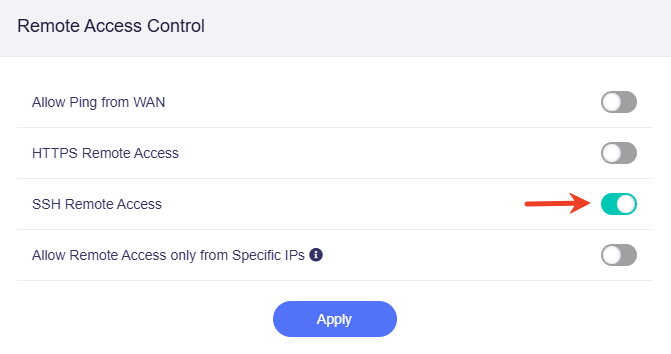
In the web admin panel, go to SYSTEM -> Security -> Remote Access Control.
-
Enable SSH Remote Access, and click Apply.
Once enabled, you can access the router's admin panel from anywhere using the DDNS host name over SSH (e.g., ssh root@xxxxxxx.glddns.com).
If port forwarding is configured, access it as ssh root@xxxxxxx.glddns.com:external_port (replace the external_port with your actual port number).
Still have questions? Visit our Community Forum or Contact us.