VPN Dashboard
Note
This guide is based on firmware v4.8. If you are using an earlier firmware version, please visit here.
On the left side of web Admin Panel -> VPN -> VPN Dashboard.
The VPN dashboard displays VPN client connection details, tunnel rules, and other advanced settings.
You can view VPN connection details (e.g., server address, traffic statistics, client virtual IP), or perform advanced settings on the VPN network, such as enabling kill switch, creating VPN tunnel rules for multi-tunnel scenarios, etc.
VPN Setup Wizard
By default, there are no available configurations on the VPN Dashboard.

Click on the book icon in the upper left, and you can follow the instructions in the VPN Setup Wizard to complete the VPN configuration quickly.

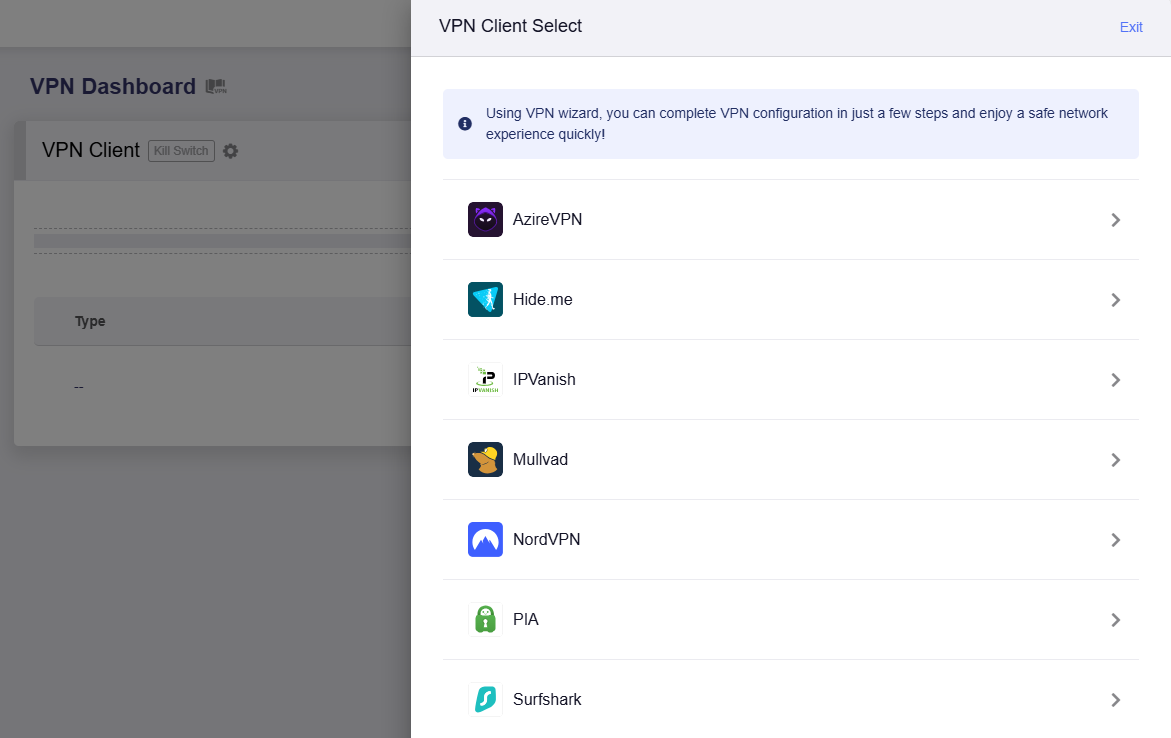
Note: The VPN Setup Wizard is only for AzireVPN, Hide.me, IPVanish, Mullvad, NordVPN, PIA and Surfshark. It may take a few minutes.
For other VPN providers, skip the wizard and go to OpenVPN Client / WireGuard Client to set up VPN manually.
Once connected successfully, the page displays as below.
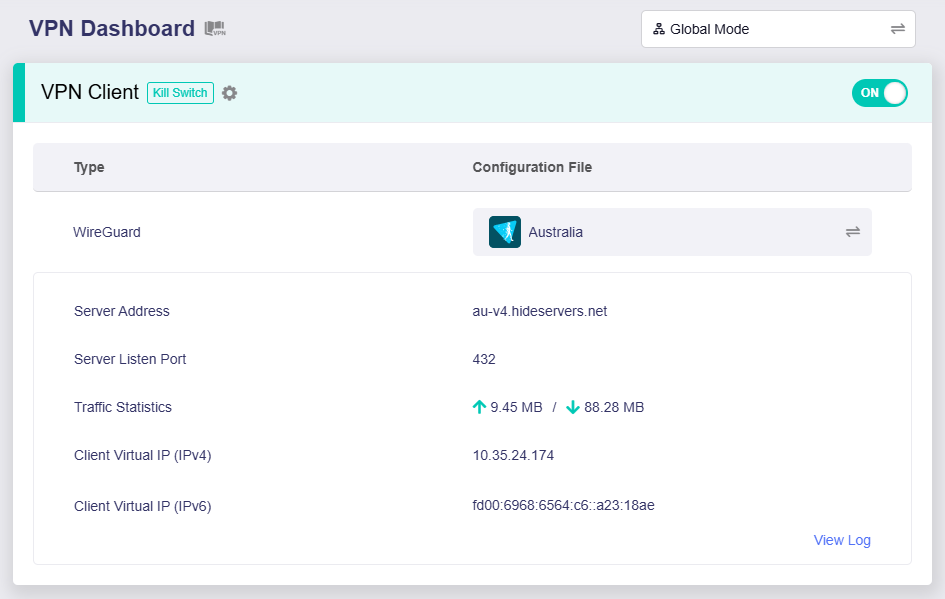
It displays the currently used VPN protocol (e.g., WireGuard), the configuration file, server address, server listen port, traffic statistics and client virtual IP(s).
VPN Mode
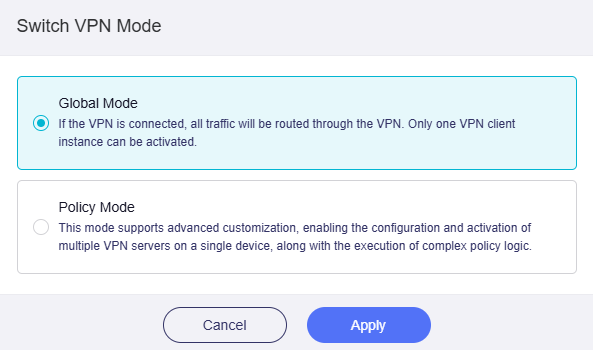
In the VPN Dashboard, you can switch the VPN mode by clicking the button in the upper right corner.

There are two modes available: Global Mode and Policy Mode.
Global Mode
Global Mode is the default VPN mode.
In this mode, all traffic will be routed through the VPN tunnel, and only one VPN client instance can be activated.
It is ideal for scenarios requiring all device traffic to pass through a single VPN server, such as unified network security or region-specific content access.
Take the following image as an example: Under Global Mode, only one VPN client can be activated, which connects to a single VPN server in Australia over WireGuard protocol. All traffic from devices connected to this router will be routed through this VPN tunnel.

Policy Mode
In this mode, you can connect to multiple VPN servers on a single device and customize VPN rules.
It suits use cases needing flexible traffic management, like routing different data through multiple VPN servers or applying custom access rules.
Switch the VPN Mode to Policy Mode, and click Apply.
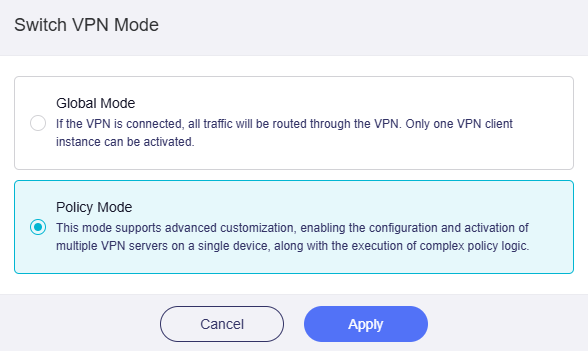
After switching, if the VPN is not enabled, the page displays as below, which has three sections, marked with A, B and C.
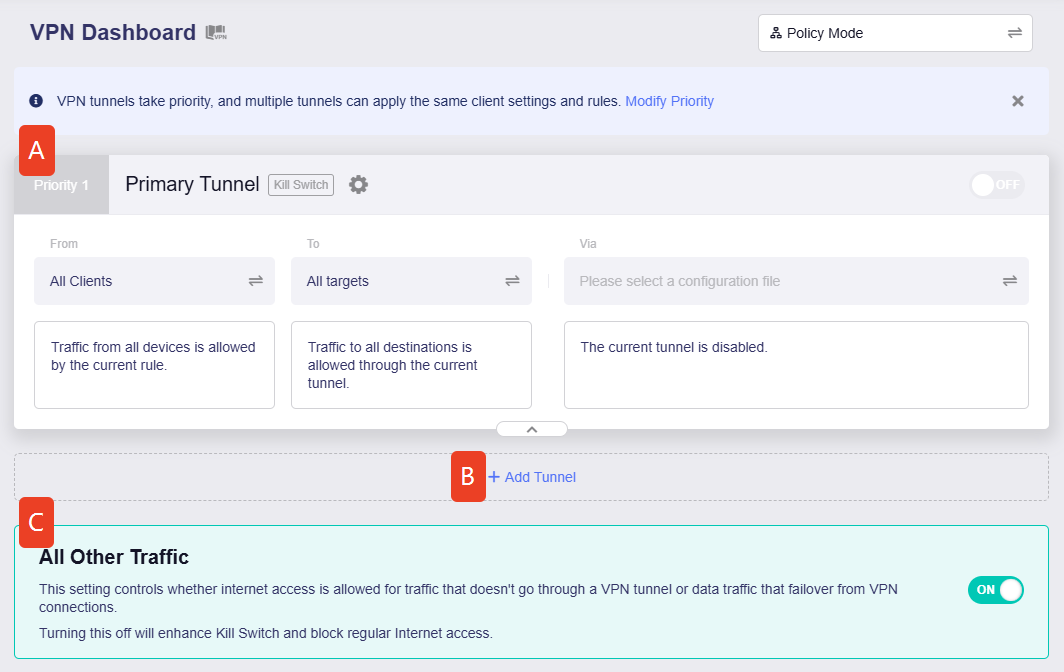
Click on the corresponding section to learn more.
Primary Tunnel
The primary tunnel is a preset tunnel in Policy Mode. By default, it has the top priority, and you can modify tunnel priority if there is more than one tunnel.
In this tunnel, you can customize the tunnel rule by setting three factors:
-
From: It refers to the traffic source, i.e., which device's traffic should apply this tunnel rule.
Follow the steps below to select the traffic source.
Click the greyed-out box.

Select the device that you want to apply this rule.
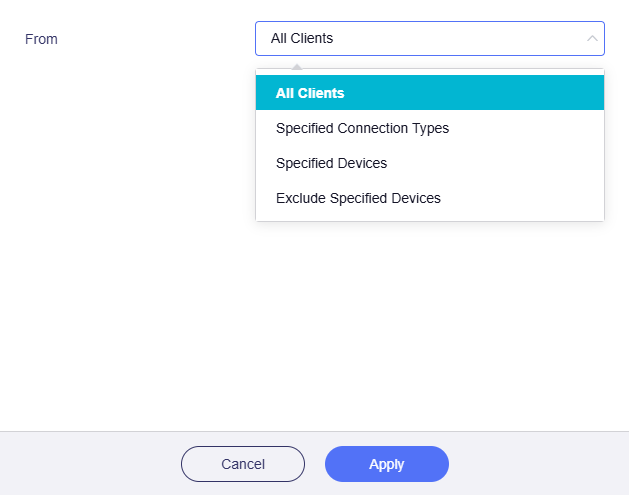
-
All Clients
If selected, traffic from all devices will apply this rule.
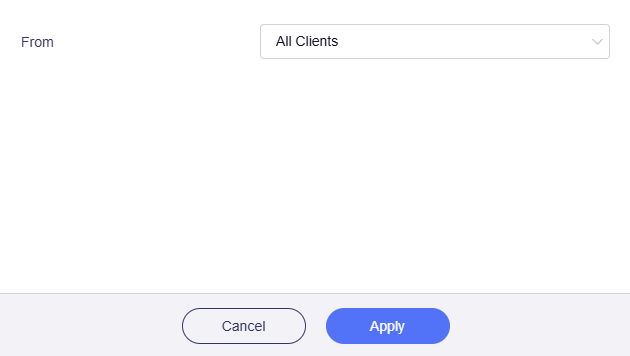
-
Specified Connection Types
If selected, traffic from specified connection types (e.g., LAN subnet, Drop-in Gateway, Guest Network) will apply this rule.

If you enable the OpenVPN server or WireGuard server on this router, there will be more options for the Specified Connection Methods, which is useful in VPN Cascading.

-
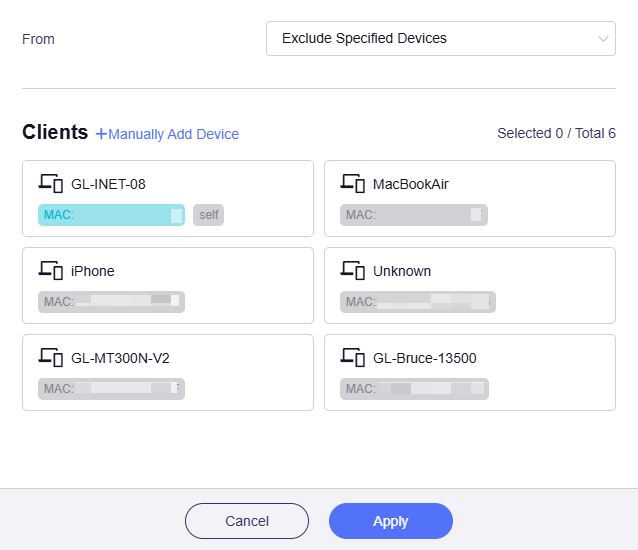
Specified Devices
If selected, traffic from specified devices (based on MAC address) will apply this rule.
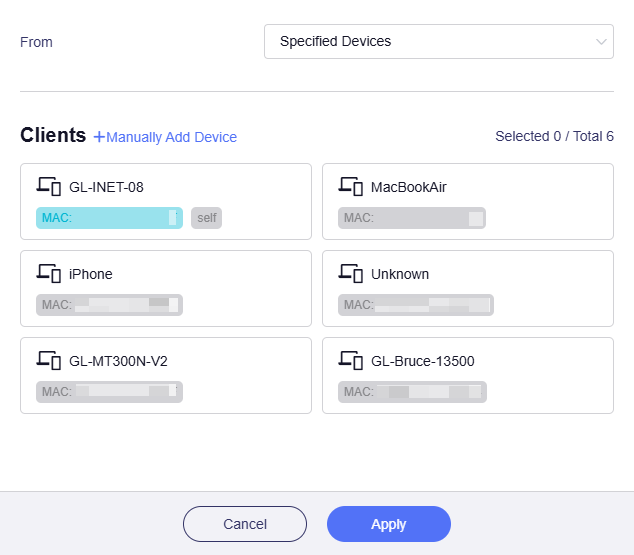
-
Exclude Specified Devices
If selected, traffic from specified devices (based on MAC address) will NOT apply this rule.
-
-
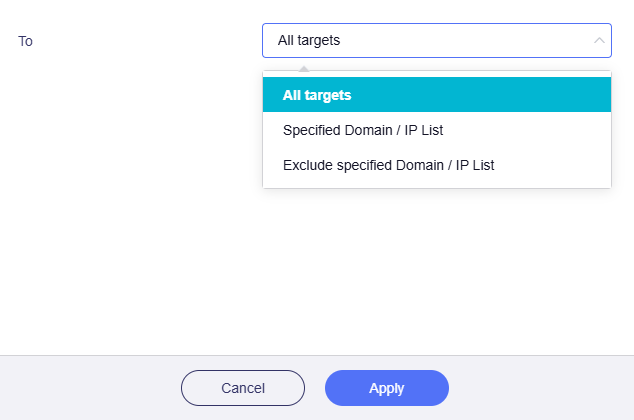
To: It refers to the destination/target, to which the traffic is routed through the current tunnel.
Follow the steps below to select the target.
Click the greyed-out box.

Select the target to which the traffic will be routed through this tunnel.
-
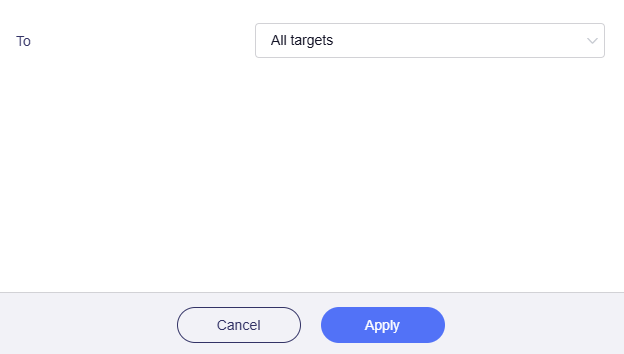
All targets
If selected, traffic that applies this rule will be routed to all targets.
-
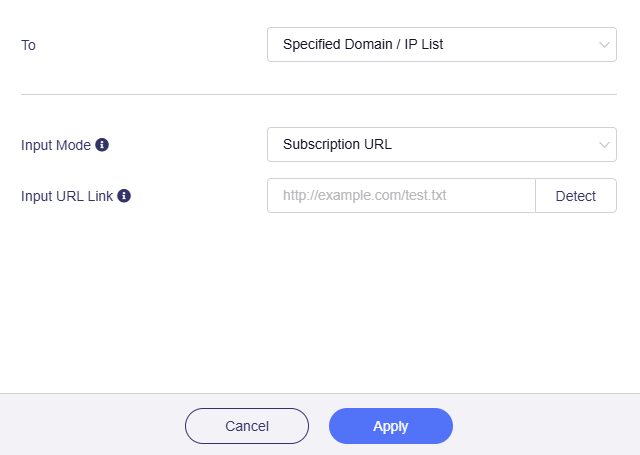
Specified Domain / IP List
If selected, traffic that applies this rule will be routed to specified Domain / IP.
Manually input the specified Domain / IP.
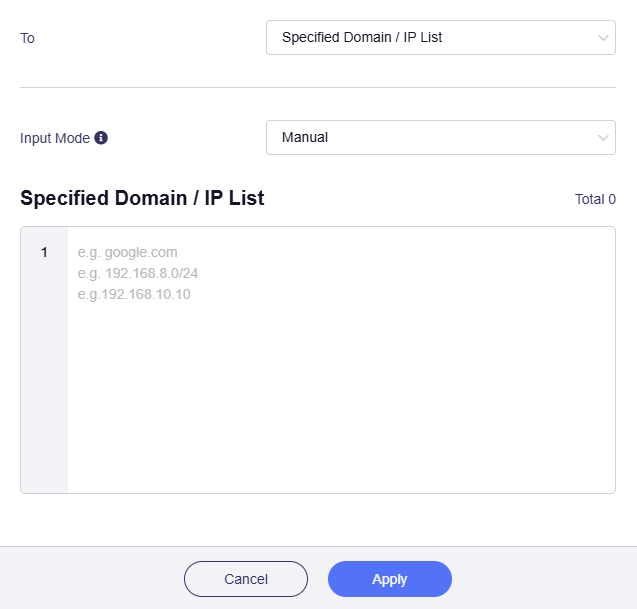
Or switch the Input Mode from Manual to Subscription URL, and input URL Link.
Note
-
If you select Subscribe URL, the domain name or IP in the URL is automatically updated every day.
-
Make sure to enter the correct URL. The URL detection will verify the validity of the domain name or IP address. Learn More
-
-
Exclude specified Domain / IP List
If selected, traffic that applies this rule will NOT be routed to specified Domain / IP.
Manually input the specified Domain / IP.
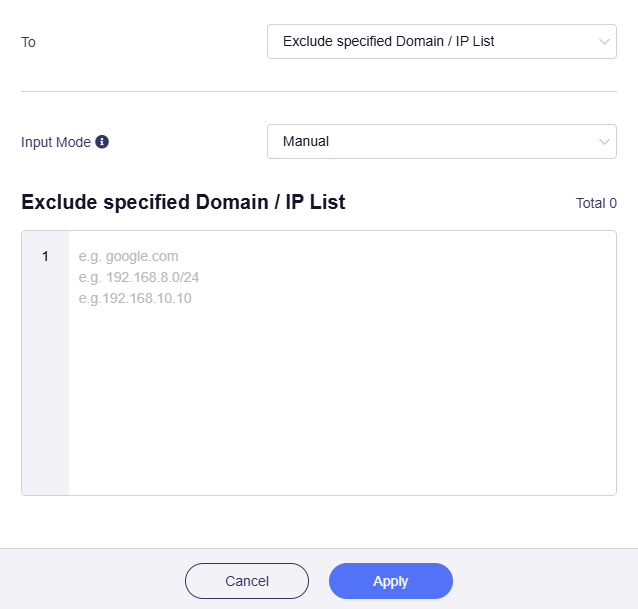
Or switch the Input Mode from Manual to Subscription URL and input URL Link.
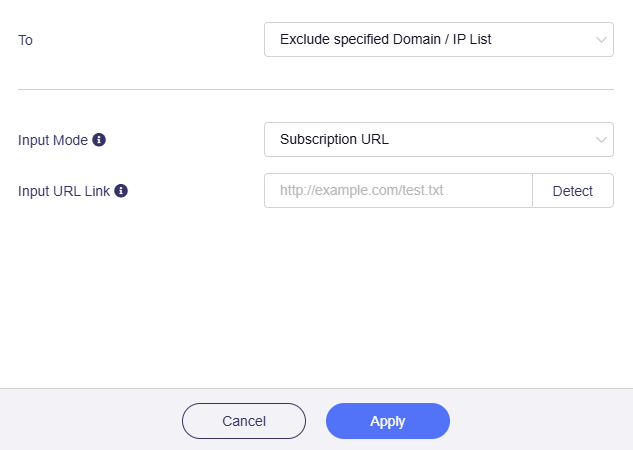
Note
-
If you select Subscribe URL, the domain name or IP in the URL is automatically updated every day.
-
Make sure to enter the correct URL. The URL detection will verify the validity of the domain name or IP address. Learn More
-
-
-
Via: It refers to the traffic routing method, i.e., whether to use VPN.
Follow the steps below to select the routing method.
Click the greyed-out box.

Select the routing method for this tunnel: Use VPN or Not Use VPN.

-
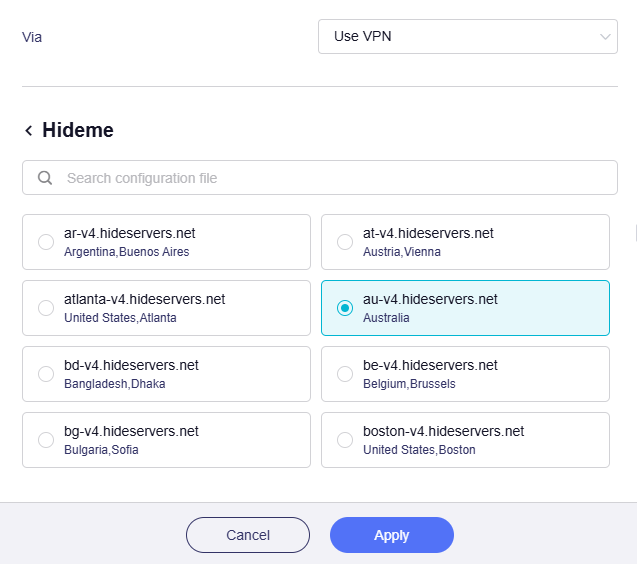
Use VPN
If selected, traffic that applies this rule will be routed to the selected targets through VPN.
To begin with, you need to configure your router as a VPN client. Use the VPN Setup Wizard to quickly complete the configuration, or navigate to OpenVPN Client / WireGuard Client in the left sidebar of the admin panel to configure manually.
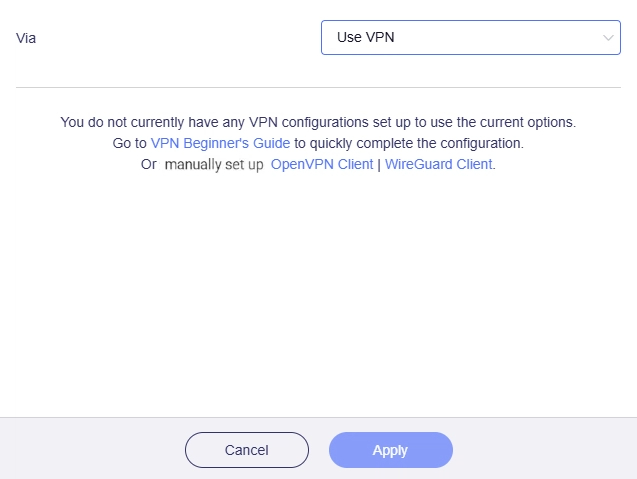
Once you set the router as a VPN client, select a VPN configuration file for this tunnel, and click Apply.
-
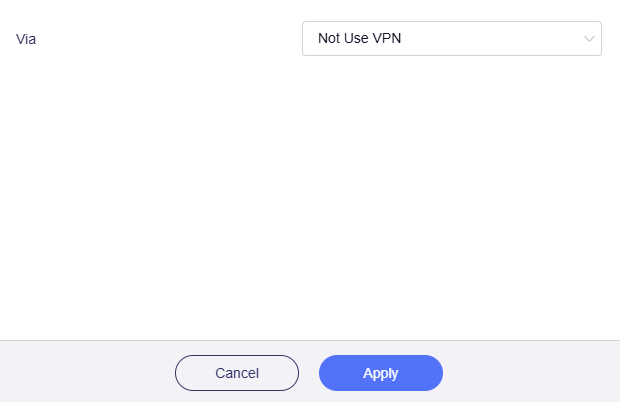
Not Use VPN
If selected, traffic that applies this rule will be routed to the selected targets via WAN instead of VPN.
-
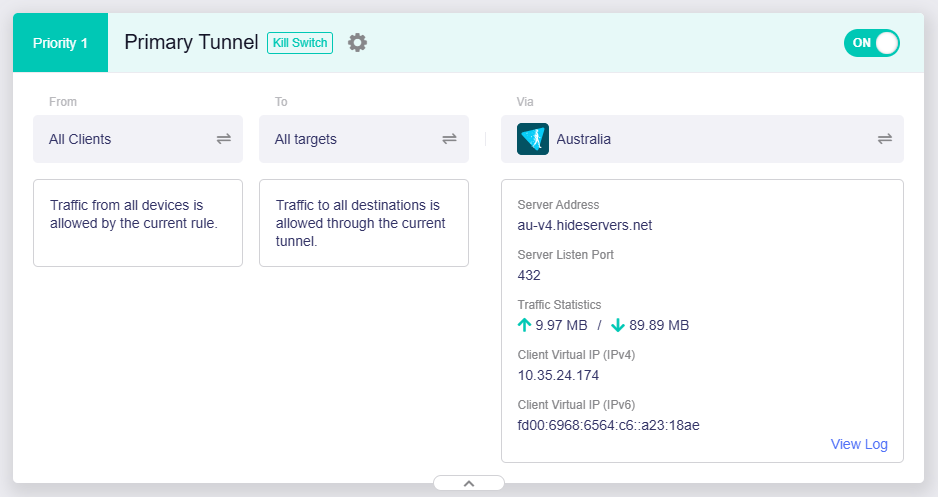
After customizing the traffic source, target, and routing method, you will complete the primary tunnel rule setup.
In the following example, the Primary Tunnel rule is: All client devices connected to this router will use VPN; Their traffic will be routed through this VPN tunnel, connected to the server in Australia and eventually exit from this server to all targets on the Internet.
Note
-
If you need to create more tunnels for multiple VPN instances, click on Add Tunnel beneath the Primary Tunnel and customize the tunnel rules.
-
If you only need one tunnel for your traffic, for security, go to All Other Traffic and Tunnel Options to check other settings before enabling the primary tunnel.
Add Tunnel
If you want to connect to multiple VPN servers at the same time, add more tunnels and specify that traffic from different devices routes to different targets through VPN (or not through VPN).
This is particularly useful when you need to route traffic from certain devices to Server A, while from others to Server B.
Click Add Tunnel beneath the Primary Tunnel.

Name the tunnel.
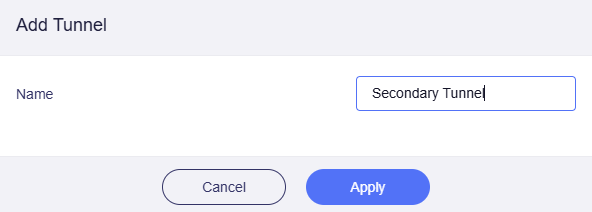
Then you will get one more tunnel on the VPN Dashboard in Polily Mode.
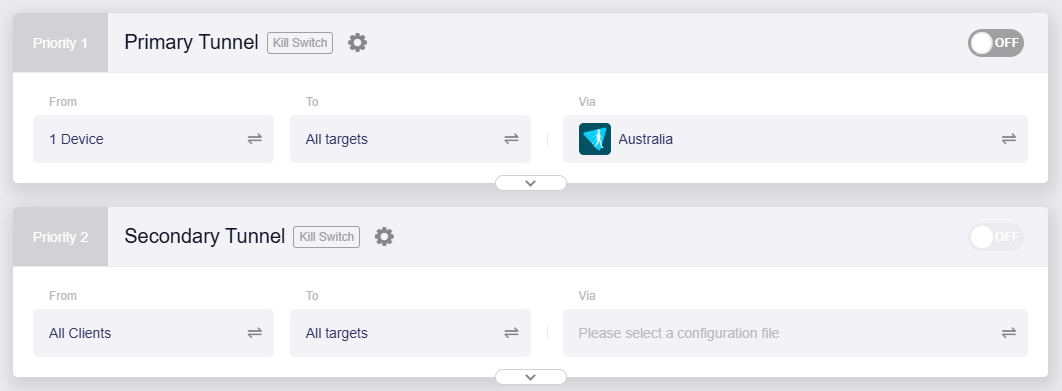
You can add more tunnels if needed. Up to 5 tunnels can be created (including the preset primary tunnel).
Customize the tunnel rules by setting the traffic source, targets and routing method. Please refer to the method and process of the Primary Tunnel.
Upon finishing the rules customization, for security, please go to All Other Traffic and Tunnel Options to check other settings before enabling the tunnels.
All Other Traffic
In Policy Mode, by default, there's a preset enabled tunnel displayed at the bottom of the VPN Dashboard page.

This tunnel is for the following data traffic:
-
The traffic that does not go through the VPN tunnel.
-
The traffic that failover from VPN connections.
Tunnel Priority
By default, the preset Primary Tunnel has the top priority, followed by other manual-added tunnel (if any), then the preset All Other Traffic tunnel to ensure local network connectivity (via WAN ISP network).
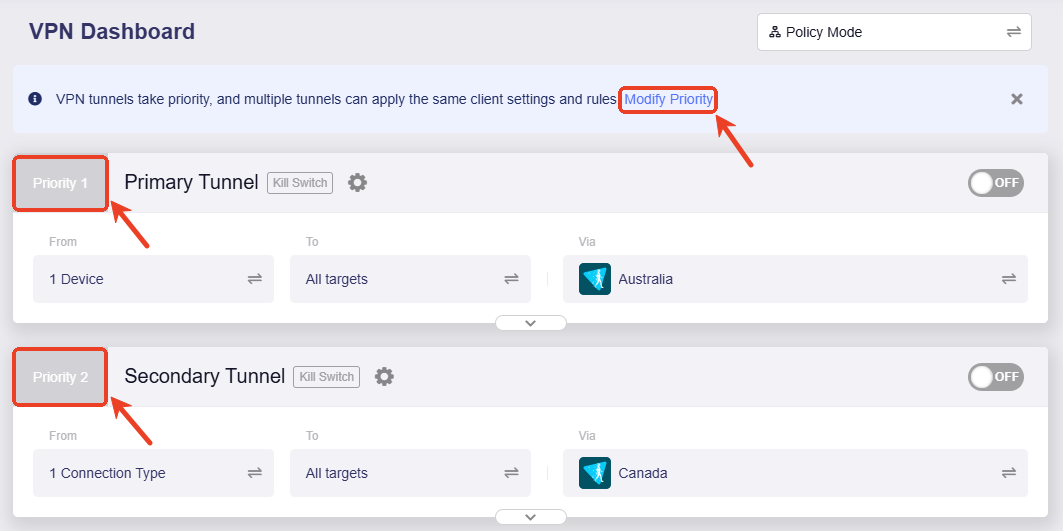
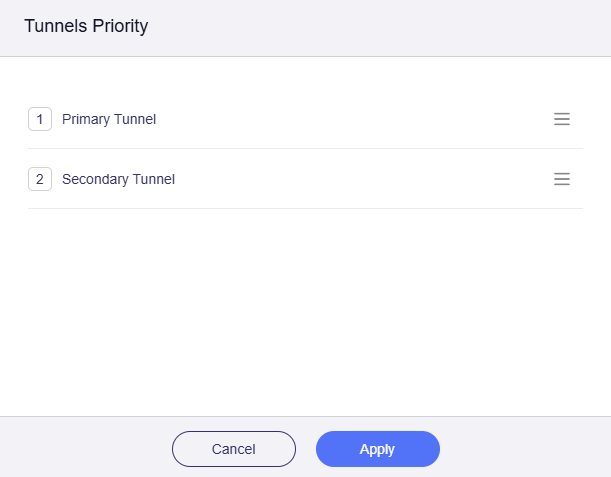
To modify tunnel priority, click Modify Priority in the top info bar, or click the priority label in the top left of any tunnel (e.g., Priority 1/Priority 2).
Press and hold the three-line icon on the right to drag the tunnels for sorting, and click Apply
When there are multiple tunnels enabled, the router will route traffic in the following order:
-
If the highest-priority tunnel is enabled, traffic that matches the rules of this tunnel will be routed to the specified targets using the selected routing method.
-
For traffic that does not match the rules of the highest-priority tunnel, it will automatically match the rules of the tunnel with the second-highest priority. This process continues in sequence, and so on.
-
If the traffic still does not match, it will continue to match the next tunnel, and so on, until it matches the "All Other Traffic" tunnel.
-
The All Other Traffic tunnel, if enabled, aims to route the traffic that does not go through the VPN tunnel, or traffic that failover from VPN connections.
Note: The All Other Traffic tunnel ensures that traffic not through the above tunnels can still connect to the Internet. If disabled, it will enhance Kill Switch and block regular Internet access for traffic that does not go through VPN.
Tunnel Options
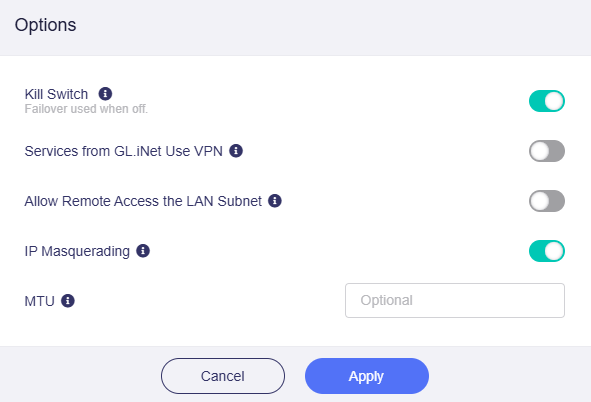
Click the gear icon next to a tunnel name to configure advanced settings for this tunnel, or perform actions such as renaming or deleting it.

-
Kill Switch: If enabled, traffic matching the assigned VPN tunnel is blocked if the connection drops unexpectedly; otherwise, it will failover to next priority tunnels or WAN.
-
Services from GL.iNet Use VPN: If enabled, GoodCloud, DDNS, and rtty services will use VPN tunnels to send packets. Note that these services normally need to use the real IP address of the device, otherwise operations may fail.
-
Allow Remote Access the LAN Subnet: If enabled, remote access to this router (tunnel IP) and LAN devices through the VPN will be allowed. Requires the VPN server to advertise a route back to your LAN subnet(s).
-
IP Masquerading: If enabled, the LAN client source IPs will be rewrote to the router's VPN tunnel IP. Disabled only for Site-to-Site setups where the remote peer knows your LAN subnets.
-
MTU: The MTU you set for the tunnel will overwrite the MTU item in the configuration file.
Still have questions? Visit our Community Forum or Contact us.