ZeroTier
ZeroTier is a software-based virtual private network (VPN) that enables secure, encrypted communications between devices over the internet. It creates a private, virtual network that allows devices to communicate as if they were on the same local network, regardless of their physical location or network topology. ZeroTier is designed to be easy to set up and use, and offers features such as end-to-end encryption, network segmentation, and network bridging capabilities.
The ZeroTier feature on GL.iNet routers, available since firmware v4.2, allows the router to join a ZeroTier virtual network. Once connected, you can access the router remotely, including its WAN and LAN resources.
Note:
-
It is not recommended to use the ZeroTier simultaneously with any of the following features or services, as this may cause routing conflicts: OpenVPN Client, WireGuard Client, GoodCloud Site to Site, Tailscale, AstroWarp.
-
This feature is currently in beta, and may have some bugs.
Supported Models
Supported Models
- GL-E5800 (Mudi 7)
- GL-MT5000 (Brume 3)
- GL-MT3600BE (Beryl 7)
- GL-BE6500 (Flint 3e)
- GL-BE9300 (Flint 3)
- GL-BE3600 (Slate 7)
- GL-B3000 (Marble)
- GL-MT6000 (Flint2)
- GL-X3000 (Spitz AX)
- GL-XE3000 (Puli AX)
- GL-AX1800 (Flint)
- GL-MT2500/GL-MT2500A (Brume 2)
- GL-MT3000 (Beryl AX)
- GL-AXT1800 (Slate AX)
- GL-A1300 (Slate Plus)
Unsupported Models
- GL-X2000 (Spitz Plus)
- GL-SFT1200 (Opal)
- GL-MT1300 (Beryl)
- GL-E750/E750V2 (Mudi)
- GL-X750/GL-X750V2 (Spitz)
- GL-AR750S (Slate)
- GL-XE300 (Puli)
- GL-MT300N-V2 (Mango)
- GL-AR300M Series (Shadow)
- GL-B1300 (Convexa-B)
- GL-AP1300 (Cirrus)
- GL-S1300 (Convexa-S)
- GL-X300B (Collie)
Set up ZeroTier network
Two versions of ZeroTier Central are available: New Central and Legacy Central.
-
New Central: A newer version of ZeroTier Central with improved usability and new features. It is recommended for new users for the best experience and latest tools.
-
Legacy Central: For accounts created before November 2025. Legacy Central continues to support existing users managing their networks.
Both versions can be used in parallel, but there is no direct migration path at this time.
Please select the appropriate version to proceed.
New Central
The following is an example using the GL-MT3600BE.
-
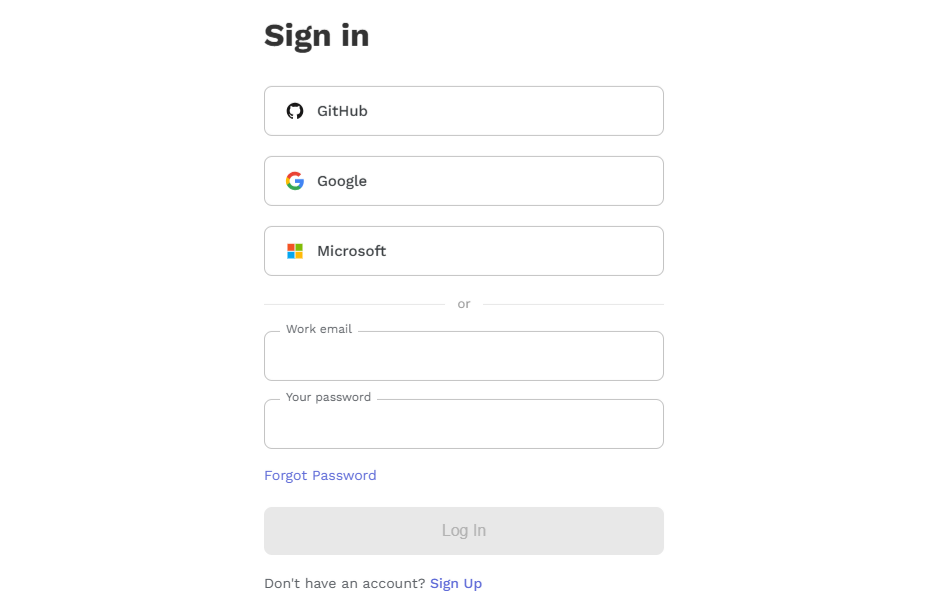
Visit ZeroTier official website and sign in with your account.
-
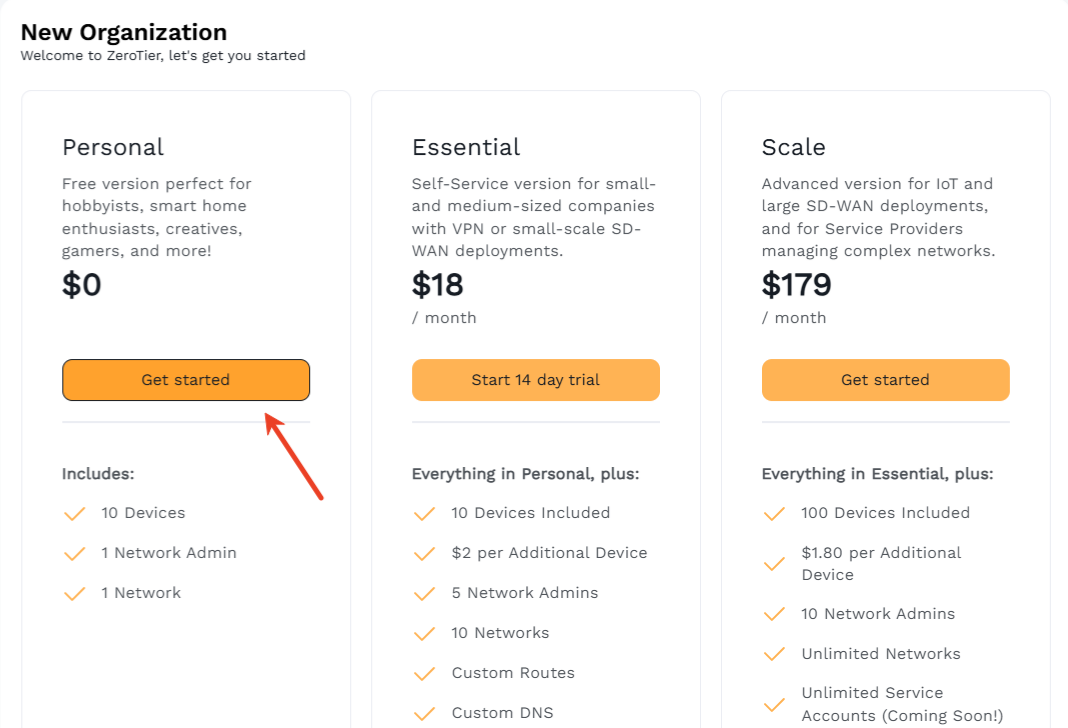
Create an organization.

-
Select a plan. Here we choose Personal plan as an example, which includes 10 devices, 1 network admin, and 1 network. If you need to create more networks, add more devices, or add custom routes and DNS, choose Essential or Scale plan.
-
Now your ZeroTier network has been created. Take note of the Network ID, which is a 16-character alphanumeric combination in the upper right corner, as it will be required when connecting other devices later.

-
Enable ZeroTier on GL.iNet router.
Log in to your router's web Admin Panel, and navigate to APPLICATIONS -> ZeroTier.
Enable ZeroTier, enter the Network ID on the same page, and click Apply.
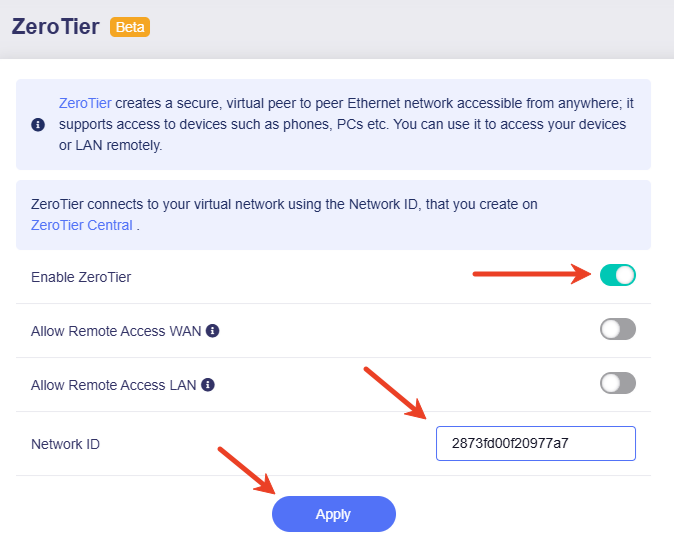
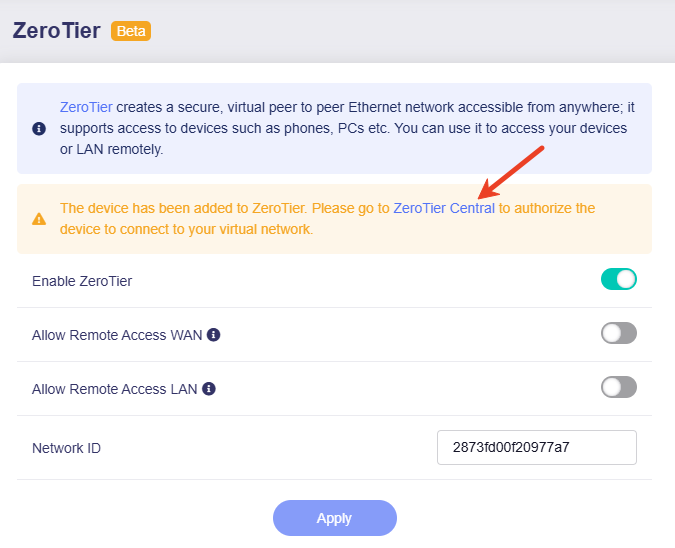
After a short while, the interface will indicate that authorization is required. Click the ZeroTier Central hyperlink to redirect to the ZeroTier Central.
-
Authorize your device on ZeroTier Central.
On the ZeroTier Central, locate the Pending device and authorize it.
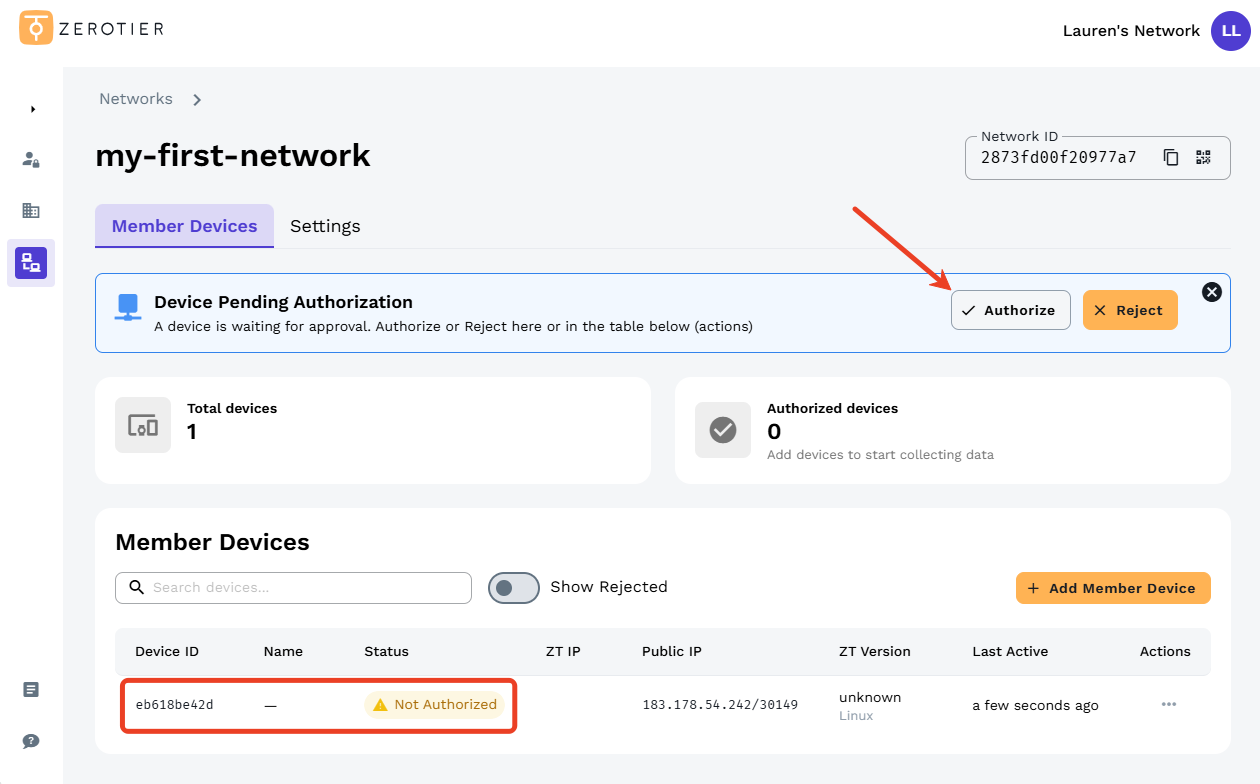
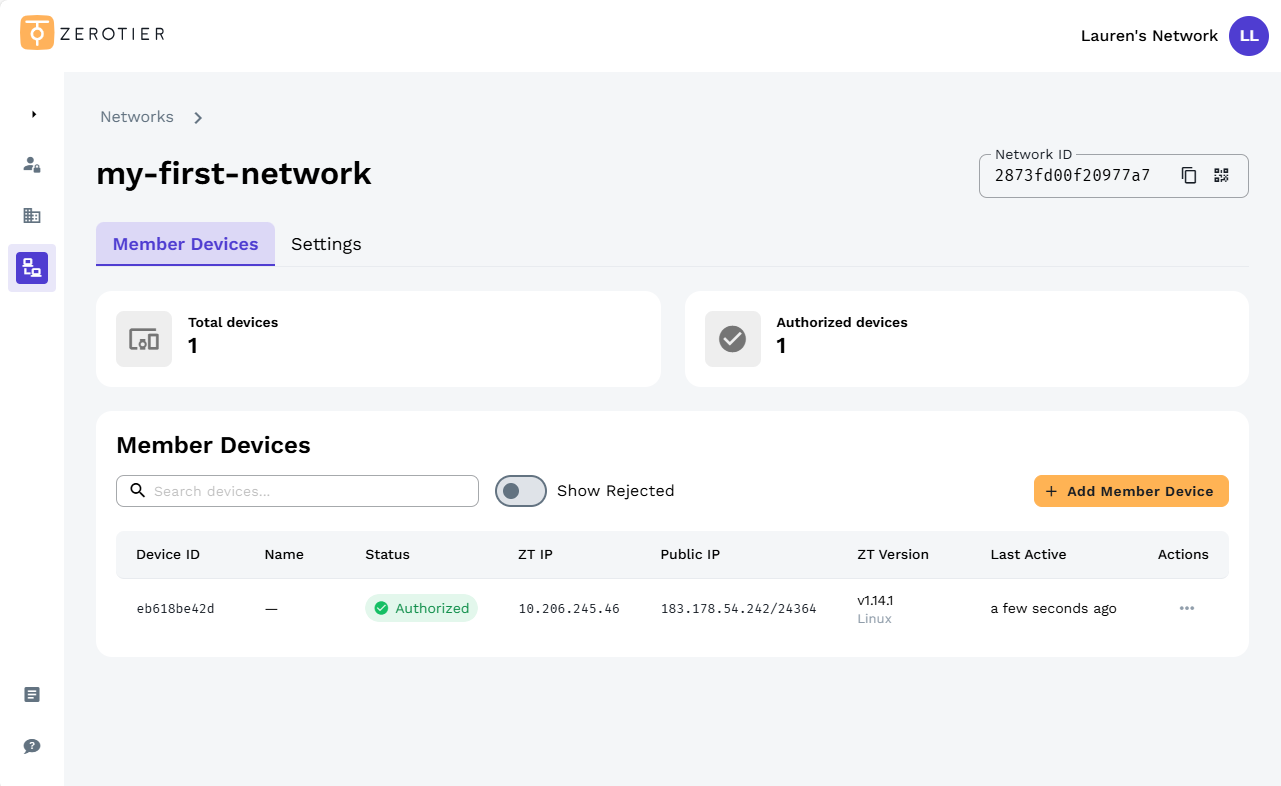
Once authorized, the page displays as follows.
-
Add another device (such as a computer or smartphone) to the same ZeroTier network by following this guide.
Below is an example using a Windows 10 Pro laptop.
-
Install ZeroTier on the laptop from here.
-
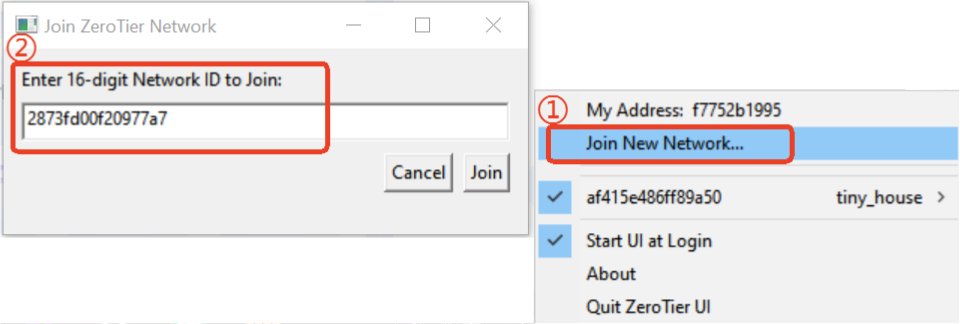
Launch ZeroTier. The ZeroTier icon will appear in the system tray at the bottom right corner of your desktop.
-
Right-click the icon, select Join New Network, and enter the Network ID obtained in step 4 in the pop-up window.
Then go to ZeroTier Central, locate the Pending device and authorize it.
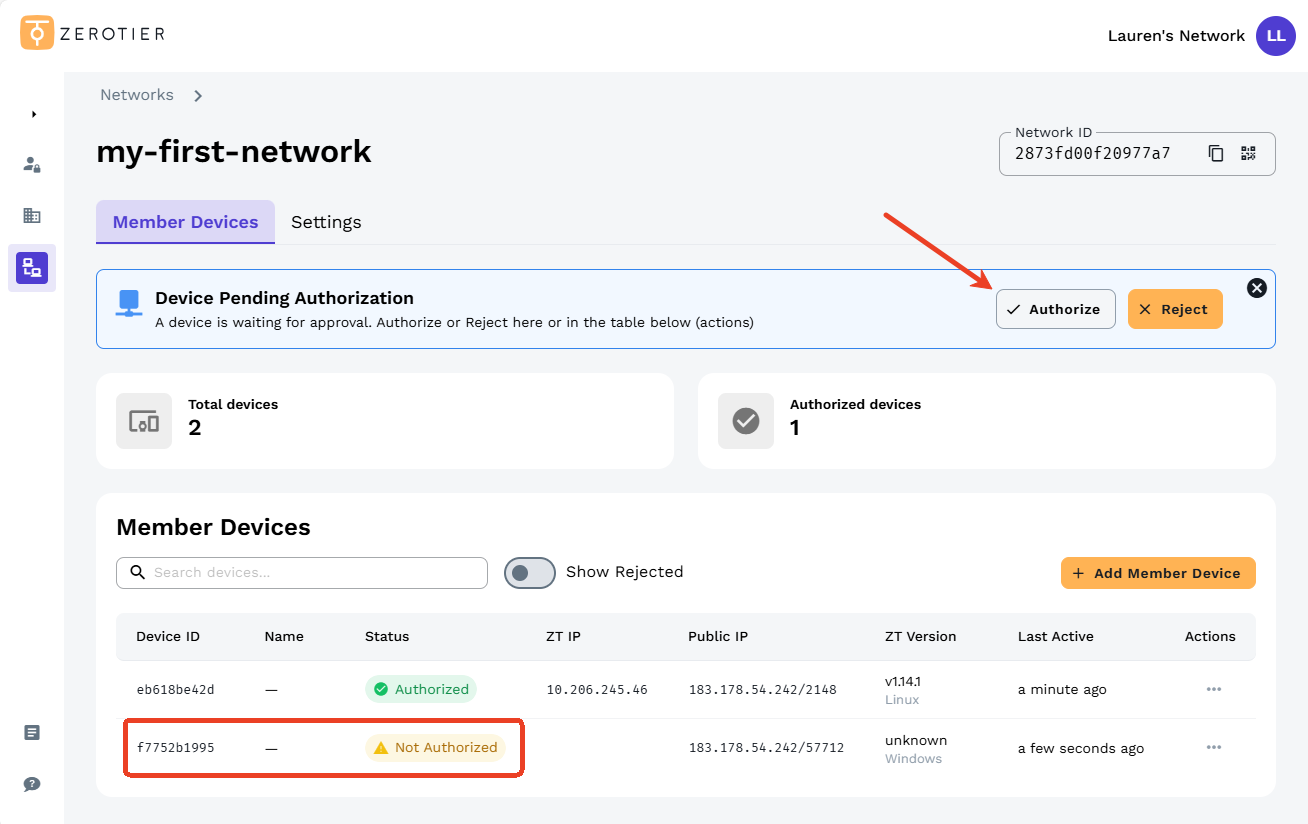
-
Once authorized, the page displays as follows. You will see the details of member devices, such as Device ID, Name, Status, Managed IP, and Public IP.
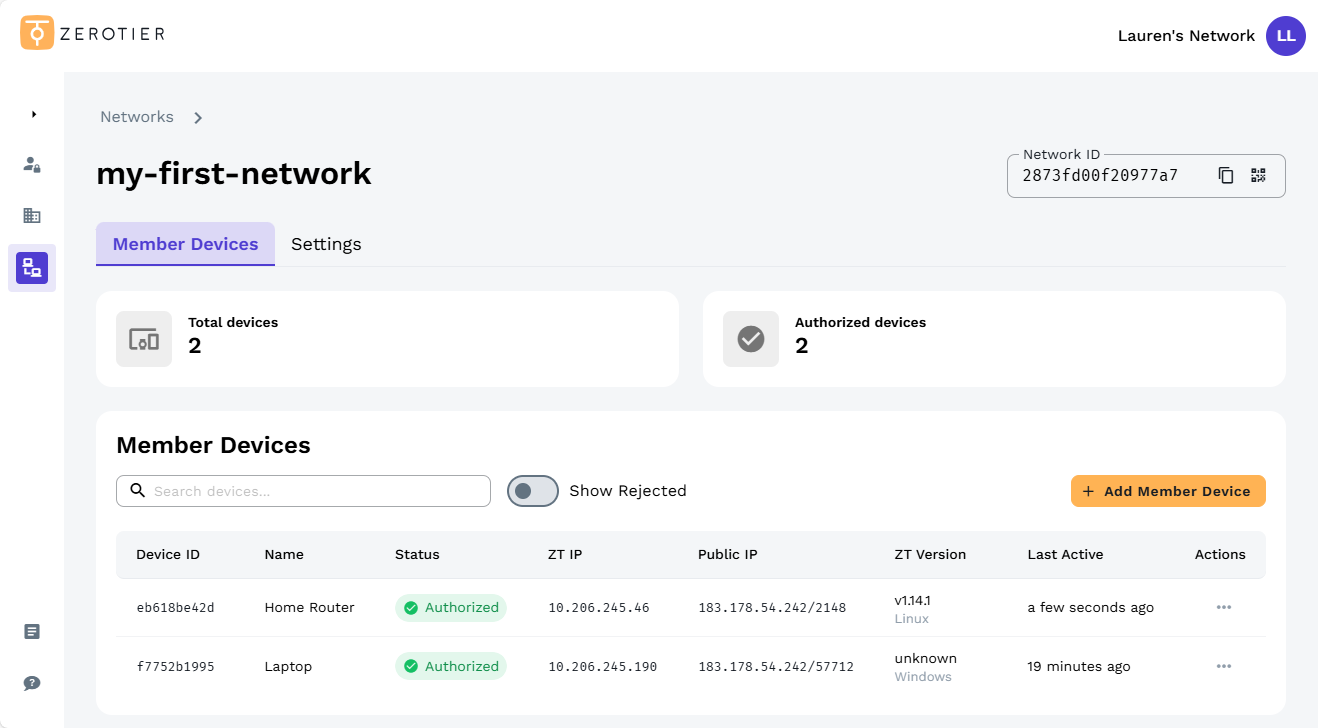
Tips: You can click the three-dot icon on the right to edit member device settings, including the device name, Managed IP(s), and advanced settings.
-
-
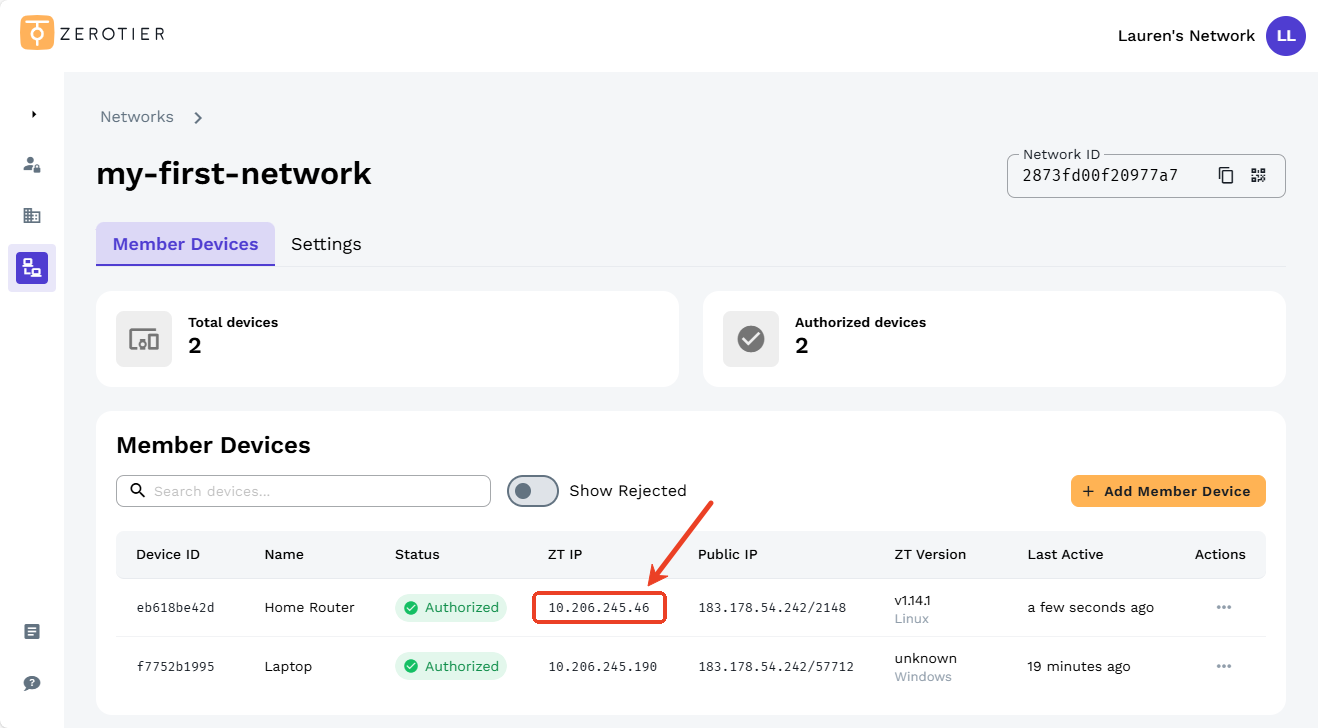
Click the router's Managed IP to copy it. You can then use this Managed IP to access the router from your laptop that is on the same ZeroTier network.
-
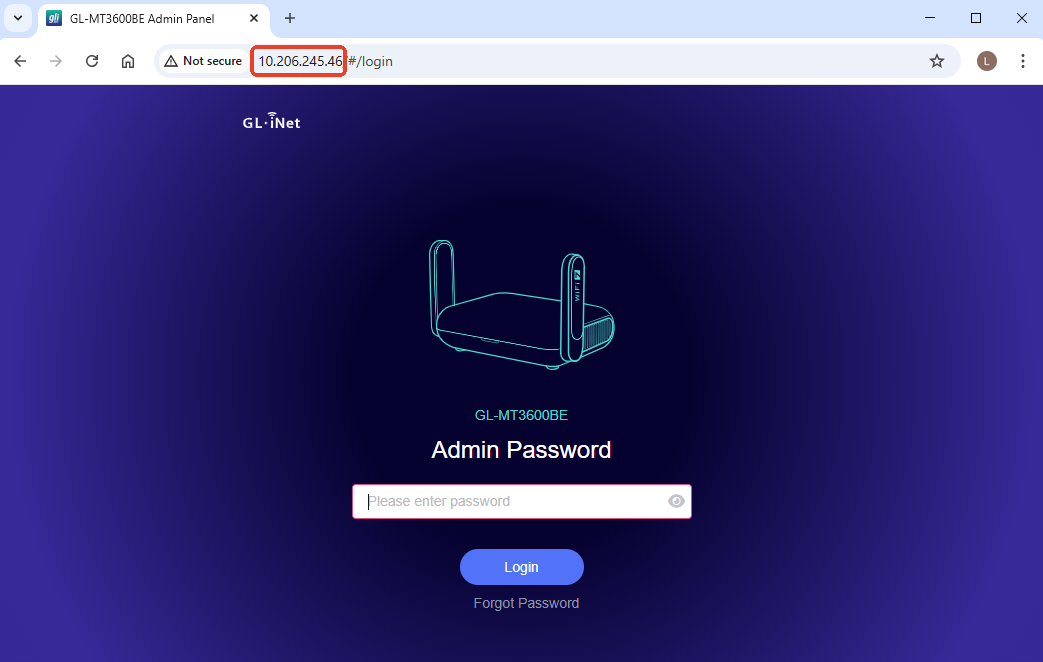
Test connectivity.
On the laptop connected to the same ZeroTier network, open a web browser and enter the router's Managed IP obtained in the previous step.
If you can access the router's web Admin Panel, the ZeroTier connection is successful.
You can also
pingthe router's Managed IP from your laptop to test connectivity. If you receive a successful response, the ZeroTier connection is successfully established.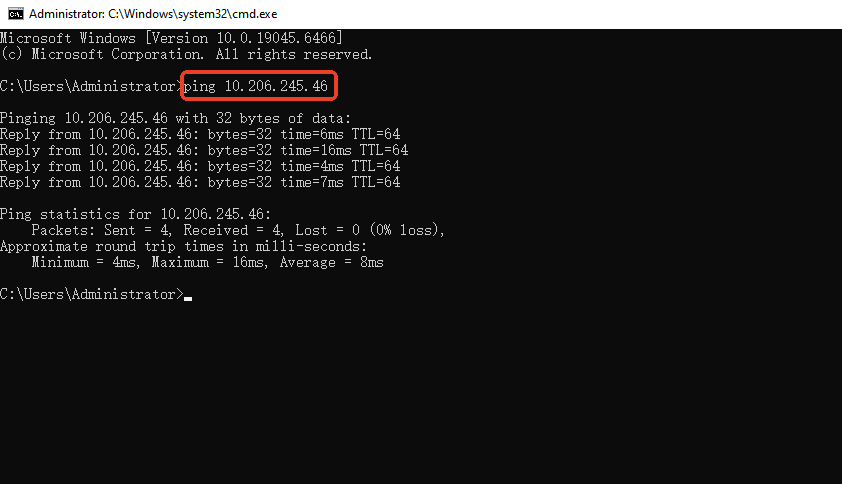
Legacy Central
The following is an example using the GL-MT2500.
-
Create your first ZeroTier network.
Refer to the ZeroTier official Getting Started Guide to create a ZeroTier account and network. Remember to take note of the Network ID, which is a 16-character alphanumeric combination, as it will be required when connecting other devices later.

-
Enable ZeroTier on GL.iNet router.
Log in to your router's web Admin Panel, and navigate to APPLICATIONS -> ZeroTier.
Enable ZeroTier, enter the Network ID on the same page, and click Apply.

After a short while, the interface will indicate that authorization is required.
Click the ZeroTier Central hyperlink to redirect to the ZeroTier Central.

-
Authorize your device on ZeroTier Central.
On your ZeroTier Central, navigate to the Members section. Locate the new device and click the Auth checkbox to authorize it. Customize the name of the device if desired.

After a short while, ZeroTier will assign a Managed IP to the device. Take note of this IP address, as it will be used in the testing step.

-
Add another device (such as a computer or smartphone) to the same ZeroTier network by following this guide.
-
Test connectivity.
On another device connected to the same ZeroTier network, open a web browser and enter the router's ZeroTier Managed IP obtained in the previous step.
You will be able to access the router's web Admin Panel.

You can also use the
pingcommand to test connectivity. Please refer to the ZeroTier Quickstart Guide.
Allow Remote Access WAN
If this option is enabled, resources on the device's WAN side can be accessed through the ZeroTier virtual network.
For example, as shown in the topology below, if this function is enabled, you can access the GL-AXT1800 via its IP address (192.168.29.1) from leo-phone. This is because the GL-AXT1800 is the upper-layer device of the GL-MT2500, and the latter is connected to the same ZeroTier network as leo-phone.

Note: This feature requires routing rules to be added to the ZeroTier network to take effect. One custom route can be added for free in Legacy Central, while in New Central you can only configure custom routes with an Essential plan or higher. Click here for details.
The following steps use Legacy Central as an example.
-
Log in to your router's web Admin Panel, and navigate to APPLICATIONS -> ZeroTier.
Enable Allow Remote Access WAN, and click Apply.

It will prompt you to configure routing rules. Keep this webpage open or take note of the route details (Destination and Via), as these will be required in the next step.

-
Go to ZeroTier Central and locate the Advanced section.
Enter the route details (Destination and Via) obtained in the previous step, then click Submit.

Once the route is added, the Managed Routes section will display as shown below.

-
You can now access the
GL-AXT1800via its IP address (192.168.29.1) on other devices. In fact, you can access all devices within the192.168.29.0/24subnet.
Allow Remote Access LAN
If this option is enabled, resources on the device's LAN side can be accessed through the ZeroTier virtual network.
For example, as shown in the topology below, if this function is enabled, you can SSH log in to Ubuntu via its IP address (192.168.8.110) from leo-phone. This is because Ubuntu is the lower-layer device of the GL-MT2500, and the latter is connected to the same ZeroTier network as leo-phone.

Note: This feature requires routing rules to be added to the ZeroTier network to take effect. One custom route can be added for free in Legacy Central, while in New Central you can only configure custom routes with an Essential plan or higher. Click here for details.
The following steps use Legacy Central as an example.
-
Log in to your router's web Admin Panel, and navigate to APPLICATIONS -> ZeroTier.
Enable Allow Remote Access LAN, and click Apply.

It will prompt you to configure routing rules. Keep this webpage open or take note of the route details (Destination and Via), as these will be required in the next step.

-
Go to ZeroTier Central and locate the Advanced section.
Enter the route details (Destination and Via) obtained in the previous step, then click Submit.

Once the route is added, the Managed Routes section will display as shown below.

-
You can now ping or SSH log in to the
Ubuntuvia its IP address (192.168.8.110) on other devices. In fact, you can access all devices within the192.168.8.0/24subnet.
Still have questions? Visit our Community Forum or Contact us.