How to connect GL.iNet router to an EAP network requiring advanced settings?
Some GL.iNet routers support connecting to EAP (Extensible Authentication Protocol) Wi-Fi networks.
If the target EAP network only requires username and password authentication, you can directly connect the router to it as a repeater via the web admin panel (WebGUI). Simply select the EAP network, security and enter your credentials to complete the connection. Click here for details.
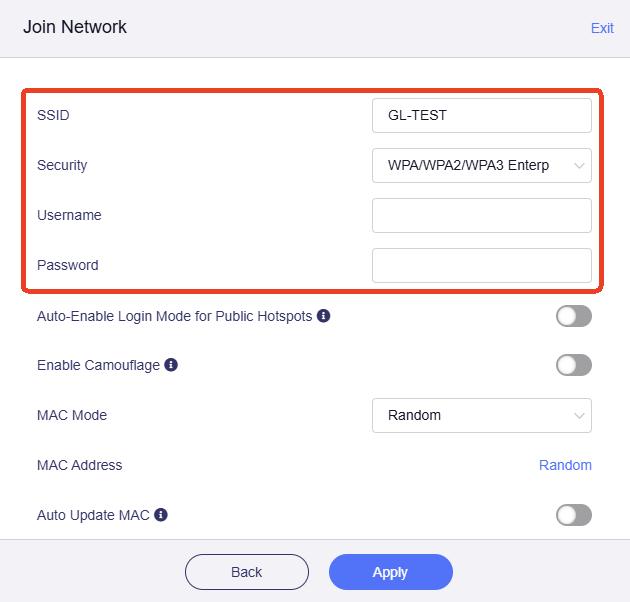
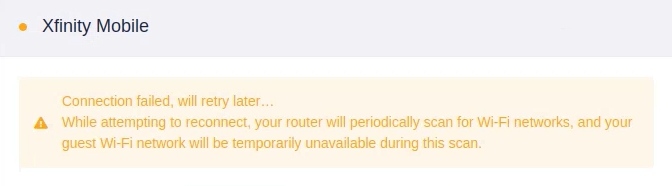
However, if the target EAP network requires additional parameters, such as EAP method (e.g., PEAP, TTLS), domain suffix match, identity, anonymous identity, etc., the repeater setup via WebGUI may fail.
This tutorial will introduce the method to connect GL.iNet router to EAP networks requiring advanced settings via LuCI interface.
1. Check Router Model
Ensure your router supports connecting to EAP networks as a repeater. Check the supported models here.
2. Obtain Configurations
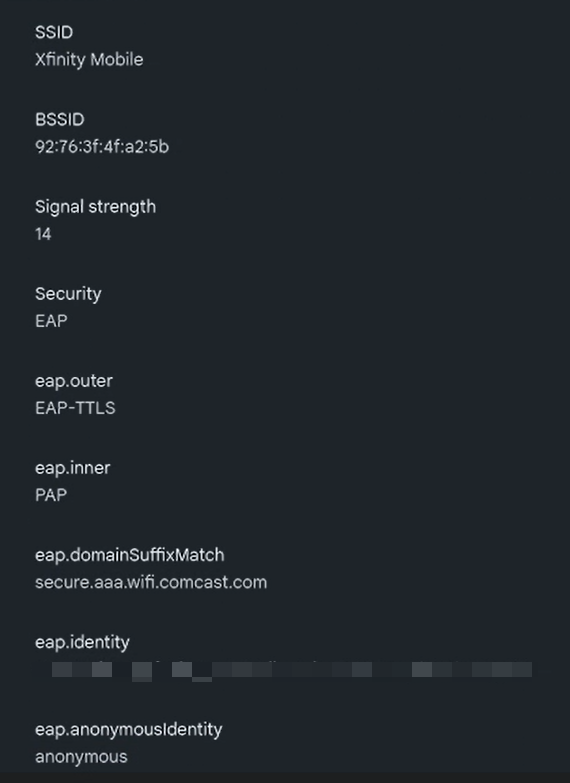
Obtain the configuration parameters for the target EAP network in advance. For example:
- EAP Type (e.g., PEAP, TTLS, TLS)
- Authentication domain suffix (e.g., @company.com)
- Identity (usually full username)
- Anonymous Identity (optional)
- Inner authentication type (e.g., MSCHAPv2, PAP)
- CA certificate (if required, prepare .crt format file)
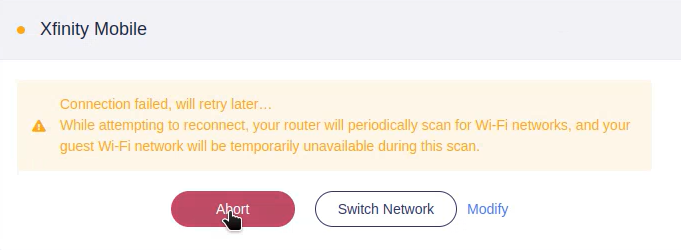
This is an example of Xfinity Mobile WiFi for your reference:
3. Access LuCI Interface
Log in to the router's web admin panel. After login, if you previously attempted to connect to the target EAP network via the WebGUI but failed, please abort the connection.
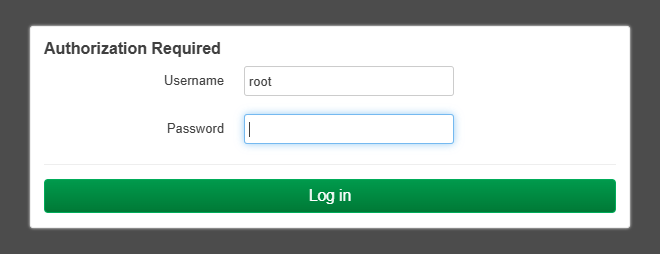
Then go to SYSTEM -> Advanced Settings -> Go to LuCI. Log in to the LuCI interface with the same admin password.
4. Configure Repeater in LuCI
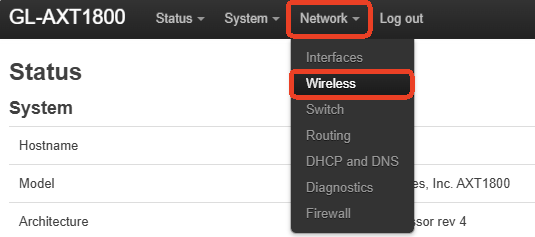
In the LuCI interface, navigate to Network -> Wireless.
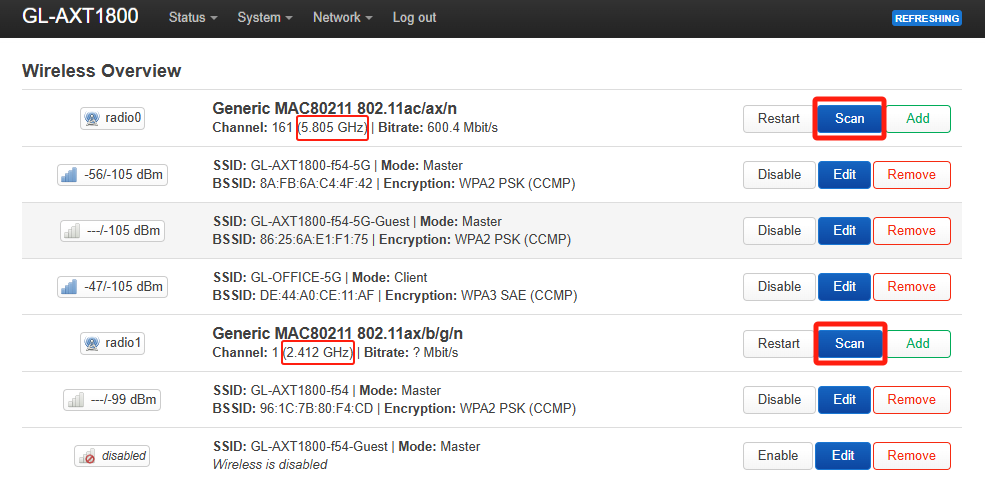
Click the Scan button in the 5G or 2.4G section to search for available WiFi networks.
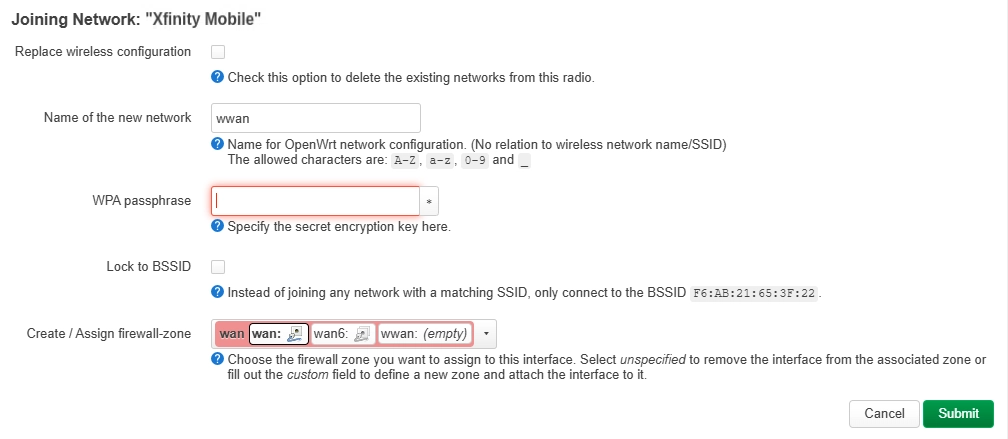
Find the target EAP network in the scan results and click Join Network.

In the "Joining Network" page, enter the WPA passphrase and click Submit button.
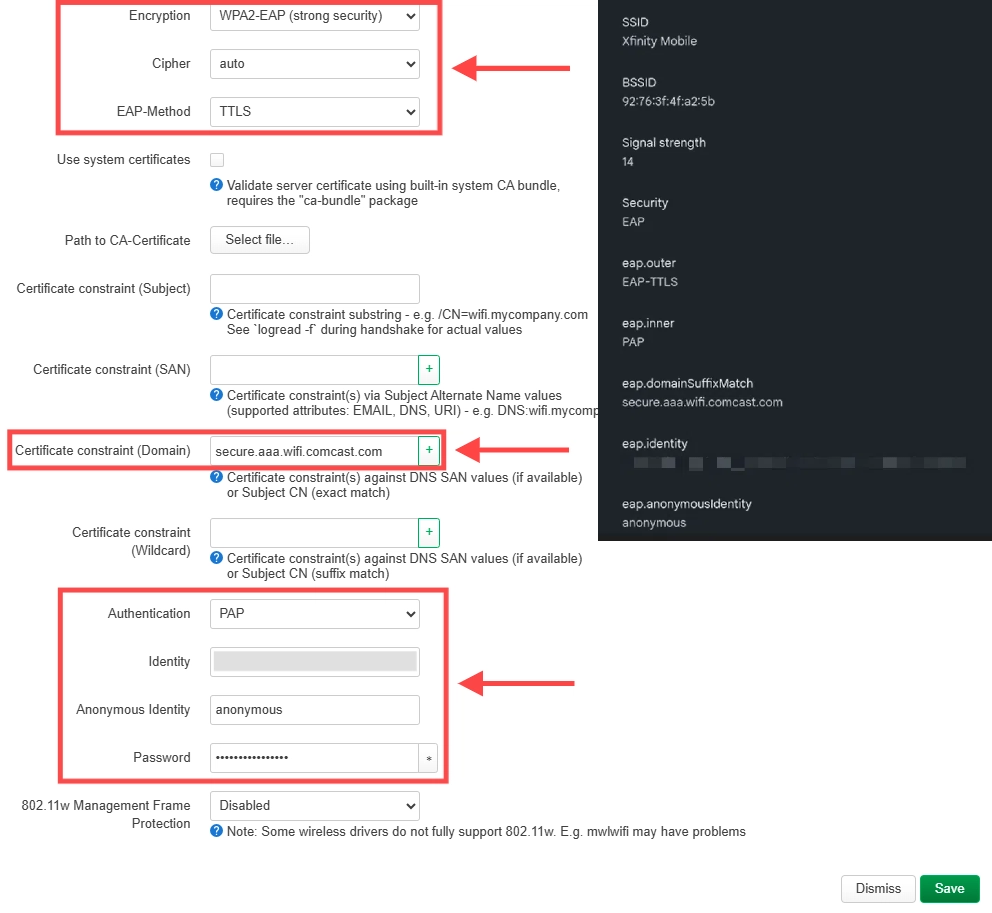
You will be directed to the Wireless Client configuration.
Locate the Interface Configuration -> Wireless Security. Select/enter the correct configuration parameters based on your target EAP network. Do NOT click Save for now.

As an example, the configuration obtained in the step 2 above has been entered into the corresponding entry box.
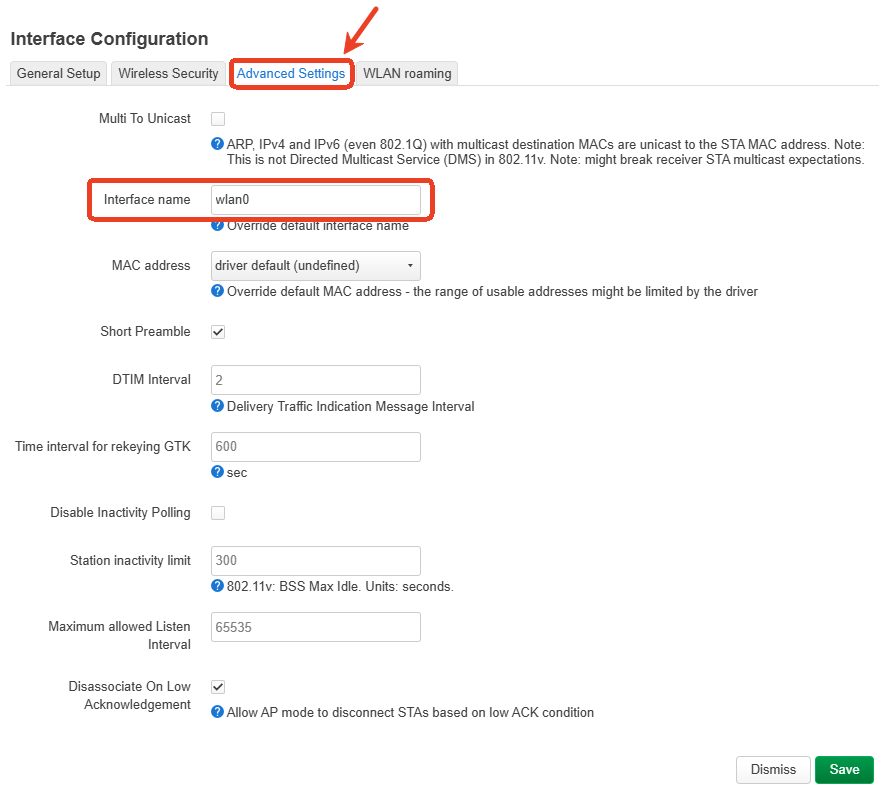
Switch to Advanced Settings tab, specify an interface name, such as wlan0. Then click Save in the bottom right corner.
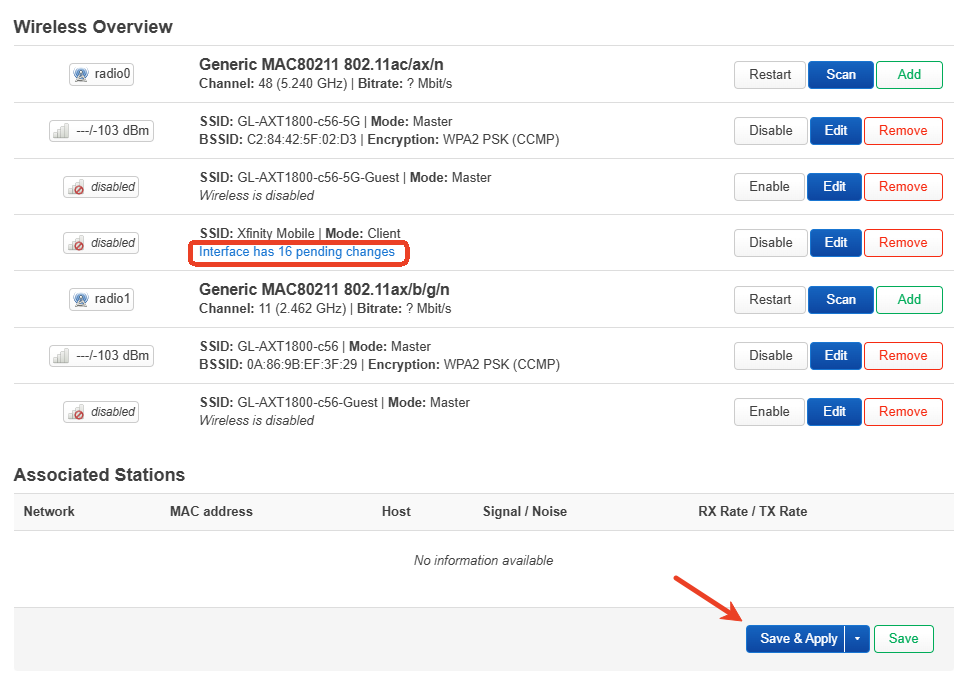
You will return to the Wireless page, where it shows there are pending changes.
Click on the Save & Apply button in the bottom right corner.
Your router will be connected to the target EAP network successfully.
5. Verify Connection
Check connection status in the WebGUI
Once the router successfully connects to the target EAP network, a repeater icon will light up in the WebGUI, as shown below.
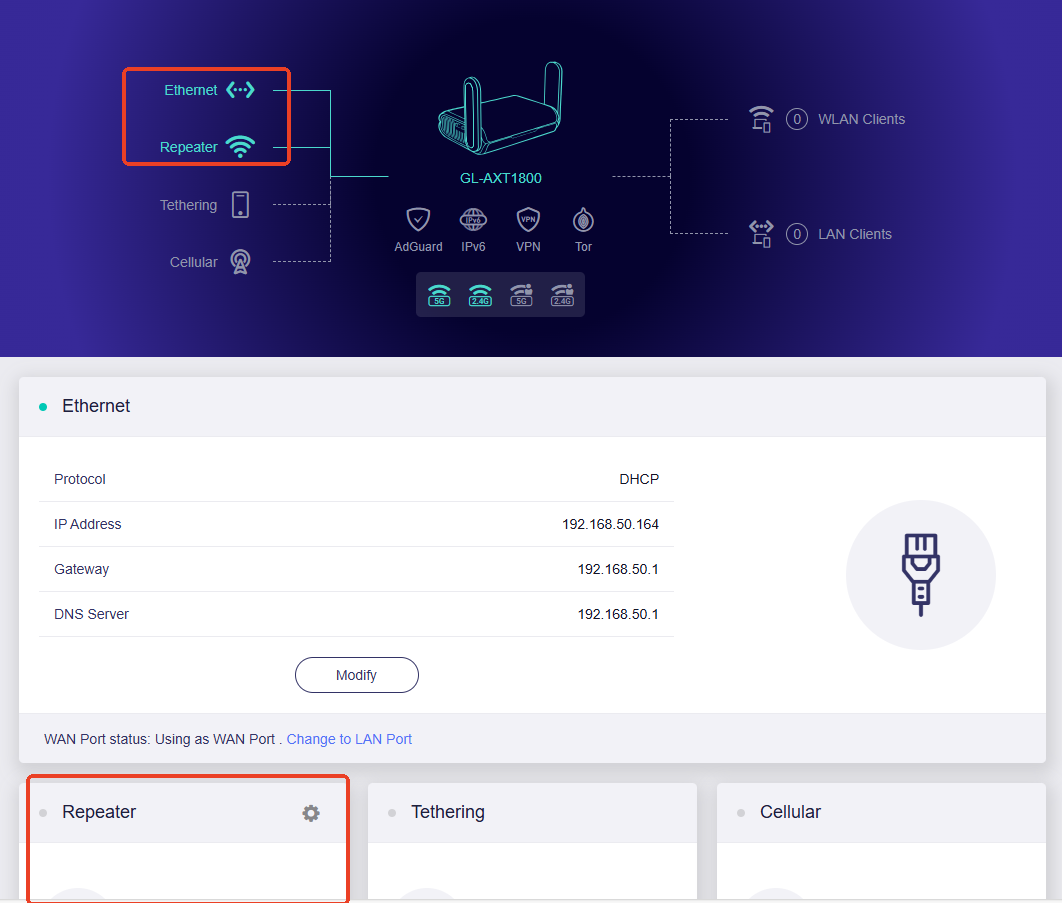
Note: Since the configuration in LuCI is not synchronized with that in the WebGUI, details of the repeater interface (e.g., connected IP, gateway, etc.) will not appear on the WebGUI.
As shown in the image, the repeater section at the bottom is blank. However, the router has already connected to the target EAP network as a repeater, because the repeater icon at the top is lit up.
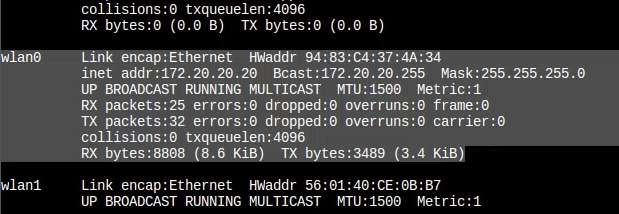
Check connection status via SSH
-
SSH log in to your router.
-
Input ifconfig and click Enter.
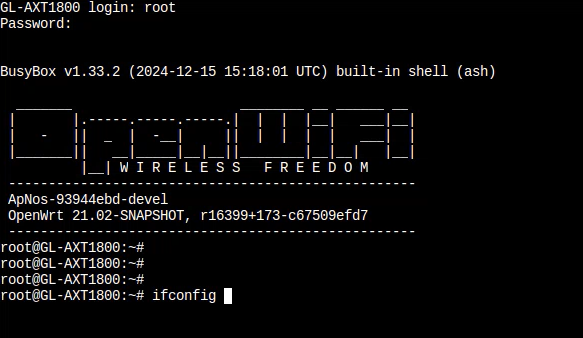
You will be able to check the wlan0 interface status.