How to use SIMPoYo uFi?
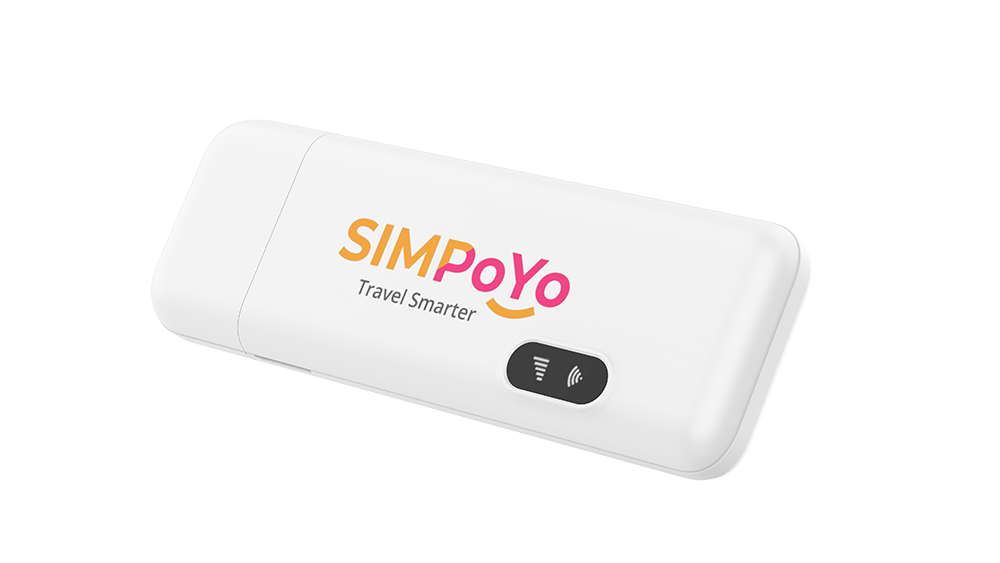
SIMPoYo uFi is our compact Plug & Play USB dongle series with Wi-Fi hotspot, designed for fast and reliable connectivity anywhere. It works seamlessly with most GL.iNet routers, as well as laptops, power banks, car USB ports, and other USB power sources. It comes with 10GB of free data for 30 days, valid in the UK and 34 other European countries.
*Available Only: EU & UK Stores
This guide will show you how to use the SIMPoYo uFi USB dongle (SP-N150C4), including LED indication, how to activate its built-in SIM card, use the dongle on different devices, top up data, and manage uFi settings.
LED Indication
| LED Type | Color | Description |
|---|---|---|
| 4G LED | Green | LTE Connected |
| Blue | WCDMA Connected | |
| Red Blinking | No Signal / No SIM Card / Out of Service | |
| Wi-Fi LED | Green | Device(s) connected to Wi-Fi |
| Blue | No device connected to Wi-Fi | |
| OFF | Wi-Fi is Disabled | 4G LED + Wi-Fi LED | White | Device Powered On |
| OFF | Device Powered Off |
Activate SIM Card
SIMPoYo uFi comes with a pre-installed SIM card, which needs to be activated before use.
Watch this video or follow the steps below to activate the SIMPoYo uFi SIM card.
Step 1. Find the ICCID number on the information label on the back of the SIMPoYo uFi.
Step 2. Scan the QR code or visit https://w.simpoyo.com/activate/ and enter your ICCID number to register.
Step 3. Enjoy 10GB of Free Data. As a new user, you'll instantly receive 10GB of free 4G data, valid for 30 days in the UK and 34 other European countries.
Internet Setup
Connect to a GL.iNet Router
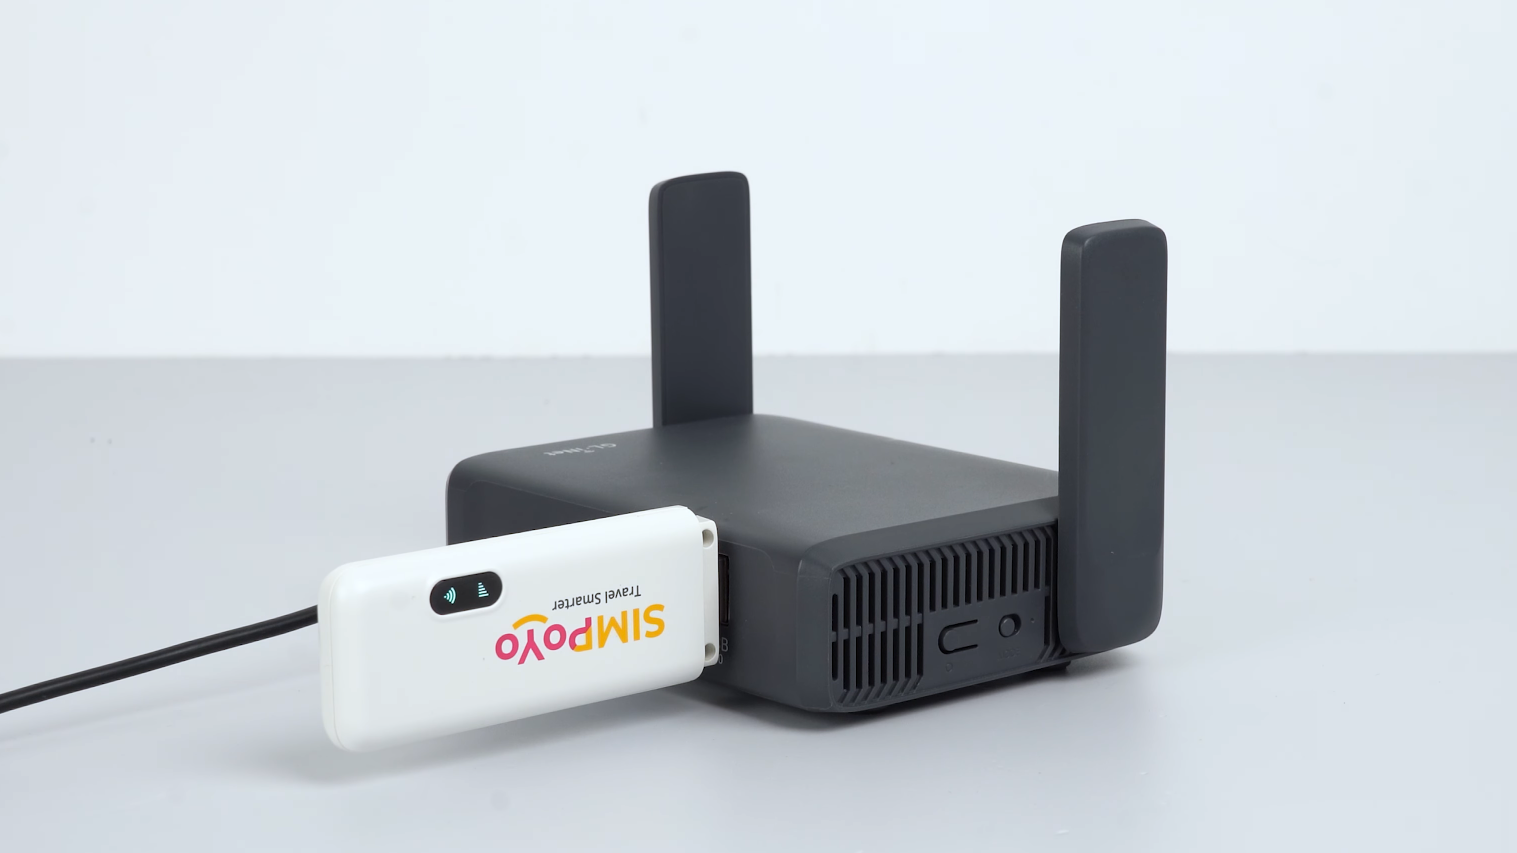
SIMPoYo uFi works seamlessly with most GL.iNet travel and home routers – simply plug it into your router and get instant 4G LTE access anytime and anywhere.
Watch this video or follow the steps below to connect SIMPoYo uFi to a GL.iNet router.
Step 1. Plug the SIMPoYo uFi into the USB port of your GL.iNet router.
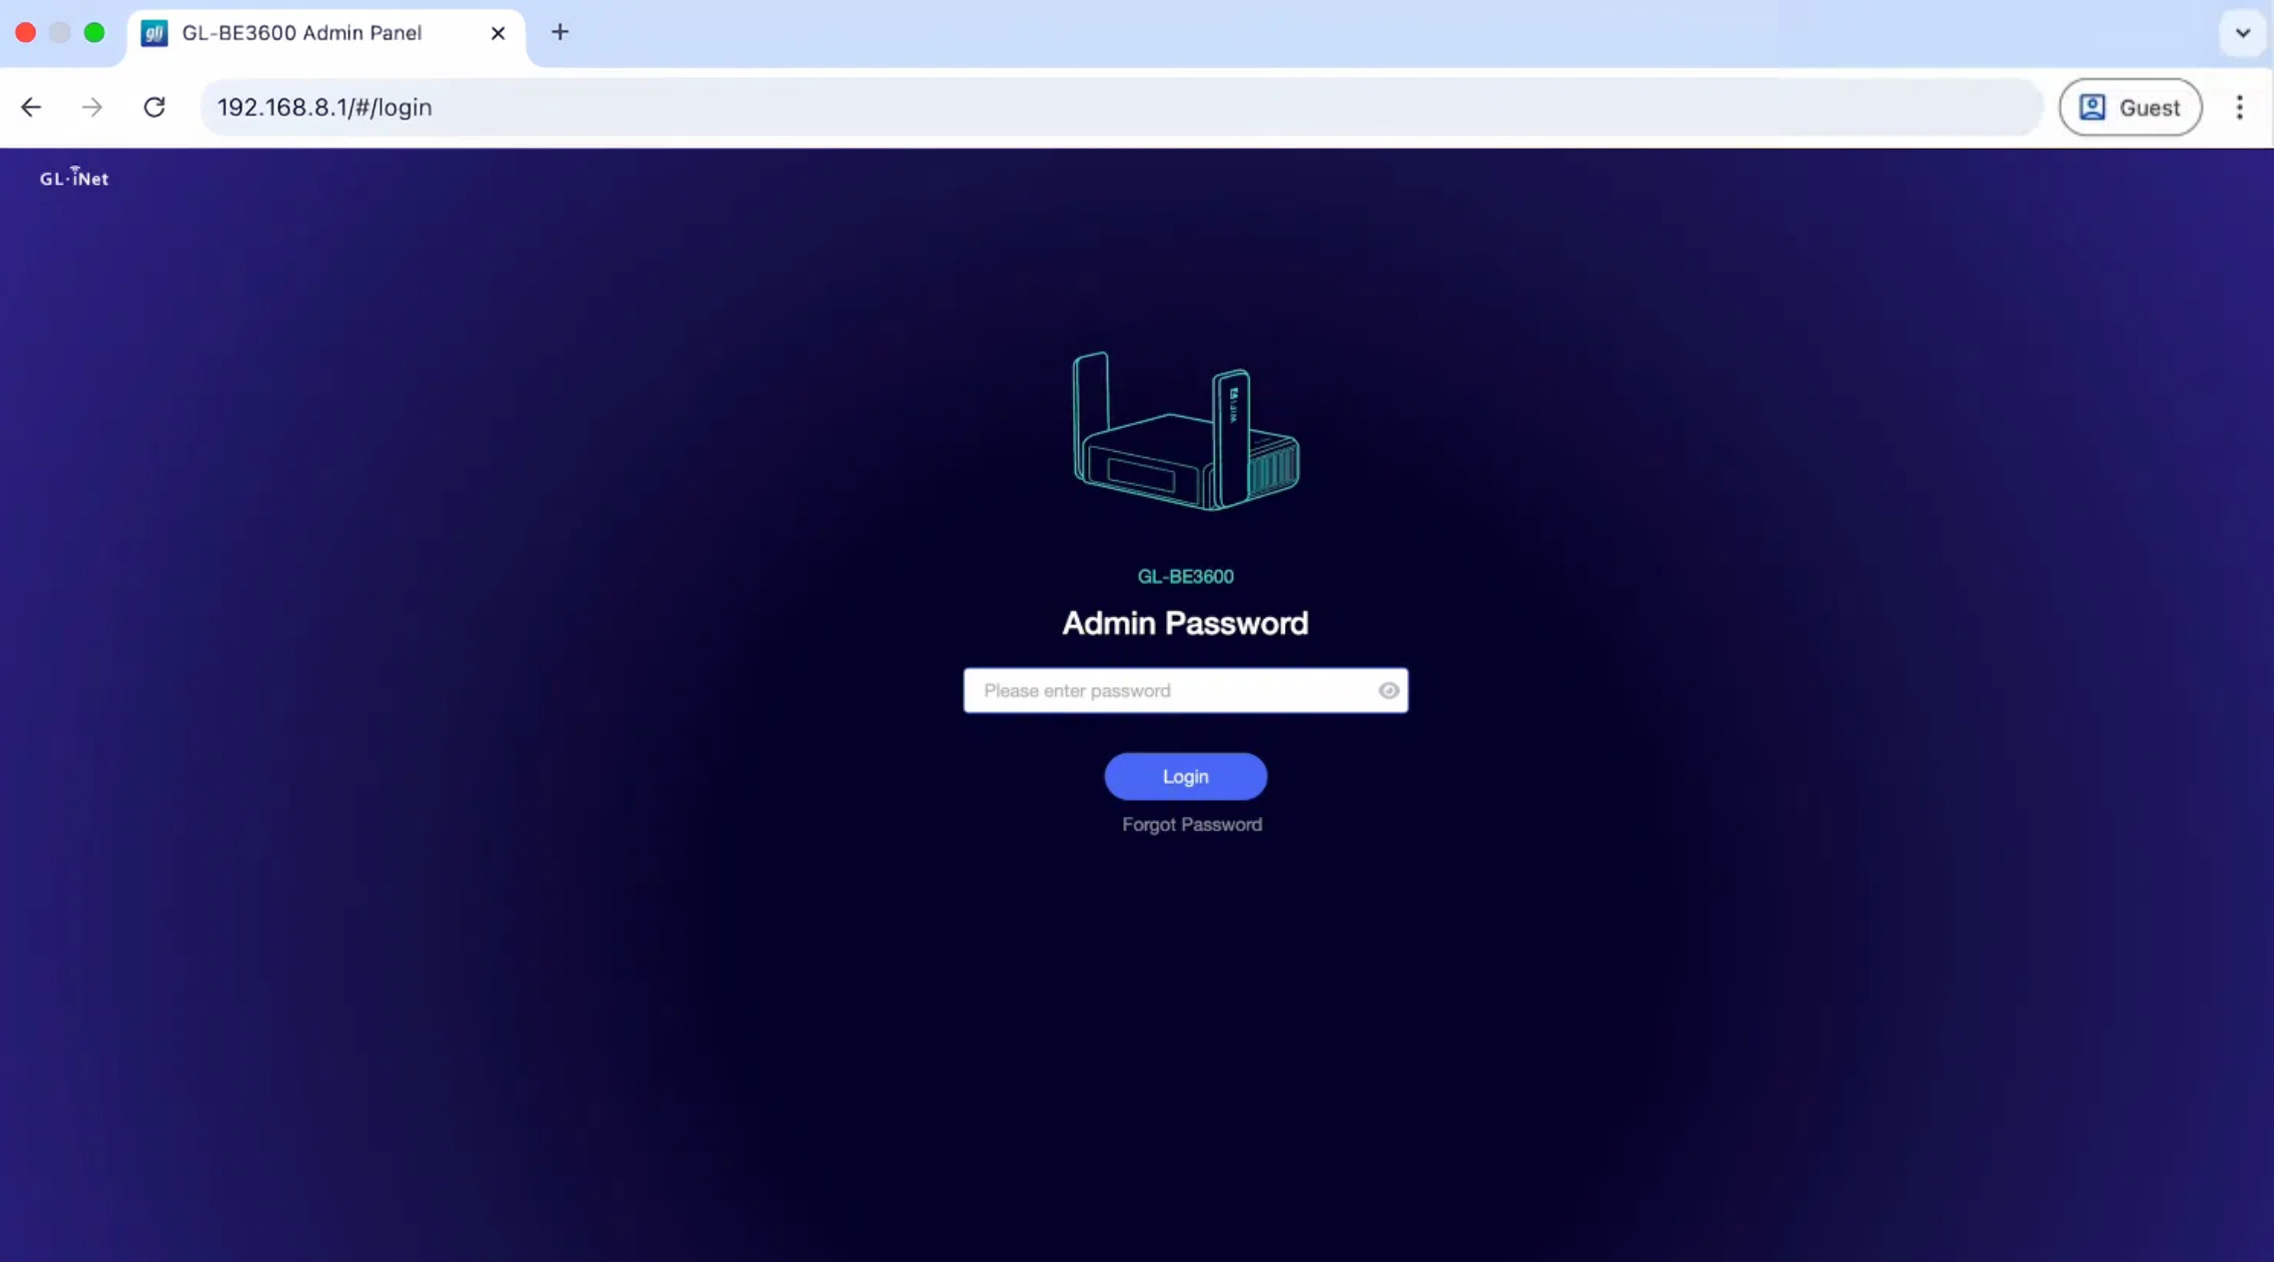
Step 2. Connect a device to your router, then open a browser and visit 192.168.8.1 to log in to the router's web Admin Panel. If you changed the router's IP address, log in with the new one.
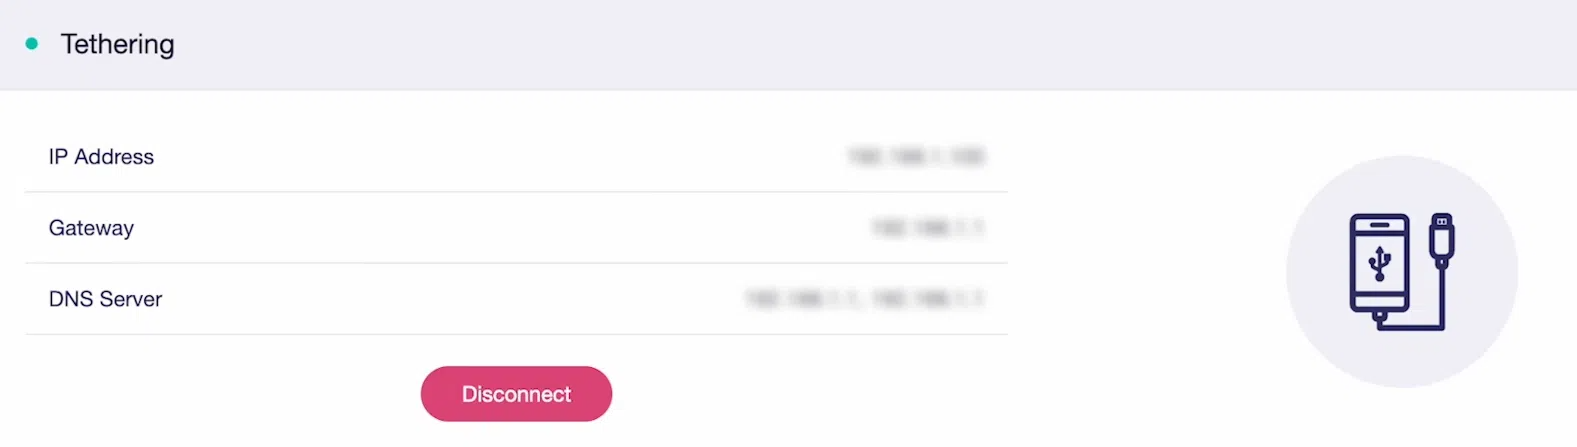
Step 3. On the Admin Panel, navigate to INTERNET -> Tethering and click Connect.
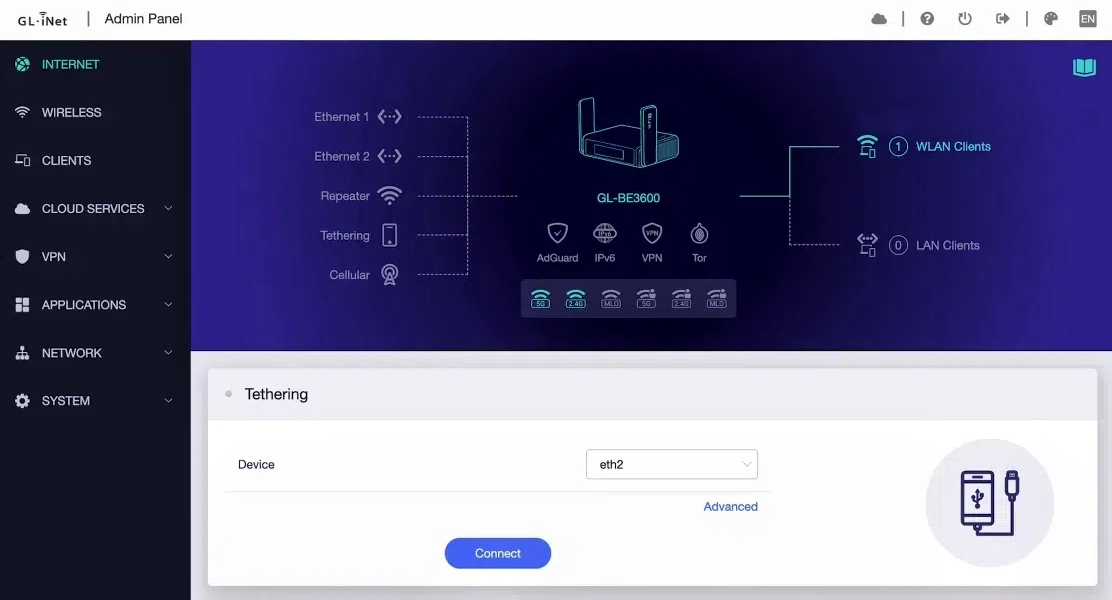
Step 4. Once connected, you will see the network details, with a blue dot at the upper left corner.
Now you can connect your devices to the router via cable or Wi-Fi, or connect to the SIMPoYo uFi's Wi-Fi directly to enjoy internet access.
-
Connect to the router via cable: Plug an Ethernet cable into the router's LAN port and your device. Ideal for wire-only devices or stable, interference-free connections.
-
Connect to the router via Wi-Fi: Find the Wi-Fi SSID and Key on the router's bottom label, then connect your device to it. Suitable for multiple devices (2.4 GHz & 5 GHz), wider coverage needs, or personalized network settings on router.
-
Connect to SIMPoYo uFi via Wi-Fi: Find the Wi-Fi SSID and Key on the SIMPoYo uFi's device label, then connect your devices (up to 8) to it. Functions as a standalone 2.4 GHz hotspot for added flexibility when needed.
Connect to a Computer
Step 1. Plug the SIMPoYo uFi into the USB port of your computer (e.g., desktop or laptop). It will automatically be recognized as a USB Ethernet device, making your device online right away.
Step 2. Other devices (e.g. smartphones, tables, etc.) can connect to the SIMPoYo uFi's 2.4 GHz Wi-Fi network to access the internet simultaneously.
Connect to a USB Power Source
Step 1. Plug the SIMPoYo uFi into any USB power source, such as a wall charger, power bank, or car charger.
Step 2. Once powered on, the SIMPoYo uFi will broadcast a Wi-Fi network with the SSID SIMPoYo-XXX.
Step 3. Locate the Wi-Fi password (Key) on the device label. Use this password to connect your smartphone, tablet, laptop, or other devices to the SIMPoYo uFi's Wi-Fi for internet access.
Top-up SIMPoYo Plans
When your data runs out or expires, simply scan the QR code on your SIMPoYo uFi or visit https://w.simpoyo.com to top up your plan.
Supported Countries & Regions
-
United Kingdom
-
Europe
Andorra, Austria, Belgium, Bulgaria, Croatia, Cyprus, Czech Republic, Denmark, Estonia, Finland, France, Germany, Gibraltar (UK), Greece, Hungary, Iceland, Ireland, Italy, Latvia, Liechtenstein, Lithuania, Luxembourg, Malta, Netherlands, Norway, Poland, Portugal, Réunion (France), Romania, Slovakia, Slovenia, Spain, Sweden, Switzerland.
-
Middle East & North Africa
Egypt, Iran, Israel, Kuwait, Qatar, Saudi Arabia, United Arab Emirates.
-
Asia
Indonesia, Japan, Pakistan, Philippines, Singapore, South Korea, Turkey, Vietnam, China Mainland, Hong Kong (China), Taiwan (China).
Manage SIMPoYo uFi
You can log in to the SIMPoYo uFi Admin Panel to manage your network settings.
Log in Admin Panel
-
Connect a device to the SIMPoYo uFi's Wi-Fi network.
-
Open a browser and enter
192.168.1.1to access the SIMPoYo uFi Admin Panel. -
Log in with the Admin Password (which is the same as the SIMPoYo uFi's Wi-Fi password by default).

Check Network Details
-
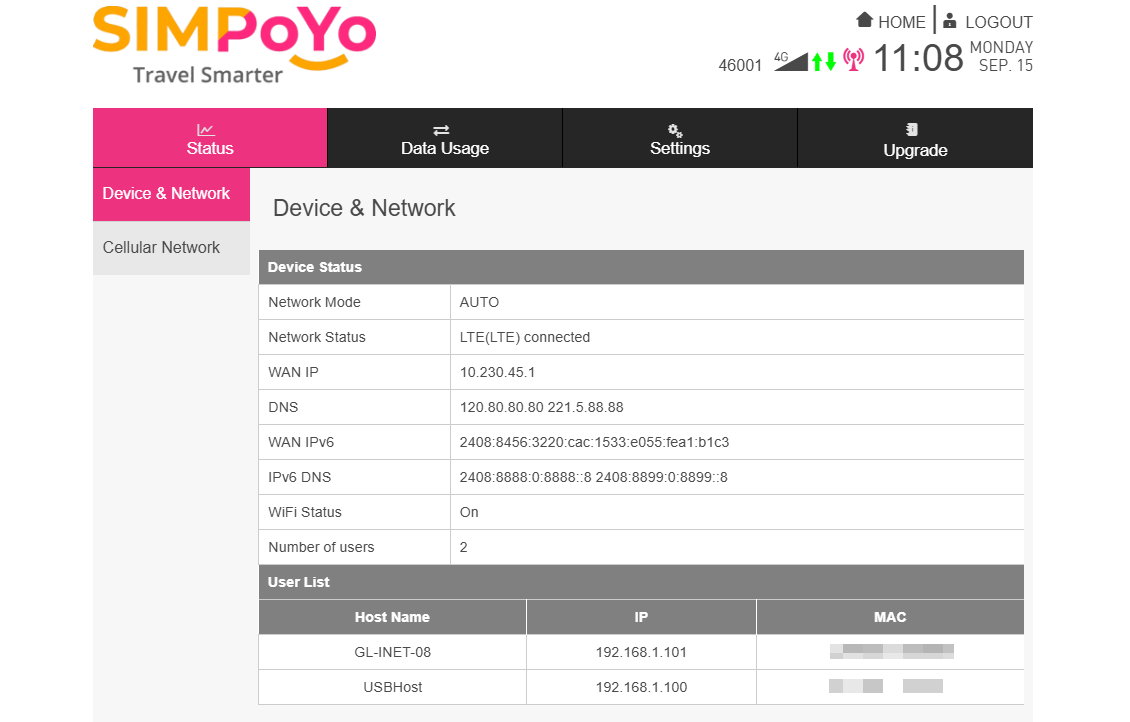
Choose Status from the top menu and navigate to Device & Network. You will enter the home page where the device's network status is displayed.
-
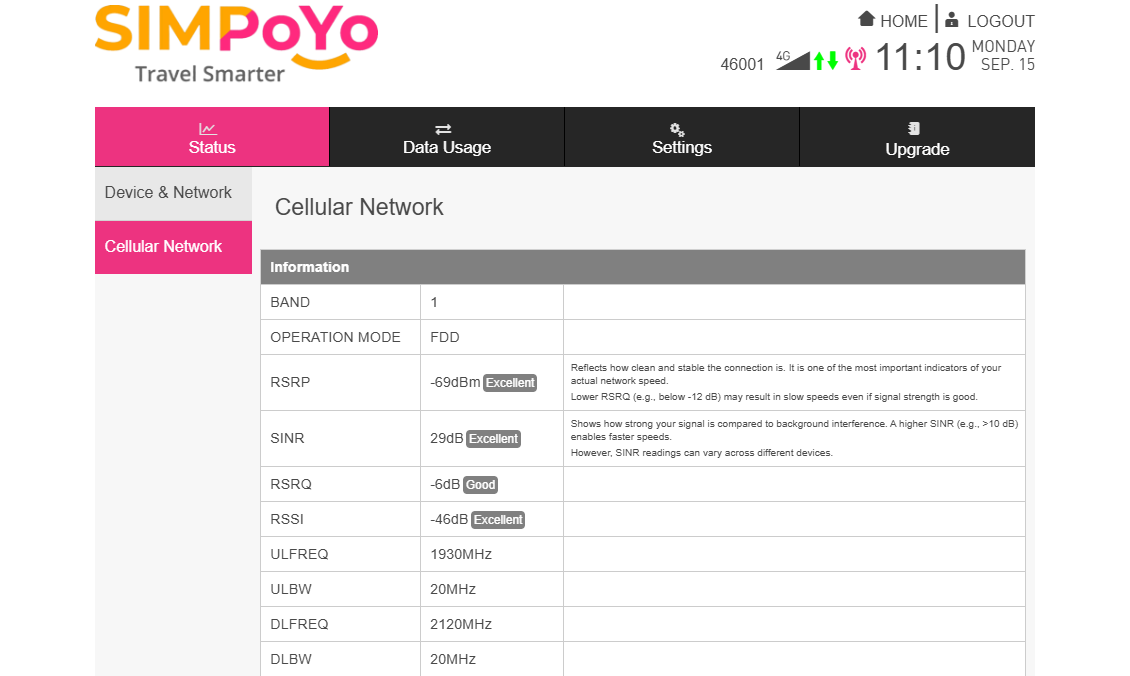
Switch to Cellular Network from the left sidebar, and you can check the cellular network details, such as the signal strength.
Check Data Usage
-
Choose Data Usage from the top menu, and you will see the download, upload and total data consumption and duration.
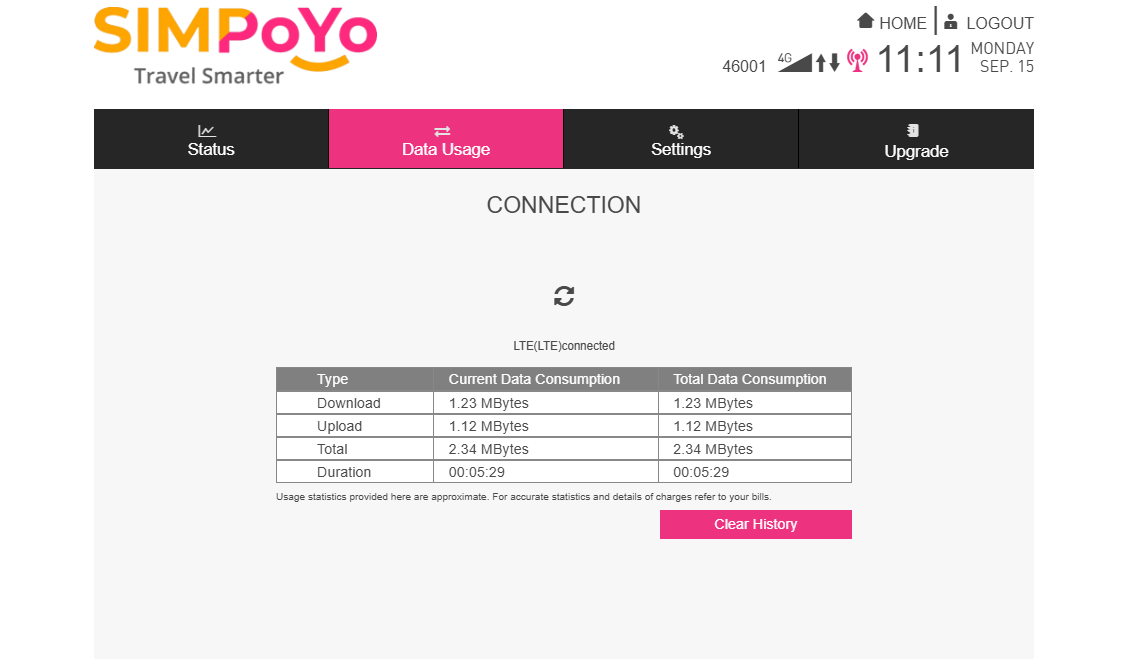
Note: Data is for reference only. Please refer to your bill for accuracy.
-
If you want to reset the data usage, click the Clear History button to reset.
Change Wi-Fi Settings
-
Choose Settings from the top menu and navigate to Wi-Fi Settings.
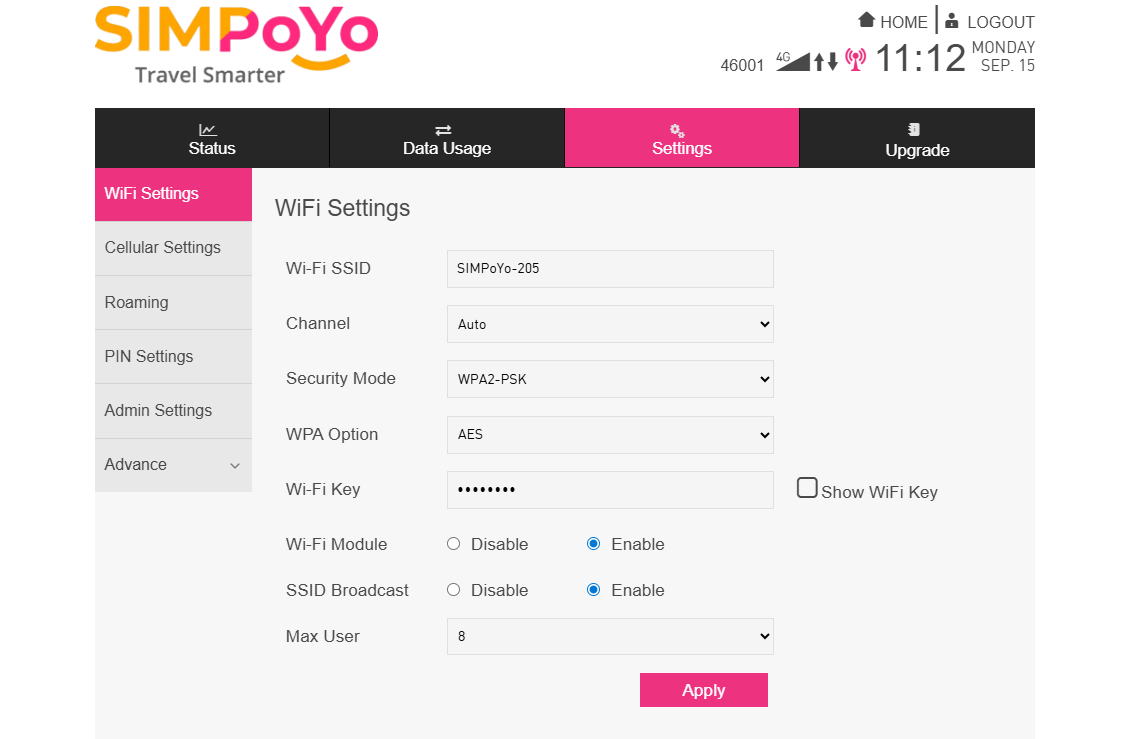
-
Customize your SIMPoYo uFi's Wi-Fi network name and password, then click Apply.
Set APN
If your SIM card requires manual APN configuration, follow the steps below.
-
Choose Settings from the top menu and navigate to Cellular Settings.
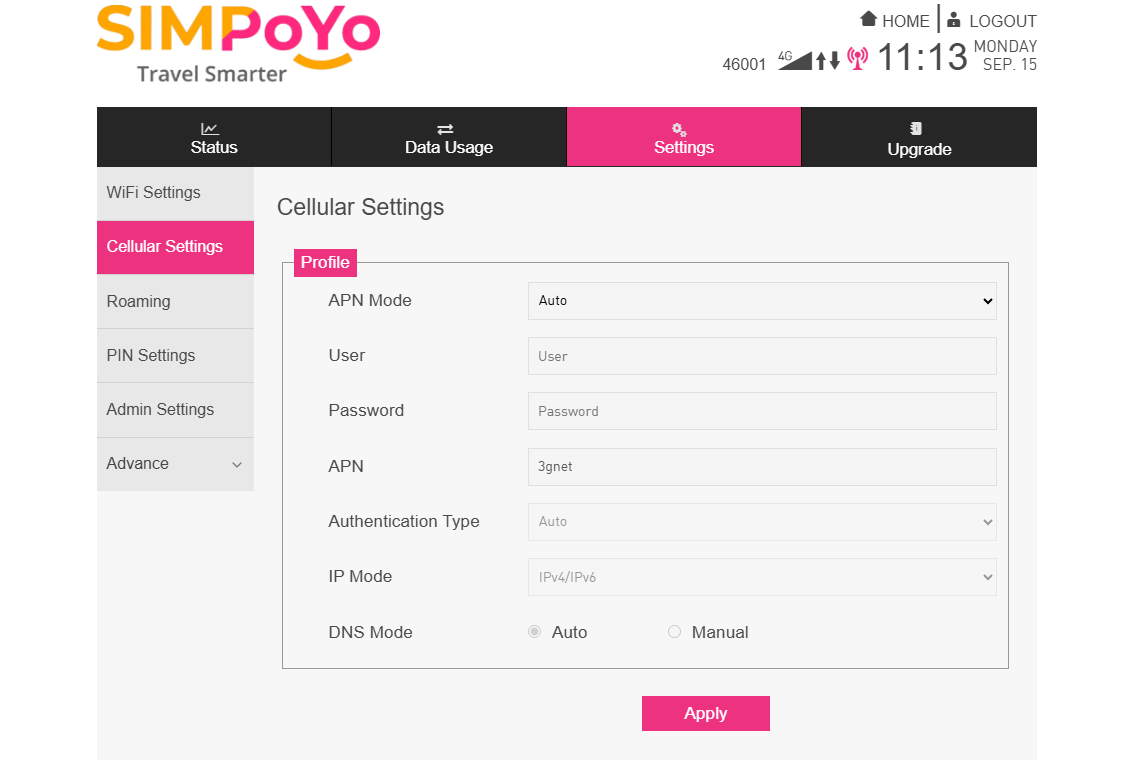
-
Switch the APN Mode to Manual.
-
Fill in the information provided by your mobile operator, then click Apply.
Enable Roaming
Roaming lets your SIM card work with local operators in other regions/countries, so you stay connected away from your home network.
Follow the steps below to enable roaming.
-
Choose Settings from the top menu and navigate to Roaming.
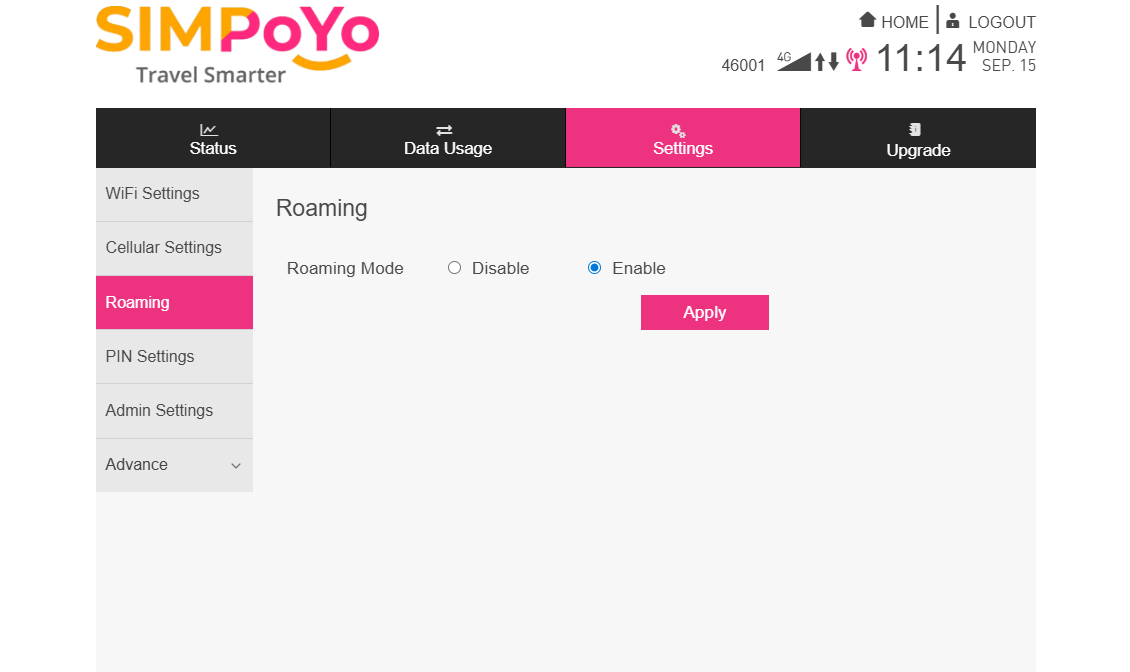
-
Select Enable and click Apply.
Enable PIN Code
A PIN code is a short (usually 4-8 digit) security password for your SIM card, which locks the card to prevent unauthorized use. If the SIM is stolen or put in another device, it cannot be activated or used without the PIN code.
Follow the steps below to enable PIN code.
-
Choose Settings from the top menu and navigate to PIN Settings.
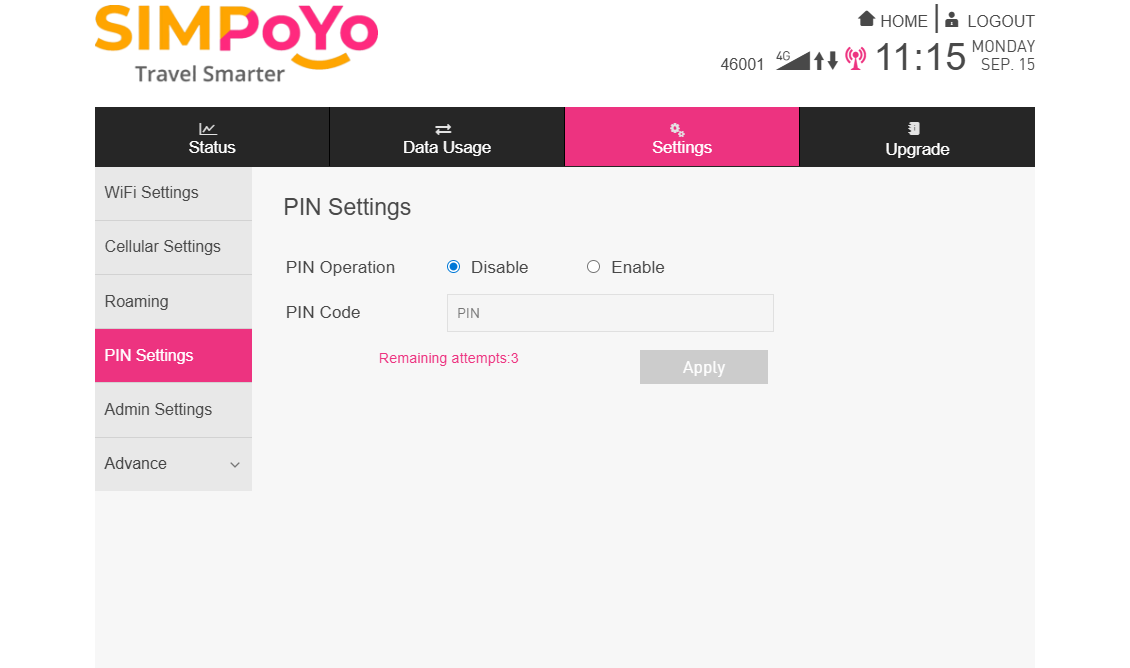
-
Select Enable, set your PIN code and click Apply.
Change Admin Password
The default admin password is the same as the Wi-Fi password. For security purposes, please change it during the initial setup.
-
Choose Settings from the top menu and navigate to Admin Settings.
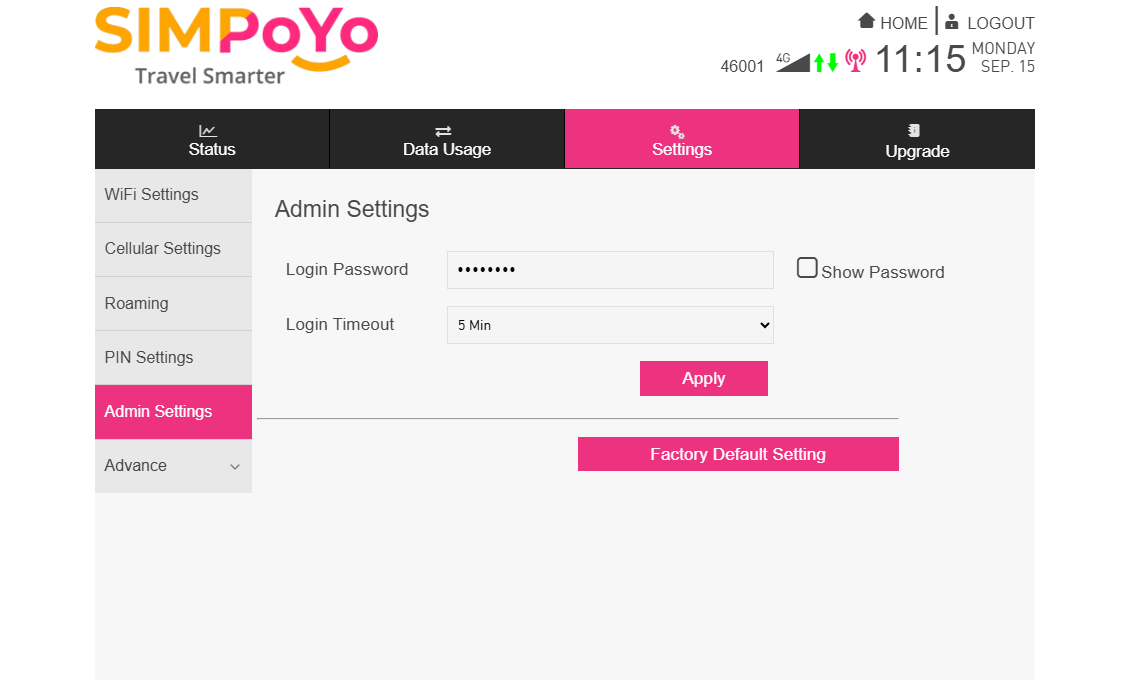
-
Customize the Admin Password and Login Timeout, then click Apply.
-
If you want to reset your SIMPoYo uFi to default settings, click the Factory Default Setting button to reset.
DHCP Settings
By default, the SIMPoYo uFi's IP address is 192.168.1.1, with its DHCP server enabled to assign IP addresses to connected devices.
If you want to change its IP address or customize the DHCP settings, follow the steps below.
-
Choose Settings from the top menu and navigate to Advanced -> DHCP.
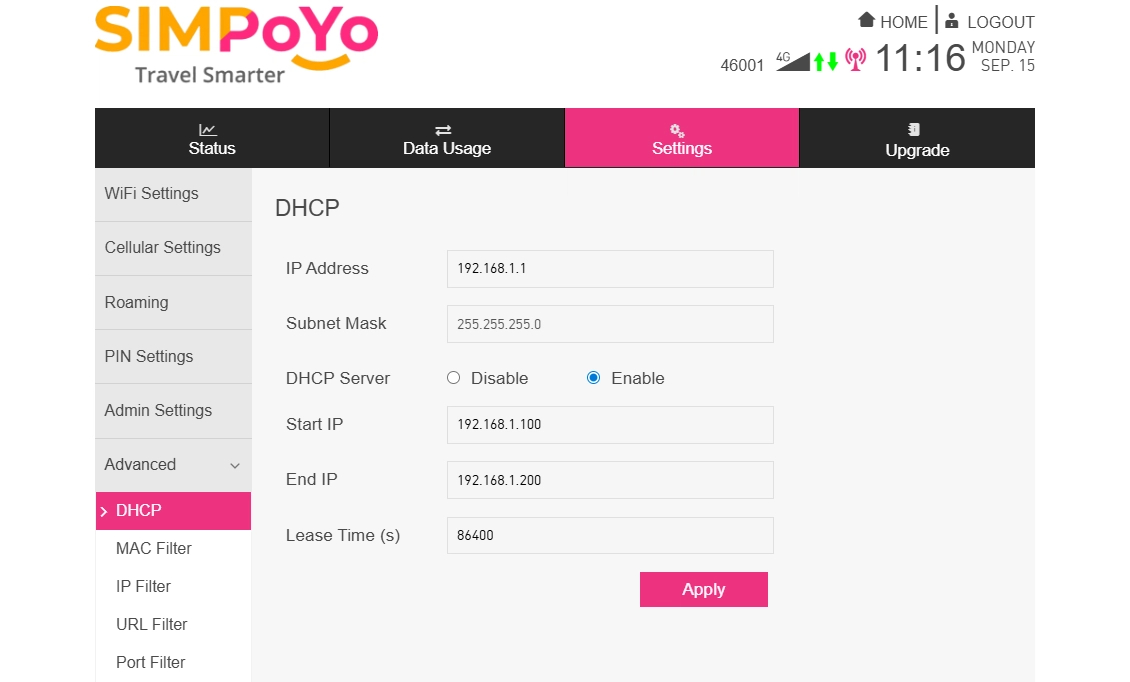
-
It allows you to change the device's IP address, enable or disable the DHCP server, and set the IP range and lease time. Configure the DHCP settings and click Apply.
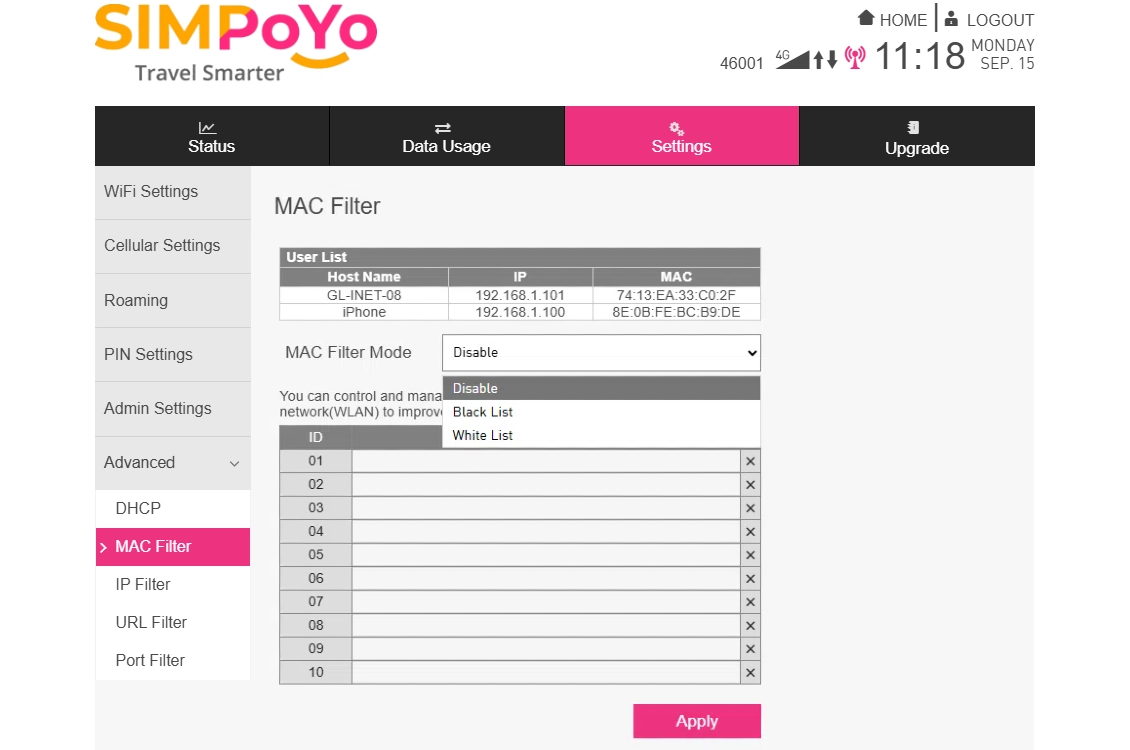
MAC Filter
MAC Filter lets you control which devices can access your WLAN by managing their MAC addresses, enhancing your network's security.
The MAC Filter is disabled by default. If you want to enable it, follow the steps below.
-
Choose Settings from the top menu and navigate to Advanced -> MAC Filter.
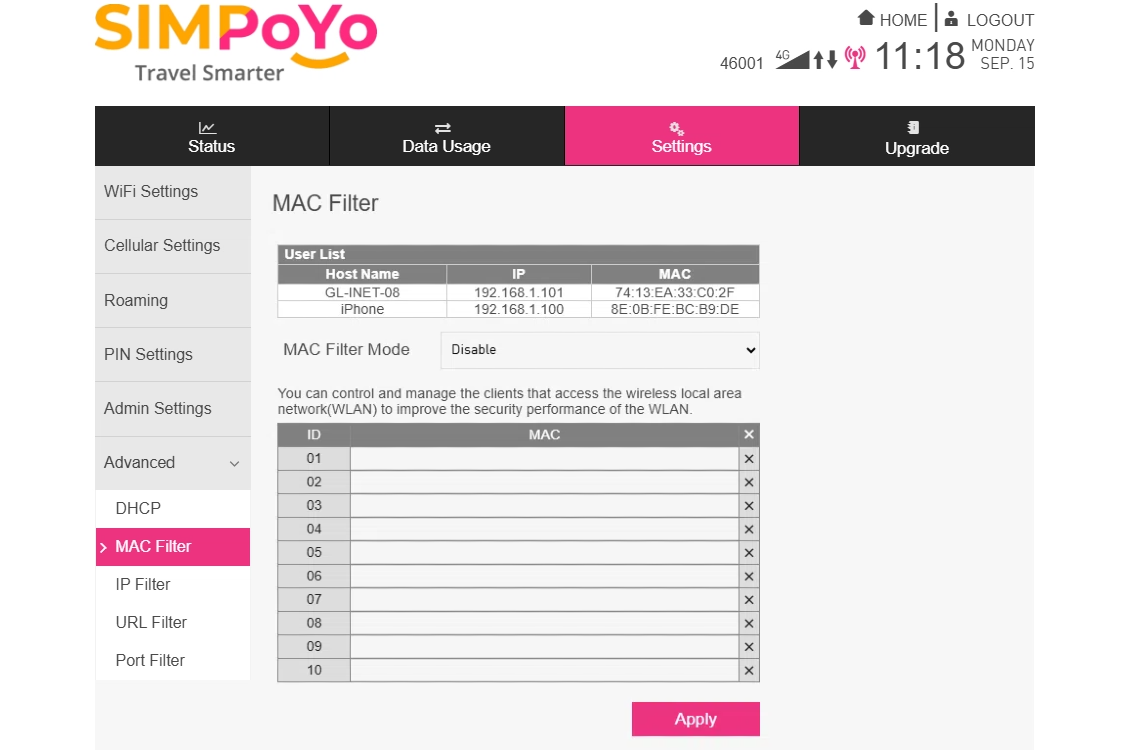
The User list at the top shows the connected devices' details. Check if the device you want to control is in the list. If not, re-connect it to SIMPoYo uFi's Wi-Fi.
-
Switch the MAC Filter Mode to Black List / White List.
-
Copy the MAC address of the device you want to block / allow into the list and click Apply.
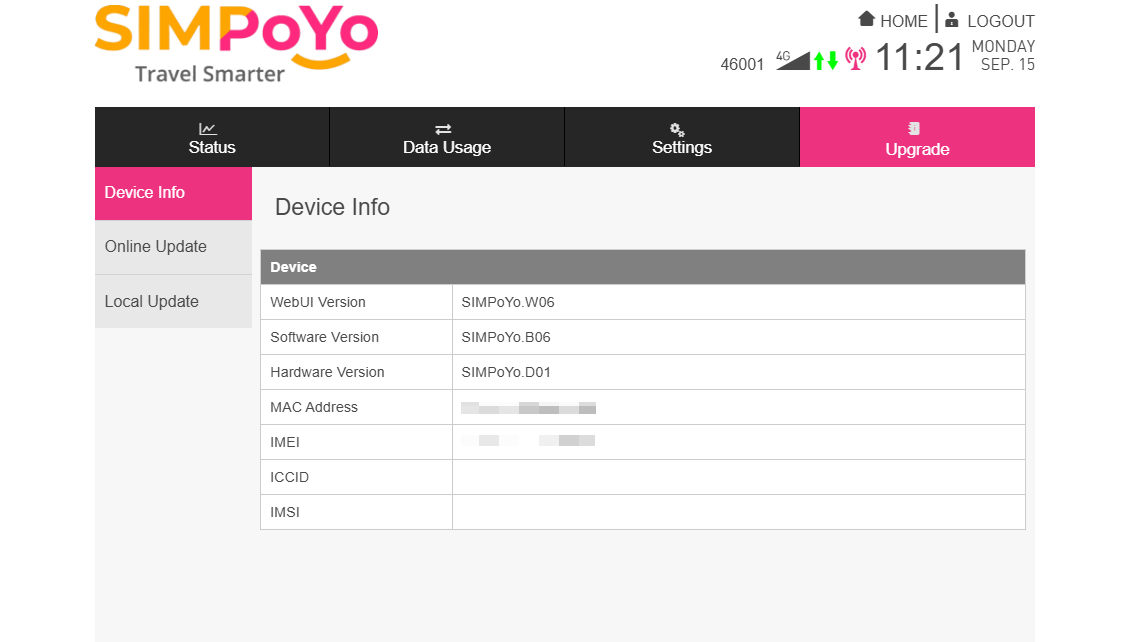
Upgrade
-
Choose Upgrade from the top menu, navigate to Device Info, and you will see the SIMPoYo uFi's device info, including:
- Hardware info (e.g., hardware version, MAC address, IMEI, ICCID)
- Software info (e.g., software version)
- WebUI info (e.g., WebUI version)
-
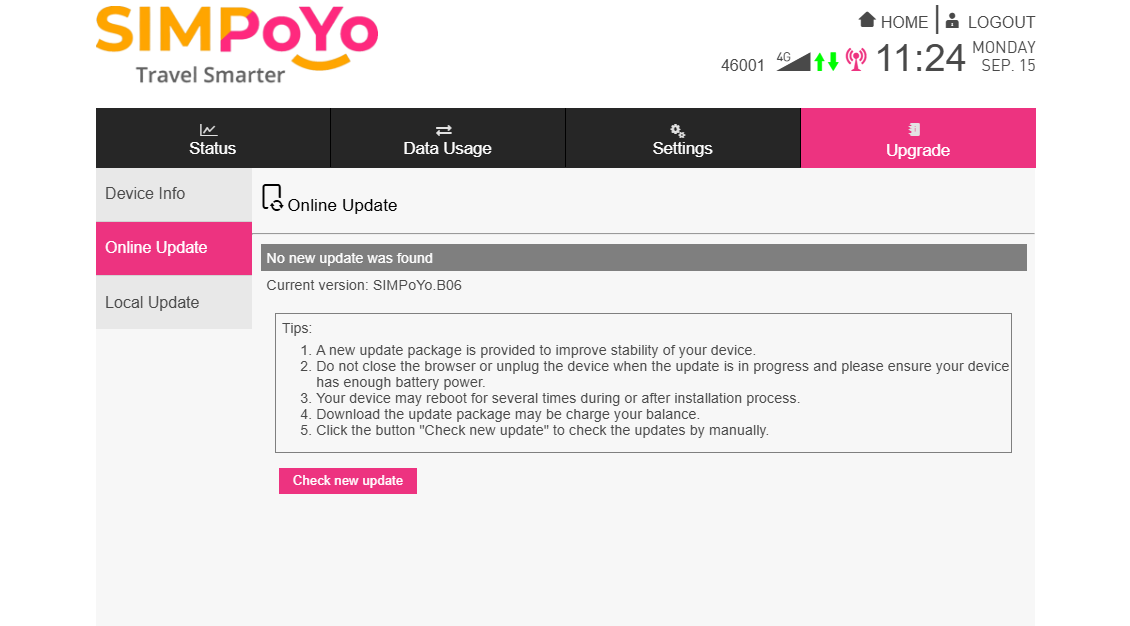
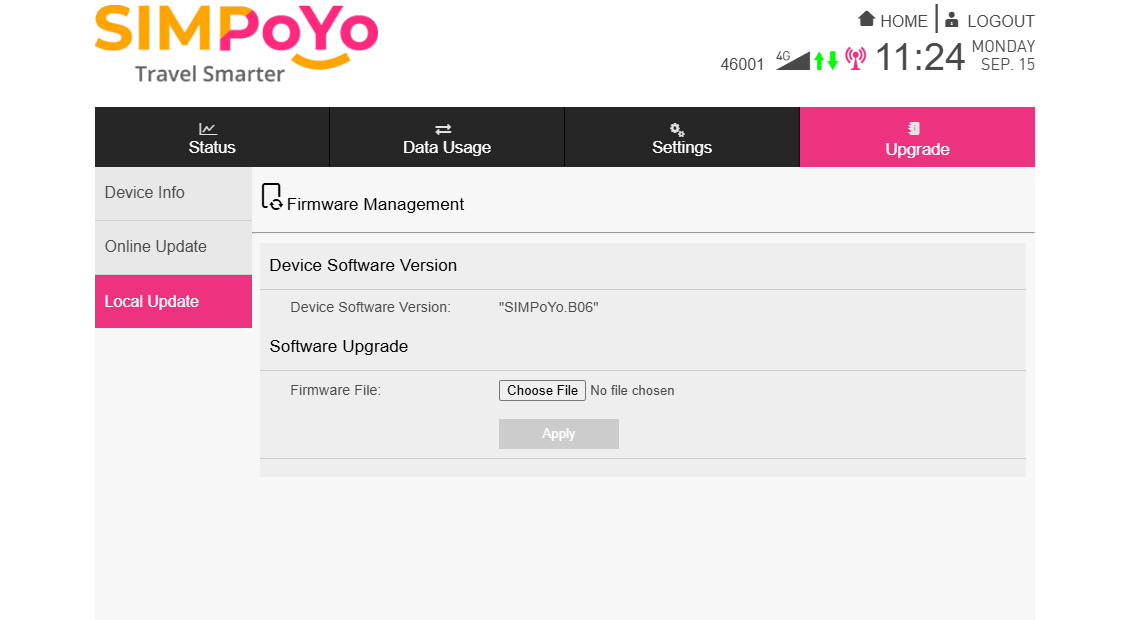
You can upgrade the software version if available.
Switch to Online Update from the left sidebar and click on Check New Update button to see if there's any new version available.
Or switch to Local Update from the left sidebar, upload a file, and click Apply to upgrade manually.
Accessories Guide
The following accessories are included in the package:
-
1 USB-C to USB-A adapter cable: Suitable for plugging the SIMPoYo uFi into devices with only a USB Type-C interface (e.g., laptops).
-
1 USB-A to USB-A adapter cable: Lets you flexibly connect the SIMPoYo uFi to a USB port (e.g., on a computer or USB power source), avoiding direct contact between the SIMPoYo uFi's native port and the target port. This helps prevent damage to the metal interface from sudden impacts.
-
1 SIM eject tool (a pin): Use it to eject SIM cards from devices (e.g., smartphones) for installation into the SIMPoYo uFi, or to press the uFi's reset pinhole if needed.
Still have questions? Visit our Community Forum or Contact us.