How to reserve a fixed IP for OpenVPN client in a self built OpenVPN connection?
This tutorial will show you how to reserve a fixed IP for your OpenVPN client connecting to your server. Set up a GL.iNet router as your OpenVPN server first before following the steps below.
-
Log in to the web admin panel of your OpenVPN server, from the left sidebar, navigate to VPN -> OpenVPN Server.
In the Configuration tab, note down the IPv4 subnet (such as 10.8.0.0/24 in the following image), and switch the Authentication Mode to Username and Password Only.

-
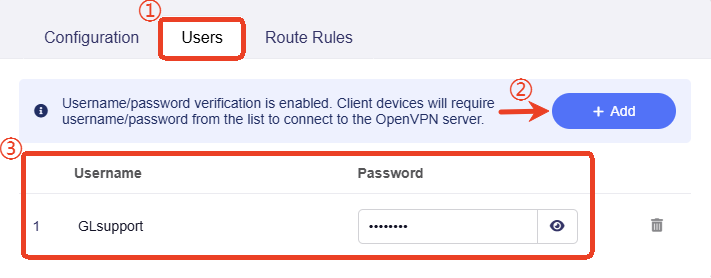
Turn to the Users tab, create a username and password, as shown below.
-
SSH log in to the router, run the following command to open the OpenVPN server configuration script file:
vi /lib/netifd/proto/openserver.shIn the opened file, check if the line "client-config-dir /etc/openvpn/ccd" exists in the script.
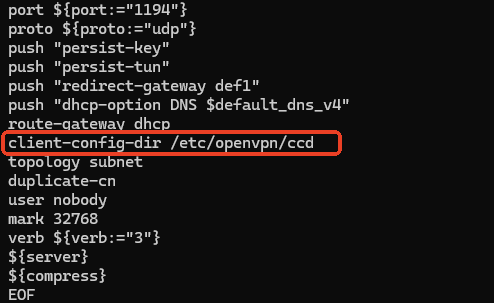
If not, add it manually, then save and exit the file.
-
Go to
/etc/openvpn/, add a ccd foldermkdir ccd.
-
Add a file "GLsupport", type in
ifconfig-push 10.8.0.10 255.255.255.0, then save and exit the file.Verify the content by
cat GLsupport
-
When you use GLsupport to connect your OpenVPN server, it will assign a fixed IP 10.8.0.10 for this GLsupport user.
-
The "255.255.255.0" is the subnet mask and you can replace it with your OpenVPN server subnet mask.
Note: If you want to fix IP addresses for multiple OpenVPN clients, please create multiple usernames and passwords in Step 2, then repeat Step 5, add files to the CCD folder in the order of users, such as user_1, user_2, user_3, followed by the "ifconfig push" command and their corresponding fixed IP and subnet mask.
For example,
ifconfig-push 10.8.0.20 225.225.225.0,ifconfig-push 10.8.0.30 225.225.225.0,ifconfig-push 10.8.0.40 225.225.225.0 -
-
At last, test with your OVPN client and check if the Client Virtual IP (IPv4) is the reserved one.
For example, if your OpenVPN client is a GL.iNet router, you can log in to the OpenVPN client router's web admin panel, navigate to VPN Dashboard to verify the Client Virtual IP (IPv4).
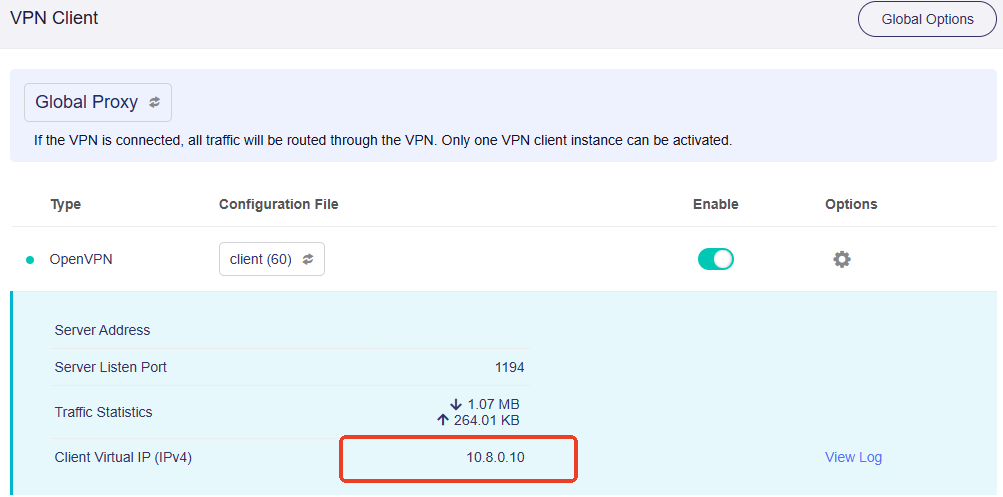 (VPN Dashboard in firmware v4.7 and earlier)
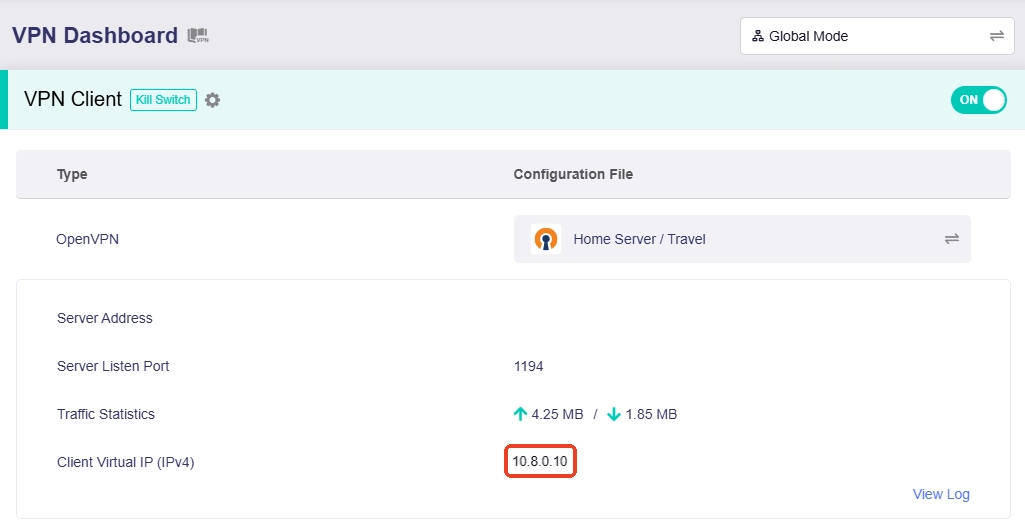 (VPN Dashboard in firmware v4.8)
Still have questions? Visit our Community Forum or Contact us.