SSH Log in to the Router
Secure Shell (SSH) is a cryptographic network protocol for operating network services securely over an unsecured network. The best known example application is for remote login to computer systems by users. Sometime you need to have basic tools to SSH to the server. This guide is about how to SSH login to the GL.iNet routers.
For Windows User
There are ways to access the router terminal on Windows, including via Windows Cmd, PowerShell, Bitvise, or PuTTY.
Using Windows Cmd
-
Open Command Prompt
Press Win + R (Windows key + R key) to open the Run box. Type cmd and hit Enter.
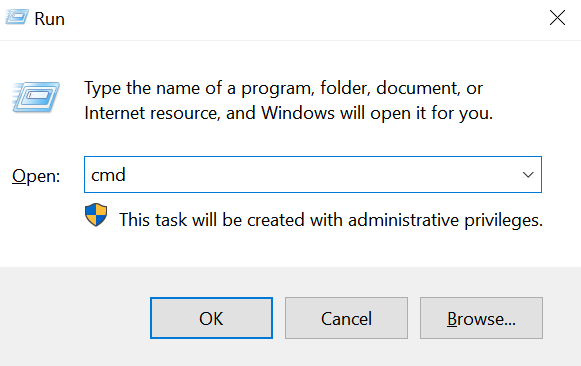
A black command prompt window will pop up.
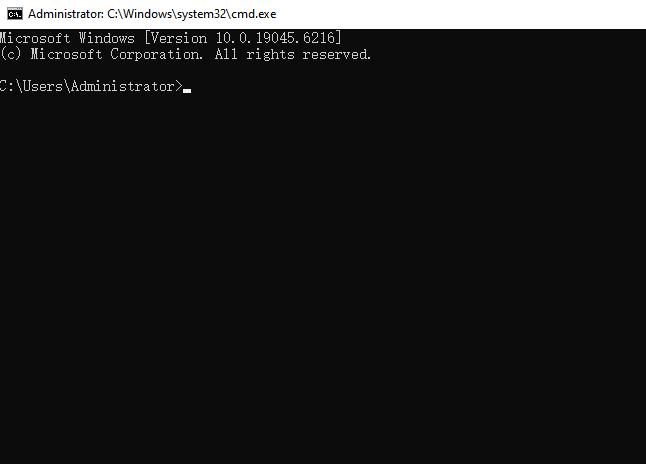
-
Log in to the Router
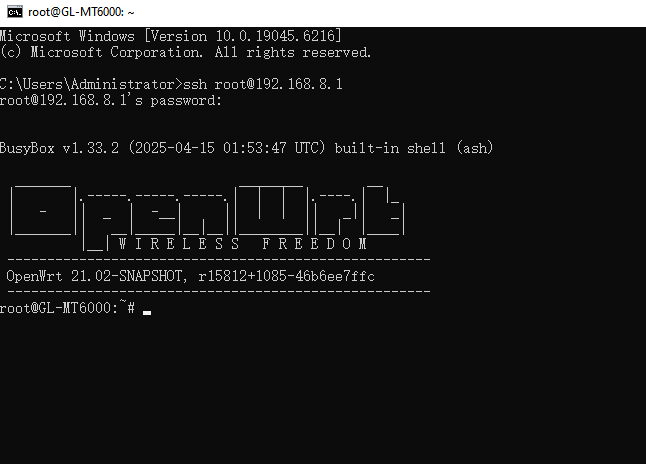
In the command prompt window, type
ssh root@192.168.8.1and press Enter.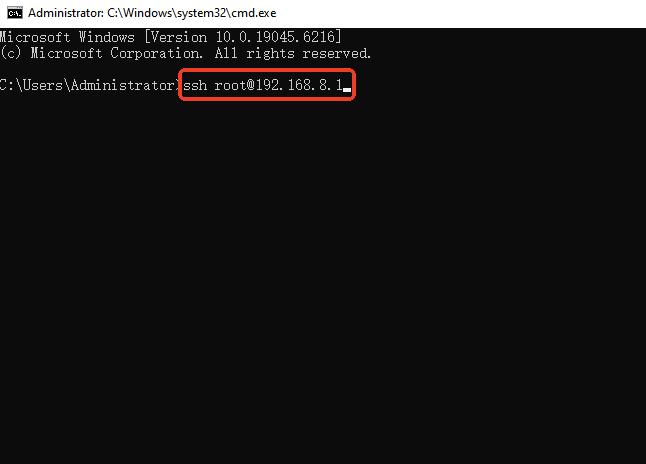
Note: 192.168.8.1 is the router's default IP address. If you changed it before, use your custom IP instead.
Next, type your router's admin password and press Enter. For security, the password does not show on screen.
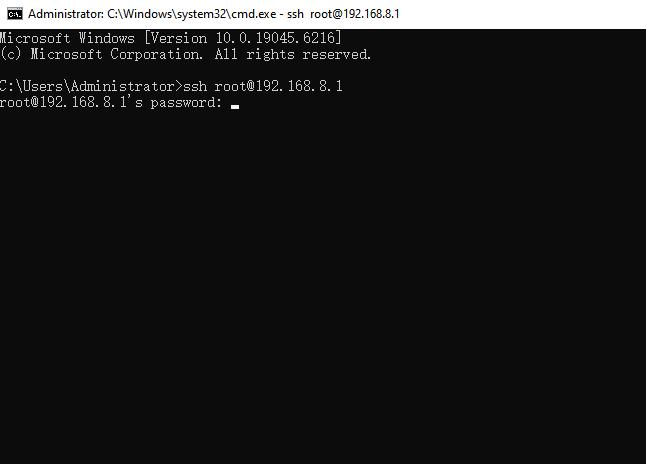
If the password is correct, you'll log in to your router successfully.
Troubleshooting
-
Error: Connection timed out
Ensure your device (such as laptop) is connected to the router. Reconnect to the router's Wi-Fi or LAN port and try again.
-
Error: Permission denied
Ensure you type the correct admin password. If you forgot the password, reset the router by pressing the RESET button for 10 seconds.
Using PowerShell
-
Open Windows PowerShell
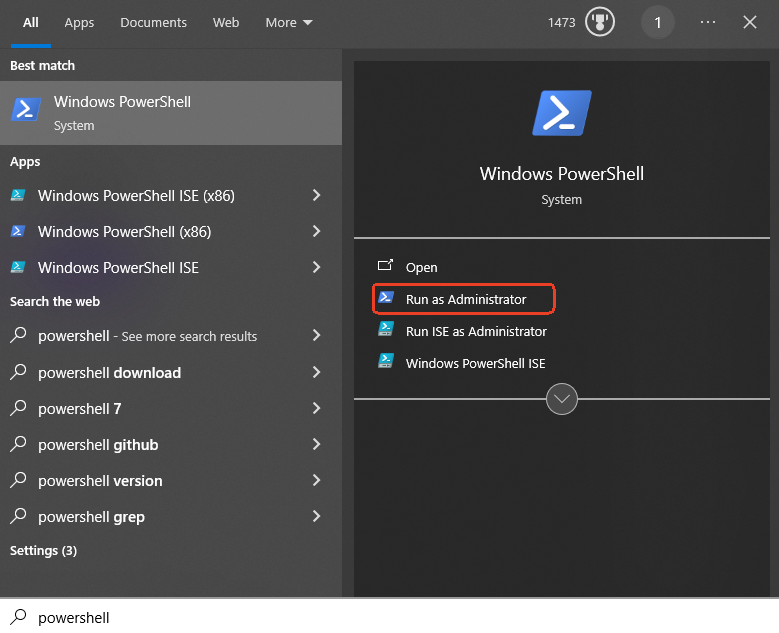
Click the search icon on the taskbar, type PowerShell, select Windows PowerShell and run it as an administrator.
-
Log in to the router
In the PowerShell window, type
ssh root@192.168.8.1and press Enter.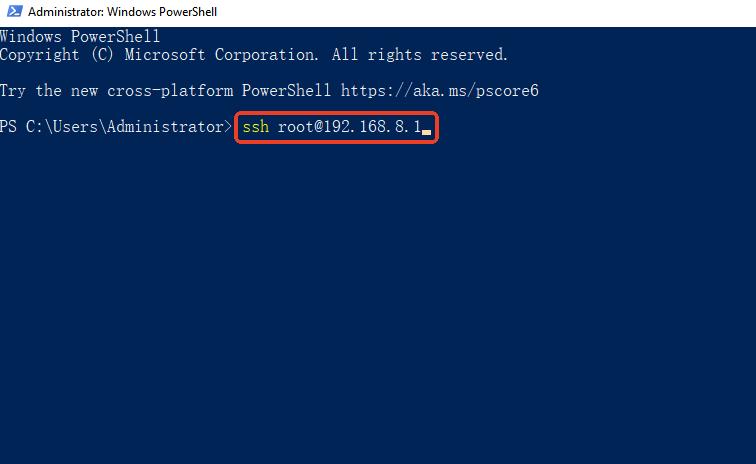
Note: 192.168.8.1 is the router's default IP address. If you changed it before, use your custom IP instead.
The system will prompt you to confirm the connection. Type
yesand press Enter.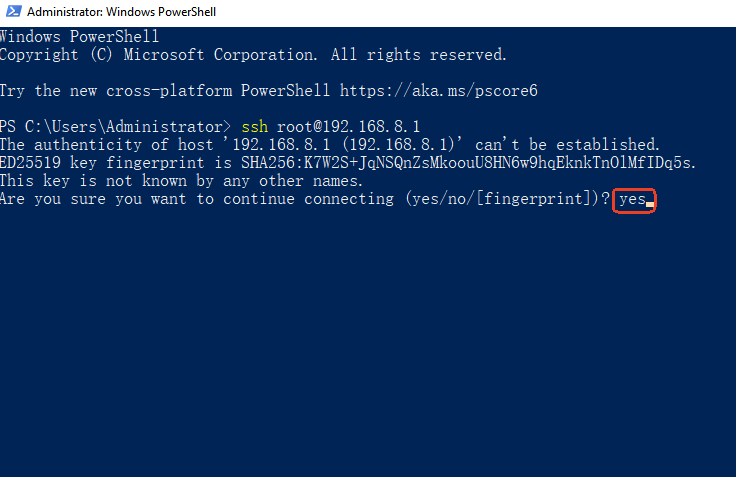
You will be prompted to enter the router's admin password. Input the correct admin password and press Enter. For security, the password does not show on screen.
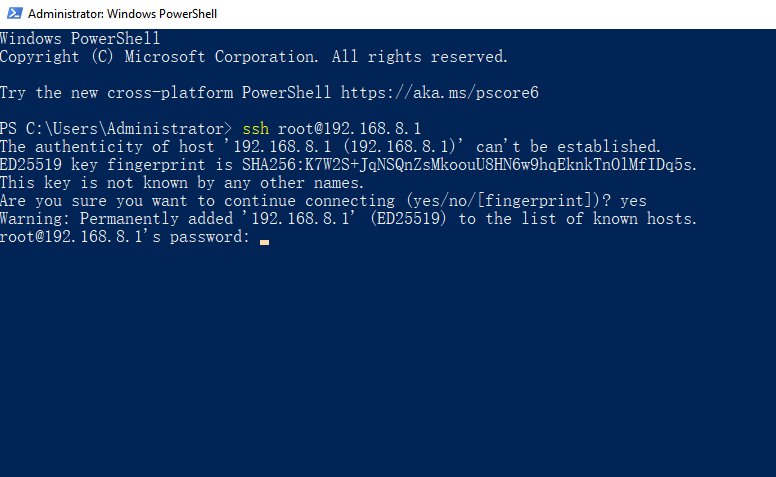
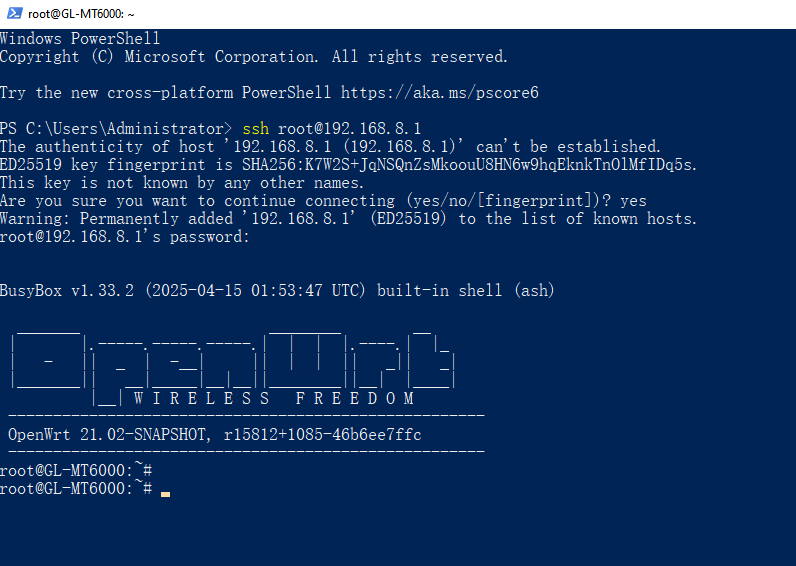
Then you will successfully log in to your router's terminal.
Troubleshooting
-
WARNING: REMOTE HOST IDENTIFICATION HAS CHANGED! / Host key verification failed
This happens if the router's security key changed (e.g., after a factory reset or firmware update), or if you have previously connected to another router, causing the host key verification to fail.
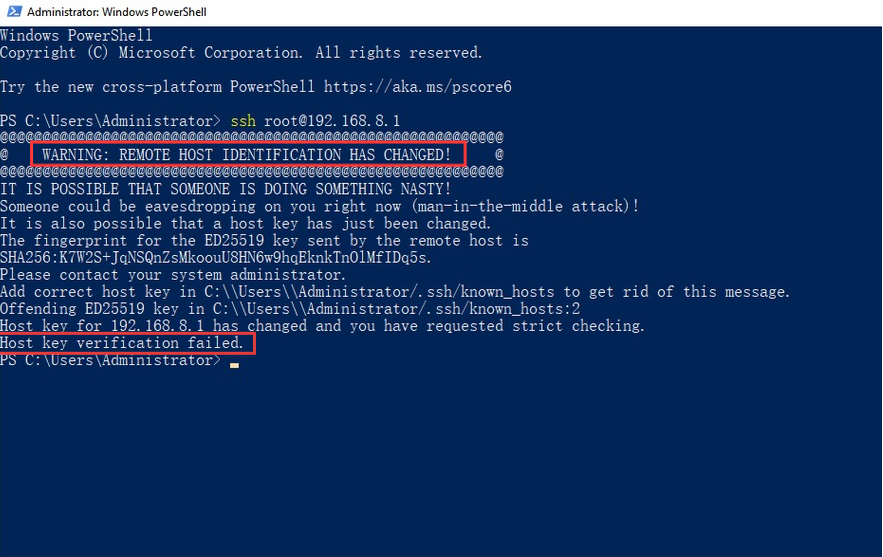
To fix it, please open File Explorer, go to
C:\Users\Administrator\.ssh, find a file named known_hosts.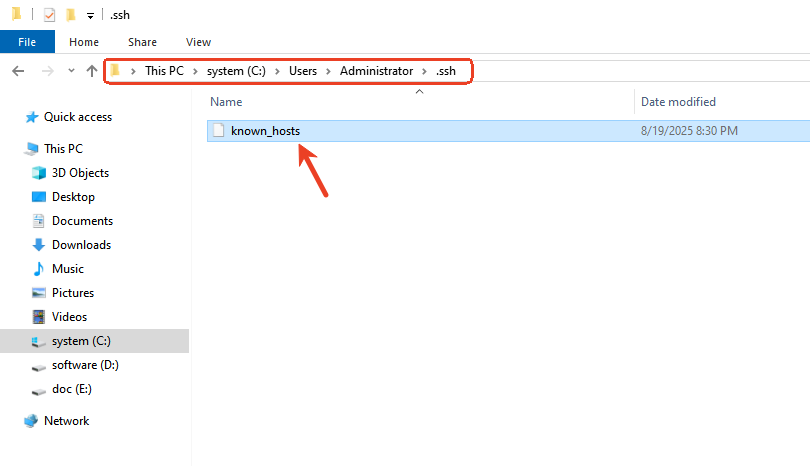
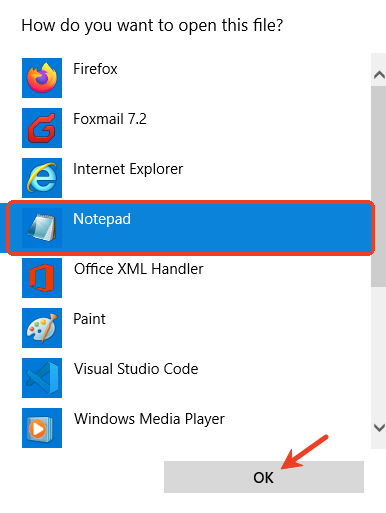
Double click on the known_hosts file and open it with Notepad.
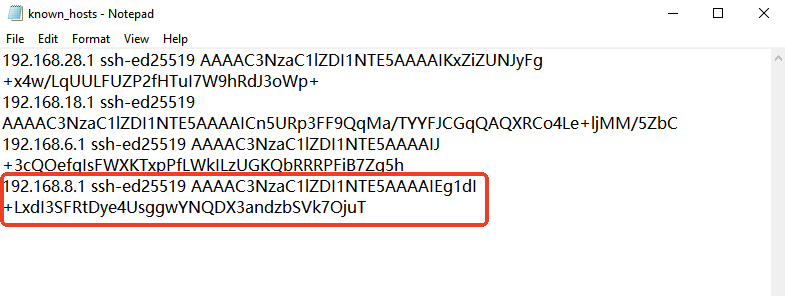
Delete the entry related to the router IP address (e.g. 192.168.8.1), and save the file. Exit the File Explorer.
Back in PowerShell, use the command
ssh root@192.168.8.1to connect to the router again. It will prompt you to confirm connection. Typeyesand press enter, then input the router's login password. You will then successfully log in to your router's terminal. -
What should I do if I changed the router's SSH port?
If you have changed the router's SSH port, specify the port via the "-p" parameter when using the ssh command. For example:
ssh -p [new port number] [username]@[router IP address]
Using Bitvise
Watch this video to log in to your router via Bitvise.
Using PuTTY
-
Download PuTTY
Download the latest PuTTY version from here.
-
Install PuTTY


-
Launch PuTTY
Click PuTTY from the Start Menu.

You will see the following Configuration Window.

Input Host Name (or IP address)
192.168.8.1, keep Port as default22, select connection type asSSH.Input
Your Sessionin saved sessions, andSaveyour content.Then click
Openat the bottom.
A security alert will pop-up as below, click
Yes.
login as:
rootThen input your admin password. For security, the password does not show on screen.

When you see a picture above, that means you are now SSH login the router successfully.
For Linux/Mac User
The process on Linux and Mac OS are generally the same. Below we use Ubuntu as an example.
Using Ubuntu
-
Launch Terminal.
Run Ubuntu. Double click on the Terminal icon to launch Terminal.

-
Log in to the router.
Input the SSH login command:
ssh root@192.168.8.1
The system will prompt you to confirm the connection. Type "yes" and hit Enter.

Then input your router's admin password. For security, the password does not show on screen.

When you see a picture above, it means you log in to the router successfully.
Troubleshooting
-
WARNING: REMOTE HOST IDENTIFICATION HAS CHANGED! / Host key verification failed
This happens if the router's security key changed (e.g., after a factory reset or firmware update), or if you have previously connected to another router, causing the host key verification to fail.

If this happens, run the command in the red box above. Please copy the exact command which is displayed in your terminal.
ssh-keygen -f "~/.ssh/known_hosts" -R "192.168.8.1"
Then try connecting again.
-
Unable to negotiate with 10.0.0.1 port 22: no matching host key type found. Their offer: ssh-rsa
You may encounter this error when connecting. This error is due to a change in the Openssh package from version 8.8. To fix it, open the ~/.ssh/config file with a text editor (for example, you can use Nano or Vim) and add the following lines:
host 192.168.8.1
    HostkeyAlgorithms +ssh-rsa
    PubkeyAcceptedAlgorithms +ssh-rsa
Make sure to change the host IP if it is not the default one.
More discussion about this issue, please refer to here.
Still have questions? Visit our Community Forum or Contact us.