How to set up VPN Obfuscation on GL.iNet routers
What is VPN Obfuscation
VPN obfuscation is a technique that disguises VPN traffic to look like regular internet traffic. This helps users bypass network restrictions and censorship, especially in regions with strict internet policies.
-
It masks VPN characteristics to prevent detection by ISPs, firewalls, or Deep Packet Inspection (DPI).
-
It makes your VPN connection appear as standard web traffic, improving connection stability and success rate in restricted networks.
What is AmneziaWG
AmneziaWG is a VPN protocol built on WireGuard, with built-in traffic obfuscation. It retains the core benefits of WireGuard, such as high speed, lightweight design, and low latency, while adding a dedicated obfuscation module. This module effectively hides VPN traffic patterns, allowing both individual and business users to protect online privacy, bypass regional restrictions, and avoid connection interruptions caused by strict network controls.
AmneziaWG is compatible with a wide range of devices, including Windows, macOS, iOS, Android, Linux, and routers, delivering reliable obfuscated VPN connections across all scenarios.
Currently, several GL.iNet routers (e.g., Brume 3, Flint 3, Flint 2, and Beryl AX) support the AmneziaWG protocol in select firmware versions. Full official support will be available in firmware ver.4.9 and gradually roll out to more models.
Quick Setup
Below are two typical scenarios for setting up AmneziaWG VPN obfuscation on GL.iNet routers.
Scenario 1. Using two GL.iNet routers
This scenario uses two GL.iNet routers to establish a VPN obfuscation connection via the AmneziaWG protocol.
- Brume 3 (GL-MT5000): Acting as a VPN Server for home use.
- Beryl AX (GL-MT3000): Acting as a portable VPN Client for on-the-go use.
Set up VPN Server
-
Log in to the Brume 3's web Admin Panel.
Connect a device (e.g., your laptop or PC) to the Brume 3's LAN port via an Ethernet cable. Open a browser and enter the default admin address (usually
192.168.8.1), then log in with your admin password. -
Complete the Brume 3 initial setup for internet access.
If the Brume 3 is used as the primary router, connect its WAN port to the upstream network such as an ISP modem.
If it is not the primary router (i.e., there is another upstream device, such as an ISP router, acting as the primary router), a port forwarding setup is required on your primary router. Please refer to this link.
-
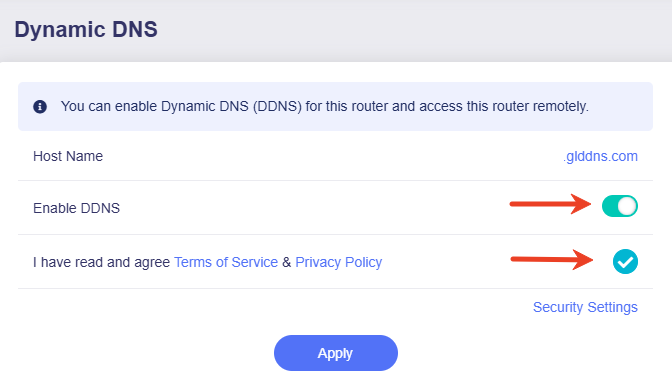
Enable DDNS (Optional).
Enable the DDNS function if your Public IP is not static but dynamic.
From the left sidebar, navigate to APPLICATIONS -> Dynamic DNS. Toggle on Enable DDNS, agree to the Terms of Service & Privacy Policy, then click Apply.
-
Enable VPN Obfuscation.
From the left sidebar, navigate to VPN > WireGuard Server -> Configurations tab, toggle on Enable Obfuscation, then click Apply.
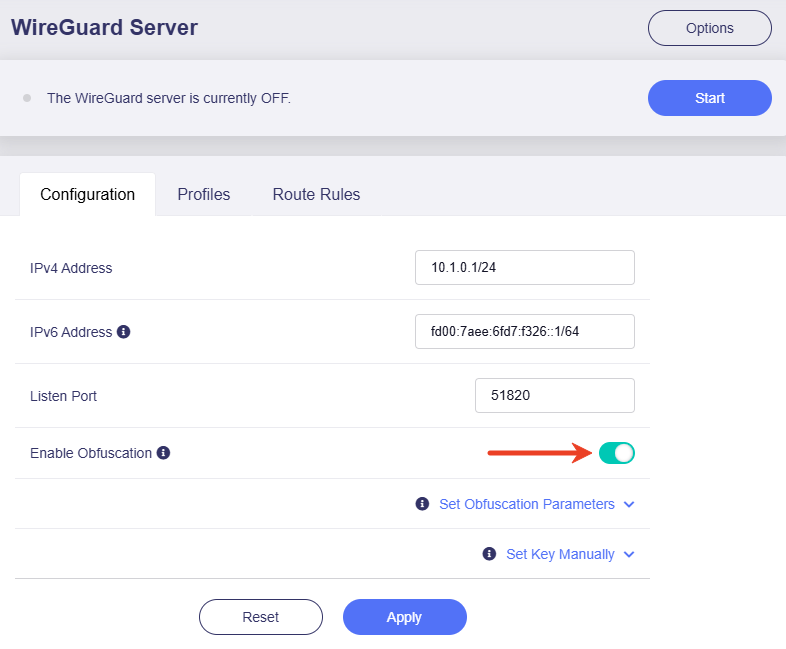
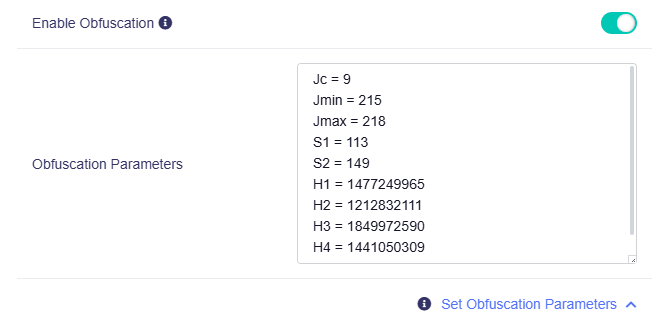
You can customize the obfuscation parameters as needed. We recommend keeping the default settings.
-
Export configuration file.
On the WireGuard Server page, switch to Profiles tab, click the Add button to create a configuration file for Beryl AX to connect.
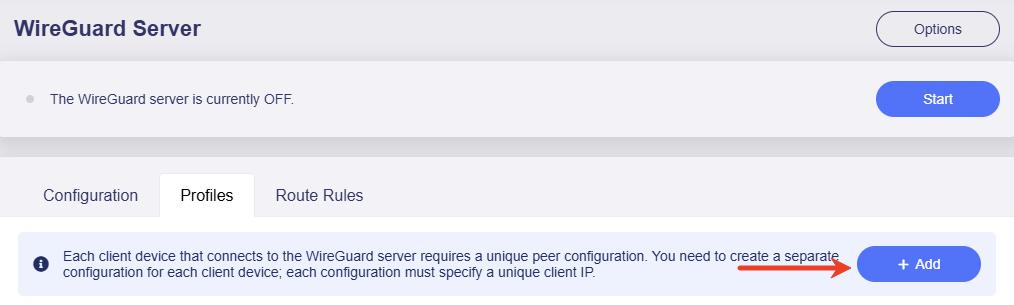
Set a descriptive name (e.g., Travel Router), then click Apply.
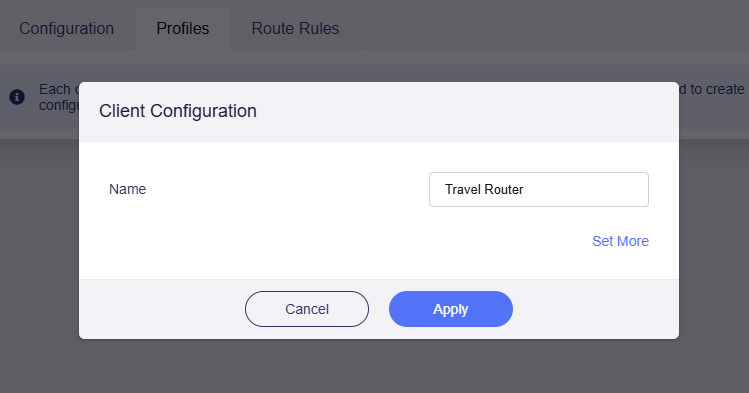
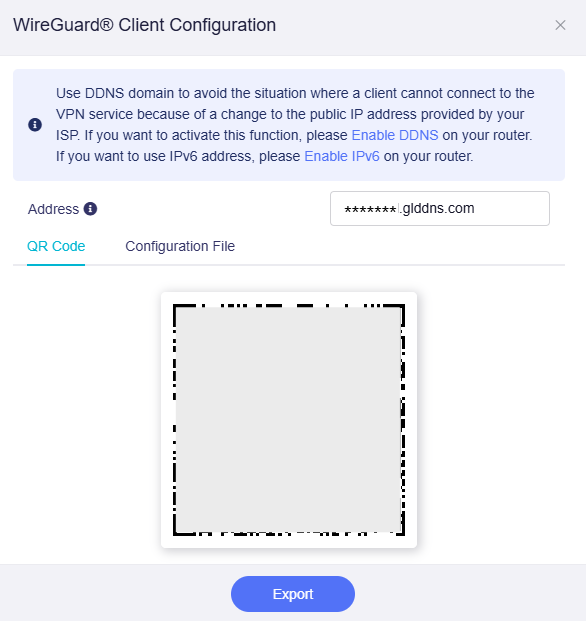
In the pop-up window, click Export to download the config to your local, which will be used latter.
-
Start the VPN server.
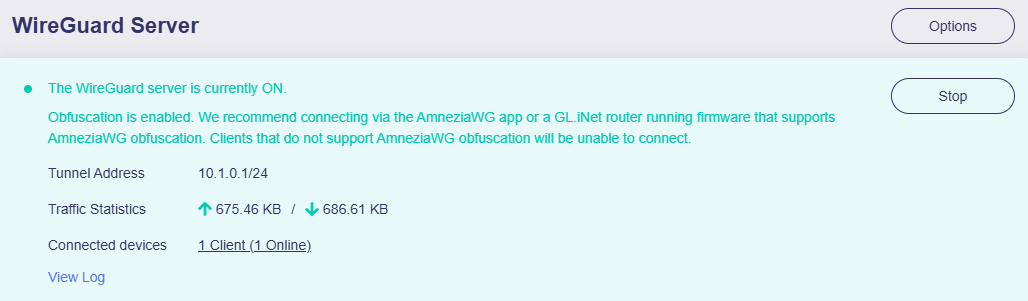
At the top of the WireGuard Server page, click the Start button to run the server.
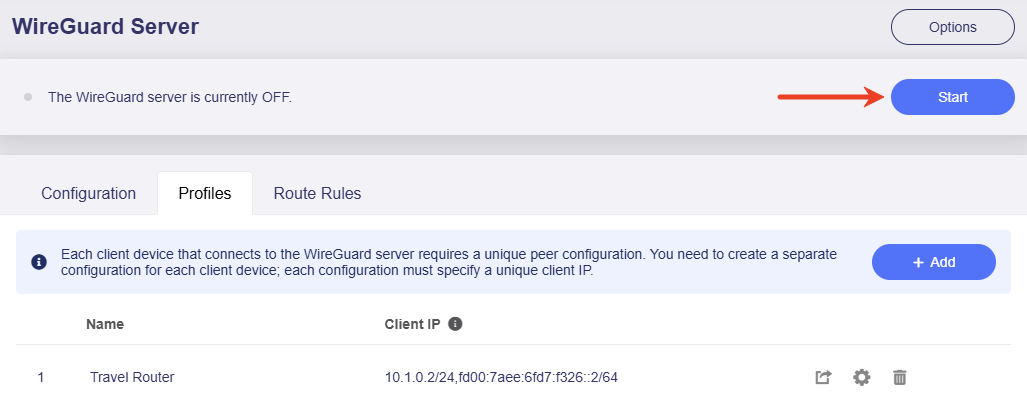
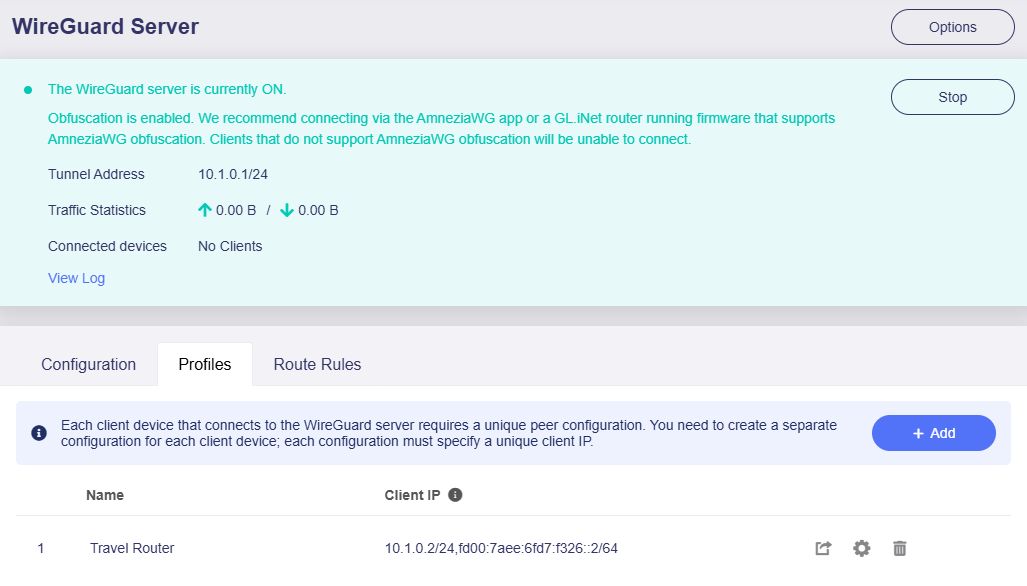
Then your VPN server with AmneziaWG obfuscation is enabled. You can now connect to this VPN server Brume 3 via the AmneziaWG app, or a GL.iNet router running firmware that supports AmneziaWG obfuscation.
Note: Clients that do not support AmneziaWG obfuscation will be unable to connect.
Set up VPN Client
-
Log in to the Beryl AX's web Admin Panel.
Connect a device (e.g., your laptop or PC) to the Beryl AX's Wi-Fi or LAN port via an Ethernet cable. Open a browser and enter the default admin address (usually
192.168.8.1), then log in with your admin password. -
Complete the Beryl AX initial setup for internet access.
Tips: Please connect the Beryl AX to a network different from Brume 3. For example, you can enable mobile hotspot for Beryl AX to connect.
-
Upload configuration file.
From the left sidebar, navigate to VPN > WireGuard Client. Add a new group and set a descriptive name (e.g., Home Router).
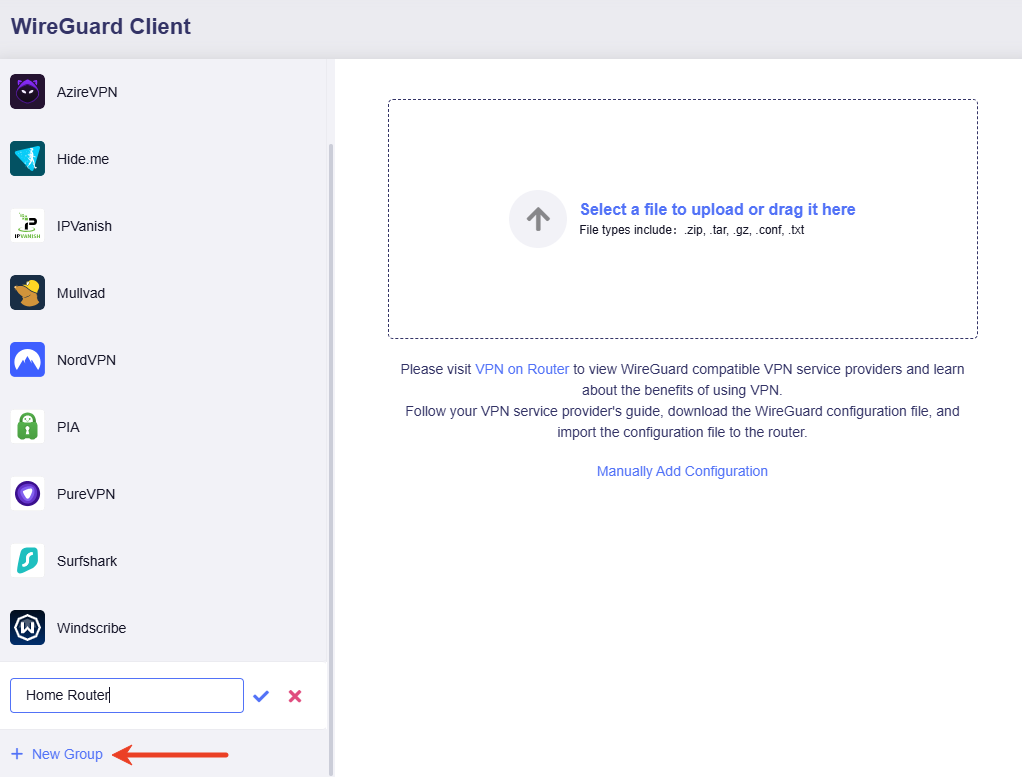
Upload the previously exported configuration file on the right side.
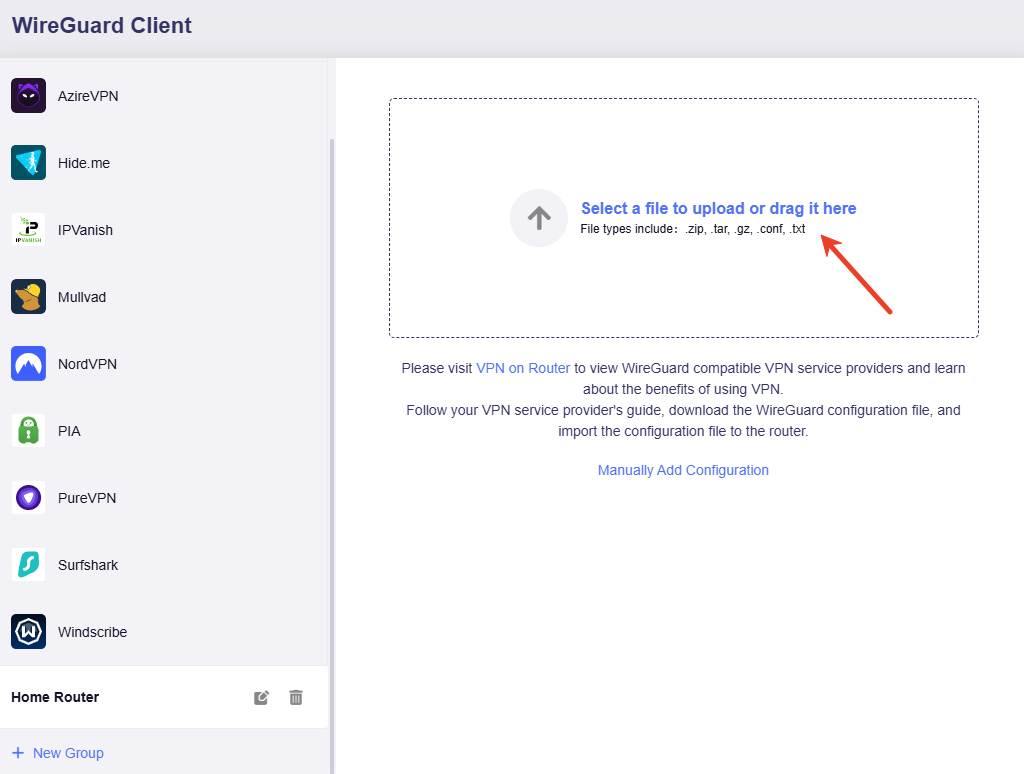
After uploading the configuration file and passing verification, click Apply.

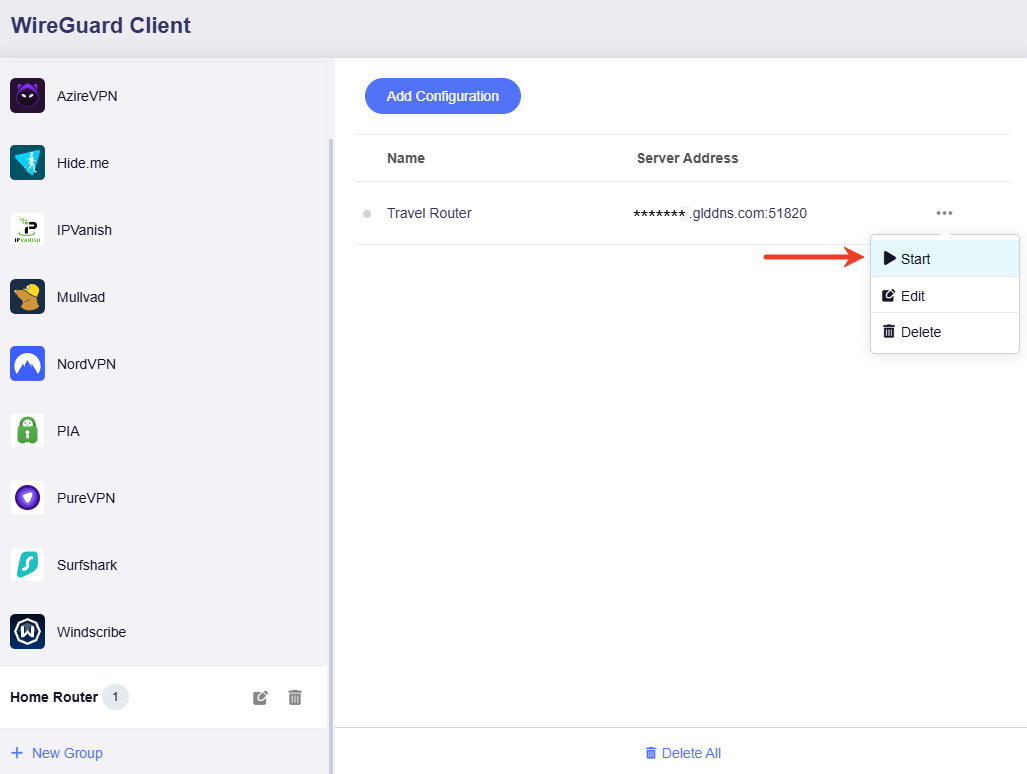
The page will refresh, with one configuration file displayed in the list.
-
Start VPN connection.
Click the three-dot icon and then select Start.
Wait for about 1 minute. If the status indicator turns green, it means the VPN connection is successful.
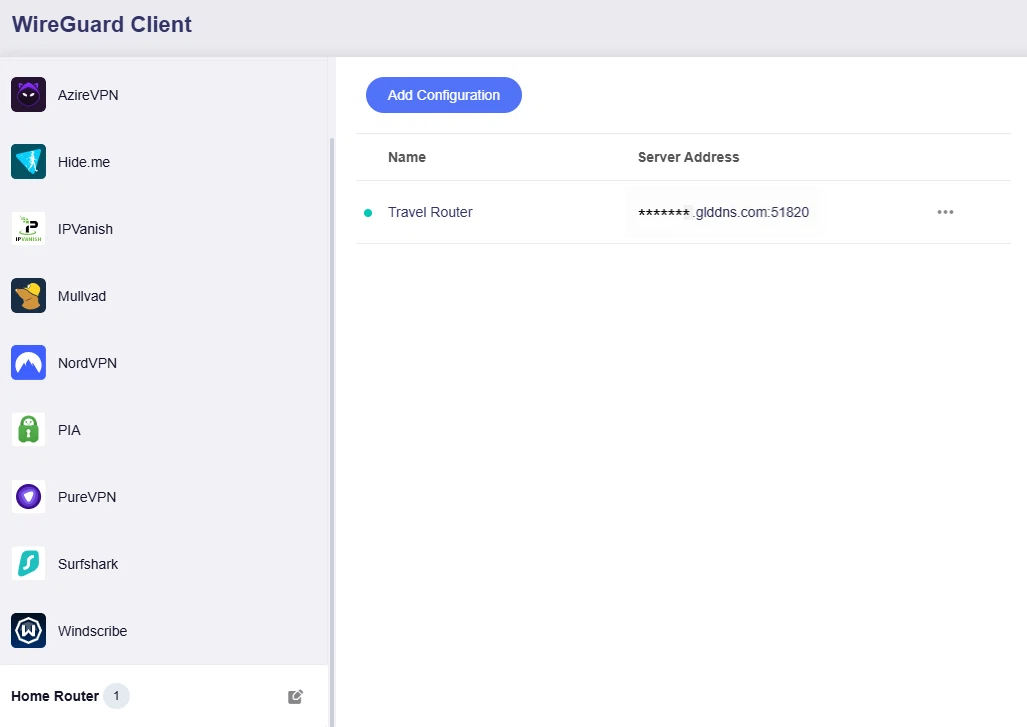
Turn to the VPN Dashboard, you will see that the Beryl AX has been connected to the Home router Brume 3.
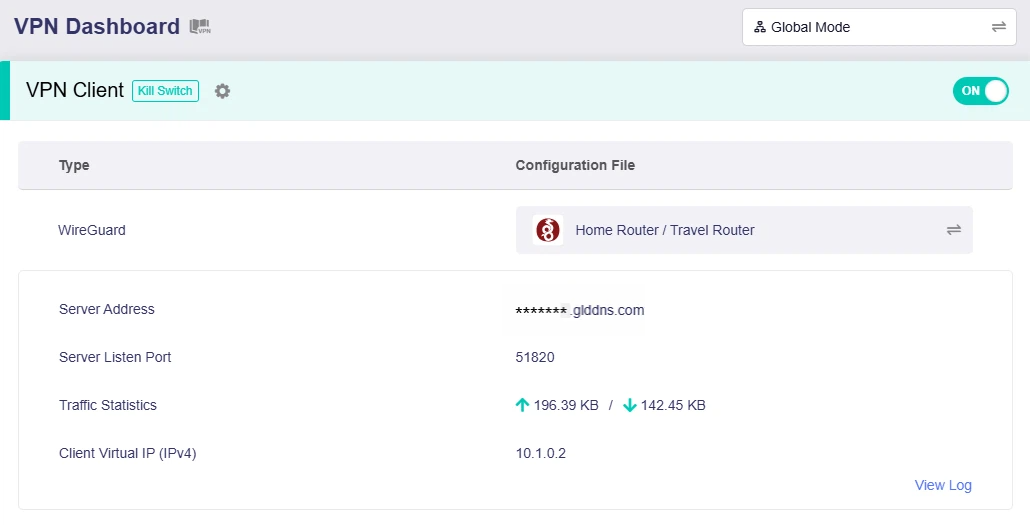
-
Double Check (Optional).
Log in to the Brume 3's web Admin Panel, navigate to VPN -> WireGuard Server. You will also see an online client, which is Beryl AX, currently connected to this VPN server Brume 3.
The VPN connection is complete. All devices on the Beryl AX now access the internet via the Brume 3's gateway, enabling a VPN obfuscation connection.
Scenario 2. Using a single GL.iNet router
This scenario uses a single GL.iNet router Brume 3 (GL-MT5000) as a VPN client to connect to an AmneziaVPN server.
In this case, you don't need to deploy your own server. Simply download an AmneziaWG configuration file from the official Amnezia website or any VPN service provider that integrates AmneziaWG, then upload the file to your GL.iNet router. You will then be able to establish a VPN connection with obfuscation enabled.
Download Configuration
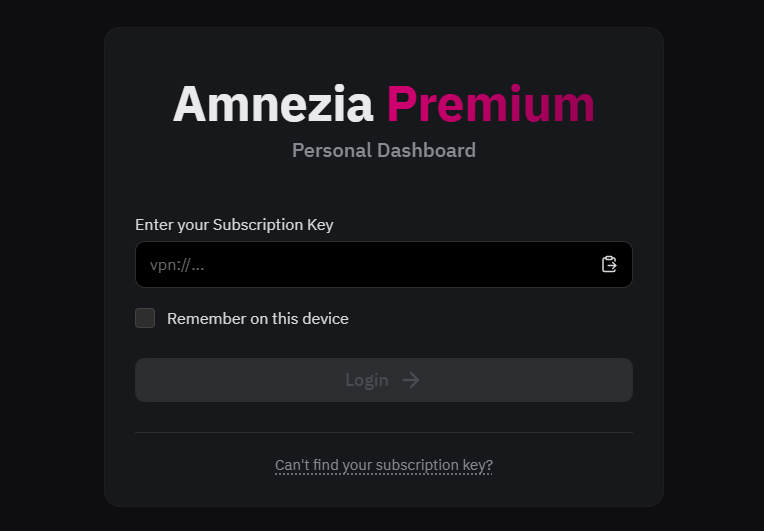
Option 1: Download a config from Amnezia Official (Premium subscription required).
-
Log in to the Amnezia Premium Dashboard with your Subscription Key.
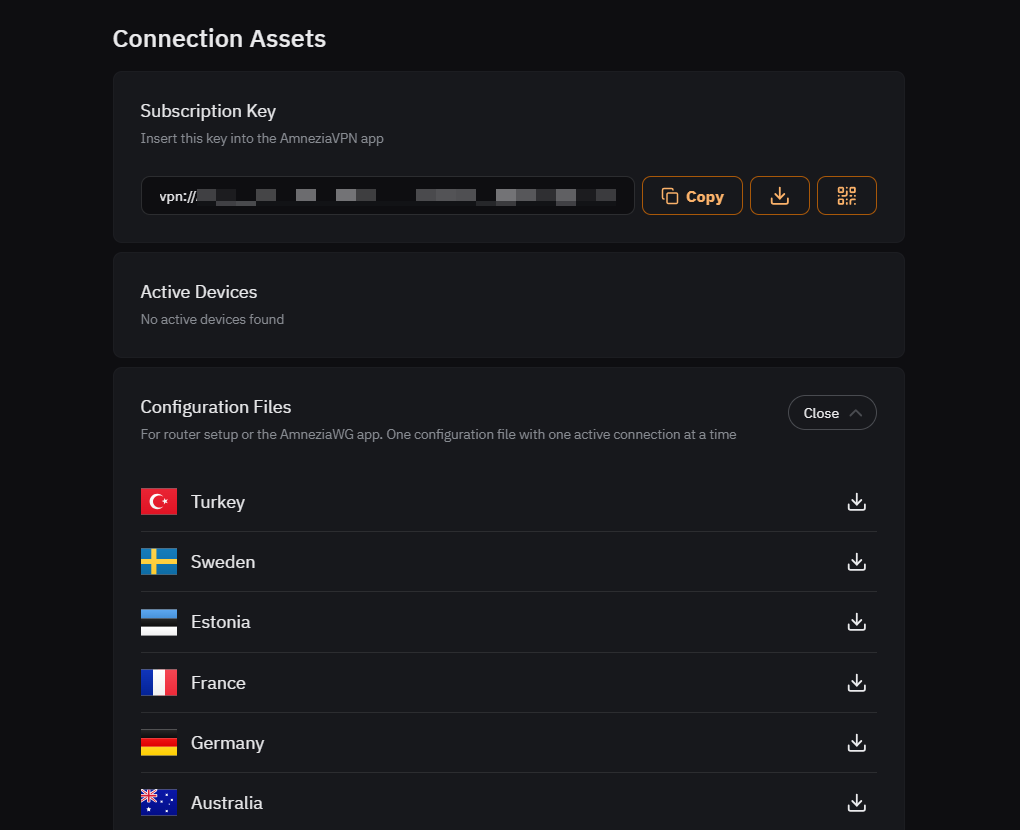
-
On the Amnezia Dashboard, turn to the Connection Assets -> Configuration Files, select a country and download a configuration file to your local for later use.
Option 2: Download a config from other VPN provider that integrates AmneziaWG.
Take StarVPN as an example.
-
Head on over to StarVPN pricing plans and choose a VPN plan that suits your needs. You can register a StarVPN account on checkout or directly here.
-
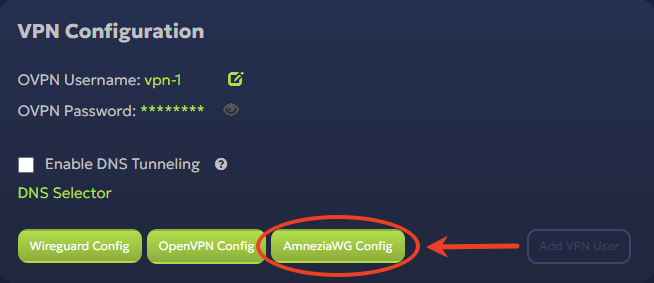
Log in to the StarVPN Dashboard, locate the VPN Configuration and click AmneziaWG Config to download the configuration file.
-
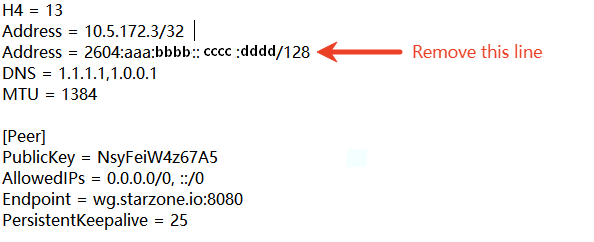
The config may contain IPv6 address. To avoid compatibility and connectivity issues, open the .conf file and remove IPv6 address, as shown below.
Then follow the steps below to set up VPN client.
Set up VPN Client
-
Log in to the Brume 3's web Admin Panel.
Connect a device (e.g., your laptop or PC) to the Brume 3's LAN port via an Ethernet cable. Open a browser and enter the default admin address (usually
192.168.8.1), then log in with your admin password. -
Complete the Brume 3 initial setup for internet access.
-
Upload configuration file.
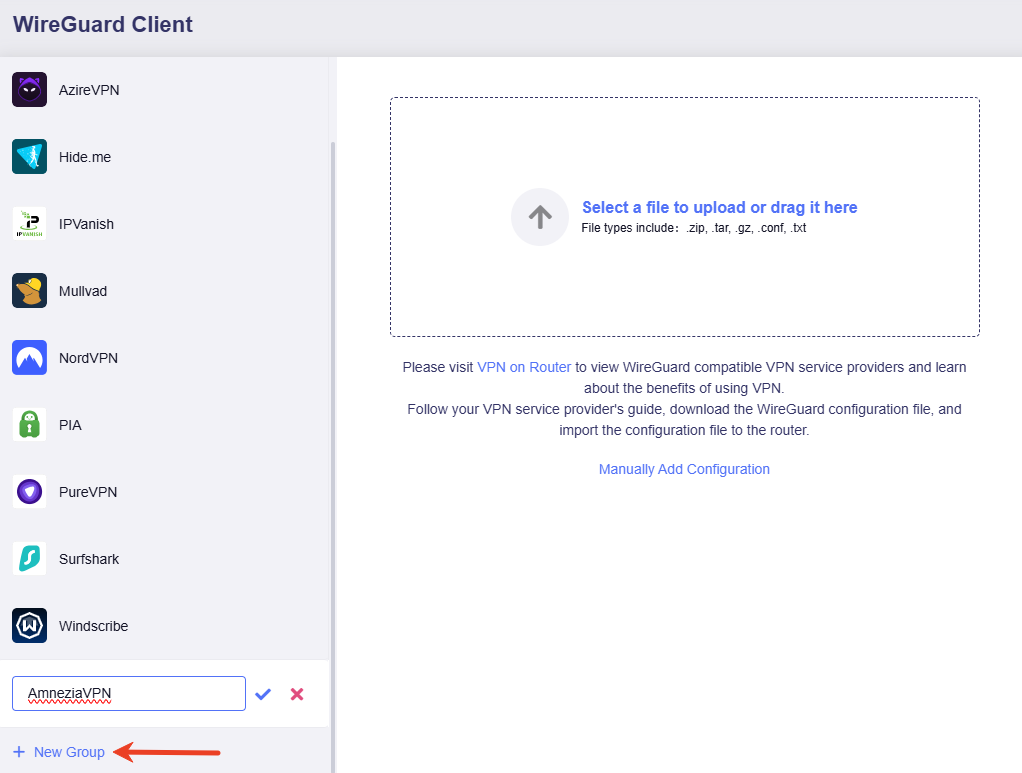
From the left sidebar, navigate to VPN > WireGuard Client. Add a new group and set a descriptive name (e.g., AmneziaVPN).
Upload the previously exported AmneziaVPN configuration file on the right side.
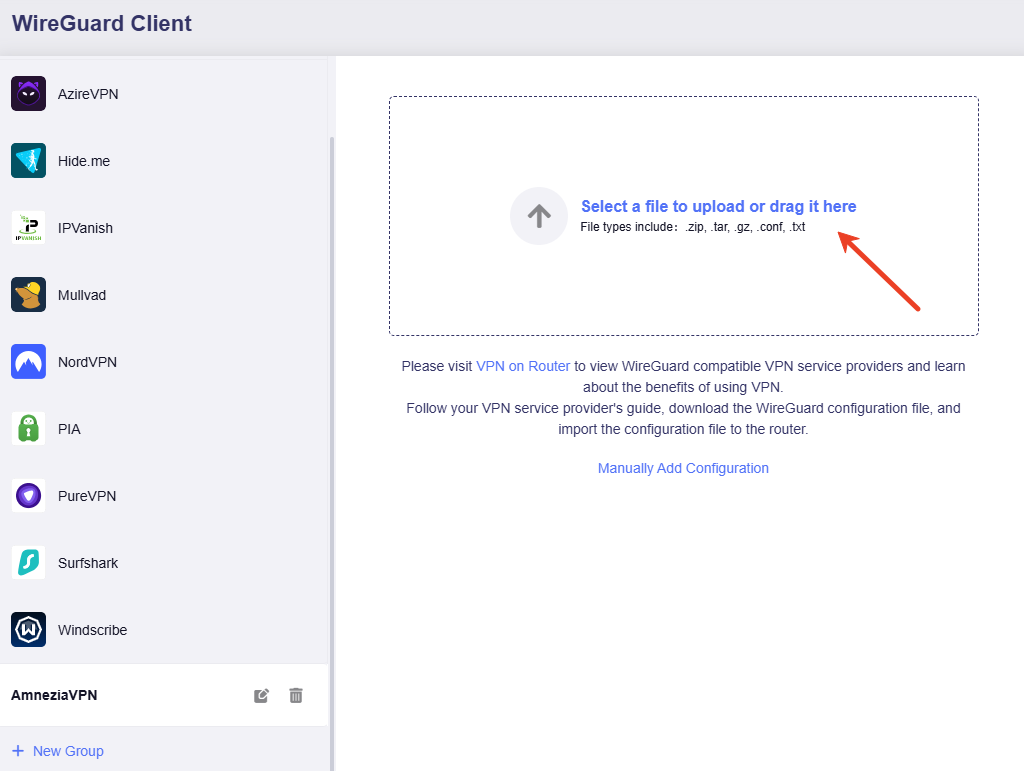
After uploading the configuration file and passing verification, click Apply.
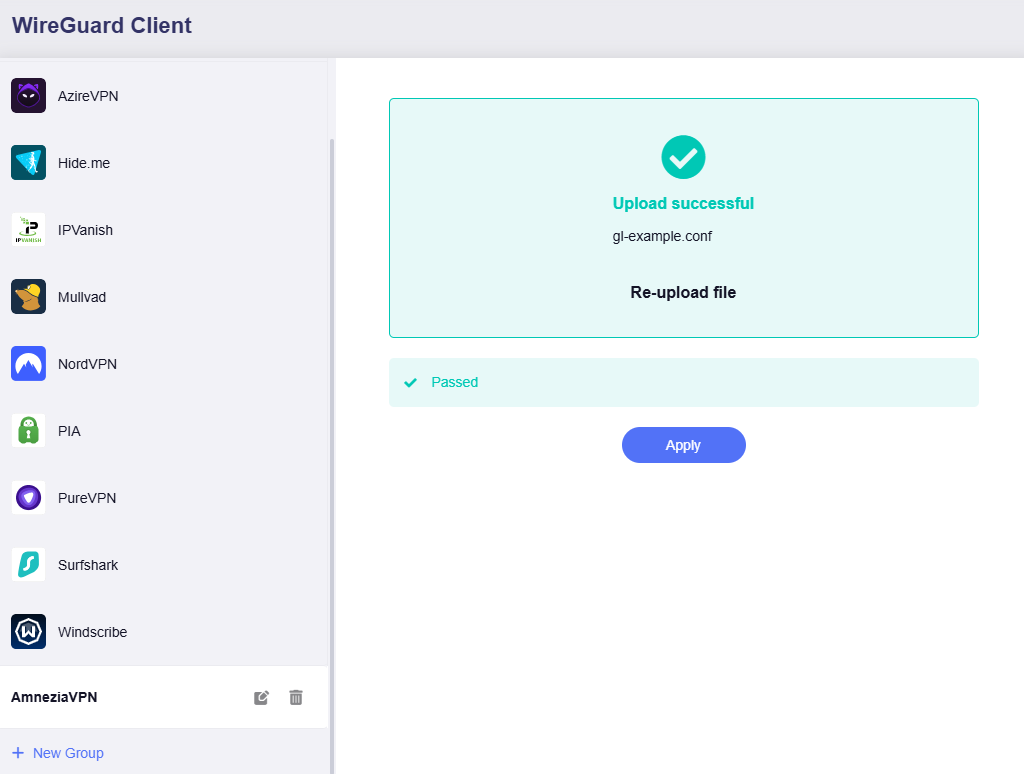
The page will refresh, with one configuration file displayed in the list.
-
Start VPN connection.
Click the three-dot icon and then select Start.
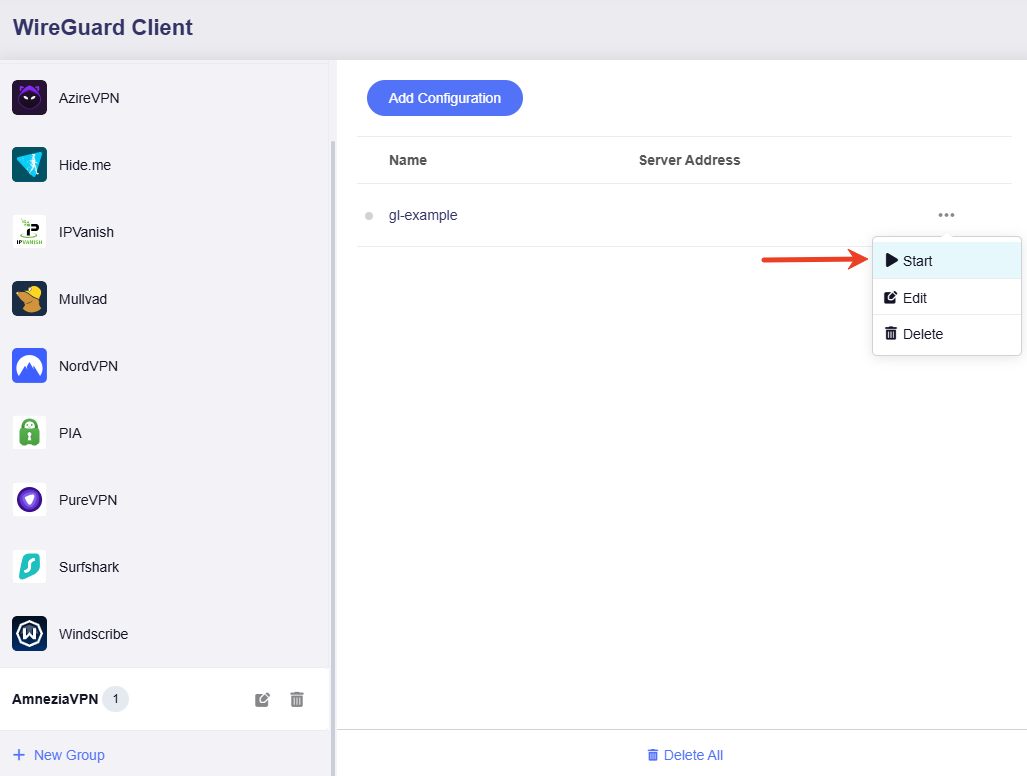
Wait for about 1 minute. If the status indicator turns green, it means the VPN connection is successful.

Turn to the VPN Dashboard, you will see that the Brume 3 has been connected to a AmneziaVPN server.
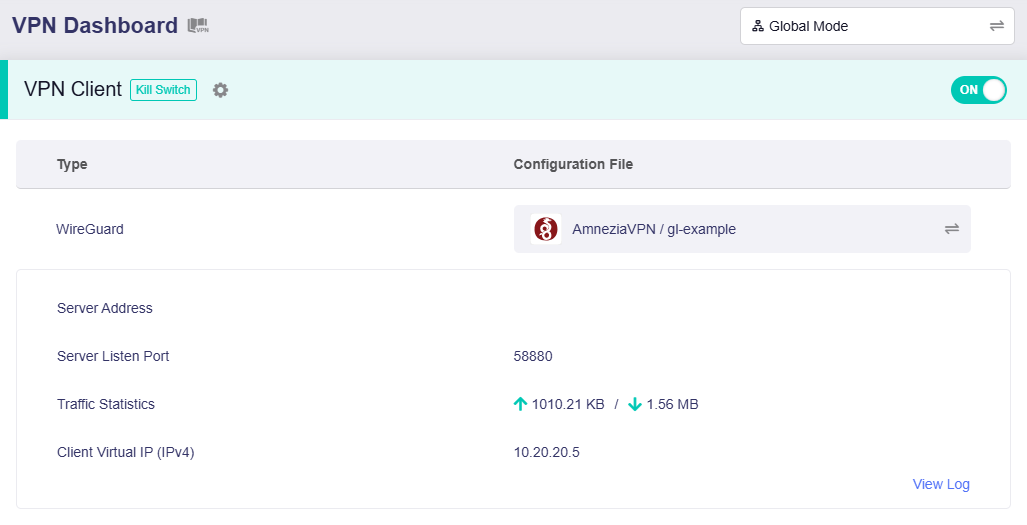
The VPN connection is complete. All devices on the Brume 3 now access the internet via the AmneziaVPN server, enabling a VPN obfuscation connection.
Still have questions? Visit our Community Forum or Contact us.