What should I do if I failed to bind device to the GLKVM app?
The GLKVM app enables remote access to your controlled device from the controller device. Simply install the app on your controller device and bind your GL.iNet KVM device to it, and you can access the controlled device remotely anytime, anywhere.
However, device binding might fail due to various reasons.
Click the error message below for corresponding solutions.
Binding failed, unable to obtain basic KVM device information.
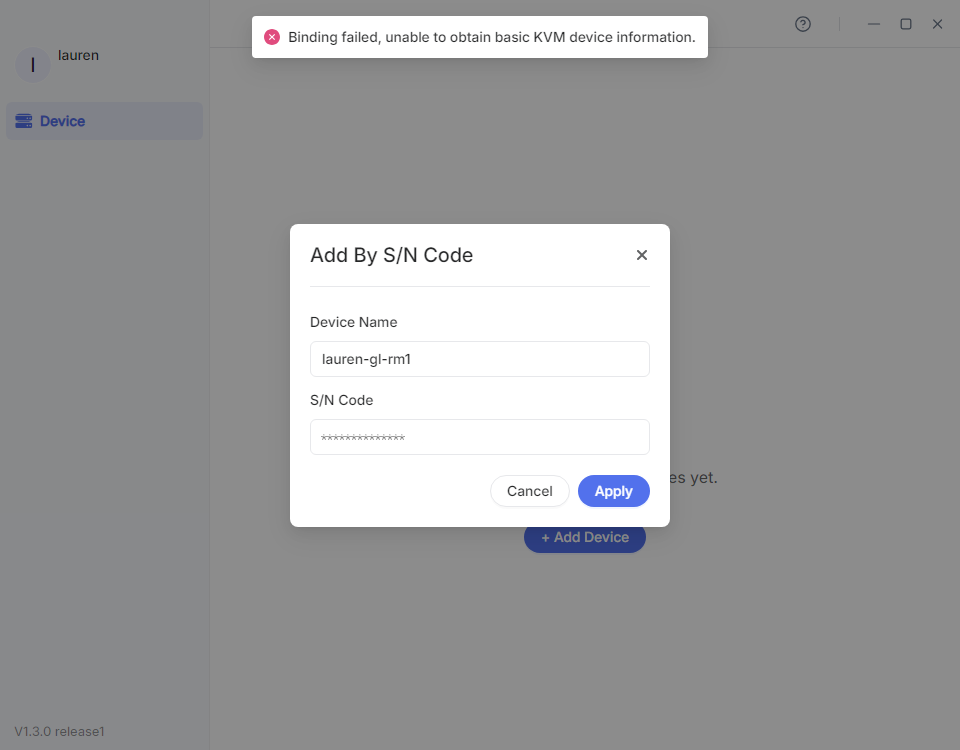
- Check the LED state. Ensure the LED is solid white and your KVM device is connected to Internet.
- Restart your KVM device, wait for 2 minutes and try to bind it again.
- If you add device by S/N code, make sure you enter the correct S/N.
-
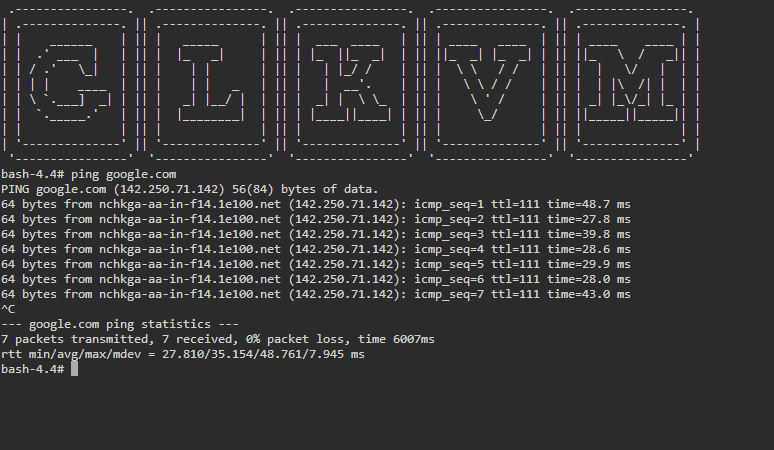
Follow the steps below to check the network by Ping command.
-
Connect your controlling device to the same network as your KVM.
-
Launch a browser (Chrome or Edge is recommended) on the controlling device, and enter
glkvm.localin the address bar. Enter the admin password to log in.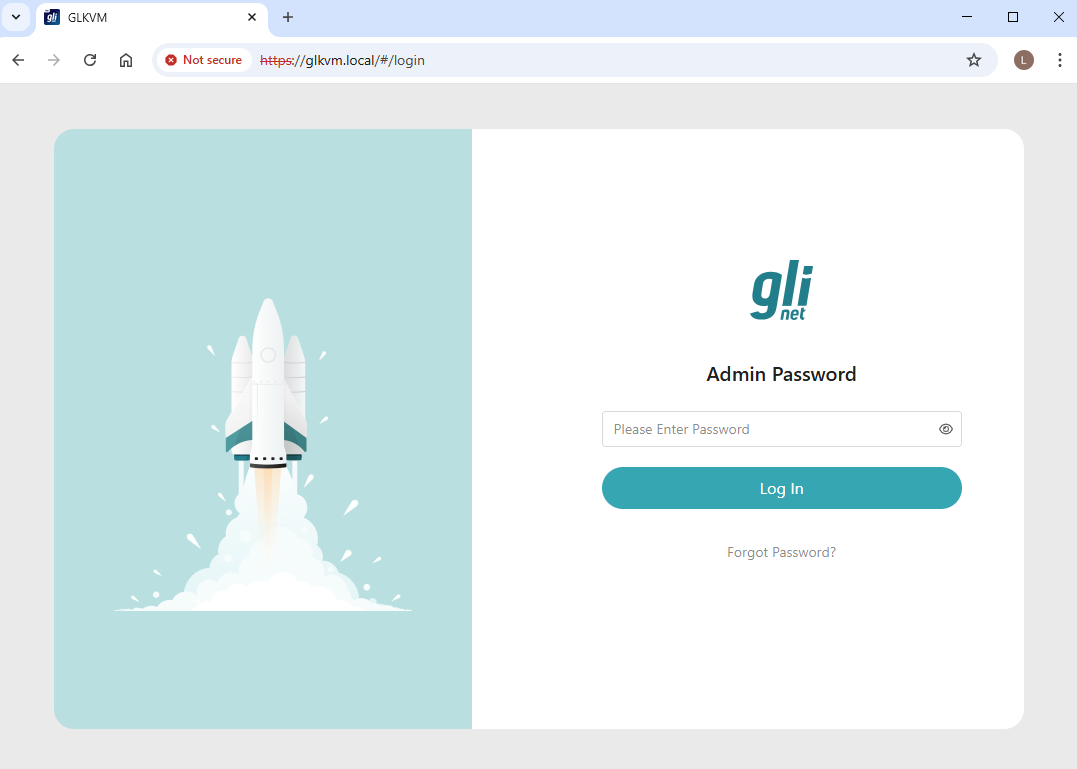
-
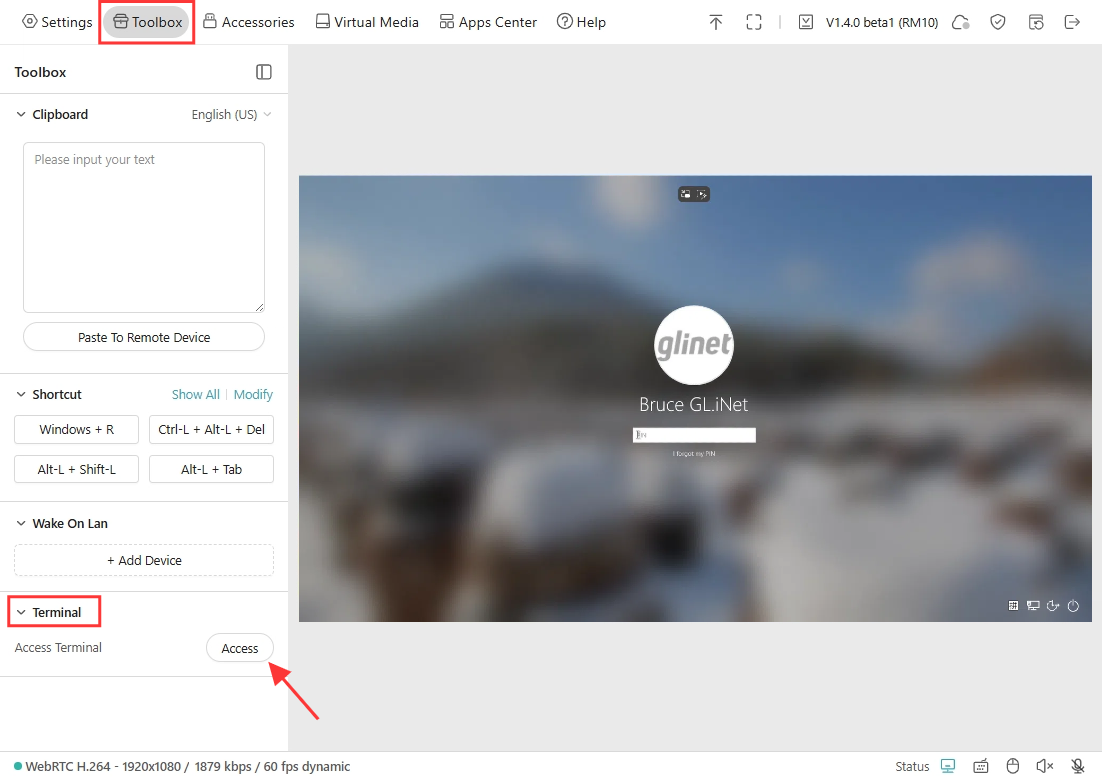
After login, navigate to Toolbox -> Terminal, click on Access to log in to the terminal.
-
Ping
google.comto check the network status.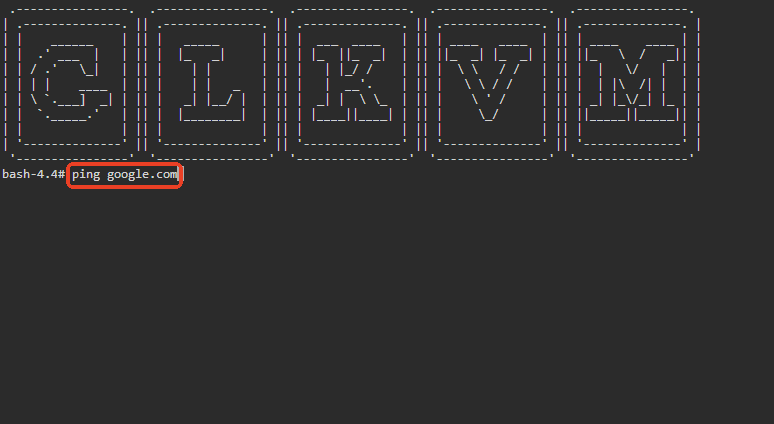
If the network is working fine, you will get the result as shown below.
If the network is unstable or unavailable, please contact your ISP or router support.
-
Device network error, binding failed.
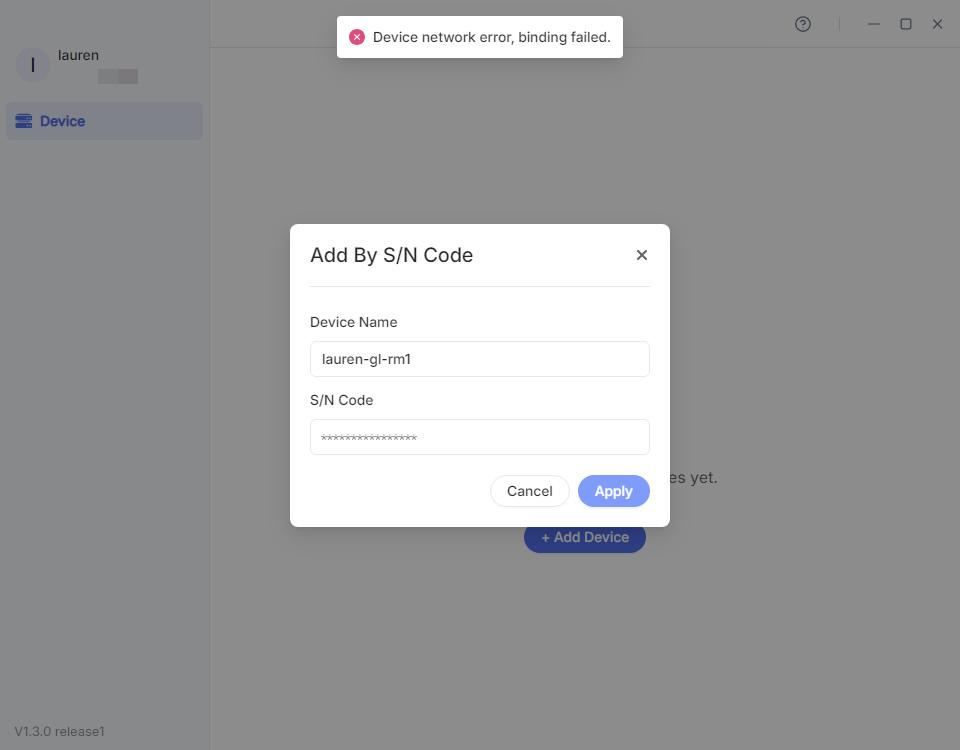
- Check the LED state. Ensure the LED is solid white and your KVM device is connected to Internet.
- Restart your KVM device, wait for 2 minutes and try to bind it again.
-
Ensure the Cloud service is enabled.
The Cloud service is enabled by default, but if you has disabled it manually before, device re-binding to the GLKVM app will fail. Please access your KVM device locally via domain or IP address to re-enable the Cloud service.
-
Follow the steps below to check the network by Ping command.
-
Connect your controlling device to the same network as your KVM.
-
Launch a browser (Chrome or Edge is recommended) on the controlling device, and enter
glkvm.localin the address bar. Enter the admin password to log in. -
After login, navigate to Toolbox -> Terminal, click on Access to log in to the terminal.
-
Ping
google.comto check the network status.If the network is working fine, you will get the result as shown below.
If the network is unstable or unavailable, please contact your ISP or router support.
-
Binding failed, KVM is already bound by others.
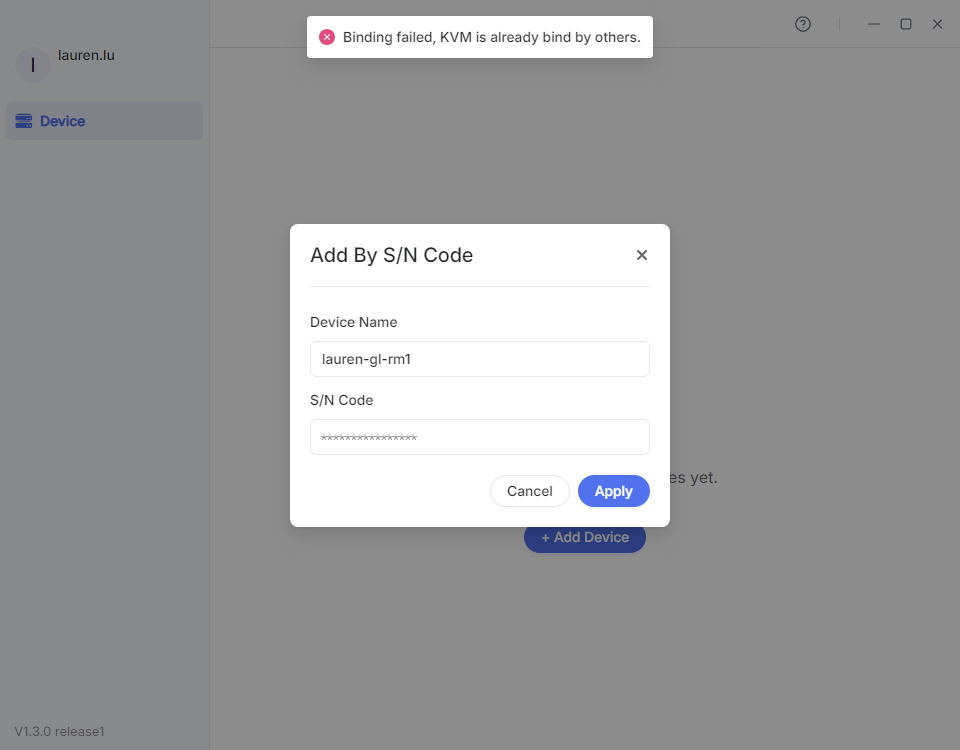
This means the KVM device has been bound to another account.
-
Check if you have bound it to your another email address. Try other accounts if any.
-
If you add device by S/N code, make sure you enter the correct S/N.
Incorrect Dynamic Binding Code. You have 4 attempts remaining.
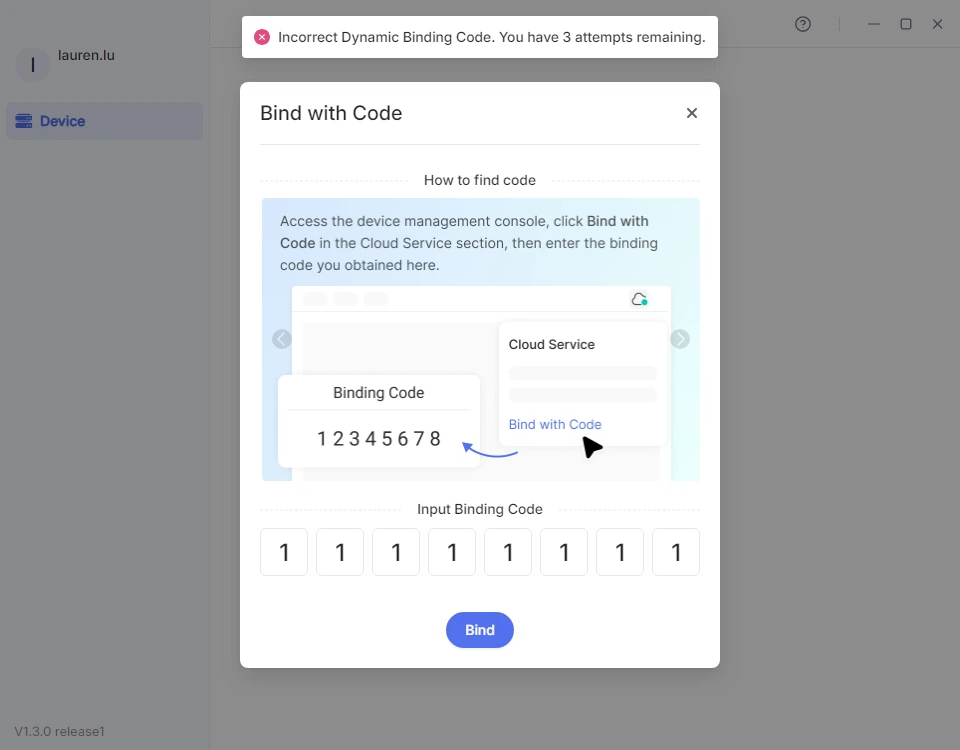
This means you entered an invalid or expired binding code.
-
Log in to your KVM admin console locally, navigate to Cloud Service in the upper right corner and click Bind with Code to get a dynamic binding code.
-
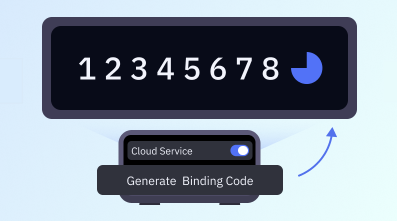
For the GL-RM10 (Comet Pro) model, you can also obtain the code on the touchscreen. Slide to the Cloud Service screen and click Generate Binding Code, then you will see a dynamic binding code on the touchscreen. Enter this binding code in the GLKVM app to complete the binding.
-
If the binding code expires, click Regenerate to get a new one.
Incorrect Device ID. You have 4 attempts remaining.
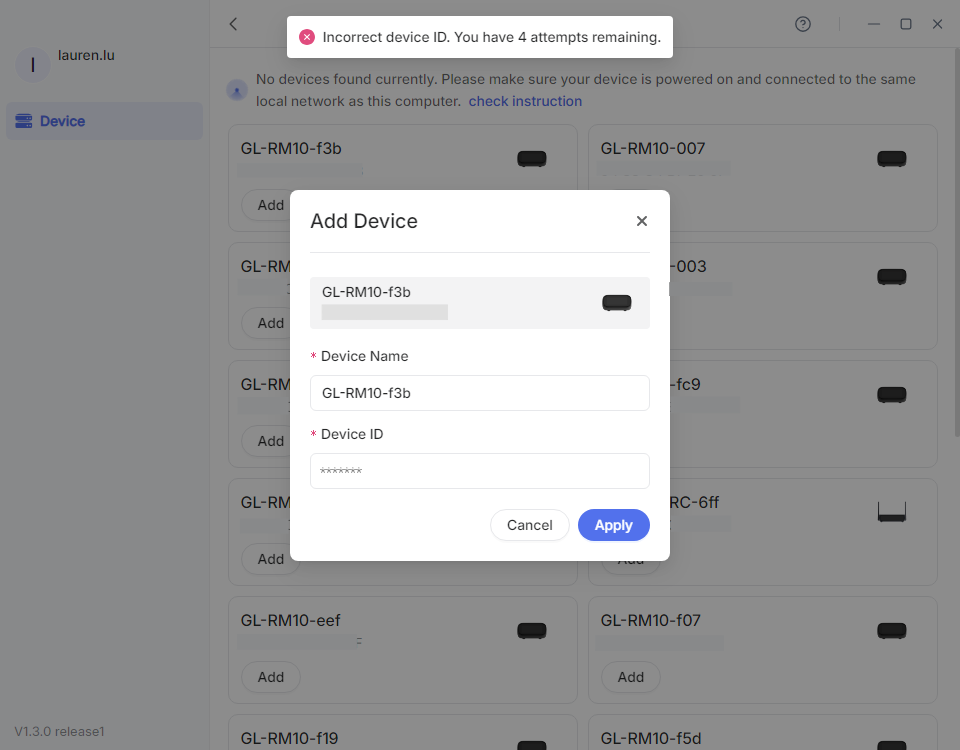
This means you entered the wrong Device ID.
-
Check the bottom label for the correct Device ID.
-
If you cannot check the bottom label, try binding your device via local access.
Log in to your KVM admin console locally, navigate to Cloud Service in the upper right corner and click Bind To KVM Cloud. Then you will be redirected to the binding page with a unique token. Log in with your Cloud account, and confirm the device information to complete the binding.
Other
Check if VPN is enabled on your controlling device, on which the GLKVM app is installed.
Disable any VPN or proxy software, including AstroWarp, Tailscale and ZeroTier, then try to bind your KVM to the GLKVM app again.
If problem persists, please contact us at support@gl-inet.com and provide Device Model, Firmware version and MAC address.