How to remotely access the controlled device via Tailscale?
GL.iNet KVM integrates Tailscale, allowing you to bind it to the Tailscale virtual network for remote access - no need to install GLKVM app. This is particularly useful when your controlling device runs neither Windows nor macOS.
Follow these steps to remotely access your GL.iNet KVM and the controlled device via Tailscale.
1. Enable Tailscale in local access
Before you begin, please connect your KVM and the controlling device to the same network.
Then access your KVM console locally using domain name or IP address. A domain name will be used here for illustration.
Firstly, launch a browser on the controlling device. Chrome or Edge is recommended for better compatibility.
Secondly, enter glkvm.local in the address bar. You will be directed to the GLKVM login page. Enter the admin password.
You will be able to access your KVM console locally.
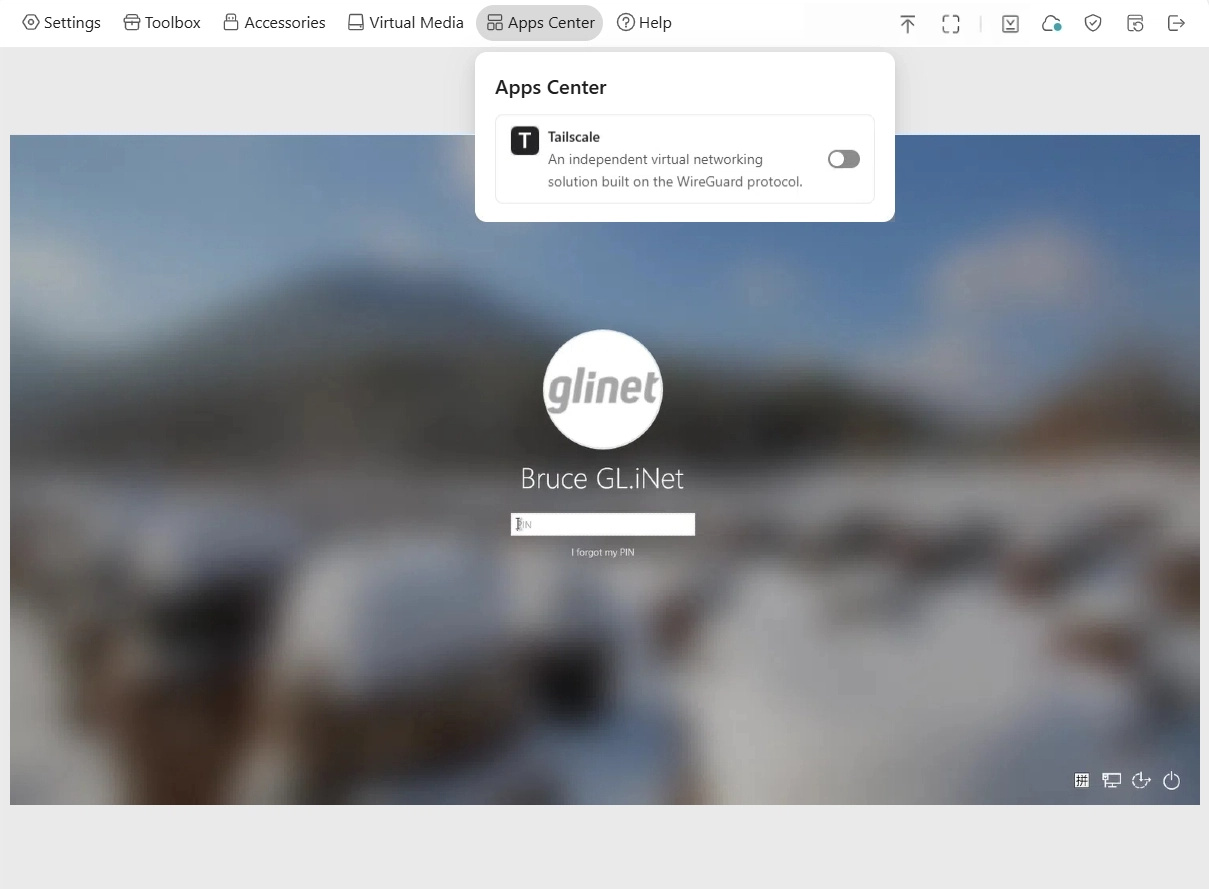
Thirdly, on the console, navigate to Apps Center -> Tailscale, enable Tailscale.
2. Bind KVM to your tailnet
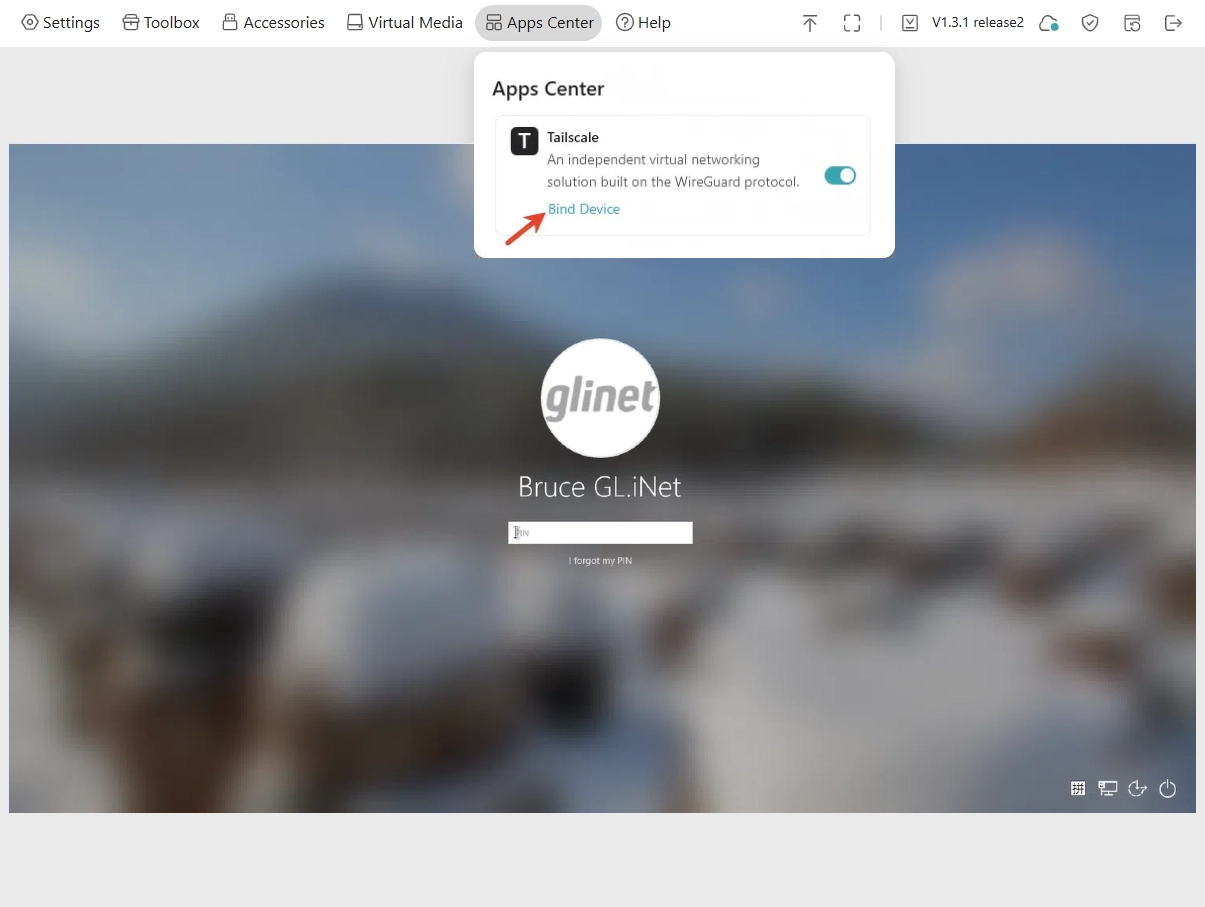
After enabling tailscale, the page will display an option to bind device. Click on Bind Device.
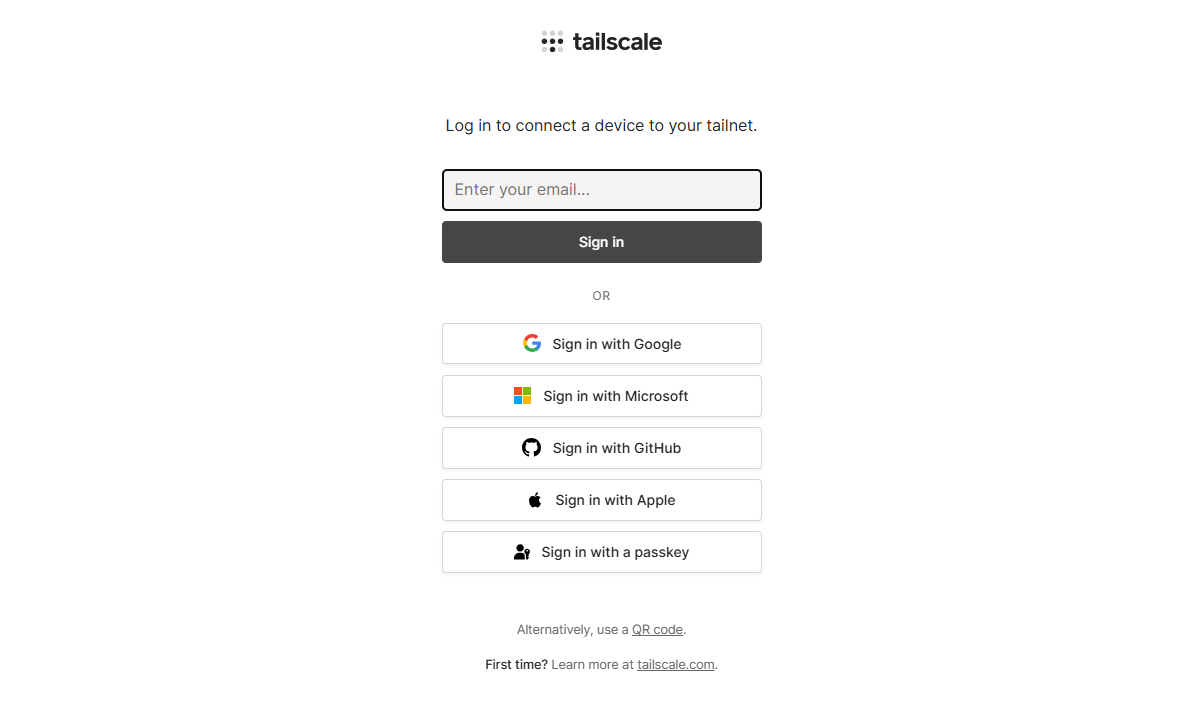
You will be directed to the Tailscale login page. Enter your email to log in.
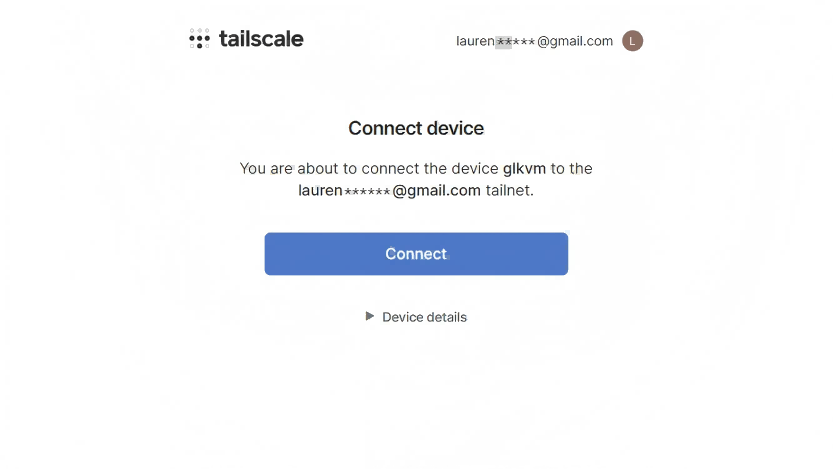
After logging in, the page prompts that you are about to connect the device glkvm to your Tailnet. Click on Connect.
Device binding successful. Your KVM device has been successfully bound to your tailnet.
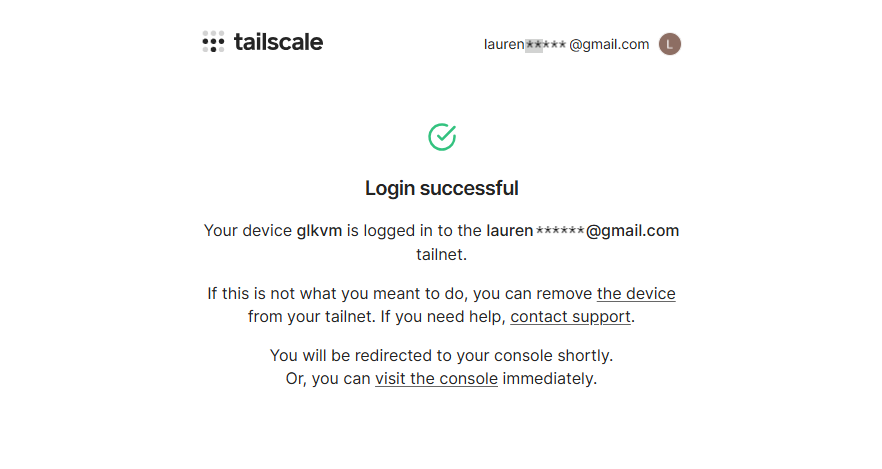
You will be re-directed to your Tailscale console, where a device labeled glkvm is displayed under Machines.
3. Bind controlling device to your tailnet
Install Tailscale on your controlling device from here, and log in with the same Tailscale account. Your controlling device will be bound to your tailnet.
The following is an example of binding a Windows laptop as a controlling device to tailnet.
Run Tailscale on the controlling device. Log in with the same email.
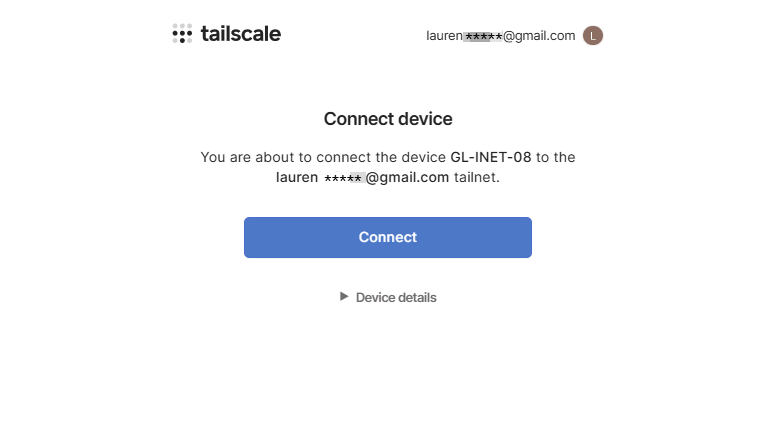
After logging in, the page prompts that you are about to connect the controlling device (e.g. a laptop) to your Tailnet. Click on Connect.
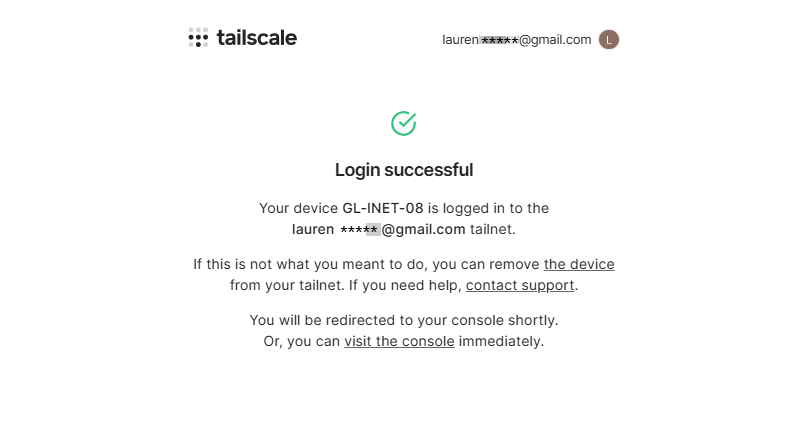
Device binding successful. The controlling device has been successfully bound to your tailnet.
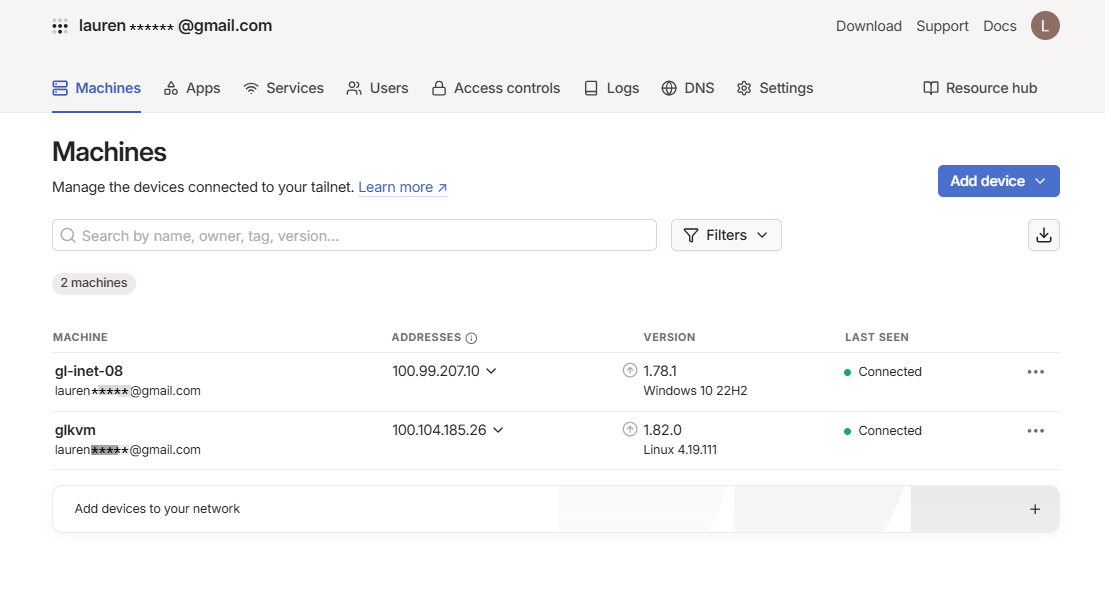
You will be re-directed to your Tailscale console, where the controlling device is also displayed under Machines.
4. Remote access via Tailscale
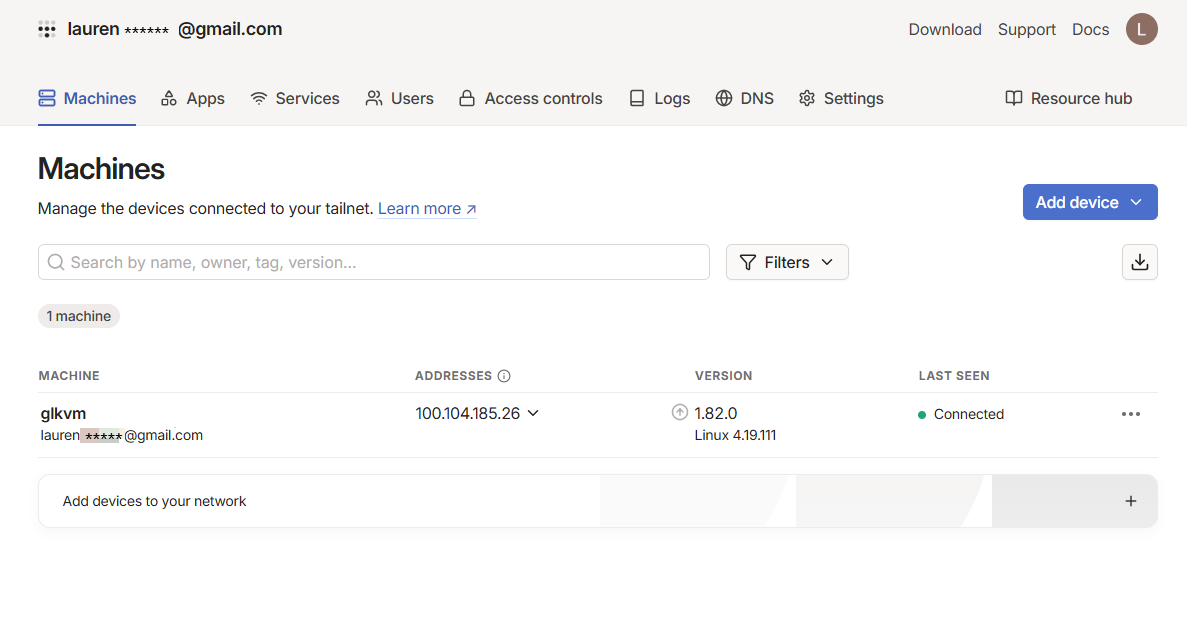
In the Tailscale console, click on the Address of glkvm, which is 100.104.185.26 in the following image.
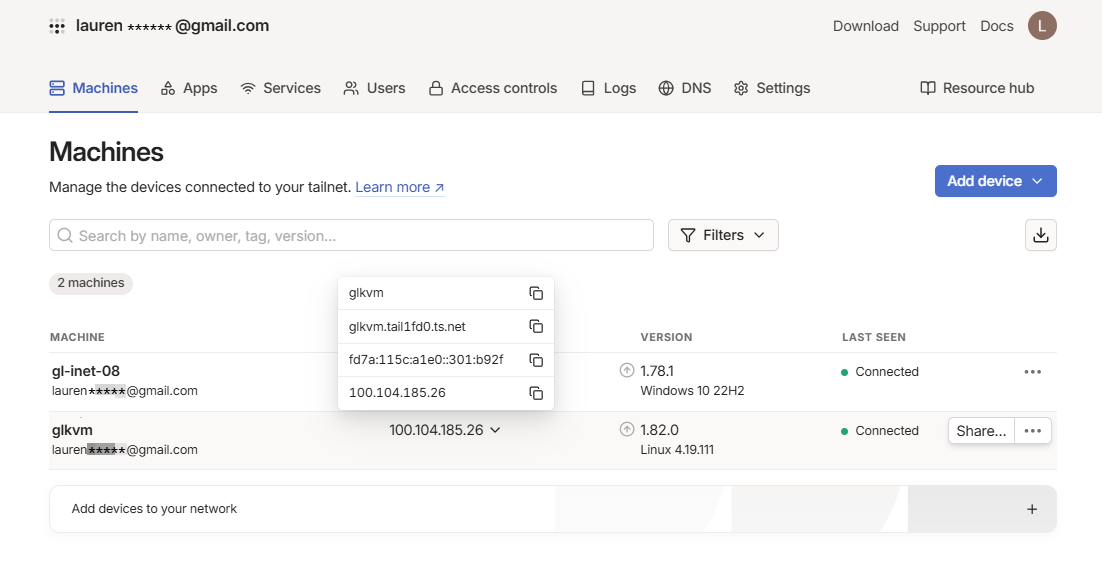
Four values will be displayed above:
- glkvm (device name)
- glkvm.tail1fd0.ts.net (Tailscale-assigned domain)
- fd7a:115c:a1e0:301:b92f” (virtual IPv6)
- 100.104.185.26 (virtual IPv4).
They are allocated by Tailscale for device identification and virtual network communication. You can remotely access your KVM device using the Tailscale-assigned domain, vitual IPv4 and virtual IPv6.
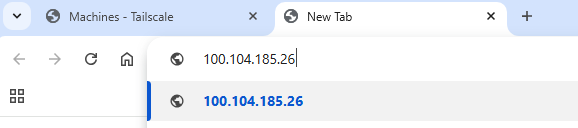
Take the virtual IPv4 as an example.
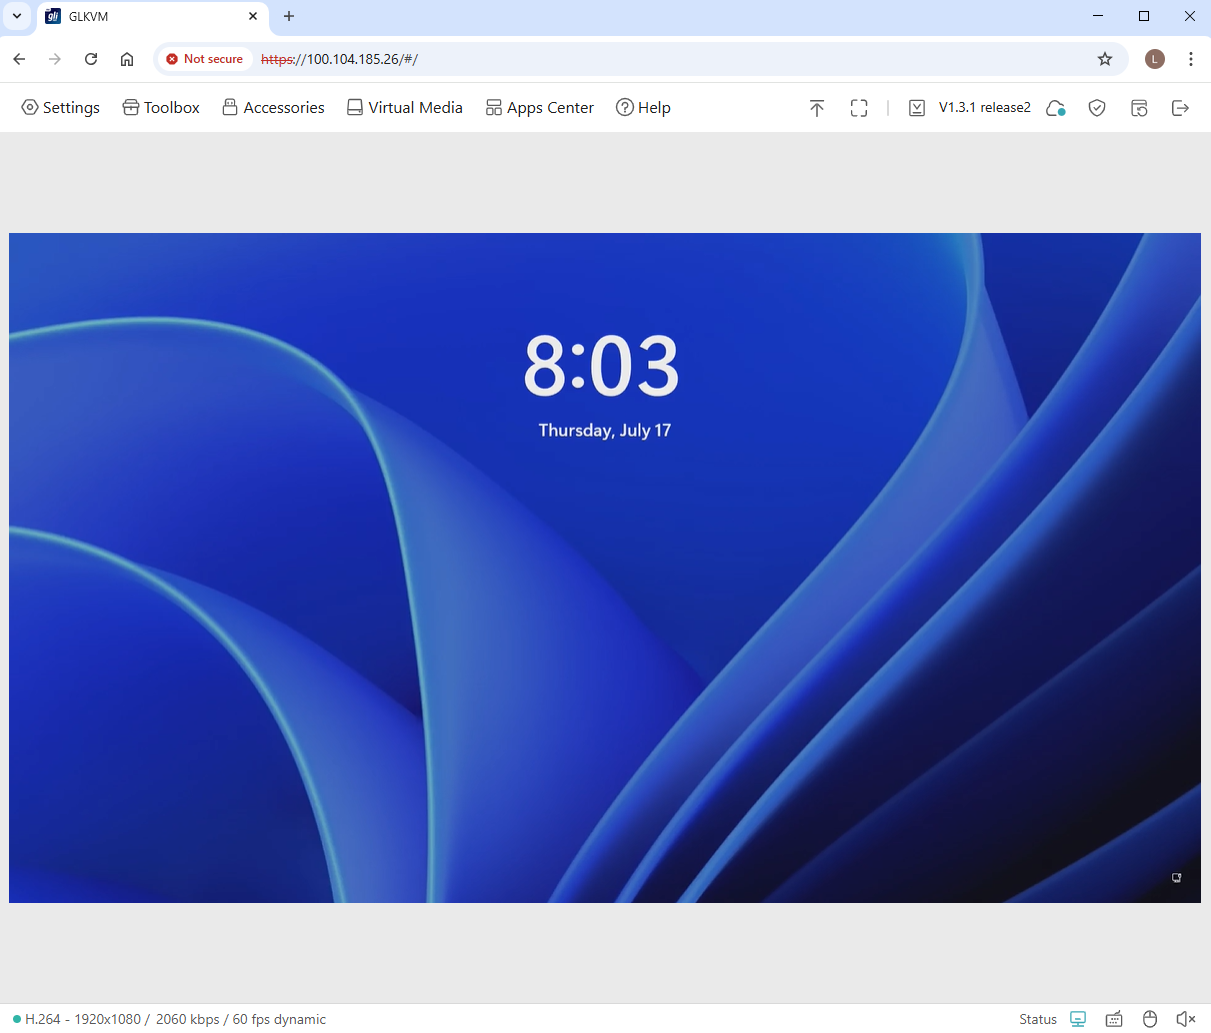
Copy the virtual IPv4 of your KVM device. Open a new tab and enter the copied IP address.
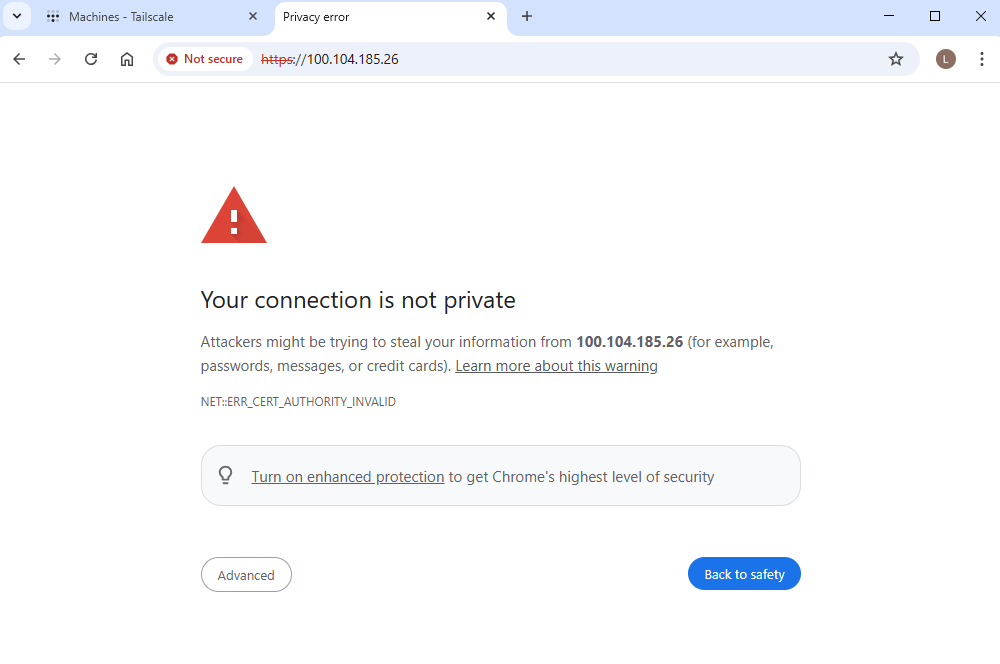
It may prompt a privacy error. Why do I get this privacy error?
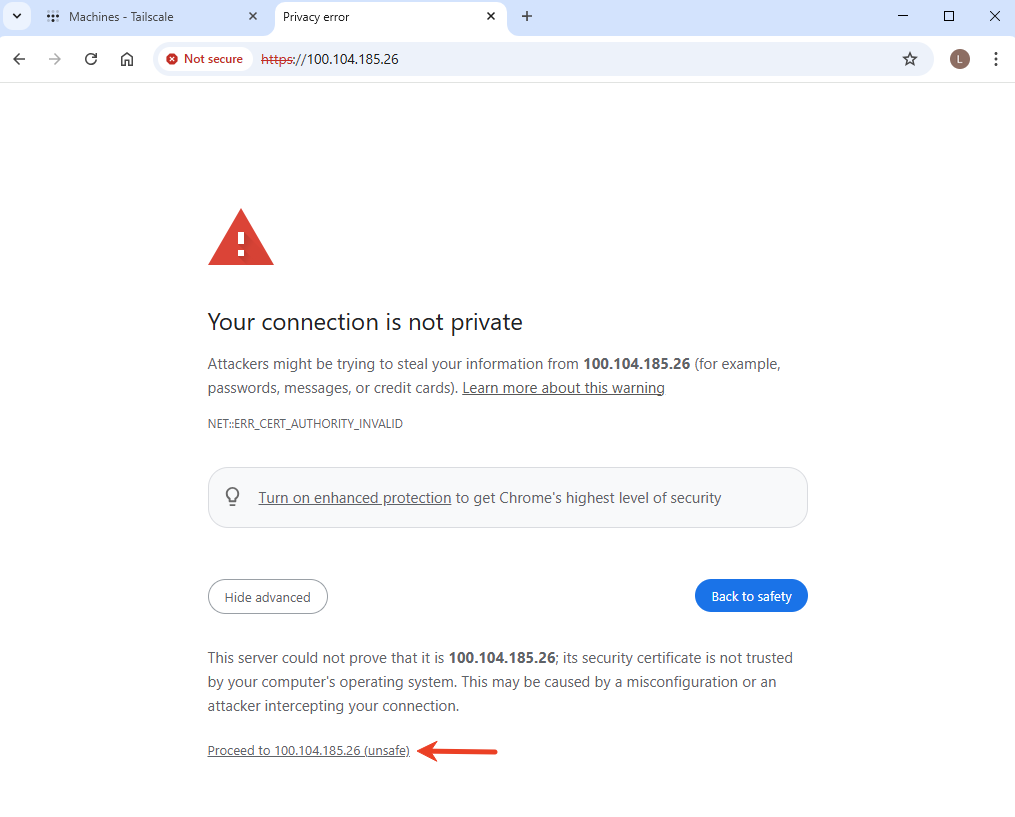
Click on Advanced, and Proceed to 100.104.185.26.
You will be directed to the GLKVM login page. Enter the admin password to log in.
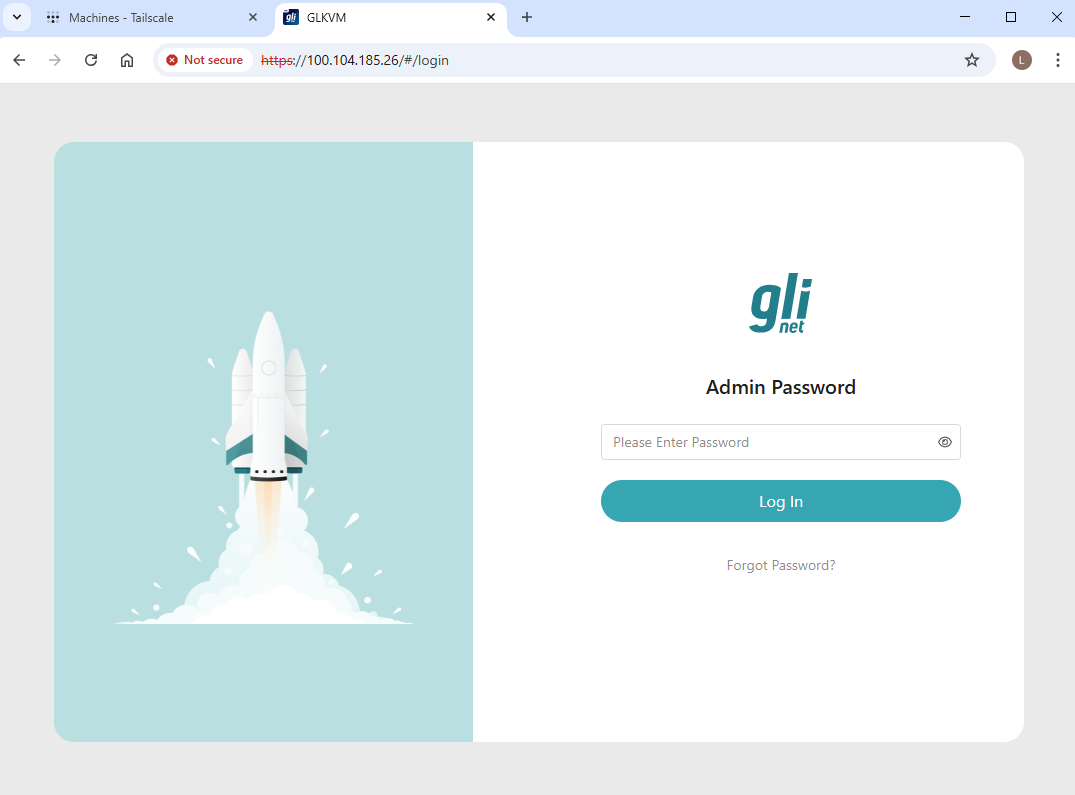
You will be able to access your GL.iNet KVM and the controlled device via Tailscale virtual IP.
Still have questions? Visit our Community Forum or Contact us.