File Sharing on GL.iNet Routers
You can use GL.iNet routers with external storage device such as USB stick, MicroSD card, etc, and some models have big internal storage, thus the contents can be shared among all your connected clients. You can easily read or modify its contents.
Supported models
Usually models with USB ports or TF slots or have big internal storage are supported for file sharing.
Note: The power consumption of USB hard drive is quite high. You should use it with an external power supply. Otherwise, it may cause malfunction.
Supported external storage models
| Router Model | USB Stick | USB Hard Drive | MicroSD Card | Internal Storage |
|---|---|---|---|---|
| GL-MT300N-V2 (Mango) | √ | √ | - | - |
| GL-AR150 Series | √ | √ | - | - |
| GL-AR300M Series | √ | √ | - | - |
| GL-USB150 | - | - | - | - |
| GL-MiFi | √ | √ | √ | - |
| GL-AR750 (Creta) | √ | √ | √ | - |
| GL-AR750S-EXT (Slate) | √ | √ | √ | - |
| GL-B1300 (Convexa-B) | √ | √ | - | - |
| GL-S1300 (Convexa-S) | √ | √ | - | - |
| GL-X750 (Spitz) | √ | √ | √ | - |
| GL-X1200 (Amarok) | √ | √ | √ | - |
| GL-E750 (Mudi) | √ | √ | √ | - |
| GL-MV1000 (Brume) | √ | √ | √ | - |
| GL-MV1000W (Brume-W) | √ | √ | √ | - |
| GL-MT1300 (Beryl) | √ | √ | √ | - |
| GL-XE300 (Puli) | √ | √ | √ | - |
| GL-AX1800 (Flint) | √ | √ | - | - |
| GL-AP1300 (Cirrus) | - | - | - | - |
| GL-B2200 (Velica) | - | - | - | √ |
| GL-X300B (Collie) | - | - | - | - |
| GL-SF1200 | - | - | - | - |
| microuter-N300 | - | - | - | - |
| VIXMINI | - | - | - | - |
Router settings
On the left side of web Admin Panel -> APPLICATIONS -> File Sharing -> File Sharing
The file sharing packages may not installed. Click Install to continue.

After installed, it will share via LAN by default.
Share via LAN: Share the contents of the external storage device with all connected clients.
Share via WAN: The contents of the external storage device can be accessed from the WAN.
Writable: The contents of the external storage device can be edited. For writable, it recommend using NTFS or EXT4 file systems.

Access the storage device
You can access the contents of the external storage device from your computer or smart phone. Please check the following guidance for the using of file sharing among different operating systems.
General Notes
You may be able to access the share via \\192.168.8.1\ or smb://192.168.8.1/ or with GL-modelXXX instead of 192.168.8.1 (eg \\GL-AR750S\) in your system's file explorer. Since sharing is enabled to the LAN by default (this includes both wired AND wireless clients) and maps a "bad user" to Guest, then even if they don't supply a username and password or an invalid one, ANYONE connected to your router can access the files in the share in Read-Only mode. If you enable Writable mode this applies to both Guests AND the default root user. If you enable write access, anybody can create or delete files and folders, if you disable write access, not even the root user can delete them via SMB (they can through the CLI though). We can hope that in a future revision there is a simple user management and that a named user (or root) can read and/or write while Guests are limited by the Writable or a Public Write flag on a share (and having multiple shares would be great as well).
Windows
Method 1: Samba 2.0 (SMB2.0) Support:
We suggest Samba 2.0 support for Windows 10 users.
Due to the security vulunerabilitiy of the Samba1.0 protocol, Samba1.0 is not enabled by default in Window 10. You may modify the router Samba configuration.

1). SSH into your router, you can gain control of both the router and the network that the rotuer is controlling. You can refer to the following link: https://docs.gl-inet.com/en/3/app/ssh/
2). Modify the Samba configuration file, type the following command:
sed -i 's/security = share/security = user/' /etc/samba/smb.conf.template
3). Restart the Samba service, type the following command:
/etc/init.d/samba restart

4). Open 'This PC' and type \\your router IP Address, such as \\192.168.8.1.

5). You can view files in your USB flash drive through GL.iNet router now.
Method 2: Samba 1.0 (SMB1.0) Support:
1) Your network must be Home/Private. Otherwise you may not be able to see your router in Network.
3.0 firmware supports SMB2, and if you need SMB3, use WinSCP to router, edit /etc/samba/smb.conf.template.
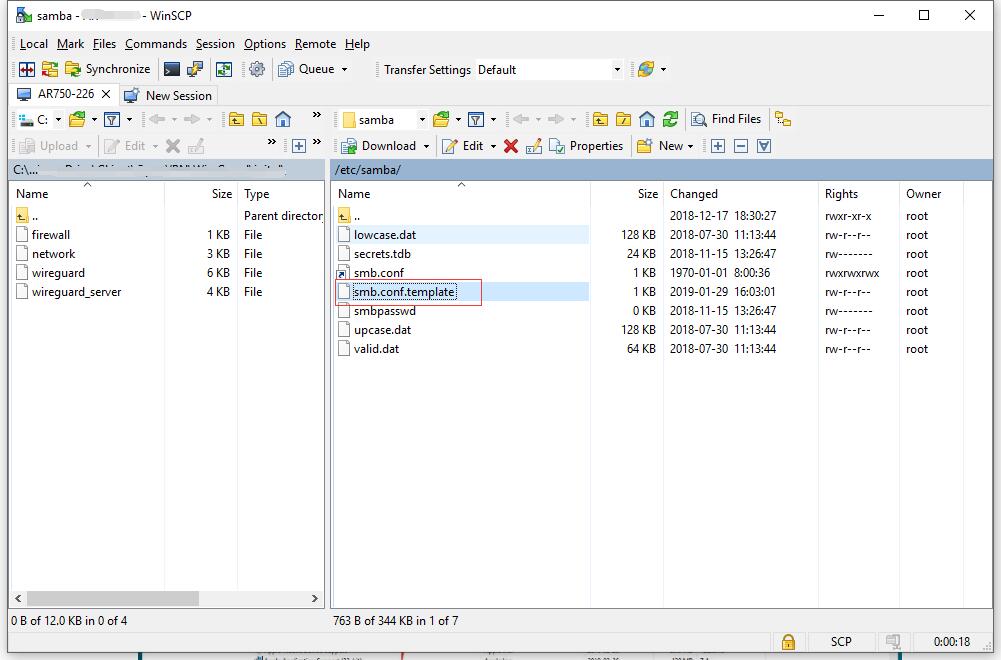
Change the "max protocol = SMB2" to
"min protocol = SMB1"
"max protocol = SMB3", then save and exit WinSCP.

If you are using Windows 10, you also need to enable SMB 1.0.
- Windows 7
Go to Control panel -> Network and Internet -> Network and Sharing Center. Find if your active network is Home network. If not, click it and change it to Home network.
- Windows 10
Change your network to private by this tutorial.
Go to Control Panel -> Programs and Features -> Turn Windows features on or off -> Find SMB 1.0/CIFS file sharing support, check all SMB1 related items, click apply and restart your computer.

2) Open a Windows explorer, you can find Network in the folder directory. Double click your router to access its contents.

Mac OS
Method 1
1) Open Finder, Menu -> Go -> Connect to Server...

2) Input smb://192.168.8.1, you need to change this if your router IP address is not 192.168.8.1

3) Click Connect.

4) Input username and password, they are the same when you login web Admin Panel.

5) Then Finder will display files of USB disk.

Method 2
1) Go to System Preferences -> Sharing -> File sharing. Click Options and then enable SMB.
2) Open Finder. You should be able to find your router under Shared.
iOS
You have to use file manage app to access the contents of your external storage device.
You may use FE File Explorer:
1) Click + to create a Windows connection.


2) Enter the IP address of your router (192.168.8.1). The User Name is root and the Password is the one that you use to login the web Admin Panel. Finally, click Save.

3) Click your newly created connection to access the contents.

Linux
If you are using Linux you are probably comfortable with connecting to servers, and how to do this can vary greatly from distribution to distribution and largely depends on your window manager/display environment. Most systems come with Gnome and it is the default on the very popular Ubuntu distribution, so we'll give an example using the Files tool (also called Nautilus). If you open the app you should have a "Connect to server" option, there you can enter either the \\servername\share or smb://servername/share format.
ChromeOS or ChromiumOS (Neverware CloudReady and others)
There is a built in Samba/SMB client in the Files app, and they have deprecated the previous separate plugin/service that was a GoogleLabs experiment.
In the Files app if you go to the 3 dot menu at the top right and "Add new service" you then select "SMB File Share" from the list and it will give you the dialog to fill out with the server name and some other details, but only the server name/IP and share name are required (unless you modify the smb.conf on your router to better control access to certain paths, you can use SSH or Luci + webmin to manage this).
The default share name appears to be GL-Samba so a connection string might be \\192.168.8.1\GL-Samba if your USB or microSD is properly recognized.
If you are having trouble getting connected or don't know the share name you can check with smbclient which you can install in the Terminal app, which is the interface for Crostini (aka Linux apps in most of the Settings menus).
sudo apt update && sudo apt install smbclient
# Answer 'y' to the prompt and hit Enter
smbclient -N -L 192.168.8.1
Android
Most Android devices have file manager tool which maybe can be used to access the files on Network Devices using SMB. Or you can search file explorer app which support SMB on Google Play.
Here I'm going to use Solid Explorer File Manager as an example:
1) Open the app.

2) Click the Plus sign button on the right bottom of page, then choose New cloud connection.

3) Choose LAN / SMB.

4) Choose the Server, the IP address of your device.

5) Choose Guest.

6) Choose Yes.

7) Choose SMB 1.
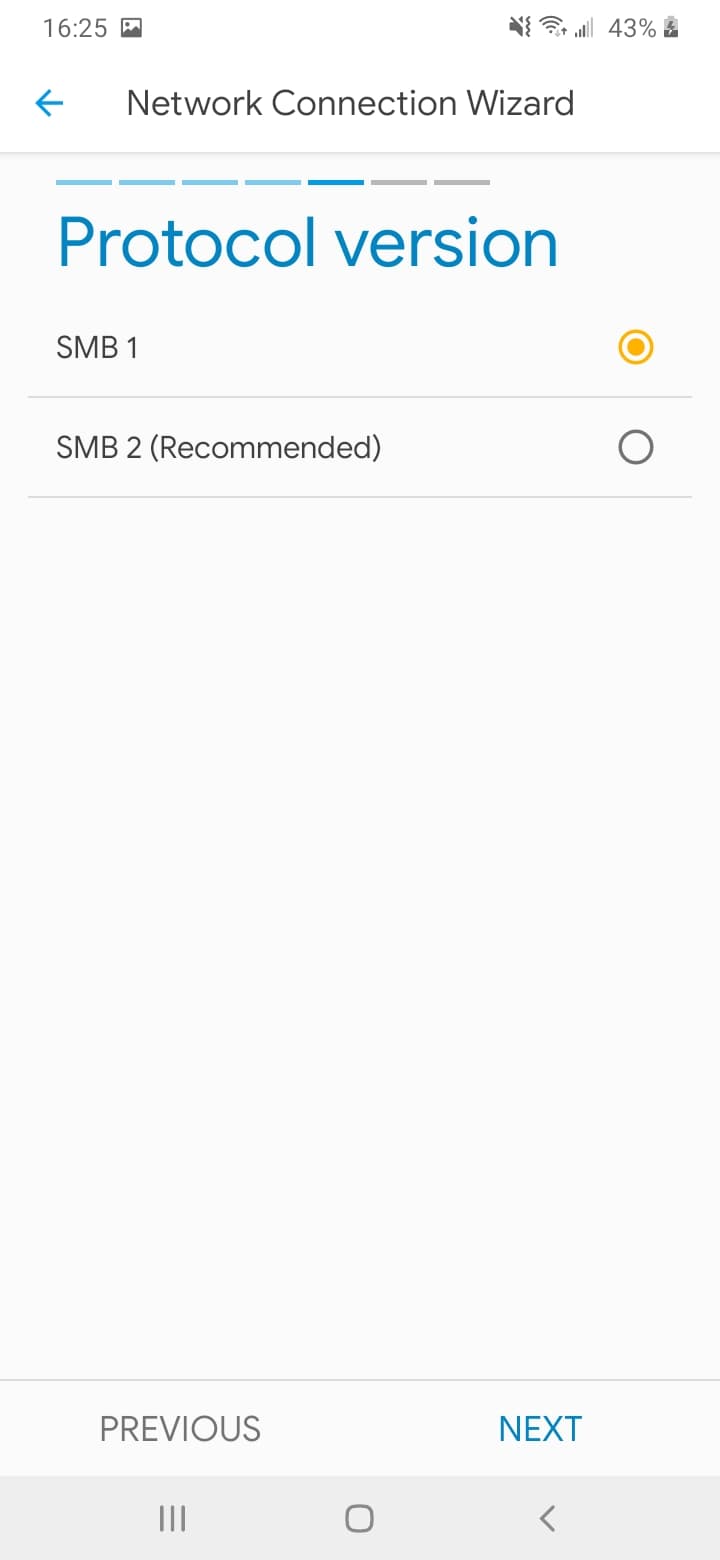
8) Click NEXT.
