Set Up OpenVPN Server on GL.iNet Routers
OpenVPN is an open‑source VPN protocol that uses virtual private network techniques to establish secure site‑to‑site or point‑to‑point connections.
To set up OpenVPN server on a GL.iNet router, watch this video or refer to the steps below.
Make sure you have a public IP address
Please click here to check if your Internet Service Provider assigns you a public IP address.
If not, your router cannot be set as an OpenVPN Server.
Alternative methods:
- If you have a primary router, log in to it and check if it gets a public IP from your ISP.
- Ask your ISP for a public IP address. This may incur an extra fee.
- If the above two methods don't work (e.g., if your network is behind CGNAT), you may try our SD-WAN solution AstroWarp.
Confirm if Port Forwarding is required
Network Topology
GL.iNet is the primary router
- If GL.iNet router is the primary router in your network, no port forwarding is required. Please move to the next step.
GL.iNet is the sub-router
-
If a primary router is already in use and the GL.iNet router is configured as a secondary router, you will need to configure port forwarding on the primary router.
-
If a primary router is already in use and the GL.iNet router is several levels below the primary router, configure port forwarding on each intermediate level.
Set up OpenVPN Server
Log in to the web Admin Panel, and navigate to VPN -> OpenVPN Server.
-
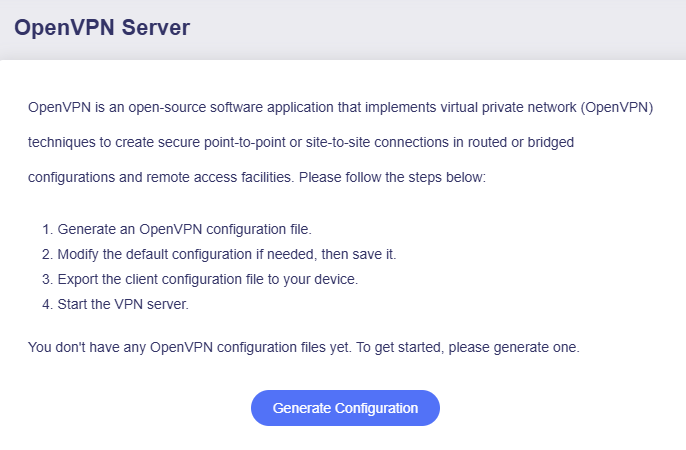
Click Generate Configuration (for vpn server initial setup only).
-
Apply the configuration.
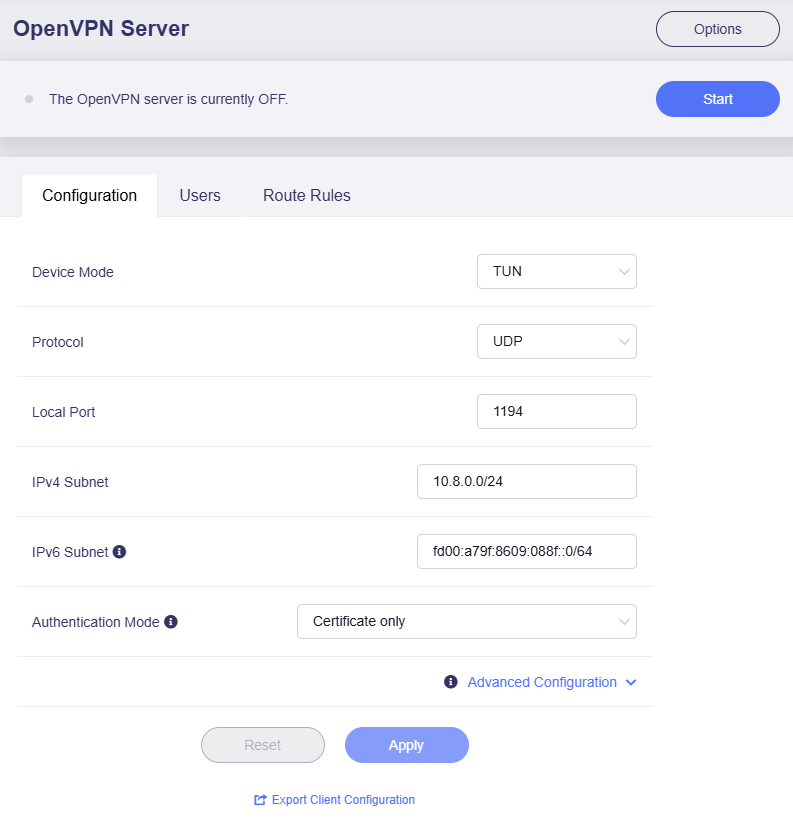
The default configuration works for most cases.
If you do not need to modify the configuration, click Export Client Configuration at the bottom and turn to step 3.
If you have modified the configuration, click Apply before exporting client configuration.
-
Device Mode: TAP-S2S or Tun. Click here to check the differences.
-
Protocol: UDP or TCP. Click here to check the differences.
-
Authentication Mode: This determines the authentication method used when the client connects to the server. There are three options.
-
Certificate Only: If selected, the router will automatically generate a server and client certificate keys and embed them in the client configuration file. When you upload the configuration to the client, no additional credentials are required.
-
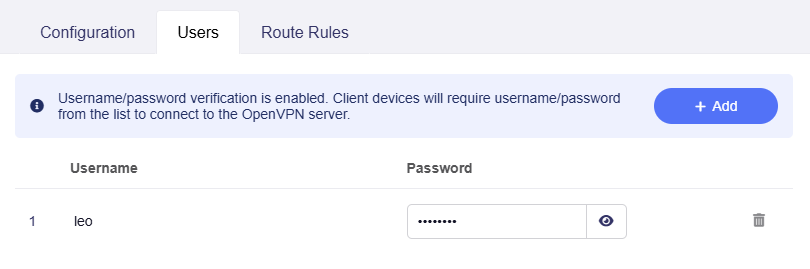
Username/Password Only: If selected, the router will generate client configuration without certificate keys. You must first add a username and password in the Users tab before exporting the client configuration. When uploading the configuration to the client, you need to enter these credentials for authentication.
-
Username/Password and Certificate: If selected, you must first add a username and password in the Users tab before exporting the client configuration; second, the router will automatically generate server and client certificate keys and embed them in the configuration file. When uploading the configuration to the client, the certificate-key will be verified first, followed by username/password authentication for two-factor security.
Here is an example of creating a user.
-
-
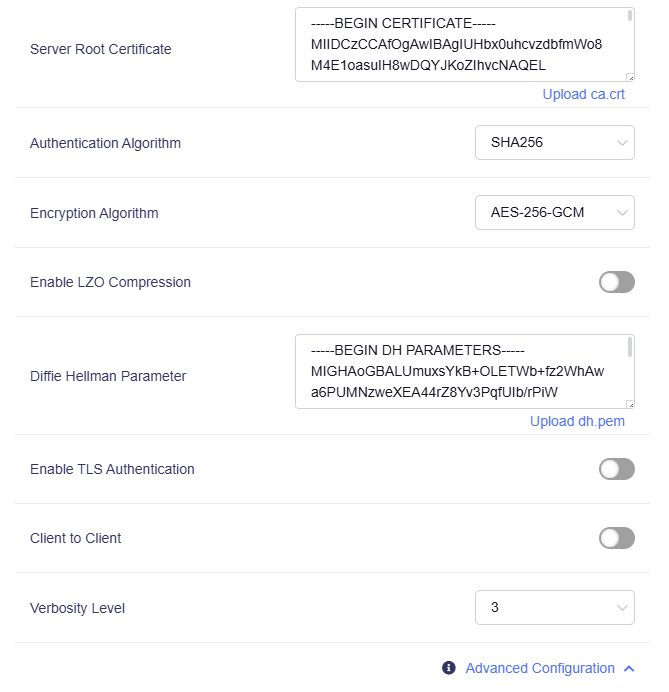
Advanced Configuration: You can modify more server settings if needed.
-
-
Export Client Configuration.
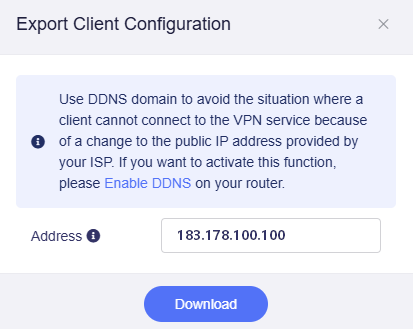
Click Export Client Configuration at the bottom of the Configuration tab (or apply the modified configuration), then a window will pop up as below.
-
If your network's public IP changes frequently, you can enable DDNS to use DDNS domain as the server address.
-
Since firmware v4.8, you can specify the server address from among the public IP, DDNS domain, and current WAN IP. Once changed, the server address in the configuration file will be updated simultaneously.
Then click Download to export the configuration.
-
-
Start OpenVPN server.
Click the Start button in the upper right corner on OpenVPN Server page to start the server. Then go to VPN Dashboard page to check its status and other settings.

Check if OpenVPN Server is working properly
Verify Server status
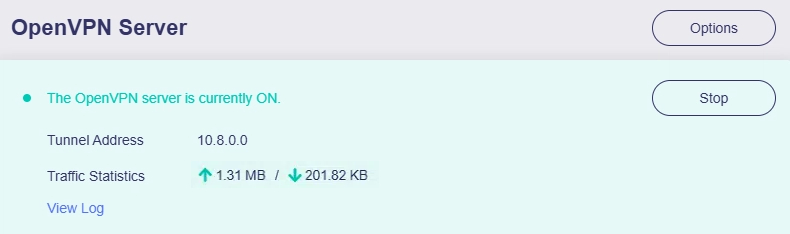
Since firmware v4.8, you can check the server connection status on the OpenVPN Server page.
If it shows upload/download traffic statistics, it means the OpenVPN server is running.
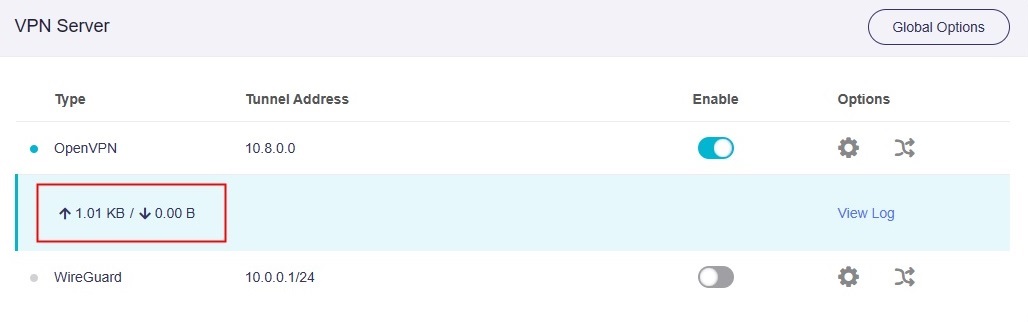
For firmware v4.7 and earlier, please check the server connection status on the VPN Dashboard page.
Verify Client's IP
Verify a successful connection to the server: Import the previously exported OpenVPN configuration to a device on a different network (not the same local network as the server). Then open a web browser, search for your IP address and location. If they match the VPN server's IP (instead of your Internet service provider's IP) and location, the VPN connection is successful.
The simplest method is to use a smartphone with the official OpenVPN App installed. First, disable the smartphone's Wi-Fi and connect exclusively to the internet via cellular data (4G/5G). Then open the OpenVPN app, import the configuration file, and initiate the connection. Check if the smartphone can access the internet and if its IP address matches the OpenVPN Server's IP.
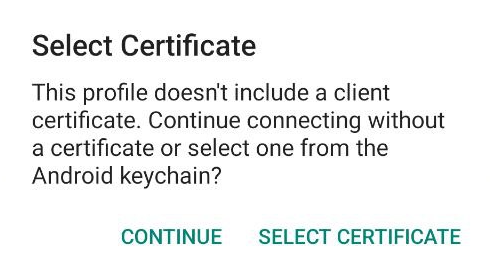
When importing the configuration file into the OpenVPN app, a reminder may appear as shown below. Click CONTINUE to proceed, as the certificate is already embedded in the configuration file.
If the connection fails, there are several common reasons:
- The Internet Service Provider doesn't assign you a public IP address. Please check here.
- You may need to set up port forwarding. Please check here.
- The port used for the OpenVPN Server is blocked by your Internet Service Provider. Change to another port, or contact the Internet Service Provider for further assistance.
- Some countries/regions may block the VPN connection.
Server Options
Server Options include some advanced settings on the server side, such as remote access server's LAN, IP Masquerading, etc. Configure these settings according to your needs.
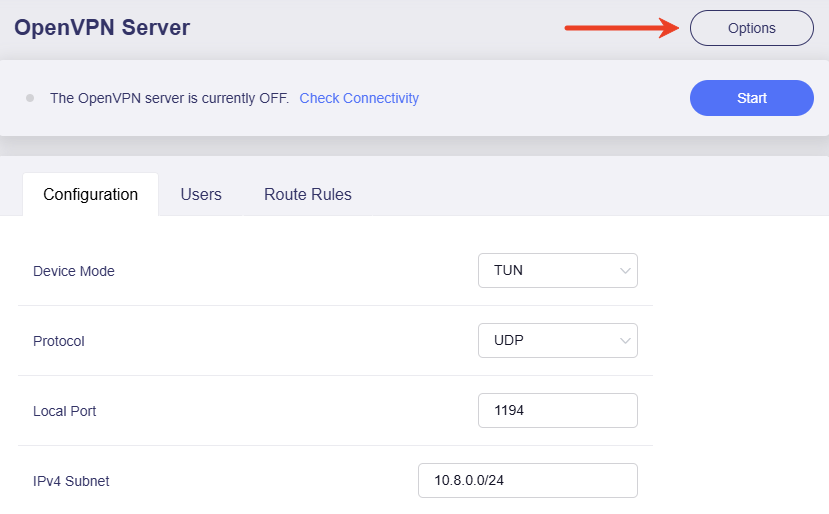
For firmware v4.8 and higher, go to OpenVPN Server and click Options in the upper-right corner.
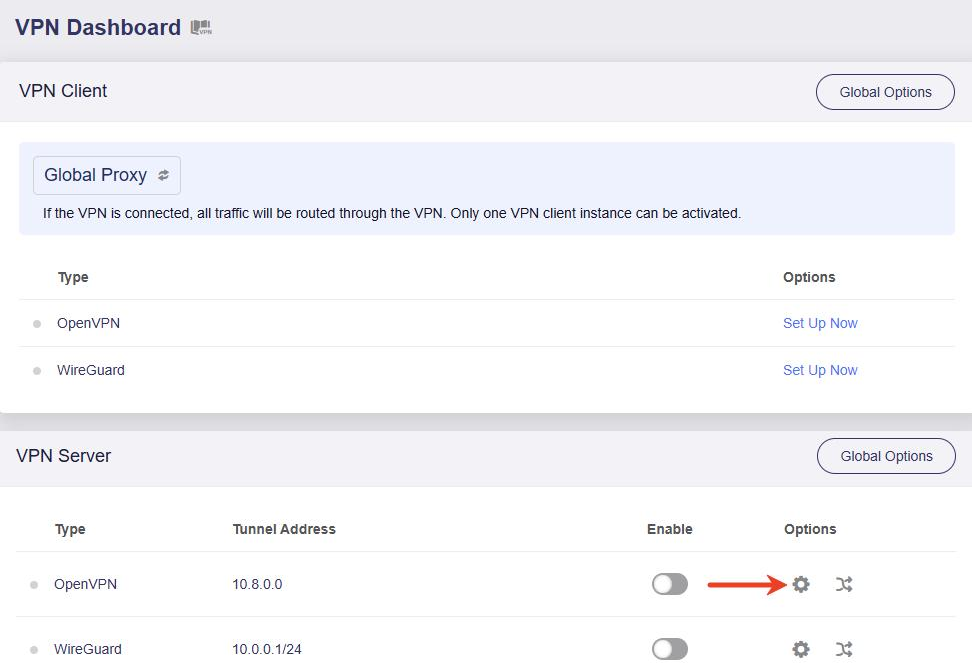
For firmware v4.7 and earlier, go to VPN Dashboard -> VPN Server and click the gear icon to access the OpenVPN Options.
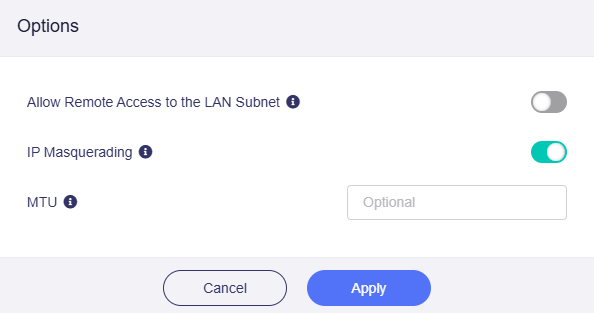
In the pop-up window, you will see the following features.
-
Allow Remote Access to the LAN Subnet: If enabled, resources inside the server's LAN subnet can be accessed through the VPN tunnel.
-
IP Masquerading: If enabled, the source IP addresses of LAN clients will be rewritten to the router's VPN tunnel IP. Disable this only for Site-to-Site setups where the remote peer knows your LAN subnets.
-
MTU: Short for Maximum Transmission Unit. The MTU value you set for the tunnel will override the MTU settings in the configuration file.
Client to Client
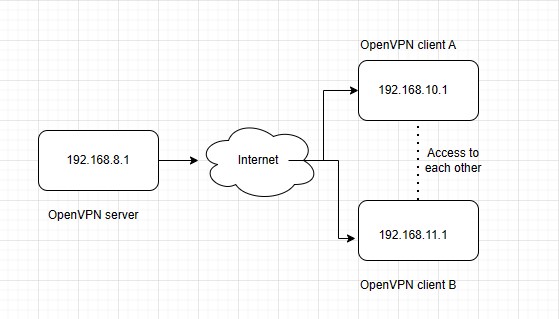
Client‑to‑Client is a server‑side VPN feature. Once enabled, connected VPN clients can communicate with one another using their respective VPN tunnel IP addresses.
The network topology is as follows.
Follow the steps below to enable Client to Client on your OpenVPN server if needed.
-
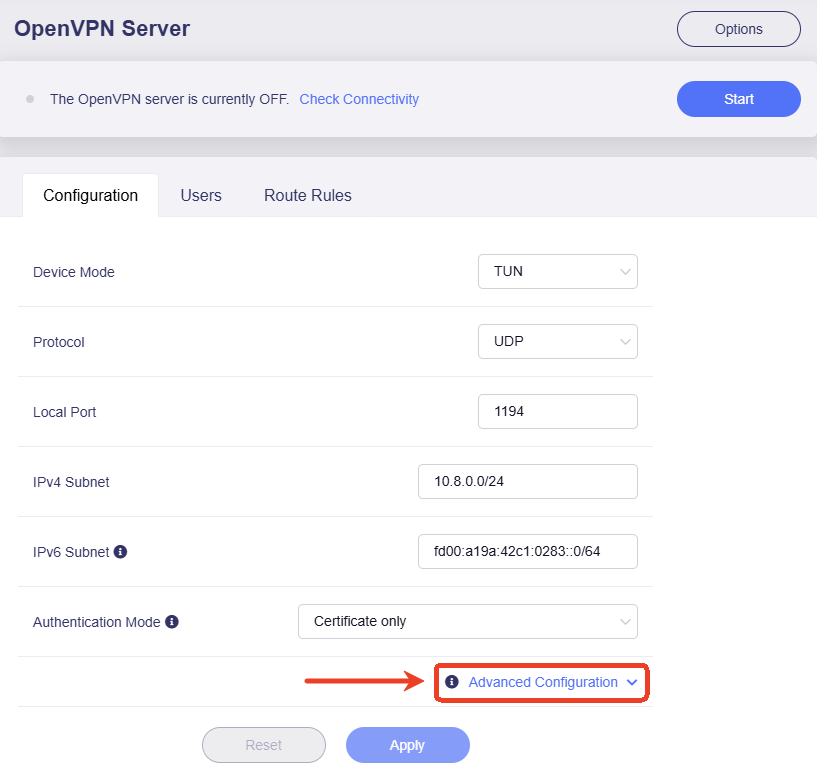
On the OpenVPN Server page, click Advanced Configuration in the bottom-right.
-
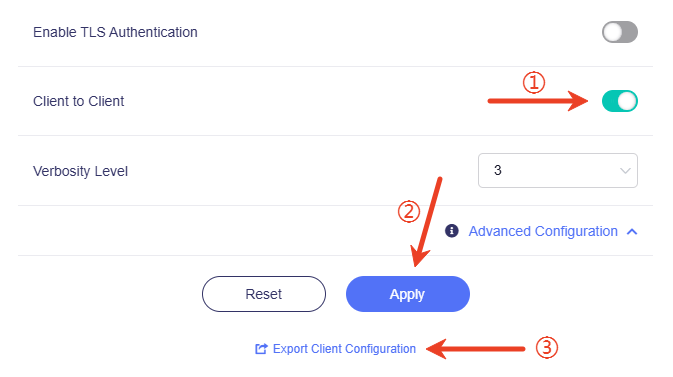
Enable Client to Client and click Apply. Then export a new configuration and upload it to your OpenVPN clients.
Tip: Client‑to‑Client only advertises each client's tunnel IP address. It does not automatically expose the local LAN subnets behind each VPN client. If you need to grant clients access to each other's LAN subnets, please add routing rules on the VPN server to advertise those remote LAN subnets.
OpenVPN App Install
Please download the OpenVPN App from OpenVPN Official Website.
Still have questions? Visit our Community Forum or Contact us.