Clients
On the left side of the web Admin Panel, go to CLIENTS.
The Clients page displays information about connected devices, including device name, connection type, IP address, MAC address, speed, and traffic, arranged left to right.
Device Name
The first column displays the device name and device type, which depends on the hostname of the device operator.
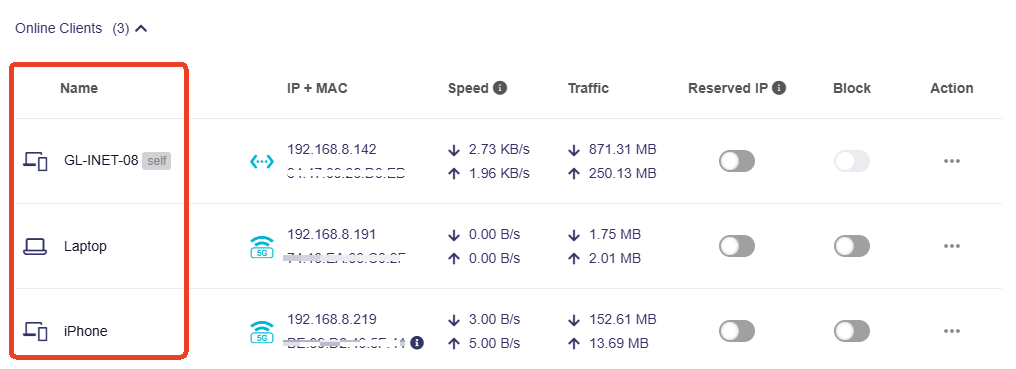
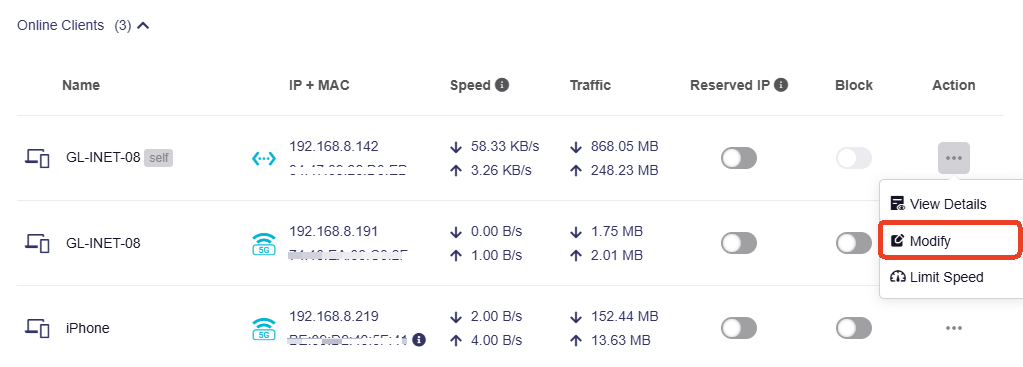
To modify the device name and type, click the three-dot icon in the Action column, and in the drop-down menu, click Modify.

Connection Type
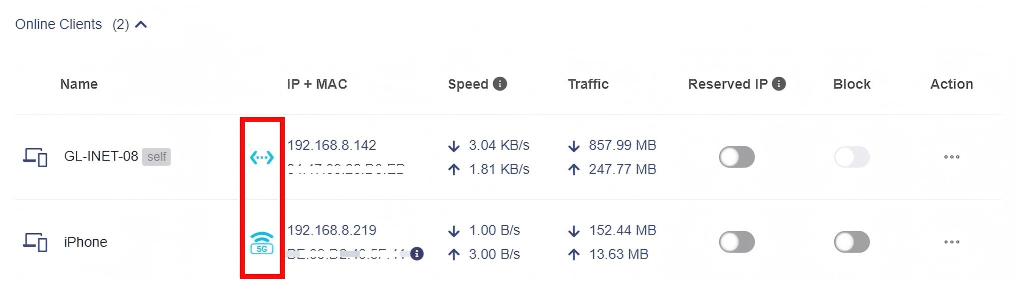
The blue icon on the right side of the device name represents the connection type/method of device.
It indicates how the device is connected to the network - whether via Wi-Fi or an ethernet cable.
IP and MAC Address
The second column lists the IP and MAC addresses of the connected device.
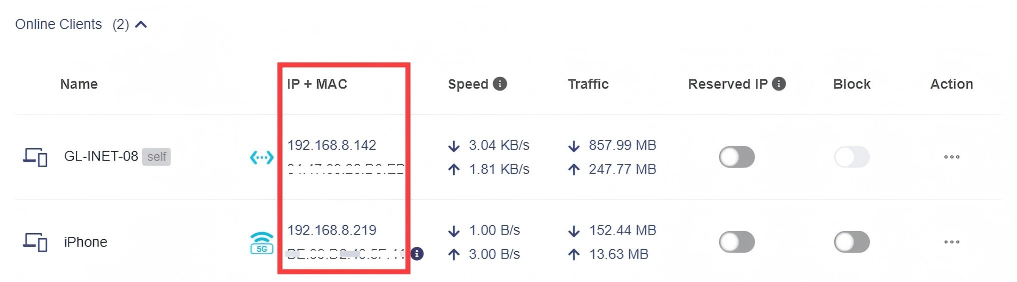
Many devices use randomized MAC addresses. If the connected devices use randomized MAC addresses, the following prompt will appear.

Note: The rule here is that if the second character of the MAC address is 2, 6, A or E(Ignore case), it is considered a randomized MAC address. However, some devices may use a different rule to generate a randomized MAC address, so this detection method may not be accurate.
Speed
The third column displays the internet speed of the connected device. This data represents the average speed over the last 3 minutes.

Note: The system begins calculating the average speed when this page is opened. For example, if the page is opened for 10 seconds, the average speed will be based on only 10 seconds worth of data.
Traffic
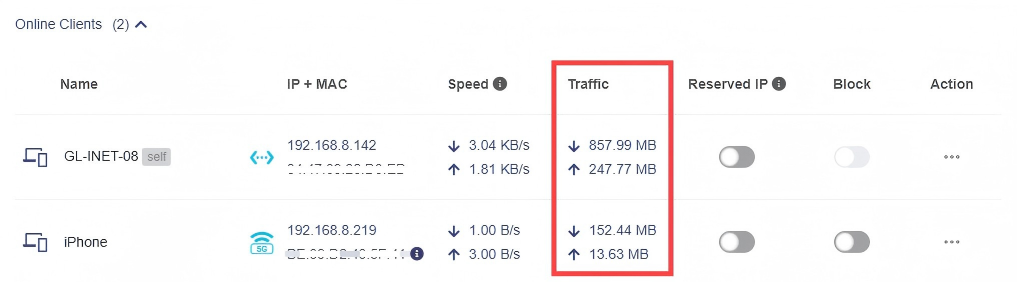
The fourth column displays the internet traffic of the connected device.
Reserved IP
In the fifth column, you can reserve IP address for a certain connected device with just one click. This feature was introduced in firmware v4.8.
When you specify a reserved IP address for a client within the LAN, the client always receives the same IP address each time it accesses the router's DHCP server.
You can assign reserved IP addresses to computers or servers that require permanent IP settings.

Blocklist
In the sixth column, you can block specific connected devices with just one click.
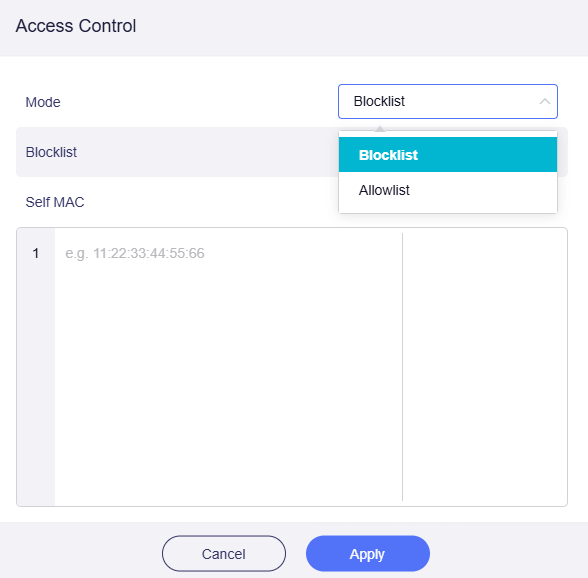
The access control rule is Blocklist by default, and you can switch it to Allowlist from the top if needed.

-
Blocklist: Devices with MAC addresses on the blocklist list are not allowed to connect to this router.
-
Allowlist: Only devices with specific MAC addresses are allowed to connect, suitable for IoT devices and enterprise network management.
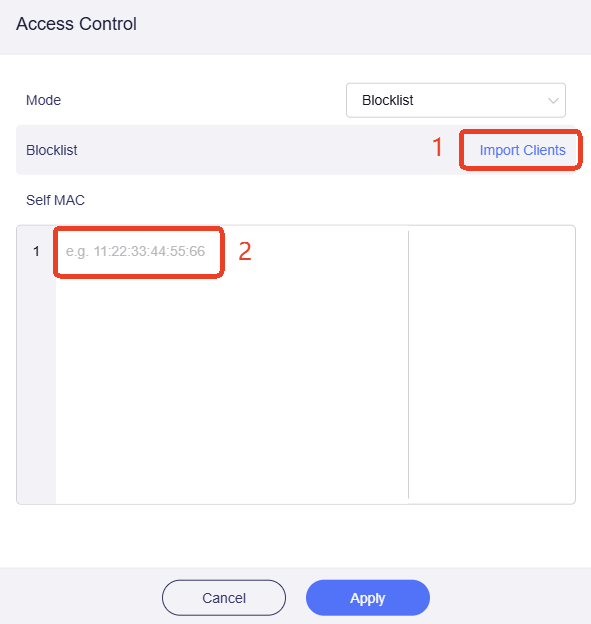
To create a Blocklist, you can upload a block list in excel form at (1), or input MAC addresses manually at (2).
Method 1. Import Clients
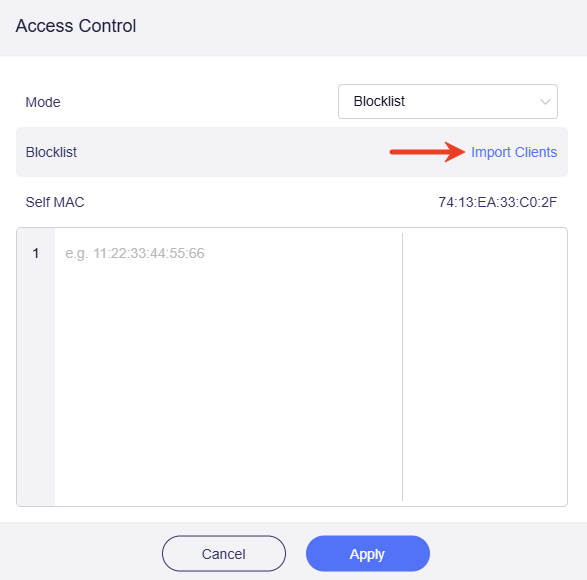
In the Access Control page, click on Import Clients.
Click on Download Import Template, and you will download an XLS worksheet named "mac-template.csv".
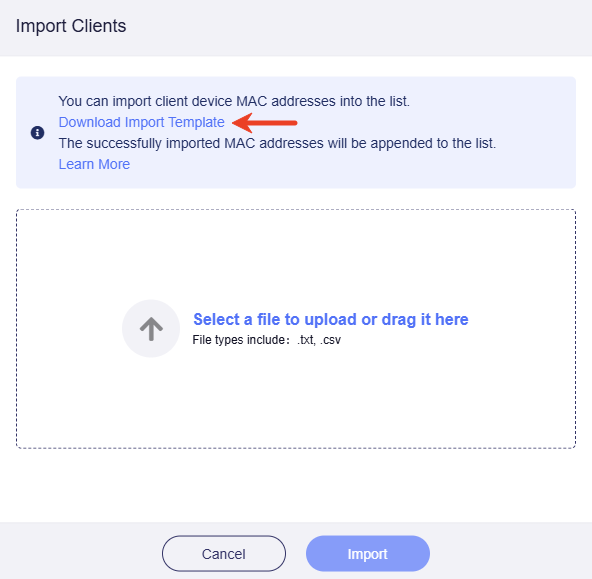
Open the file, import the MAC addresses and save.

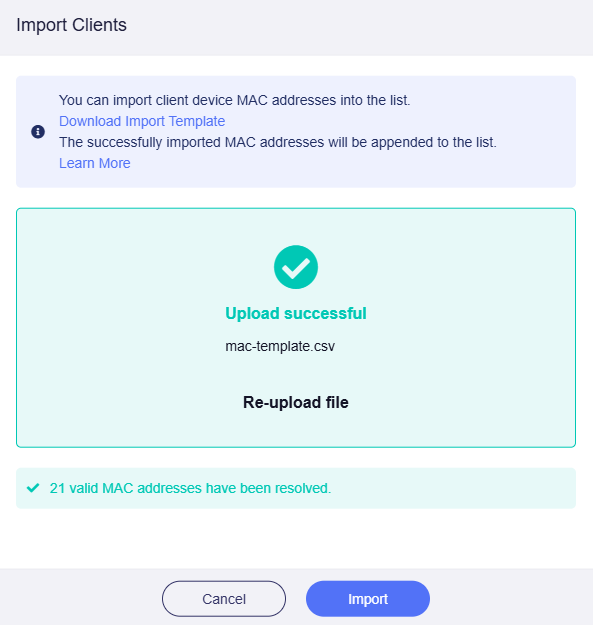
Select the saved file or drag it to the upload area.

Once the upload is successful, click Import to complete the batch import of MAC addresses.
Method 2. Input Manually
In the Access Control page, manually input the MAC address of the devices you want to block, and click Apply.
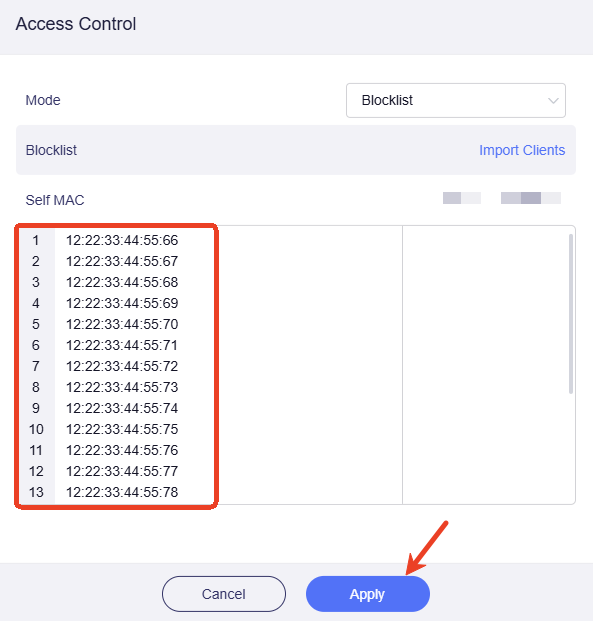
Note: Blocking client is based on the MAC address of the device. If the blocked device uses different MAC address next time, it can still be able to connect to router.
Action
View Details
If you need to view the details of the client device, click the three-dot icon in the rightmost Action column and then click the View Details in the drop-down menu.
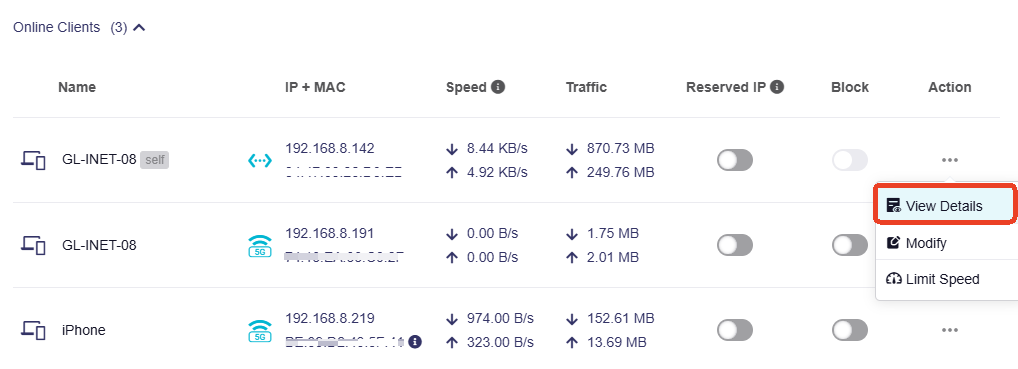
You can see all the information about the client device in the opened subpage, including all IPv6 addresses of the device if any.

Modify
Click the three-dot icon in the Action column, and in the drop-down menu, click Modify.
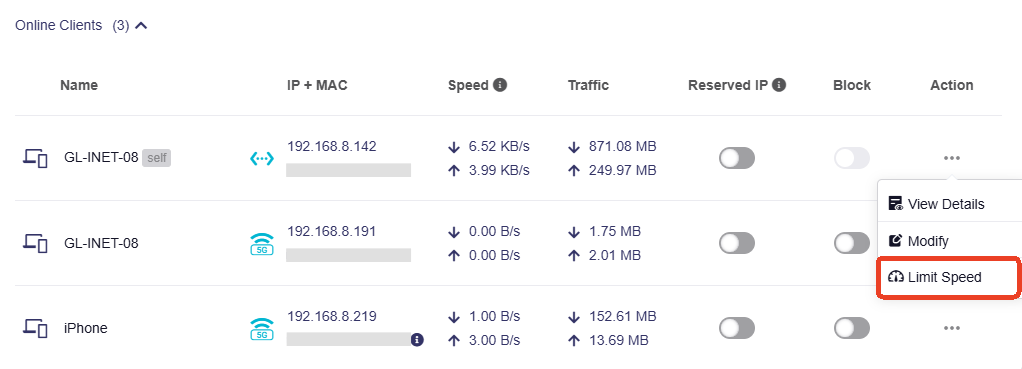
Limit Speed
Click the three-dot icon in the Action column, and in the drop-down menu, click Limit Speed.

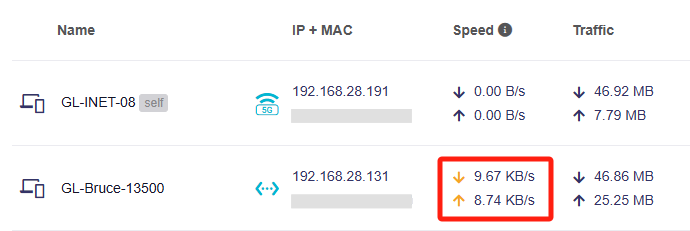
If a client has been applied speed limitation, its up arrow and down arrow of speed will turn yellow.
Click the three-dot icon in the Action column to disable speed limit.
Use VPN Tunnel
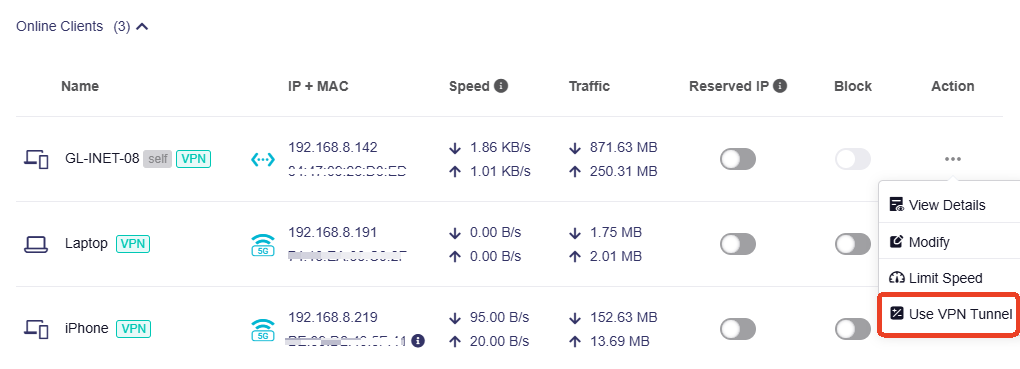
Note: This option is available as of firmware v4.8 and will only appear in the Action menu if a MAC-based policy is configured.
Add a client to the VPN tunnel list with MAC-based policy. If you need to make detailed adjustments to the tunnels, go to the VPN Dashboard for management.
Sort
The current sort rule is displayed in the upper right corner, and you can switch to others.
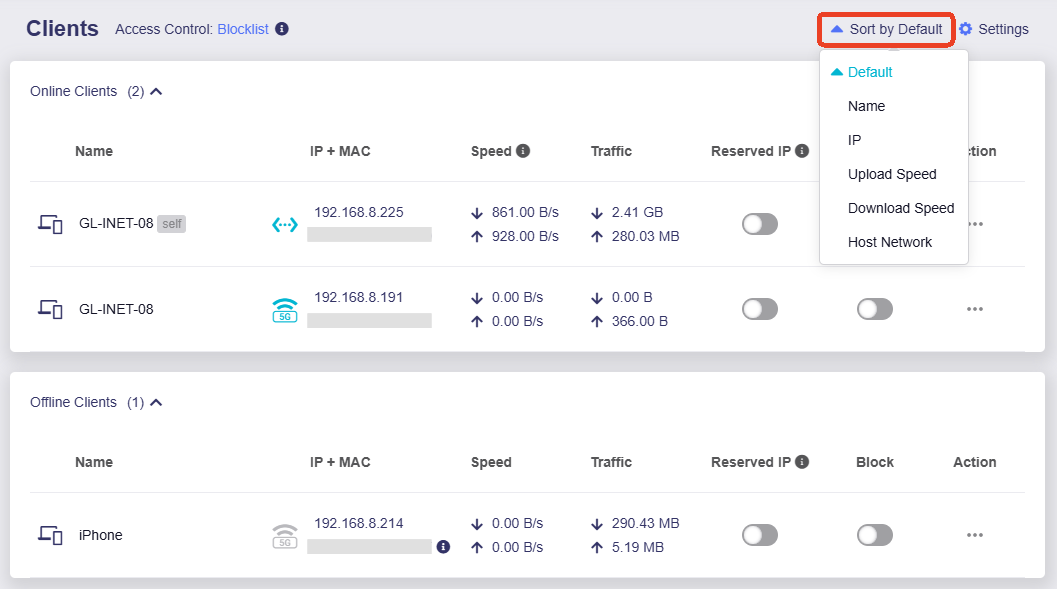
The default sort order is as follows:
- The self-device (i.e., the device you are using to access the Admin Panel) always appears at the top.
- In the Online Clients section, devices are listed higher if they connected earlier.
- In the Offline Clients section, devices are listed higher if they disconnected earlier.
Settings
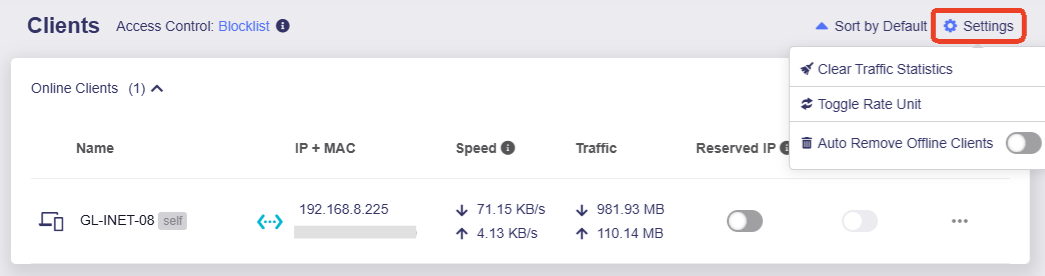
Click the Settings button in the upper right corner for further operations.
-
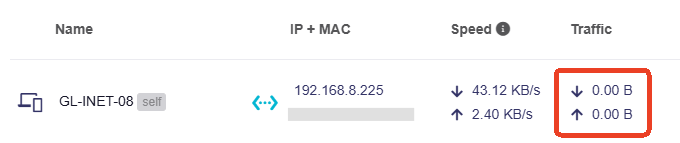
Clear Traffic Statistics: Clear traffic statistics for all online clients with one click. Once applied, the traffic statistics column will be reset to zero and then restart the statistics.
-
Toggle Rate Unit: Switch the rate unit for the speed column between KB/s and Kbps.
-
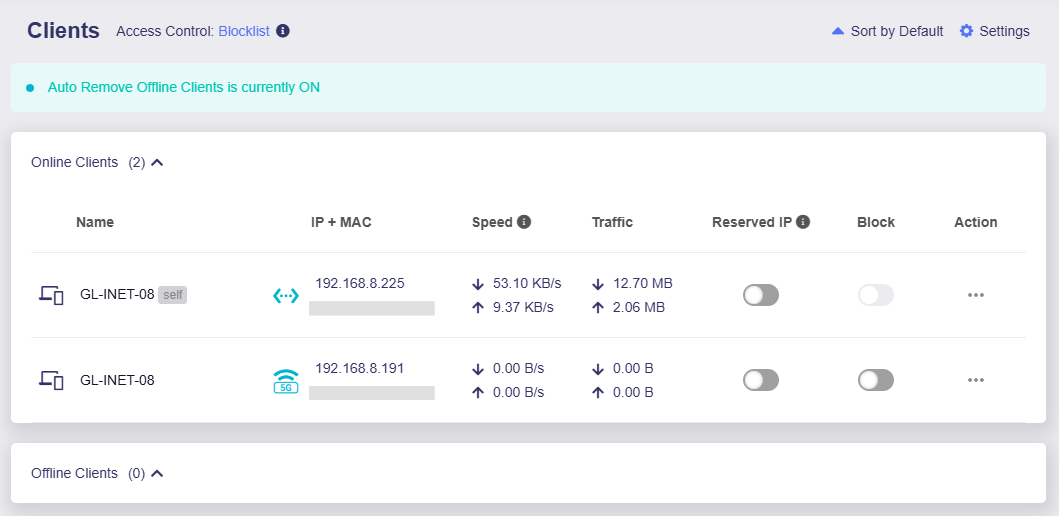
Auto Remove Offline Clients: This feature was introduced in firmware v4.9. Once enabled, all offline clients will be cleared immediately and will not display in the Offline Clients section.
Remove Clients
In the offline clients section, you can click Delete All at the top right to delete all offline clients.
If you want to remove specific client, click the three-dot icon in the Action column, and in the drop-down menu, click Remove Client.

Still have questions? Visit our Community Forum or Contact us.