Using U-Boot to unbrick your KVM
If you bricked your KVM due to some DIY projects or flashing a wrong firmware, your KVM may not be able to power up properly. In this case, you can re-install the firmware by using U-Boot failsafe.
Preparation
Please prepare a computer or laptop with an Ethernet port. If your computer does not have an ethernet port, an additional USB-Ethernet adapter is required.
Unbrick steps
To avoid unbrick failure, please follow the steps below strictly.
-
Please download firmware here to your computer.
-
Remove the power of KVM. Connect your computer to the Ethernet port of the KVM.
-
Press and hold the Reset button firmly, at the same time power on your KVM.
Wait for the LED to flash in a regular sequence several times. Release the Reset button after the flashing pattern changes.
LED Flashing Patterns by Device Model
-
Comet (GL-RM1): When holding the Reset button, the blue LED will flash 5 times. Release the Reset button after the 5 flashes, and the blue LED will remain solid.
-
Comet PoE (GL-RM1PE): When holding the Reset button, the blue LED will flash 5 times. Release the Reset button after the 5 flashes, and the blue LED will remain solid.
-
Comet Pro (GL-RM10): Hold the Reset button for about 5 seconds, during which power on your KVM at the same time, then release the button. It will enter the U-Boot mode.
-
Comet 5G (GL-RM10RC): Hold the Reset button for about 5 seconds, during which power on your KVM at the same time, then release the button. It will enter the U-Boot mode.
-
-
Manually set the IP address of your computer to 192.168.1.2. Please check the step-by-step guide for different operating systems below.
Windows 7 / Windows 10
-
Go to Control Panel -> Network and Internet -> Network and Sharing Center -> Change adapter settings.
-
Right click Local Area Connection -> Properties.
-
Click Internet Protocol Version 4 (TCP/IPv4) -> Properties.
-
Set the IP adress to
192.168.1.2manually. -
Set the Subnet mask to
255.255.255.0.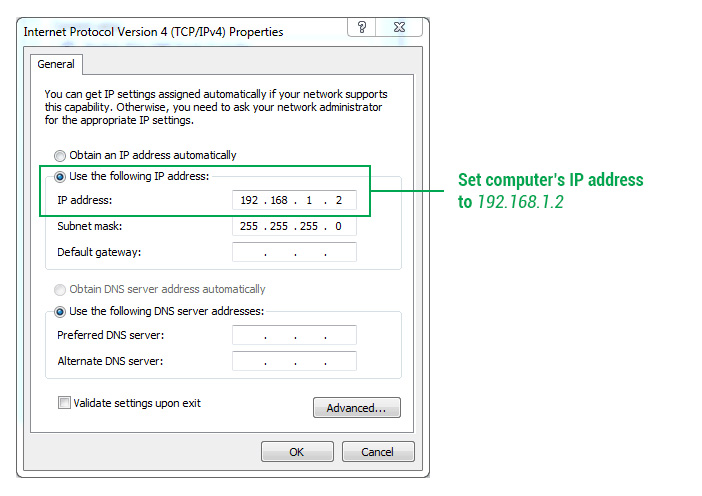
-
Click the OK button.
Windows 11
-
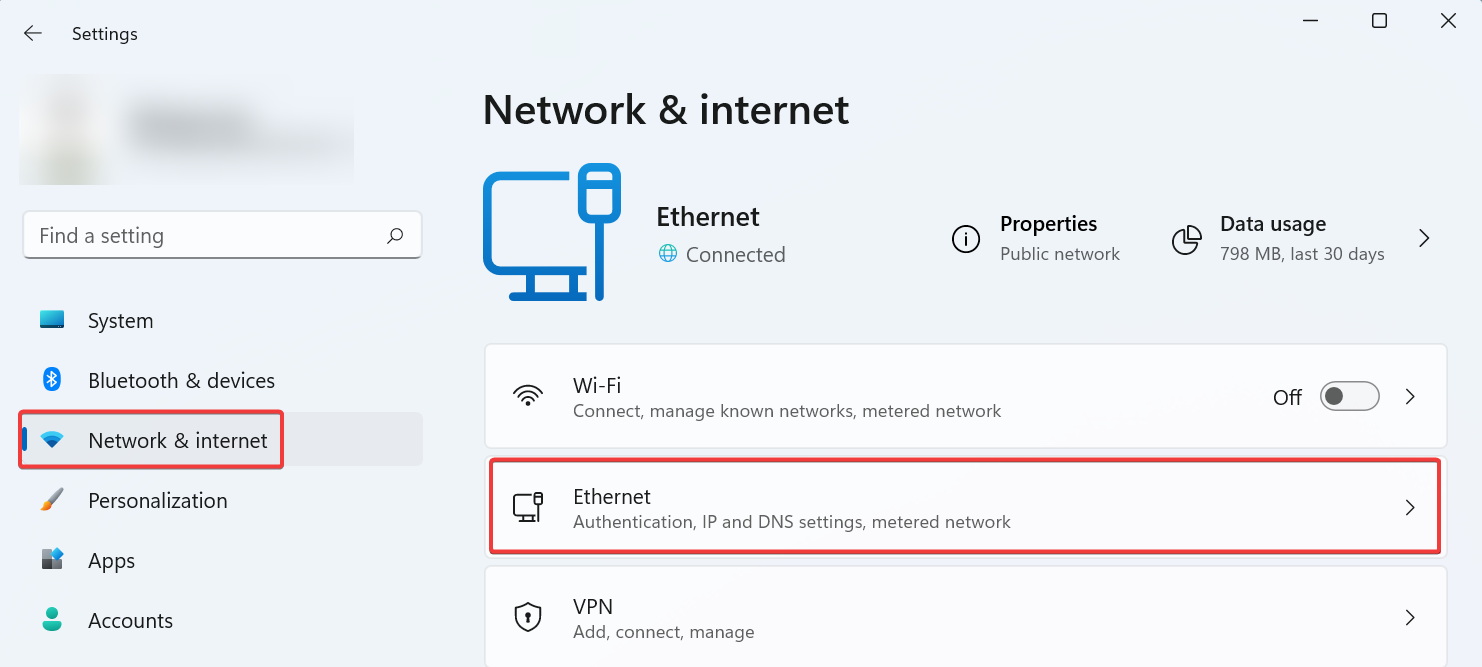
Open Settings.
-
Click on Network & Internet.
-
Click the Ethernet tab.
-
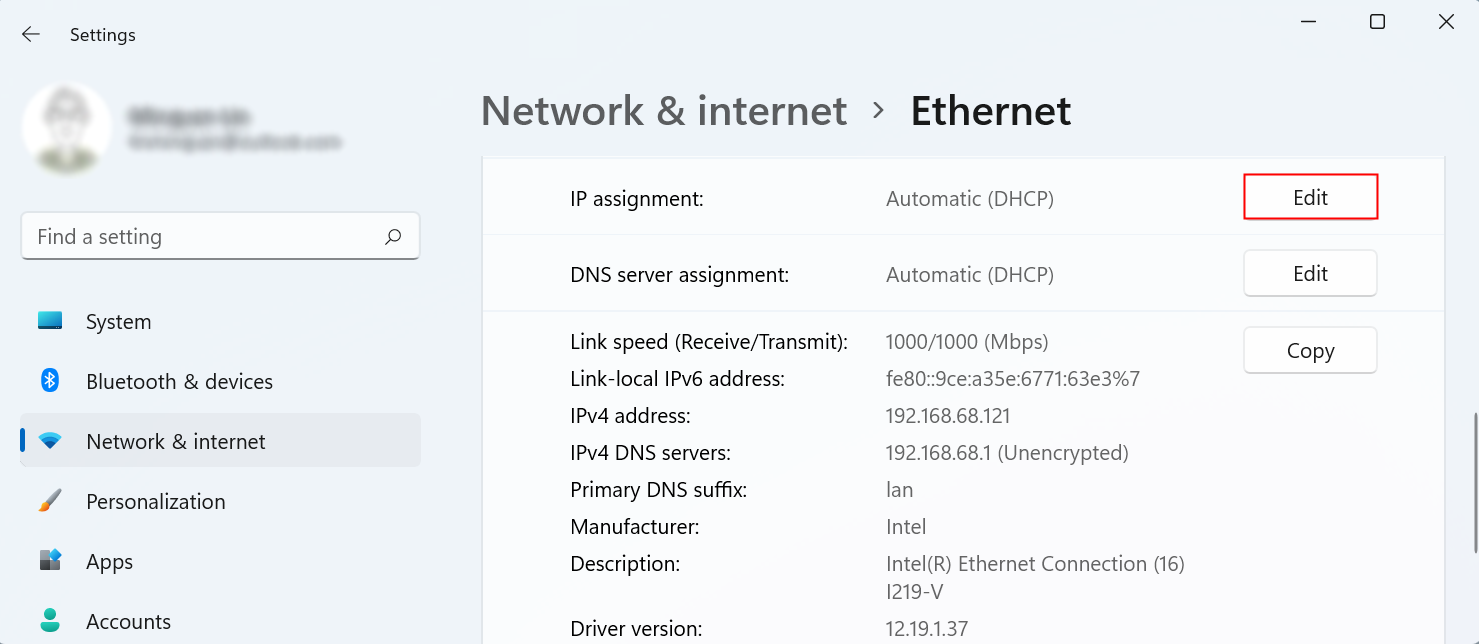
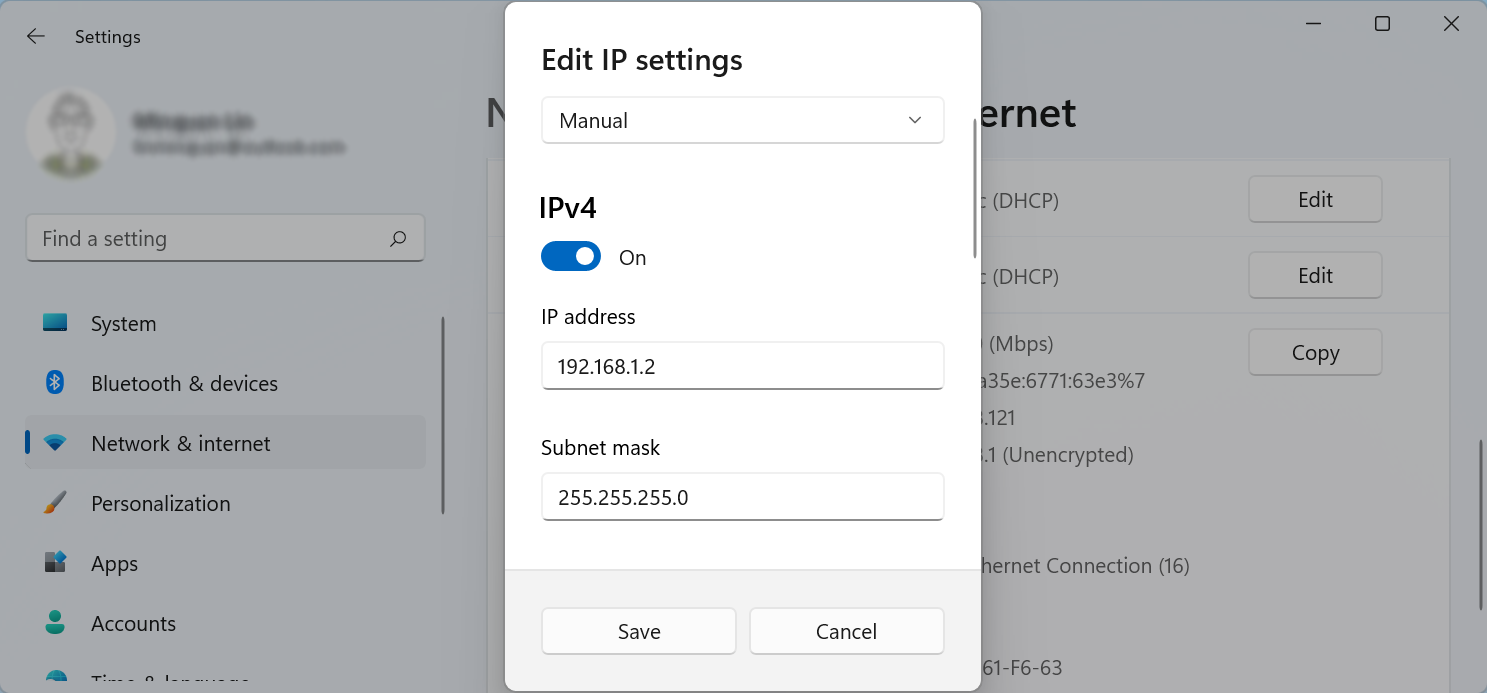
Under the "IP assignment" section, click the Edit button.
-
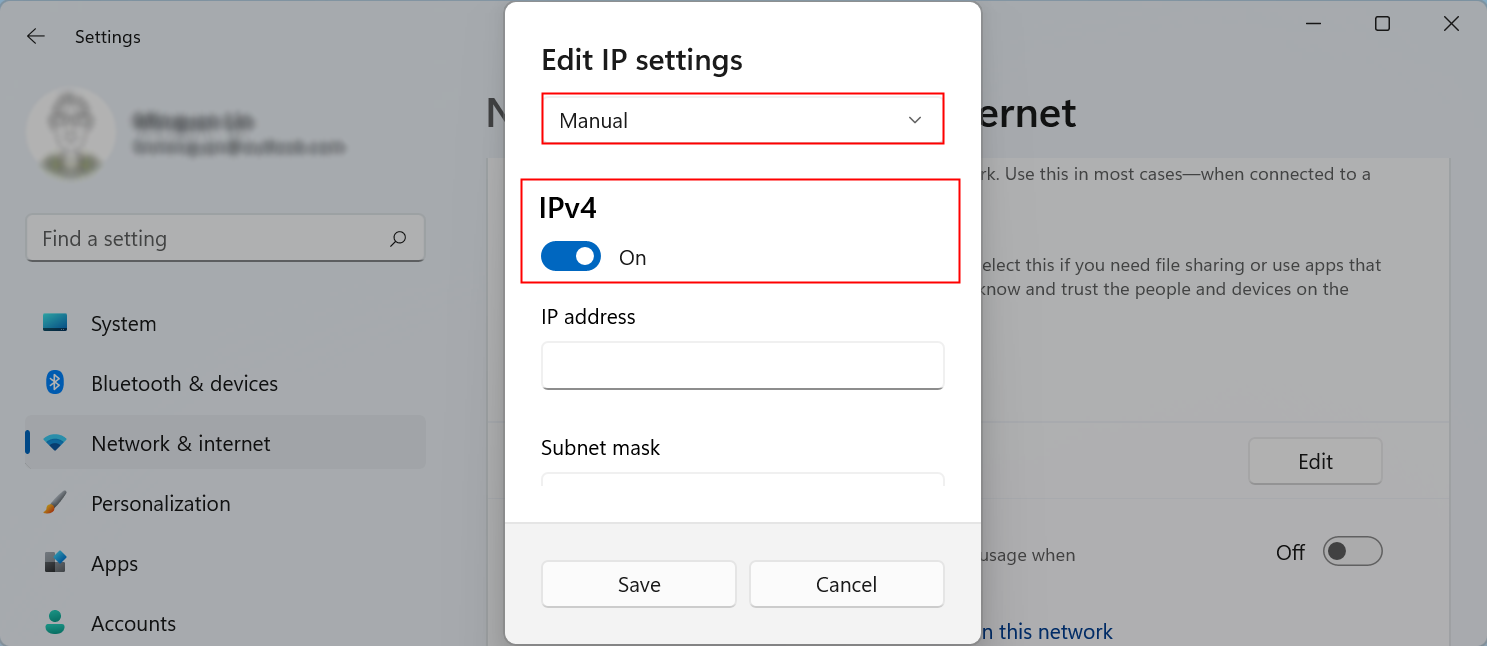
Select the Manual option.
-
Turn on the IPv4 toggle switch.
-
Set the static IP address as 192.168.1.2.
-
Specify the Subnet mask as 255.255.255.0.
-
Click the Save button.
macOS
-
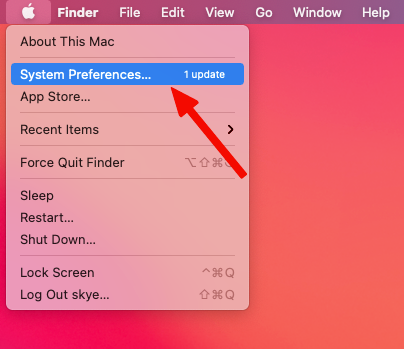
Click the Apple icon in the top left corner of the screen, and select System Preferences.
-
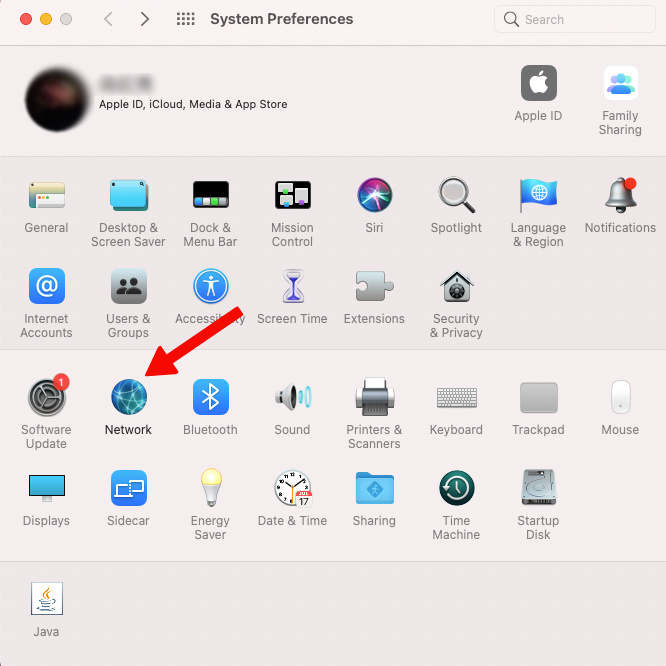
Click Network.
-
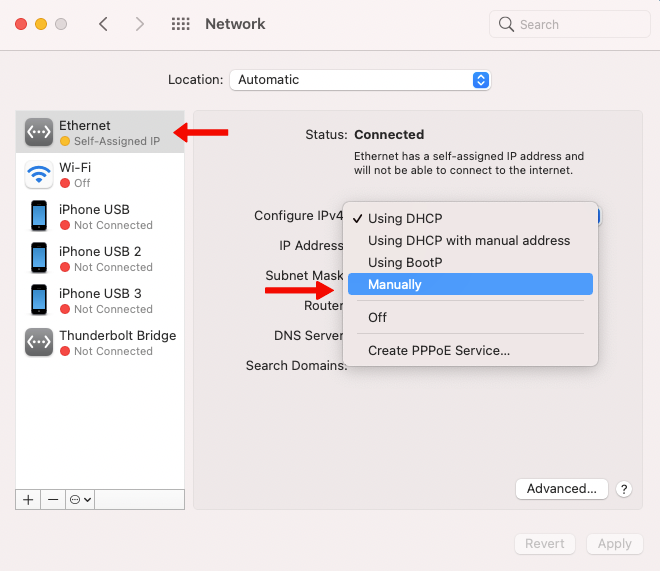
Click Ethernet on the left and then click the drop-down box next to Configure IPv4 and select Manually. If you are using a USB Ethernet Adapter, Ethernet may not be found and it may show up as the name of the USB Ethernet Adapter.
-
Enter the IPv4 Address to
192.168.1.2, Subnet Mask to255.255.255.0, Router to192.168.1.1, then click the Apply button in the lower right corner.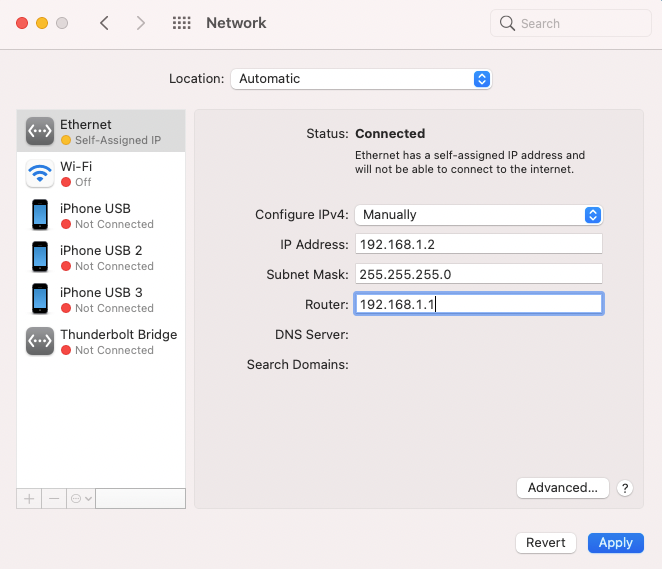
-
-
Use browser to visit http://192.168.1.1. This is the U-Boot Web UI.
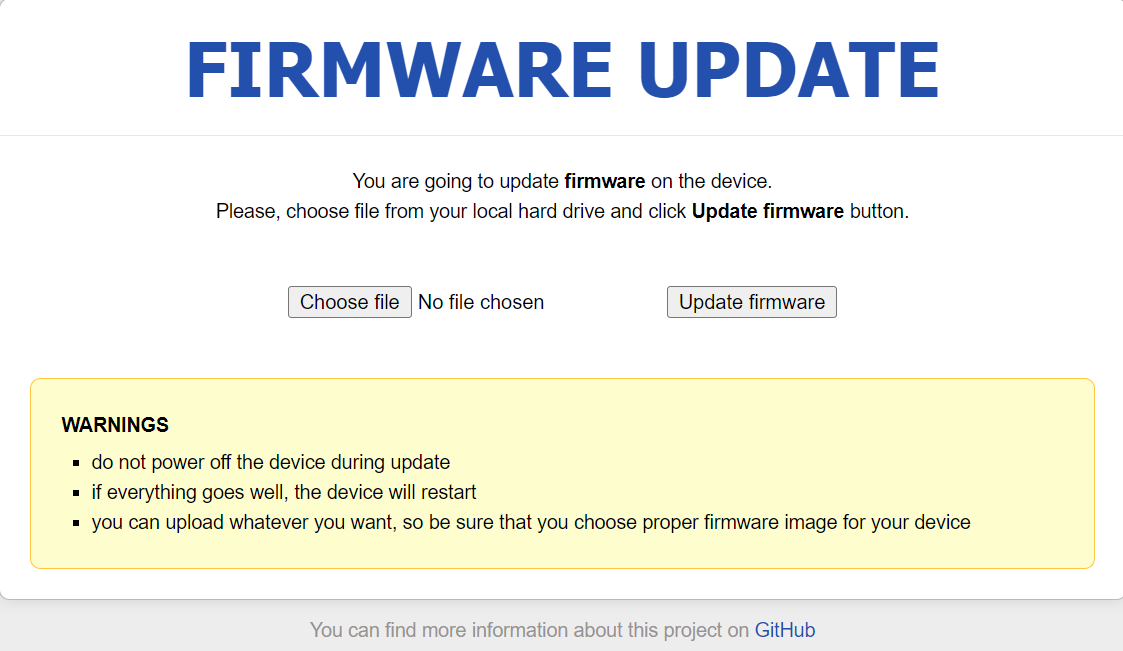
Note: The U-Boot Web UI above may not be exactly the same as what you see, because the U-Boot version is different for different production dates. For security reasons, we currently do not provide separate U-Boot upgrades. If an update is necessary, we will integrate it into the new firmware.
-
Click Choose file and select the firmware file. Then click Update firmware button.
-
Wait for about 3 minutes. Do NOT power off your KVM when updating.
The KVM is ready when its LED is flashing white.
-
Revert the computer IP settings you did in step 4.
-
Unplug the Ethernet cable between your computer and the KVM, then connect your KVM to a network source (e.g. a router or a network switch) via this Ethernet cable or Wi-Fi.
Wait for about 1 minute to allow the KVM to obtain Internet access. You will then be able to access your KVM again.
Note: Configuration settings are typically retained. However, they will be reverted to default if a configuration error caused the system failure that required recovery.
Still have questions? Visit our Community Forum or Contact us.