Comet Pro (GL-RM10) Quick Setup
Watch this video or follow the steps below to set up your Comet Pro.
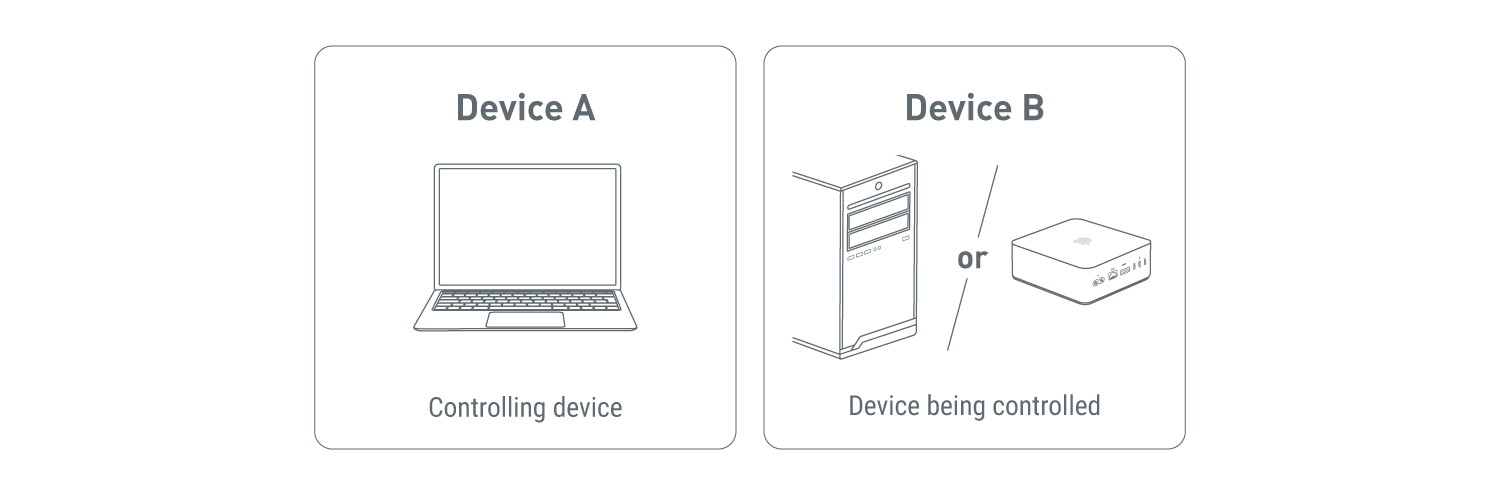
Connect Devices
For clarity, Device A refers to the controlling device, and Device B the controlled device.
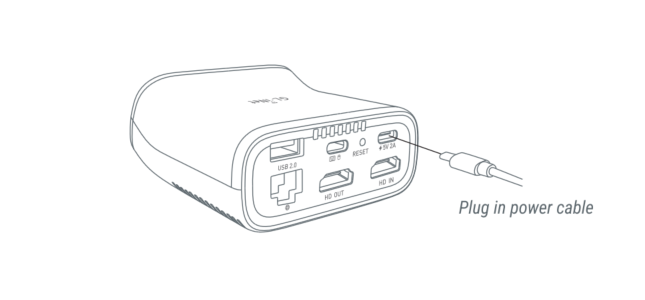
-
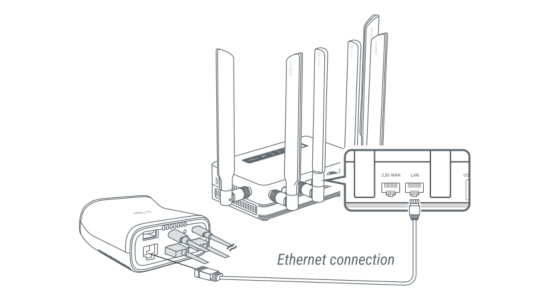
Connect Comet Pro to the power source.
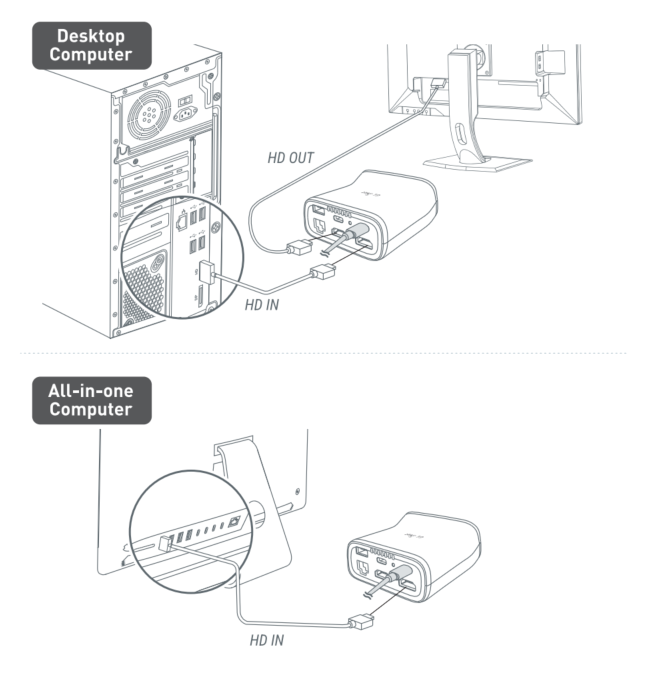
-
Connect Comet Pro's HD IN port to the Device B's HD OUT port using an HDMI cable. Use another HD cable to connect Comet Pro's HD OUT port to an external monitor if necessary.
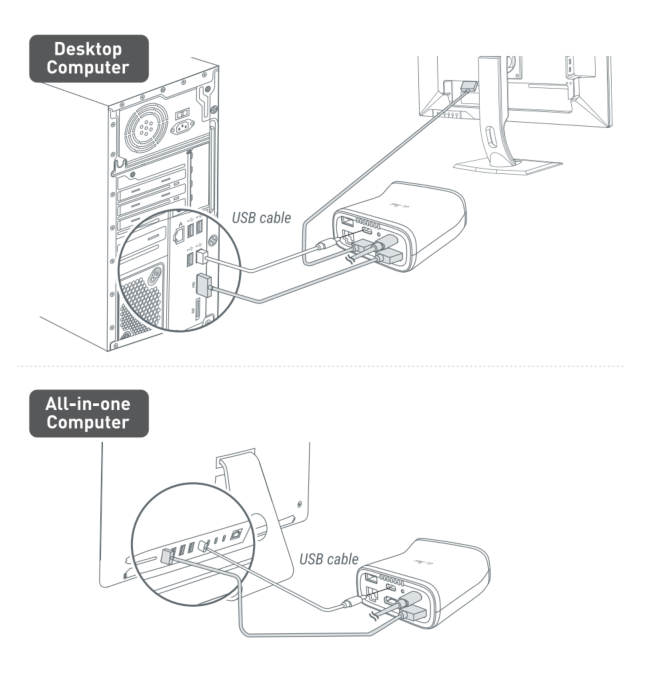
-
Connect Comet Pro's USB Type-C port to the Device B's USB port using a USB cable.
-
Connect Comet Pro to a network source via an Ethernet cable or Wi-Fi.
-
Ethernet: Connect the Comet Pro's Ethernet port to a network source.
-
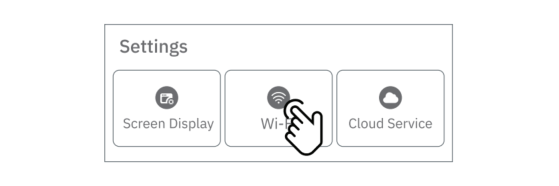
Wi-Fi: Swipe left on the touchscreen, connect Comet Pro to an existing Wi-Fi network (2.4G/5G supported).
-
-
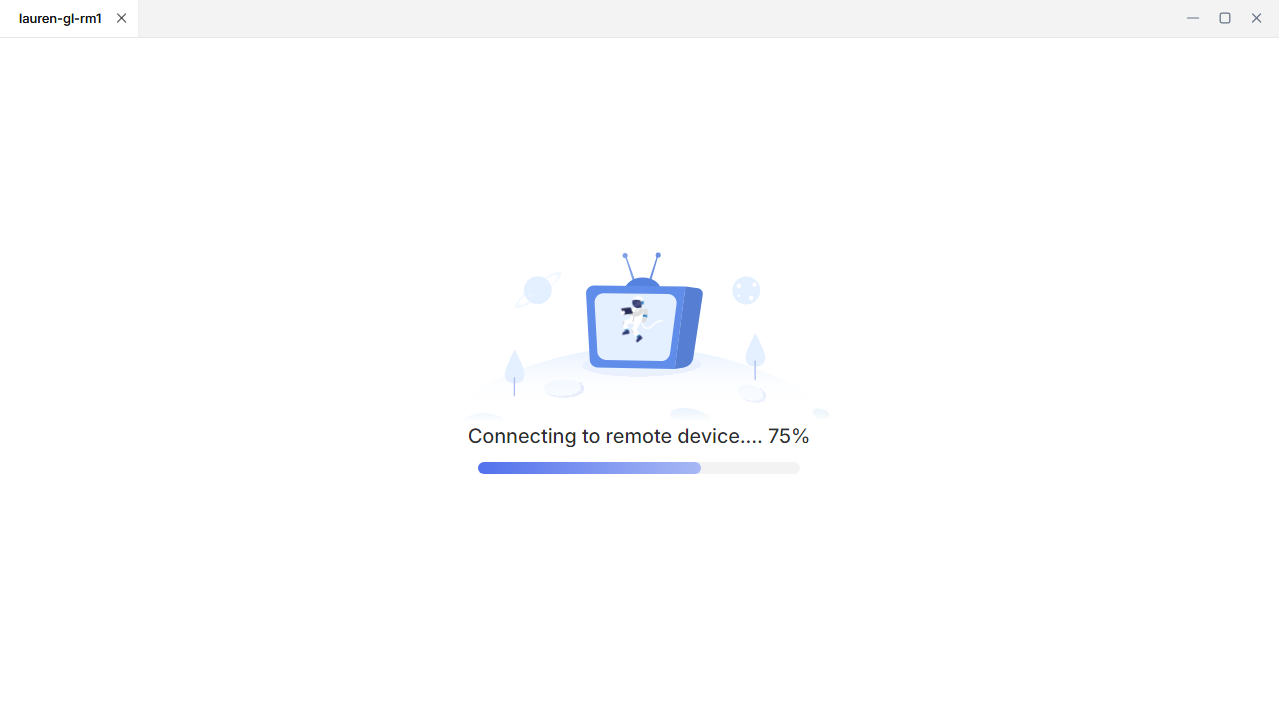
Device connection is complete. Now you can access the Comet Pro's console locally or remotely.
Local Access
There are two ways to access Comet Pro on the local network: via domain name or IP address.
Before accessing, ensure your controlling device is on the same LAN as Comet Pro.
Domain
-
Launch a browser on the controlling device. Chrome or Edge is recommended for better compatibility.
-
Enter
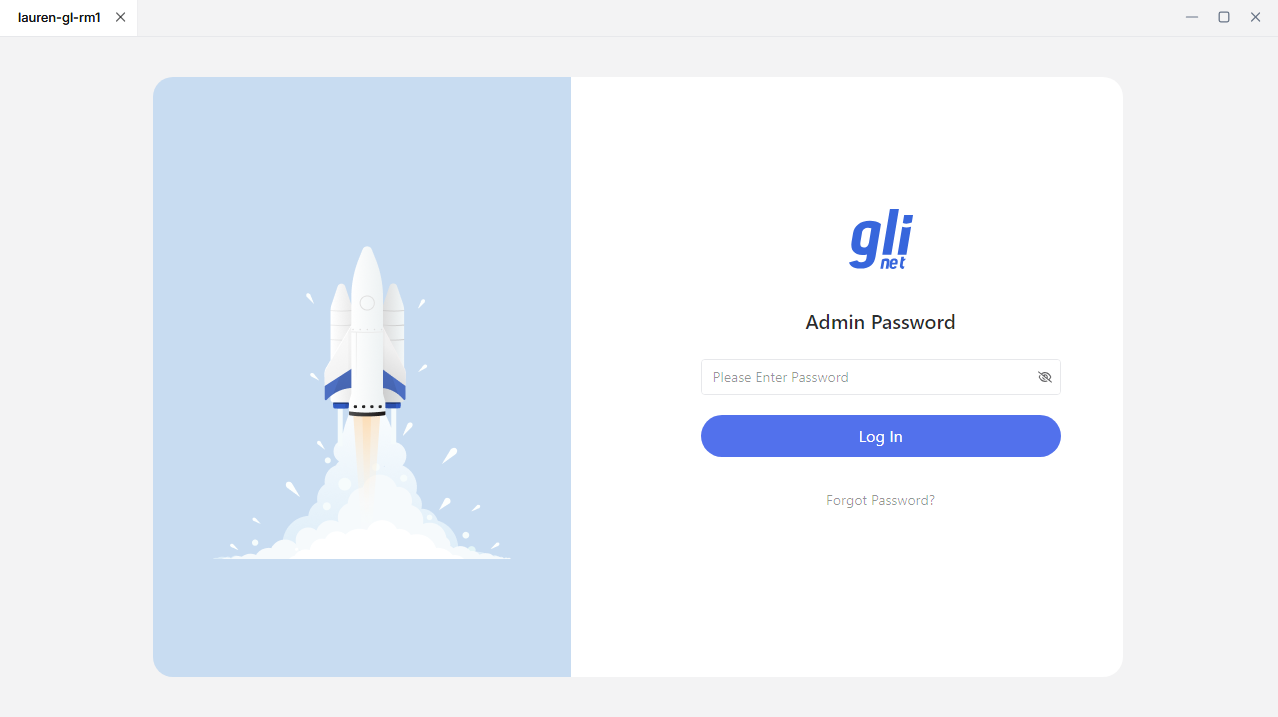
glkvm.localin the address bar. You will be directed to the GLKVM login page. Enter the admin password.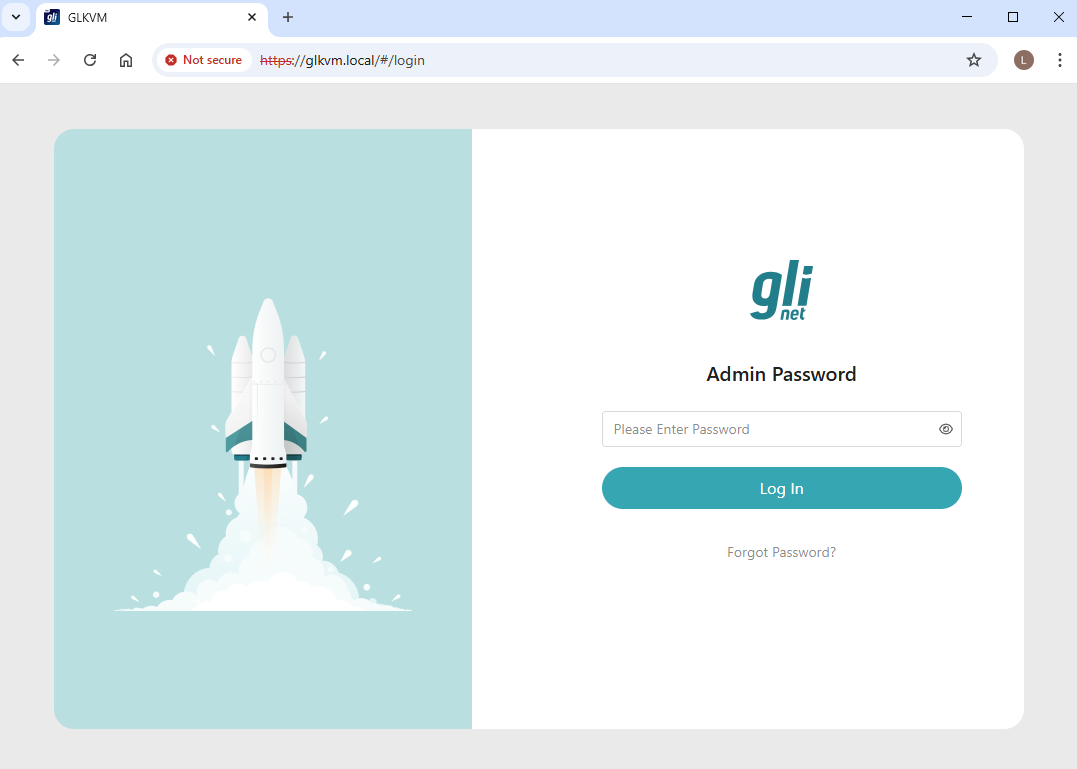
Note: You will need to set up your admin password when accessing for the first time.
-
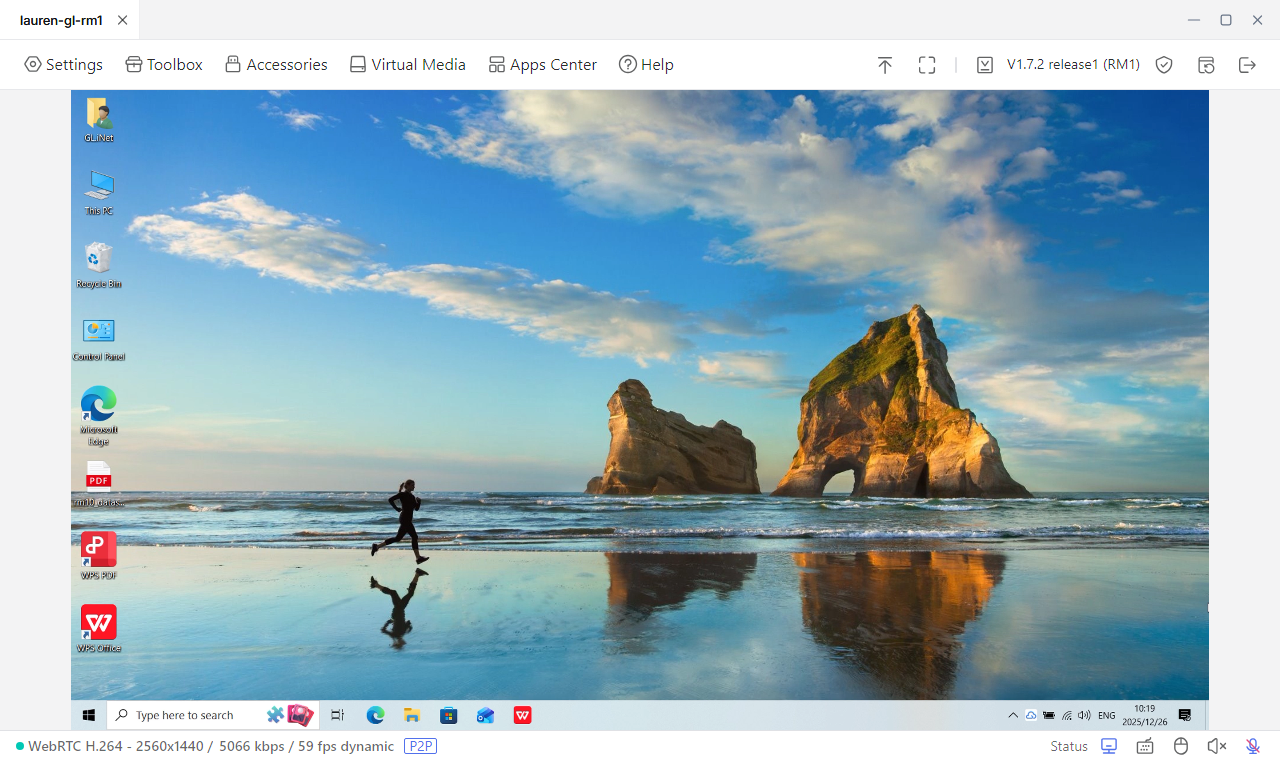
You can then access the Comet Pro's console locally and gain access to the controlled device.

IP address
-
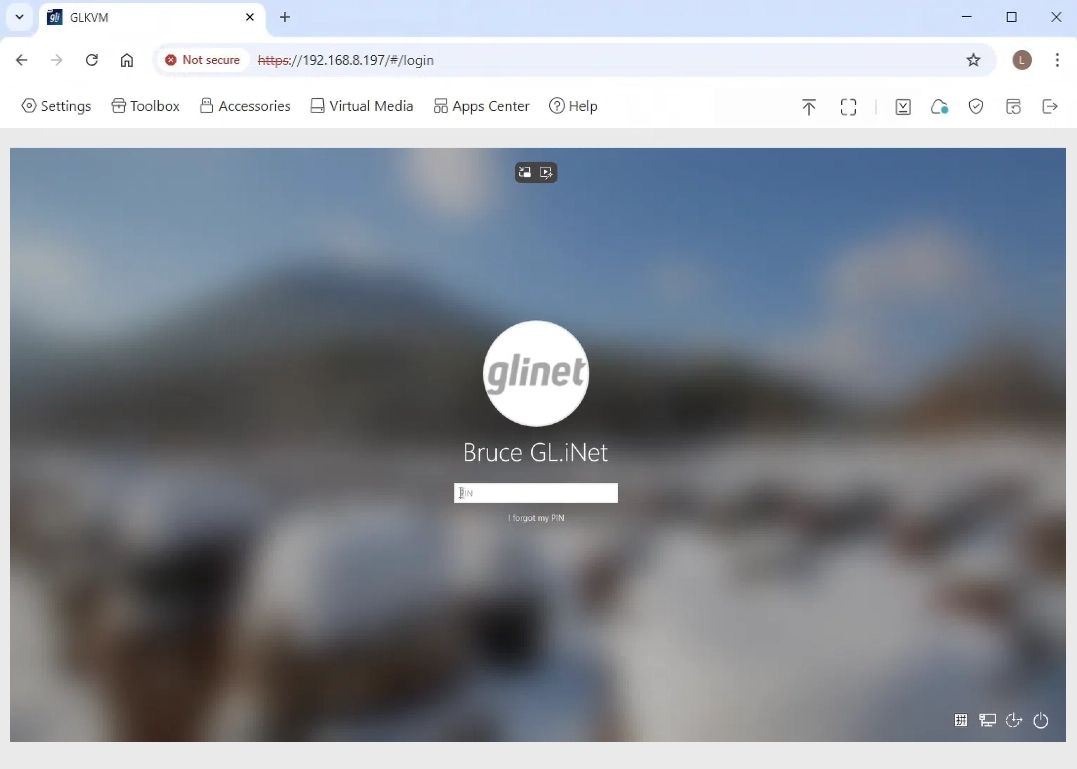
Find Comet Pro's IP address on the touchscreen. In this example, the Comet Pro's IP address is
192.168.8.197. -
Launch a browser and enter this IP in the address bar. You will be directed to the GLKVM login page. Enter the admin password.

Note: You will need to set up your admin password when accessing for the first time.
-
You can then access the Comet Pro's console locally and gain access to the controlled device.
Remote Access
There are multiple ways to access Comet Pro remotely: via Cloud service, GLKVM App, Tailscale, ZeroTier, and NetBird.
Cloud service
-
Bind your device to KVM Cloud. This needs to be done on the local network.
There are two ways to bind your KVM to the Cloud: Regular Binding or Dynamic Code Binding. Here we take Regular Binding as an example. If you prefer Dynamic Code Binding, click here for details.
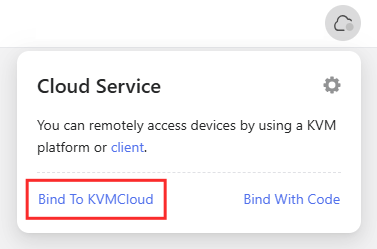
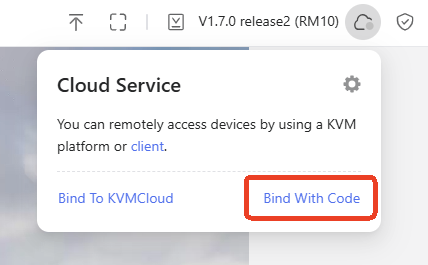
First, locally access your Comet Pro and navigate to Cloud Service in the upper right corner. Click Bind To Cloud.
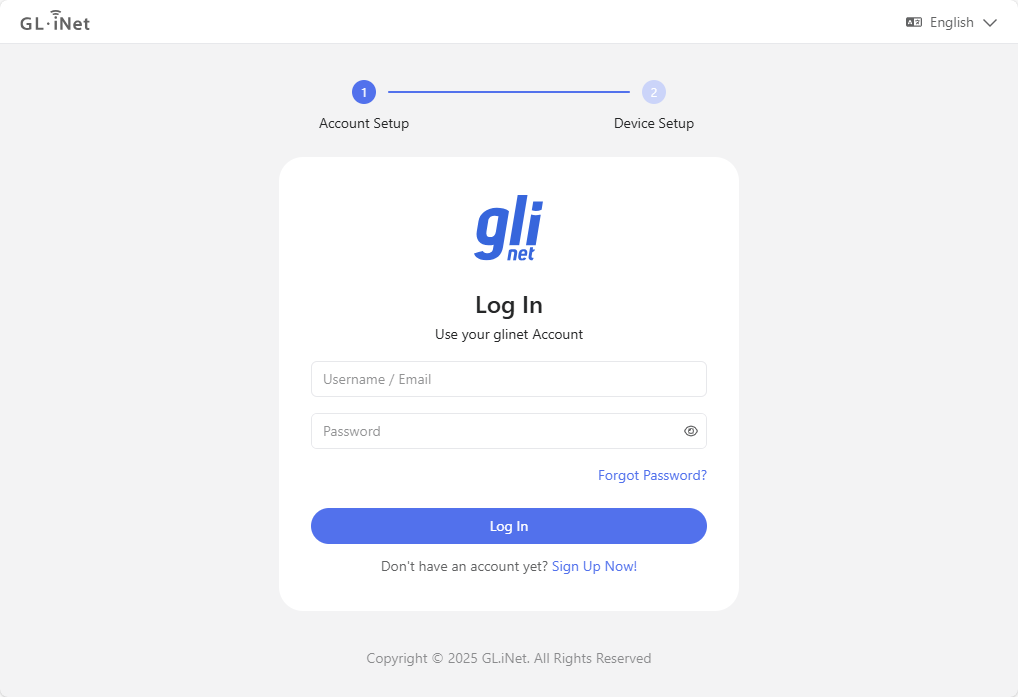
You will be redirected to a login page. Log in with your glinet cloud account.
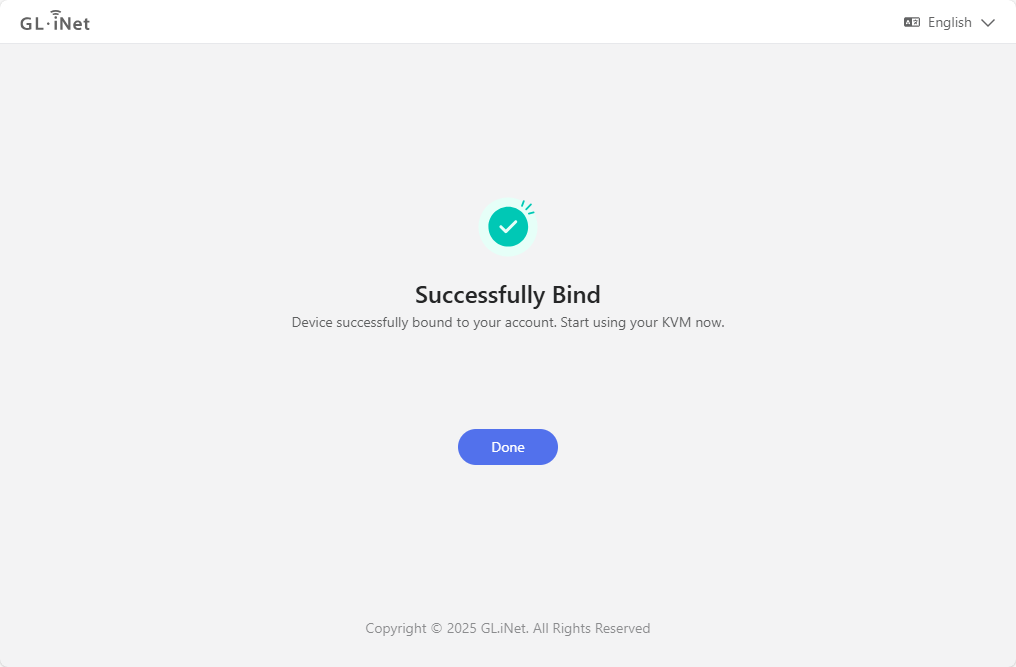
Second, confirm your device info, and click Bind.

Wait a second and your Comet Pro will be bound to your account successfully. Click Done.
-
Remote access via Cloud service.
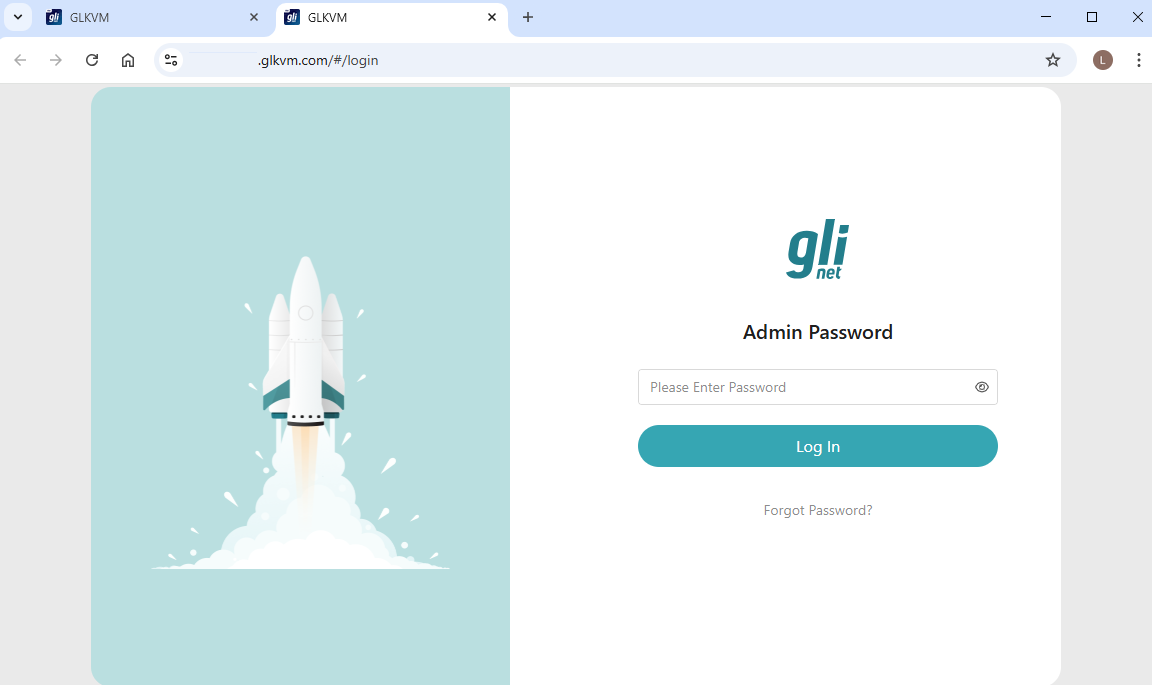
Open a browser (take Google Chrome as an example), and enter
glkvm.comin the address bar. You will see a login page. Use your glinet account to log in.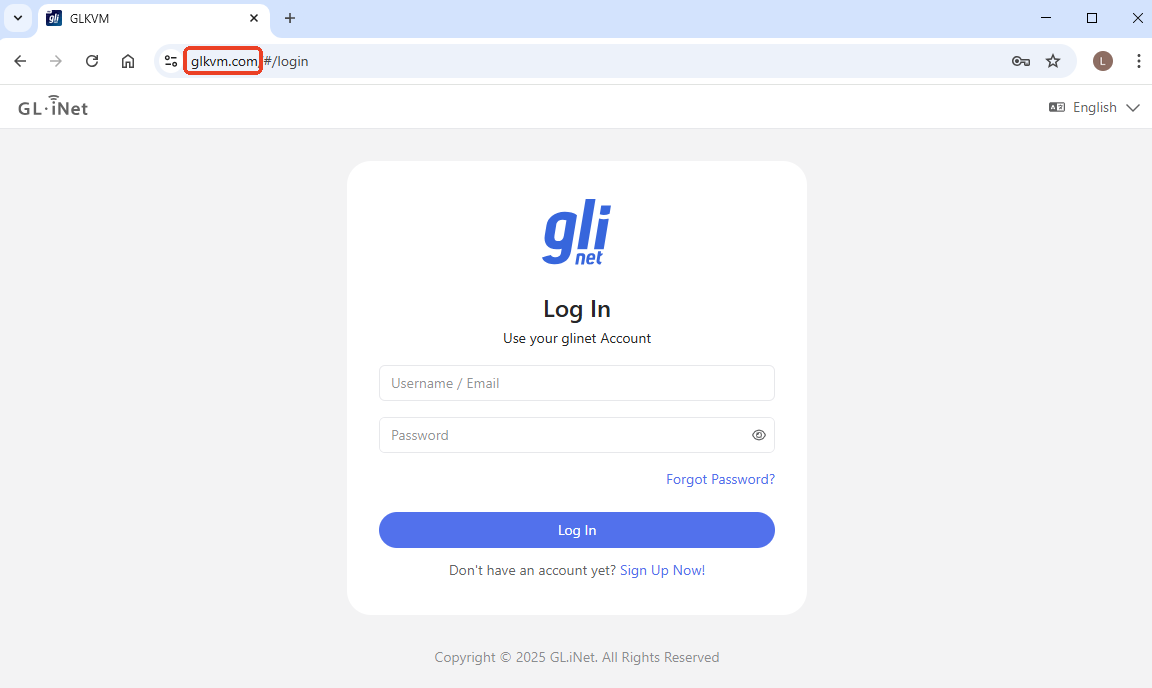
After login, you will see the devices bound to your account. Click on the device you want to remotely access.
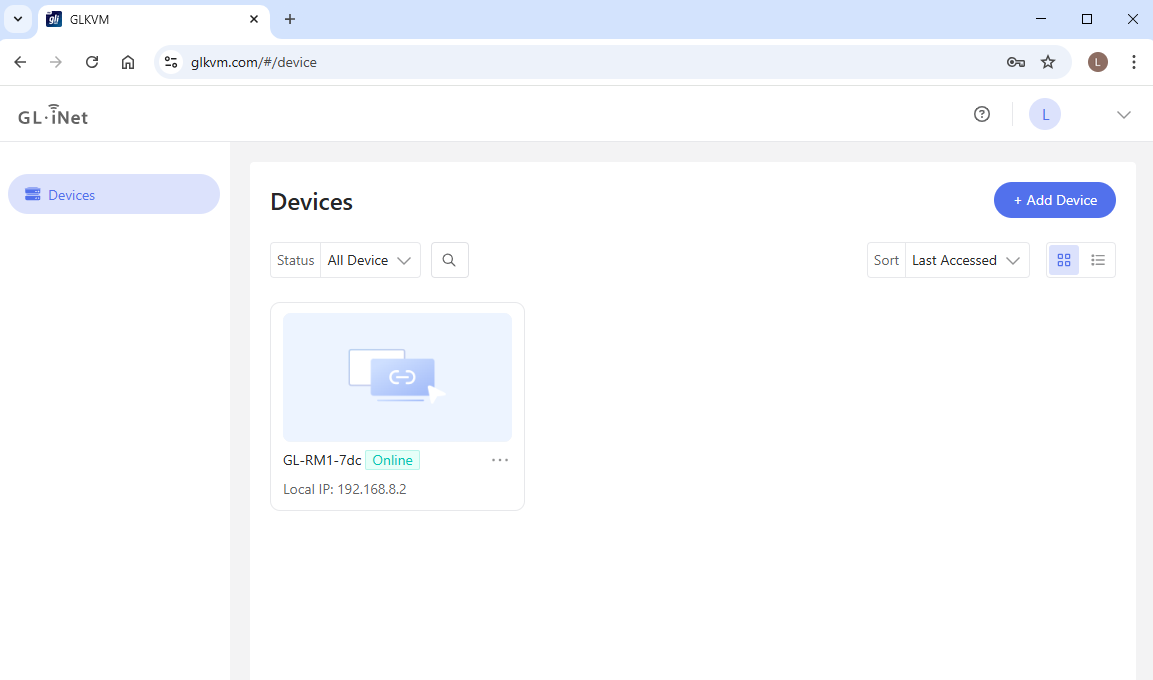
It will redirect to a new webpage with the domain
glkvm.xyz,glkvm.site, orglkvm.top. These domains are secure and provided by GL.iNet.Enter the admin password and log in.
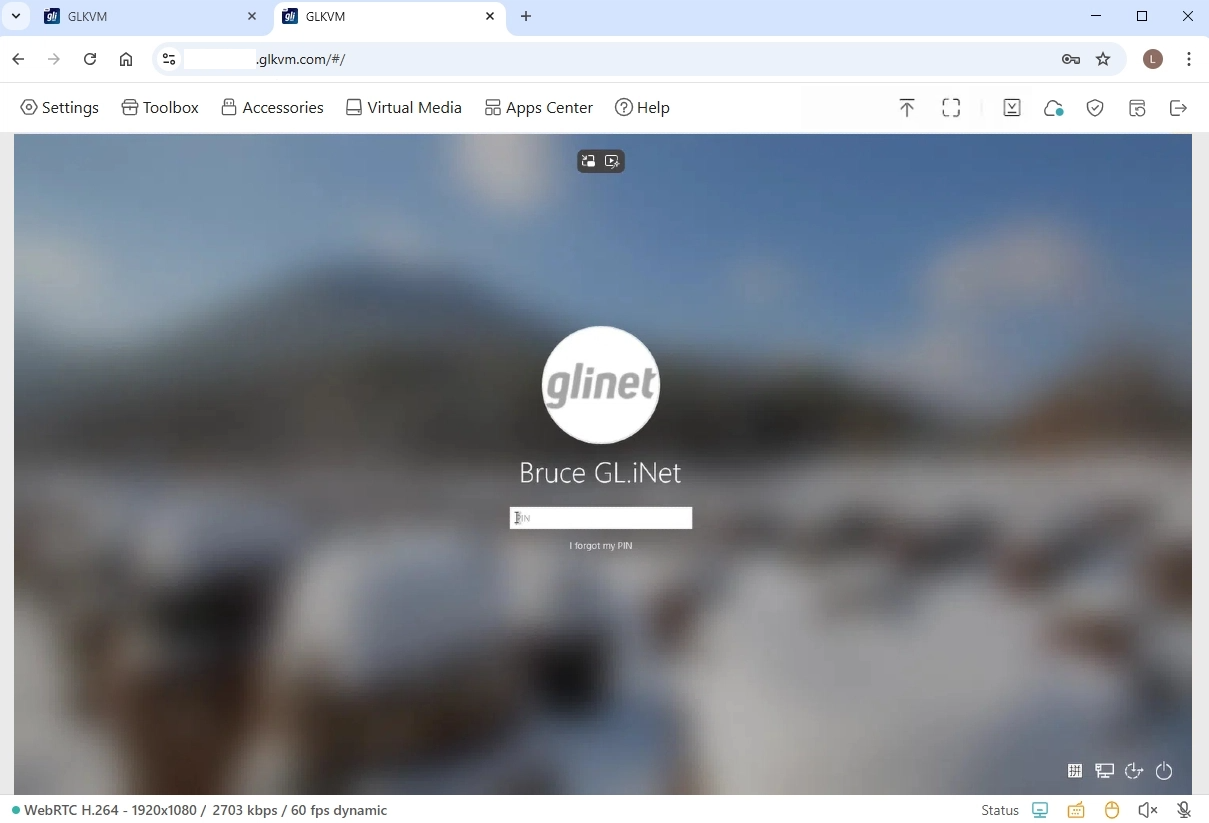
You will then be able to access your Comet Pro and the controlled device remotely via Cloud, without installing the app.
GLKVM App
-
Install the GLKVM App on your controlling device.
-
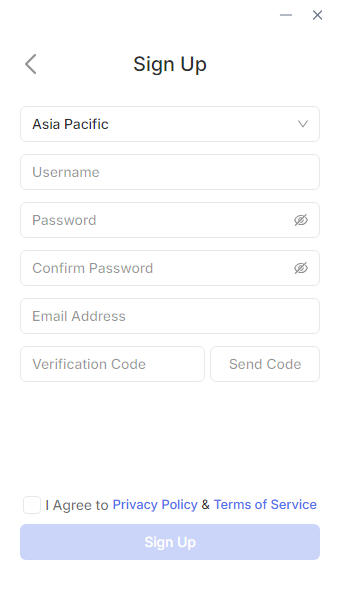
Log in with your GL.iNet account.
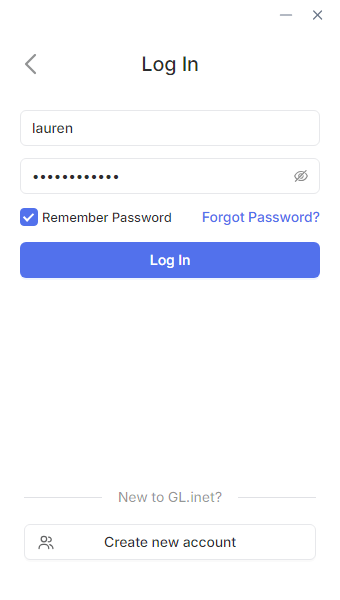
If you don't have one, sign up first and log in.
-
Bind your device.
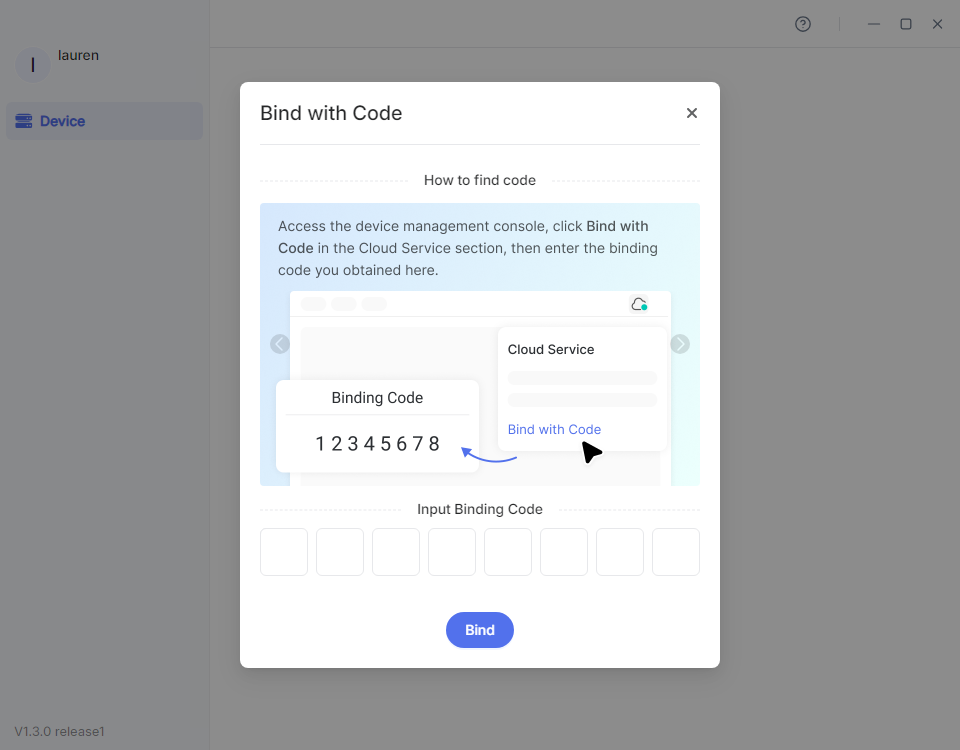
After login, the page will display as follows. Click Add Device.
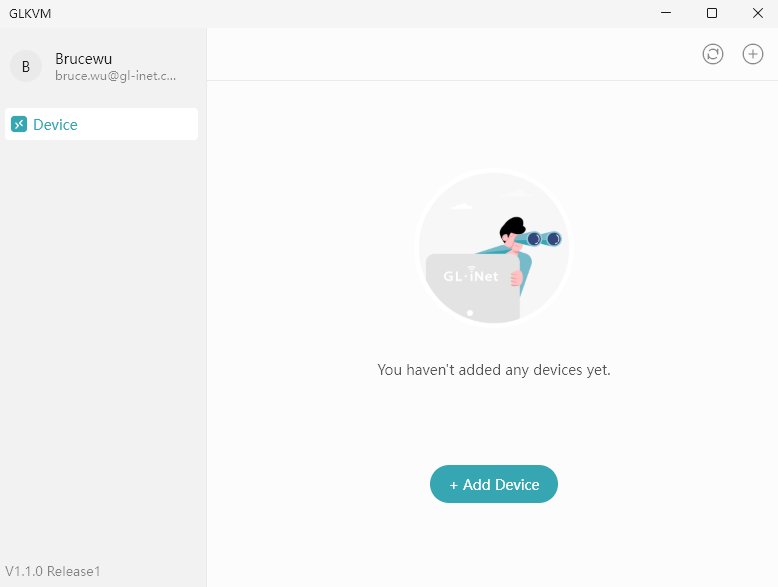
You can bind your device in three ways: Auto Discover, S/N Code, and Dynamic Binding Code.
Auto Discover
This needs to be done on the local network. Ensure your controlling device is on the same LAN as Comet Pro.
Click Auto Discover. It will start searching automatically.
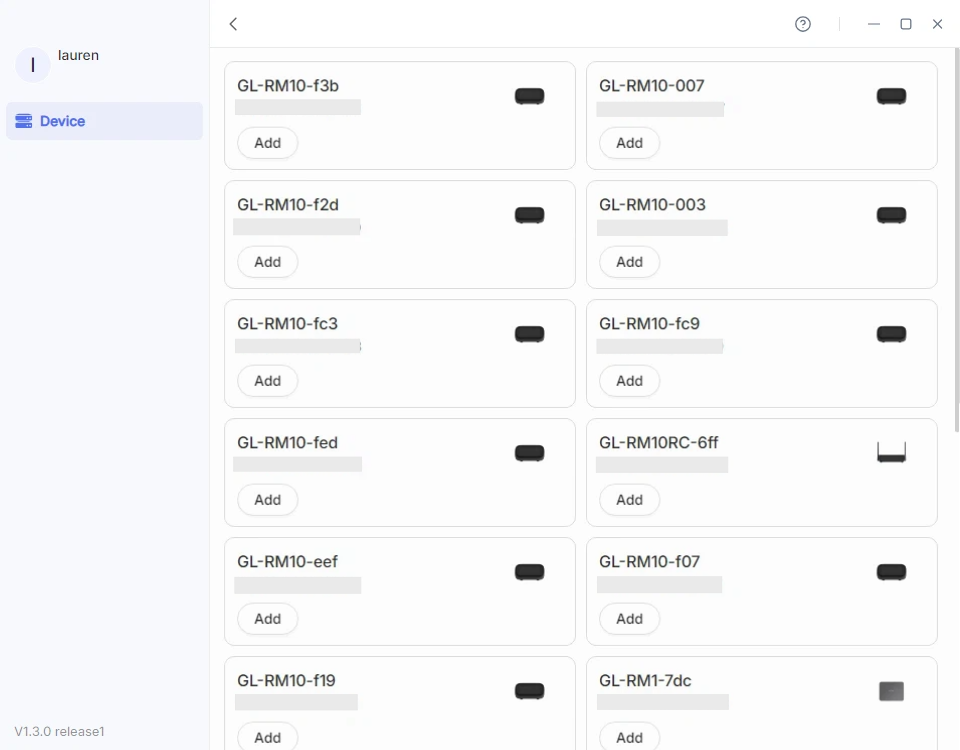
Locate your KVM and enter its Device ID to bind it to your account.

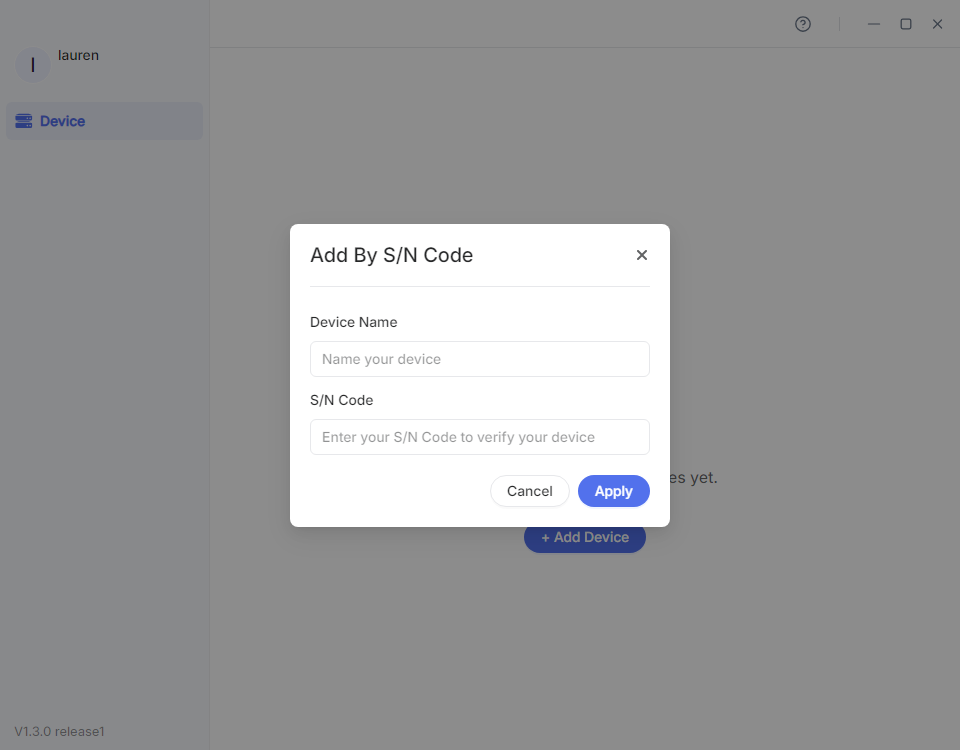
S/N Code
This applies to the scenario where your KVM is not detected, or is not on the same LAN, but you have its serial number (S/N).
Click S/N Code. In the pop-up window, customize the device name and enter the S/N, which is printed on the label bottom of your KVM device.
Dynamic Binding Code
This needs to be done on the local network. Ensure your controlling device is on the same LAN as Comet Pro.
-
Log in to your KVM locally using domain or IP address. Click here for details.
-
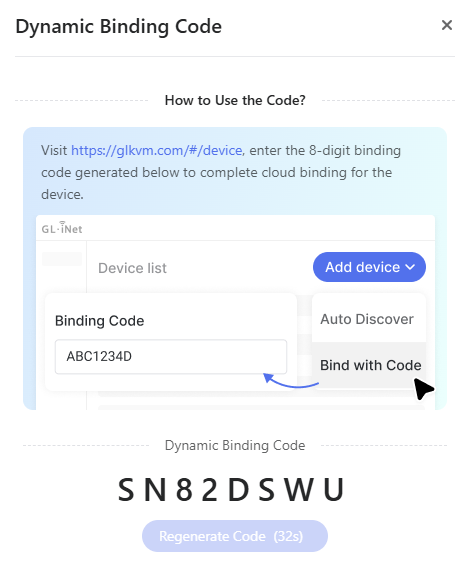
Navigate to Cloud Service in the upper-right corner, and click Bind With Code.
-
It will generate an 8-digit dynamic code randomly for device binding, valid for 60 seconds. Click the code to copy it.
-
Back to the GLKVM app, enter the dynamic binding code and click Bind.
-
-
Remote access via GLKVM App.
Once your KVM device is bound to your account, it will show "Online" in the app.
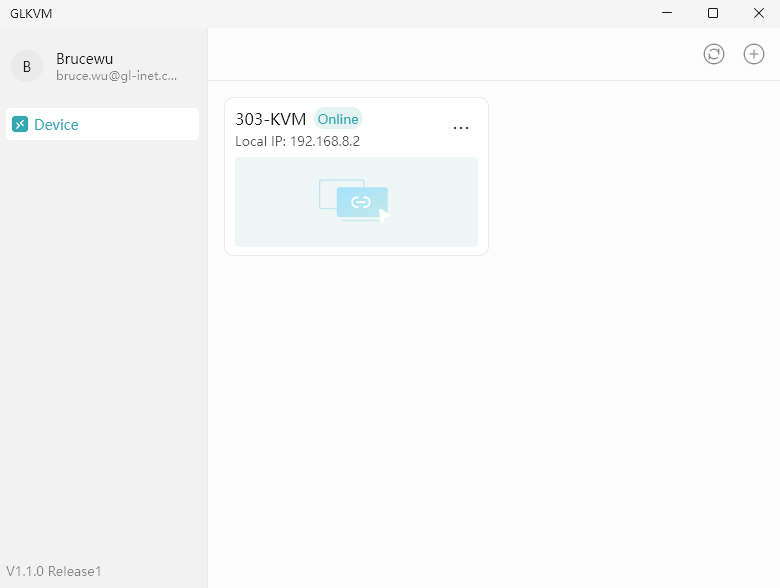
Click your KVM device. It will open a new window and start connecting.
Once connected, enter the admin password to log in to your device.
You will then access your KVM device, through which you can access the controlled device.
Tailscale
Comet Pro integrates with Tailscale, allowing you to remotely access it through Tailscale virtual network.
On the console, navigate to Apps Center -> Tailscale, enable it and bind your Comet Pro to your Tailscale account.
Next, bind your controlling device to the same account. You will then be able to remotely access your Comet Pro by entering its Tailscale virtual IP in a web browser on the controlling device, without installing GLKVM app.
See here for details.
ZeroTier
Comet Pro integrates with ZeroTier, allowing you to remotely access it through ZeroTier virtual network.
On the console, navigate to Apps Center -> ZeroTier and enable it.
Next, join both Comet Pro and your controlling device to the same ZeroTier network (using a 16-character alphanumeric Network ID), then you can remotely access your Comet Pro by entering its ZeroTier IP in a web browser on the controlling device, without installing GLKVM app.
See here for details.
NetBird
Comet Pro integrates with NetBird, allowing you to remotely access it through NetBird virtual network.
On the console, navigate to Apps Center -> NetBird, enable it and bind your Comet Pro to your NetBird account.
Next, bind your controlling device to the same account. Then you will be able to remotely access your Comet Pro by entering its NetBird virtual IP in a web browser on the controlling device, without installing GLKVM app.
See here for details.