How to change KVM device identity
What is KVM device identity
GL.iNet KVM's device identity refers to the identifier that enables the KVM to be recognized and distinguished by the connected device during communication.
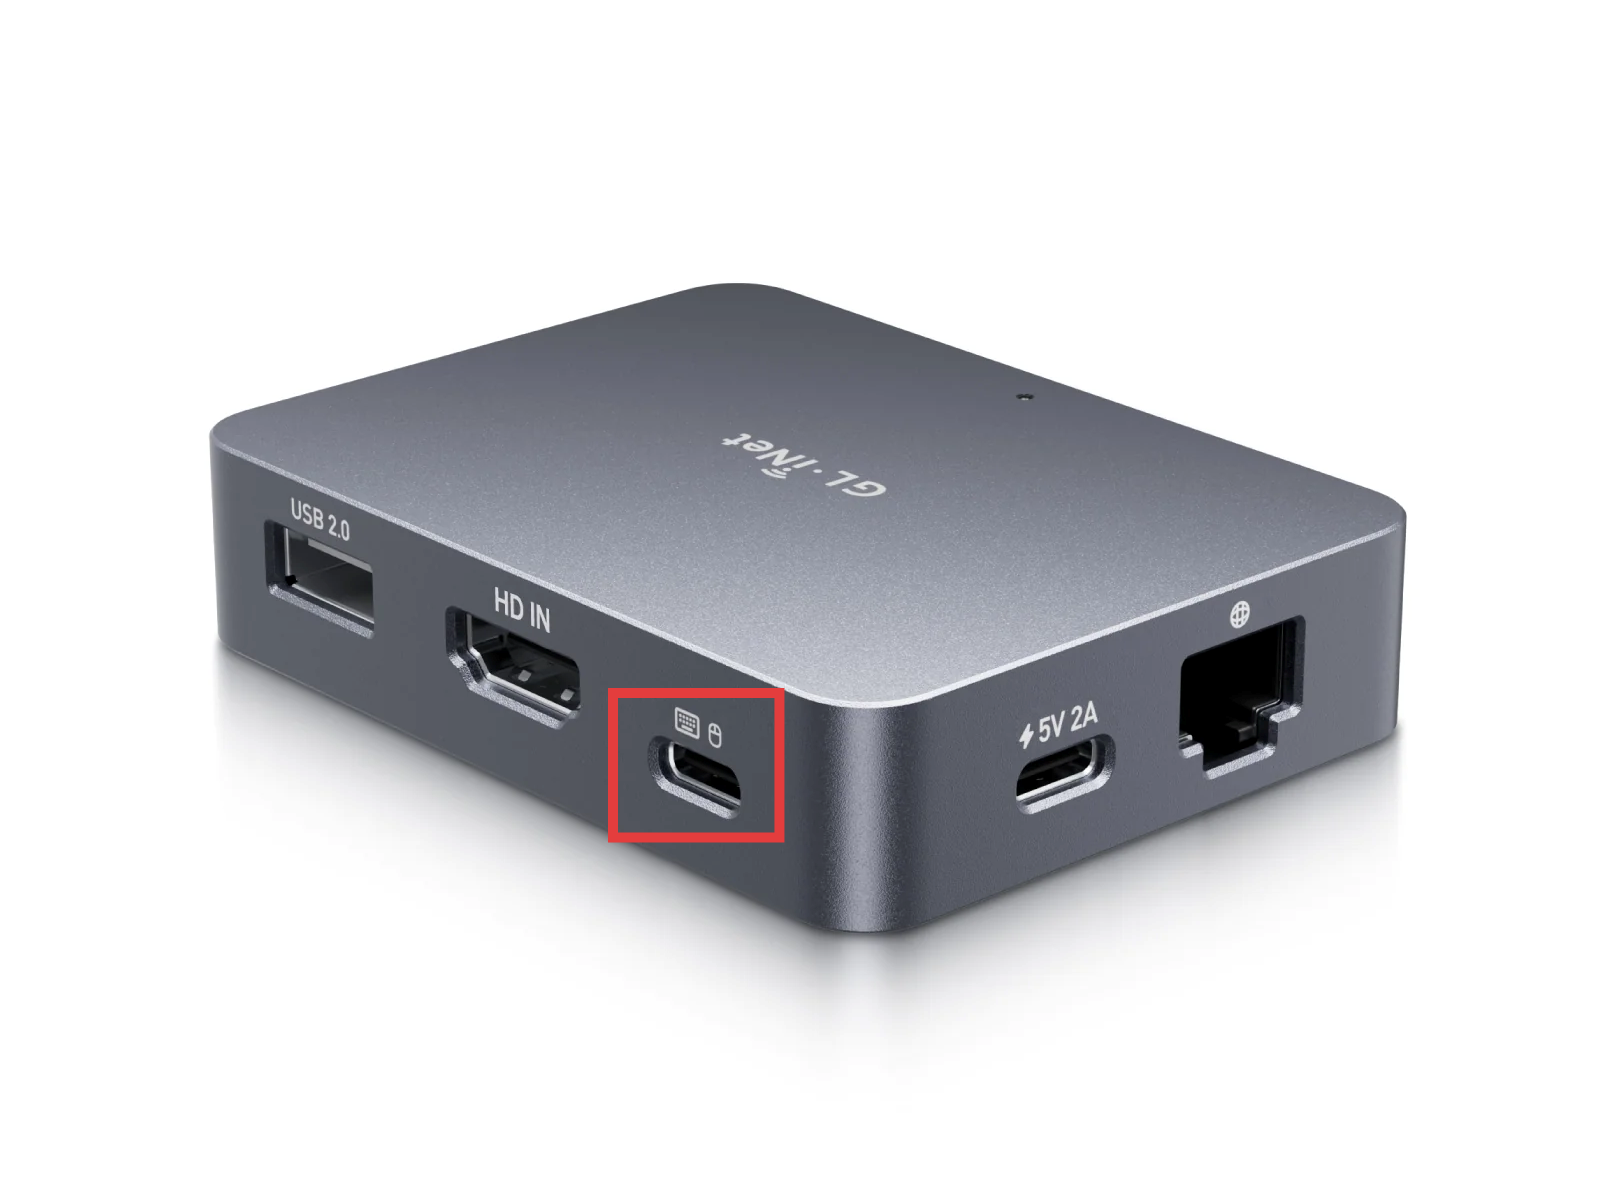
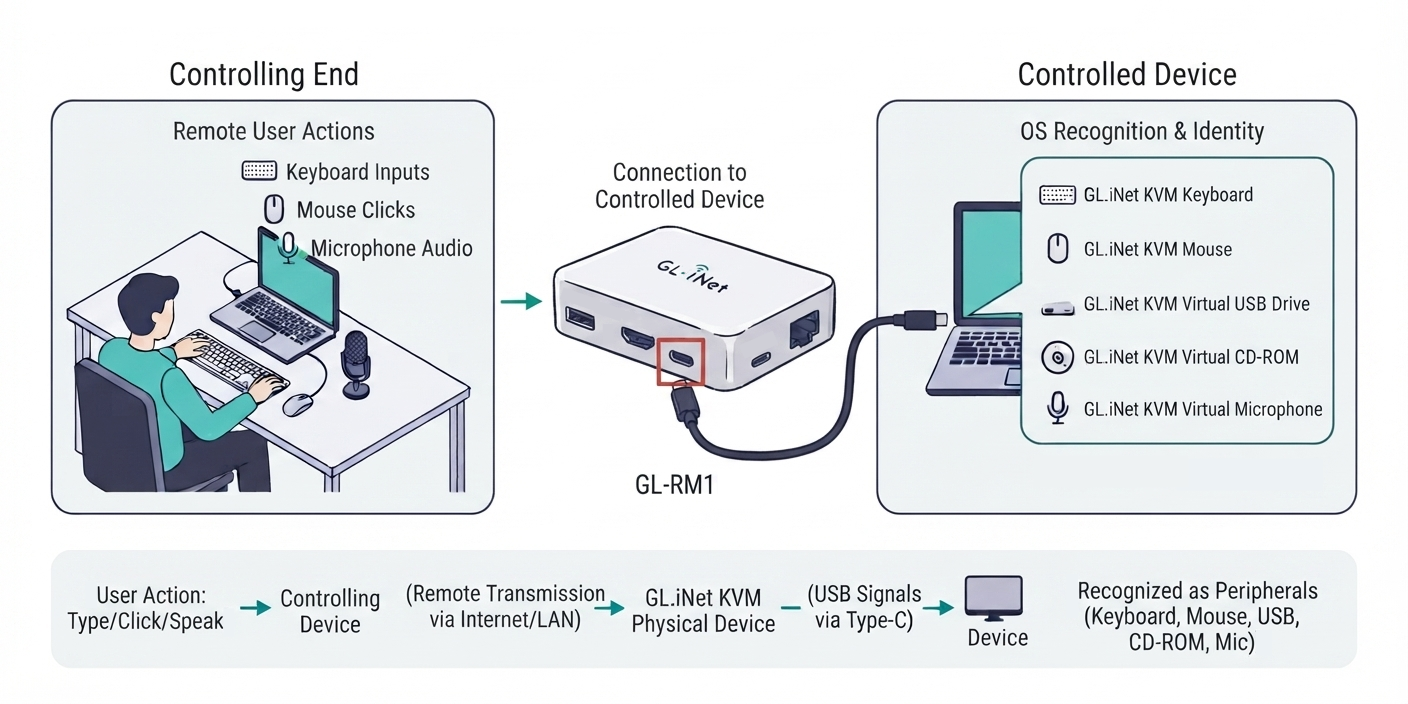
Typically, the KVM is equipped with a Type-C port, as shown below, which connects to the controlled device's USB port to simulate peripheral devices (e.g., keyboard, mouse, USB drive, microphone) and CD-ROM.
When you click the mouse, type on the keyboard, or use the microphone on the controlling end, these signals are remotely transmitted to the physical KVM device. The KVM then forwards them to the controlled device through its Type-C port.
Therefore, the KVM is usually regarded as a composite device, emulating several peripheral devices connected to the controlled device's USB ports.
Note
If the input method/keyboard of the controlling device is not consistent with that of the controlled device, some symbols/letters may have different positions on the keyboard, which can cause the output of the controlled end to be inconsistent with the input of the controlling end. Click here for details.
Why change device identity
Since GL.iNet KVM works as a combined emulator of several devices for user interaction, when connected to the controlled device, it is recognized as a set of multiple devices, including a monitor, several USB devices such as mouse and keyboard, and USB drive.
By default, the device identity is GLKVM, thus it will be displayed as GLKVM or Glinet Composite Device in the system settings of the controlled device. This usually does not cause inconvenience, as these settings are only visible to users themselves.
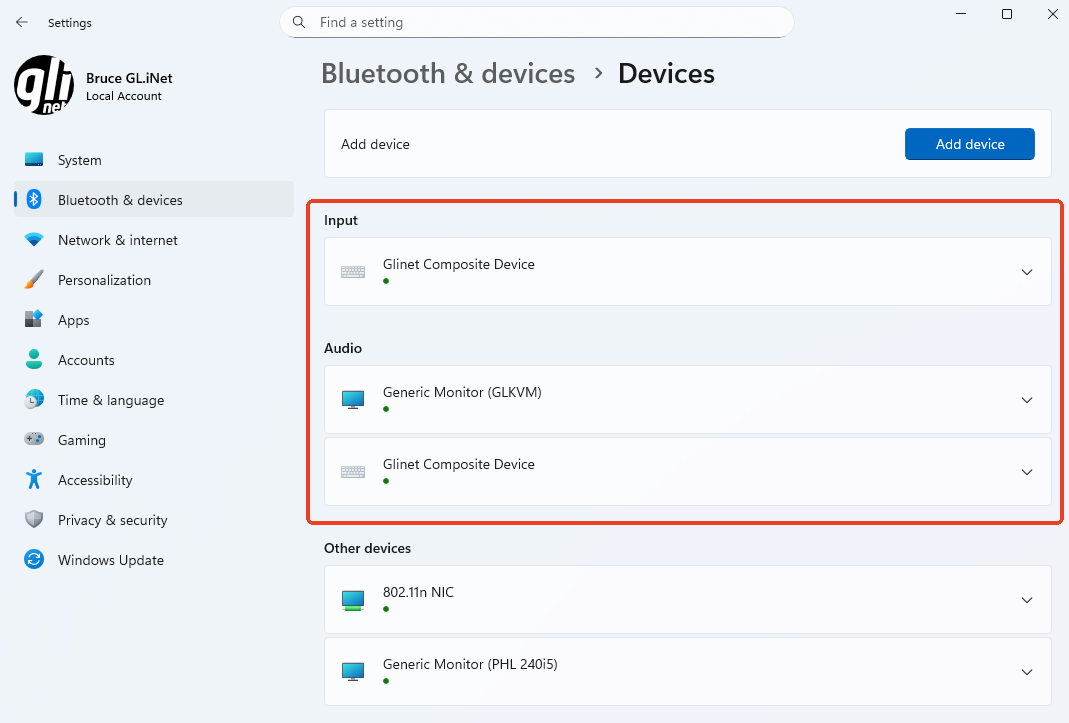 (Bluetooth & devices settings)
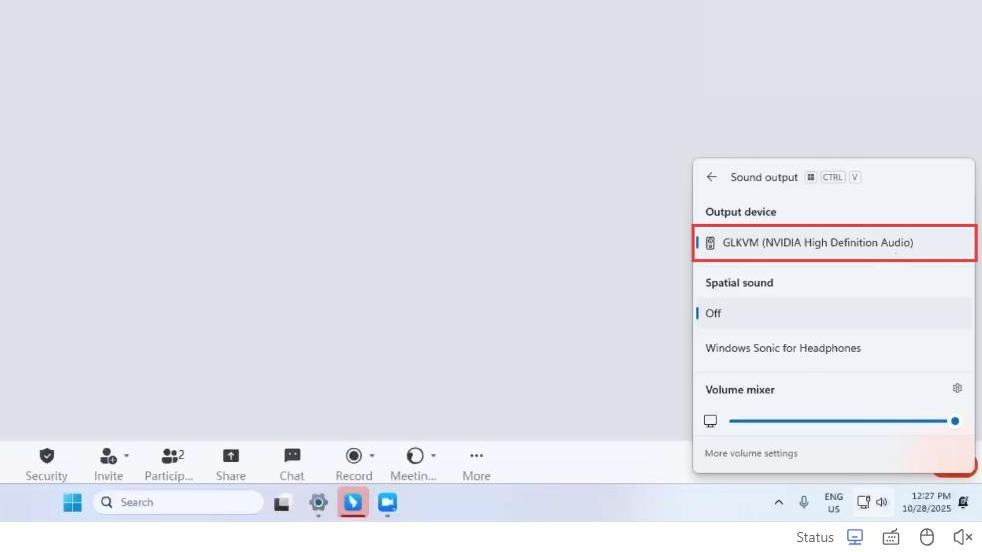 (Speaker settings)
However, users may need to change KVM's device identity in the following scenarios.
Scenario 1: Avoiding alerts from monitoring software on office computer
When the controlled device is an office computer, it may have built-in or installed monitoring software. These tools may mark KVM remote access as abnormal activity, trigger alerts, and even report to IT systems.
Changing the KVM's device identity can help prevent such unnecessary notifications, while maintaining normal remote control functionality.
Scenario 2: Hiding KVM remote usage during online meeting screen sharing
During online meetings that require screen sharing, the controlled device's system settings (e.g., Bluetooth & devices) may display the KVM's default identity. This may expose your KVM remote access usage to meeting participants, which could be undesirable for some users.
Changing the device identity ensures the KVM remains hidden in shared screens.
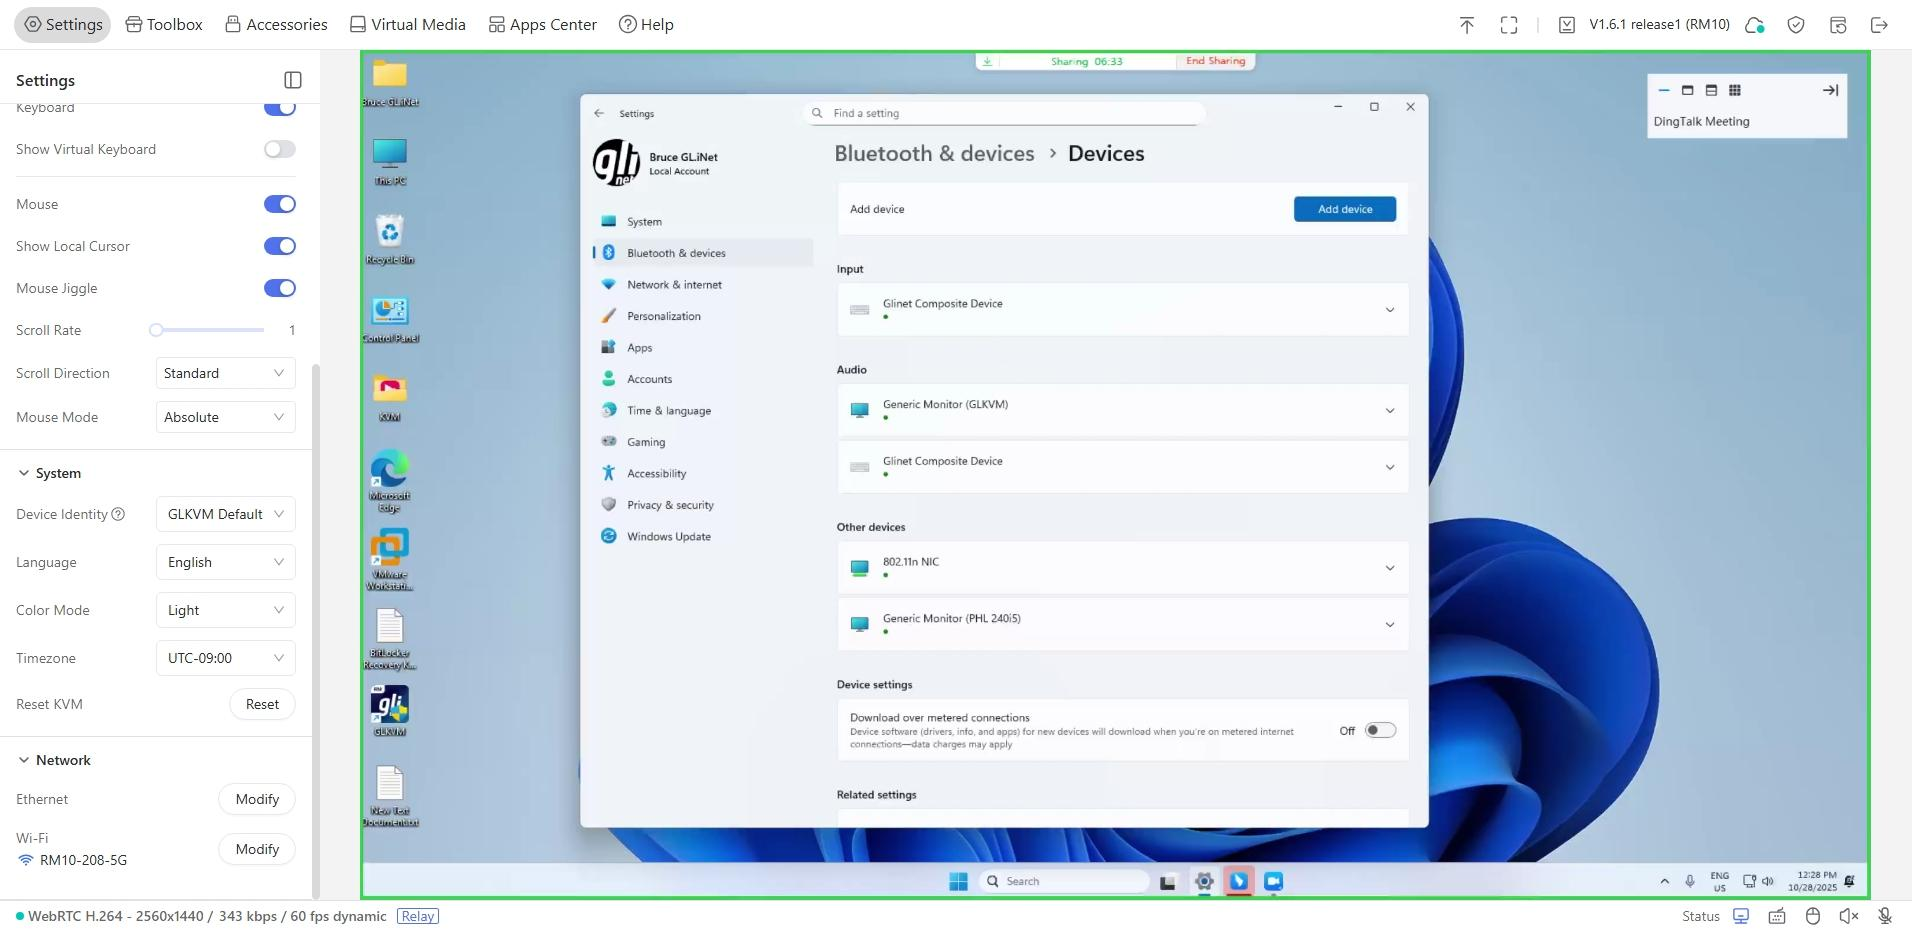 (screen sharing)
Scenario 3: Resolving unresponsive mouse/keyboard control on the controlled device
If you fail to control the mouse and keyboard on the controlled device through KVM, try modifying the KVM's device identity to avoid compatibility issues, enabling smooth signal transmission between the KVM and the controlled device.
Limitations of Device Identity Customization
Behavioral Detection Software May Still Identify KVM
Regardless of how you customize the USB device identity, the USB structure of the virtualized devices (keyboard, mouse, microphone, camera, etc.) may still appear suspicious to behavioral detection software.
The fundamental issue is that all these virtualized peripherals belong to a single composite USB device. While a composite device containing only a keyboard and mouse is relatively common — many wireless keyboard/mouse receivers (such as Logitech Unifying) present a similar structure — a single composite USB device that simultaneously includes keyboard, mouse, and microphone is extremely rare in practice.
Therefore, changing the device identity alone may not be sufficient to evade detection by advanced monitoring or behavioral analysis software.
How to change device identity
Firmware v1.10 and above
-
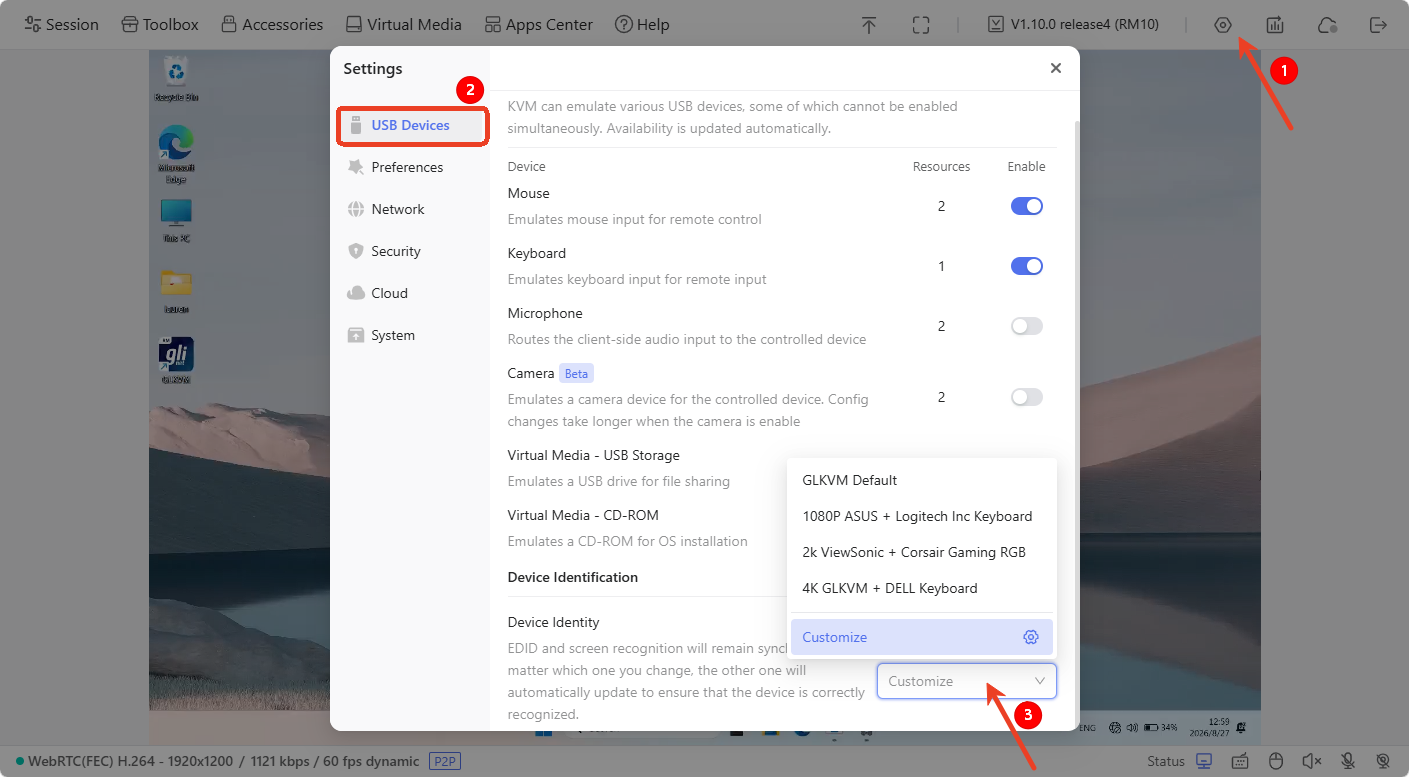
Log in to your KVM and navigate to Settings in the upper-right. In the USB Devices, find the Device Identity and customize it.
-
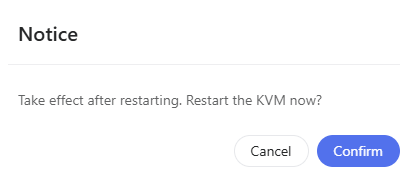
In the pop-up window, click Confirm to restart.
-
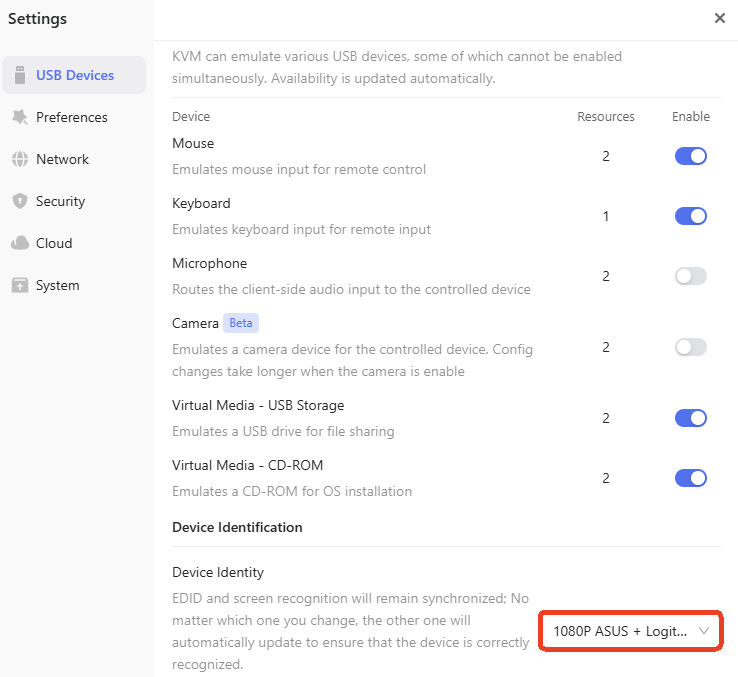
After restarting, the Device Identity is changed on the KVM console.
-
Verify device identity. The following example uses Windows 11 Pro as the controlled device to verify device identity.
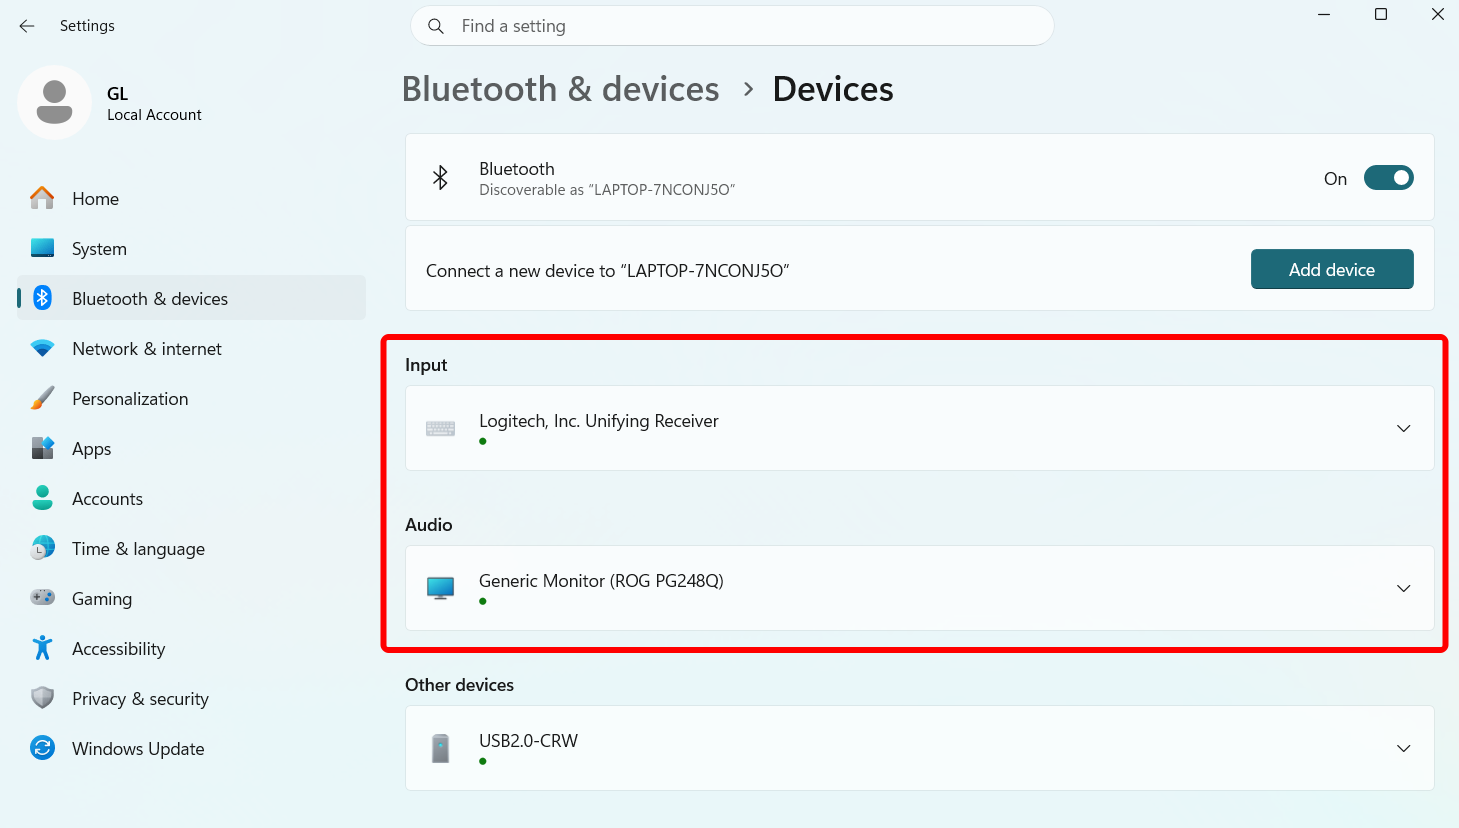
On the controlled device, go to Settings -> Bluetooth & devices. The input and audio devices have been recognized as the ones you set.
Firmware v1.9 and earlier
-
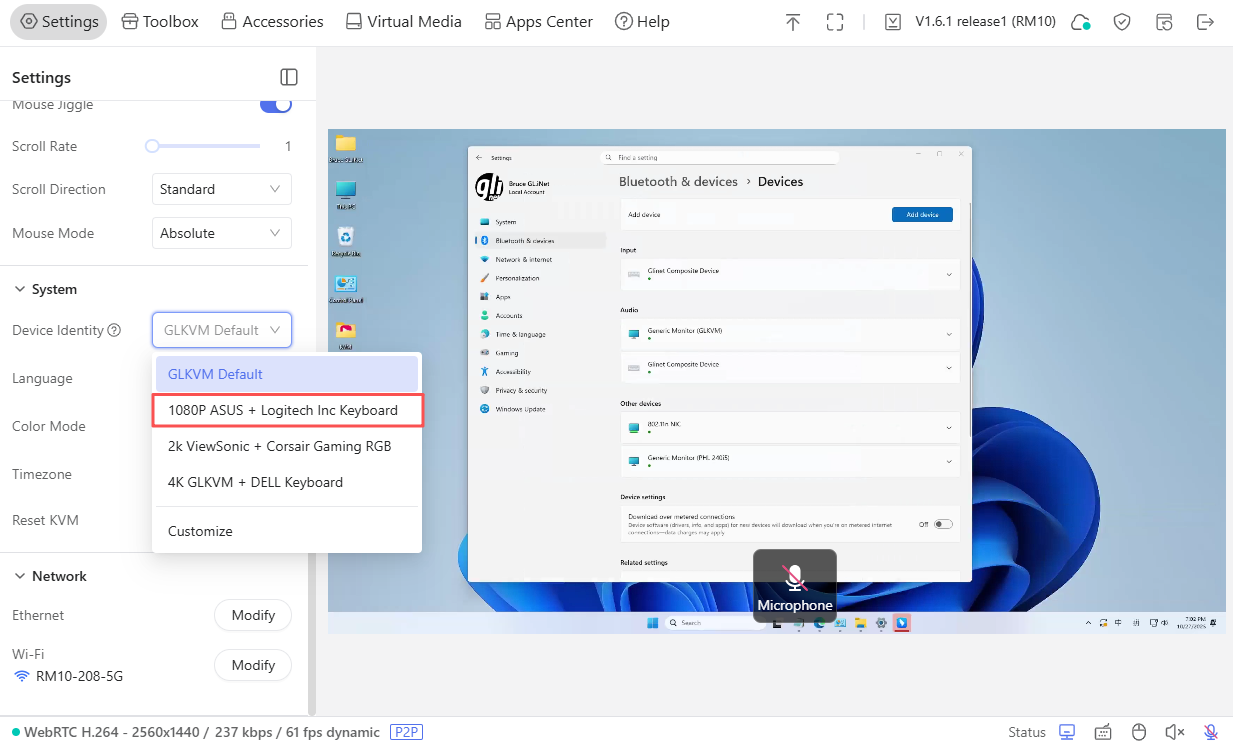
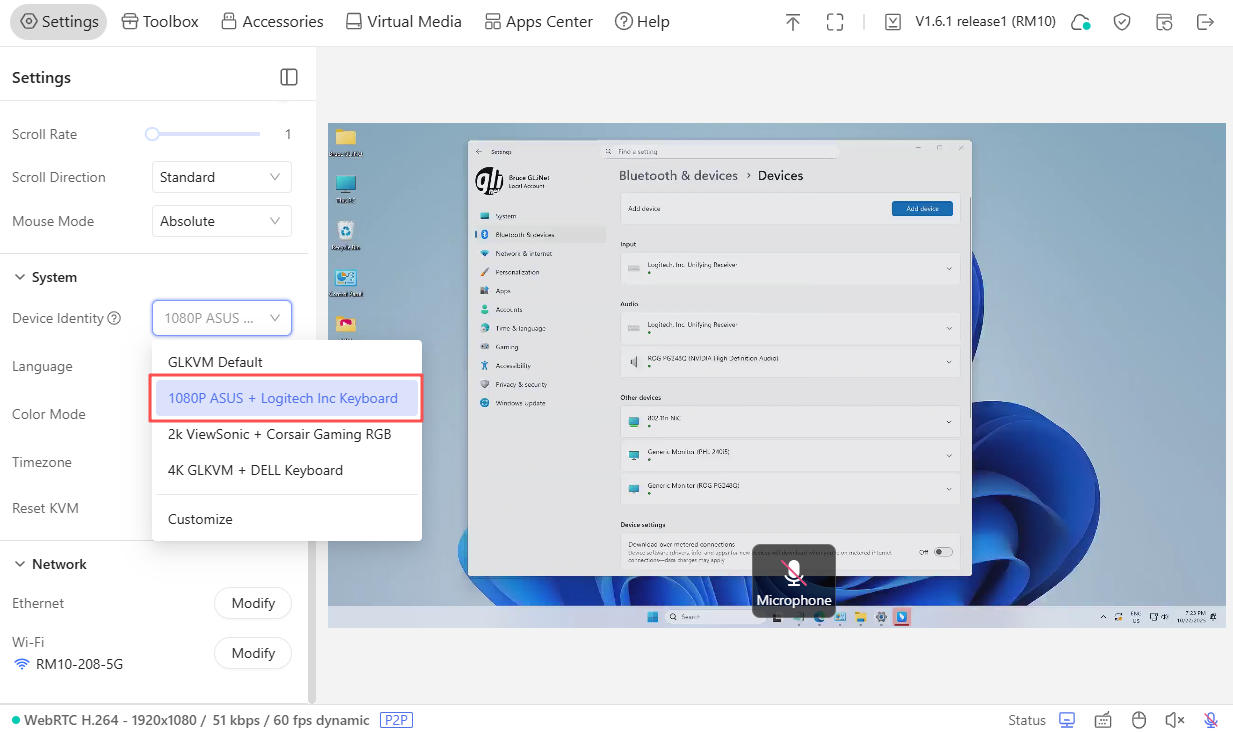
Log in to your KVM, and navigate to Settings -> System -> Device Identity. Select a preset identity from the drop-down list.
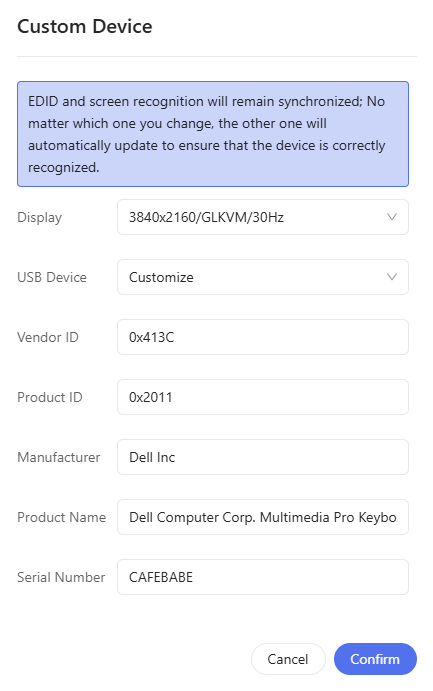
Or click on Customize and fill in the parameters you want in the pop-up window.
-
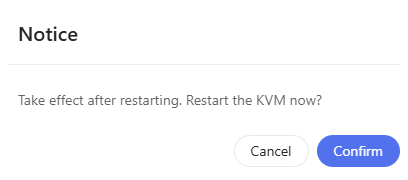
In the pop-up window, click Confirm to restart.
-
After restarting, the Device Identity is changed on the KVM console.
-
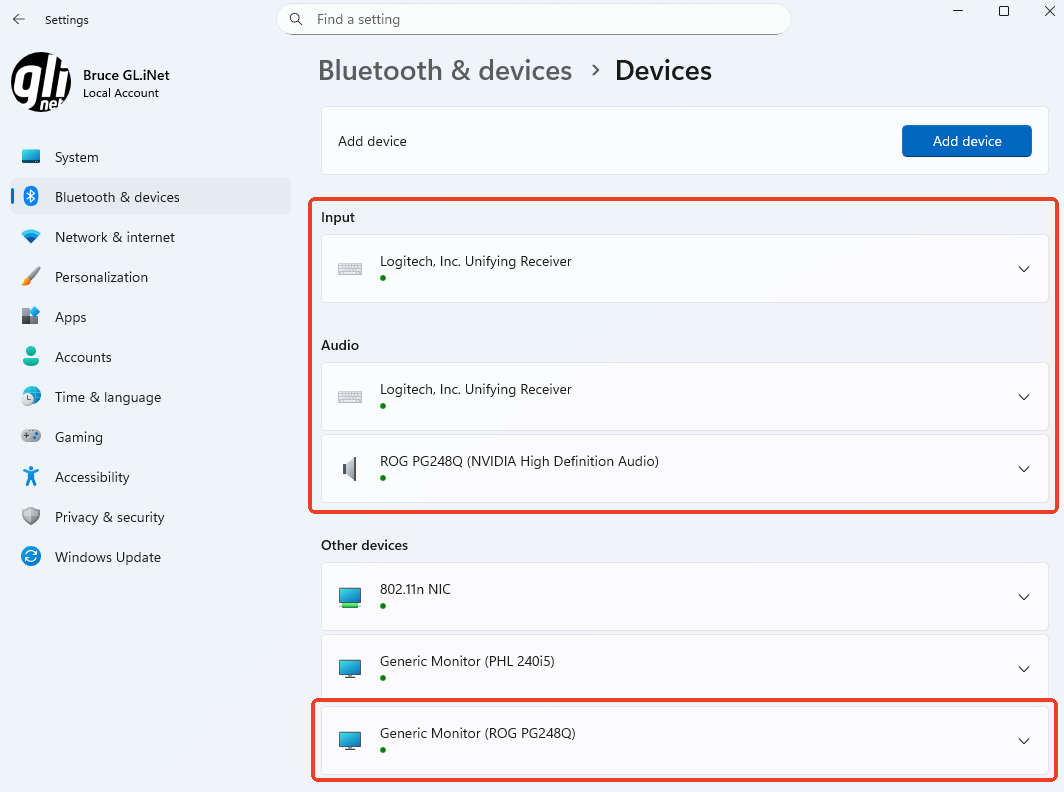
Verify device identity. The following example uses Windows 10 Pro as the controlled device to verify device identity.
On the controlled device, go to Settings -> Bluetooth & devices. The input and audio devices have been recognized as the ones you set.
Still have questions? Visit our Community Forum or Contact us.