How do I factory reset my GL.iNet KVM?
Method 1: Use the physical reset button
Make sure your KVM is powered on and has finished starting up.
Press and hold the physical RESET button for 8 to 10 seconds, then release it. If your KVM has a reset pinhole, use a pin to press and hold the button inside the pinhole for 8 seconds, then release it. On Comet X (GL-RM4PE), use the switch button on the front panel.
Wait for the KVM to restart automatically. Do not disconnect power during the reset.
Do not hold the reset button while powering on the KVM. Do not use the reset button on the connected computer or the ATX board.
Method 2: Use the local web interface
Connect your computer and the KVM to the same local network. Open the KVM's local IP address in a browser and sign in. See How to access the KVM locally via a web browser.
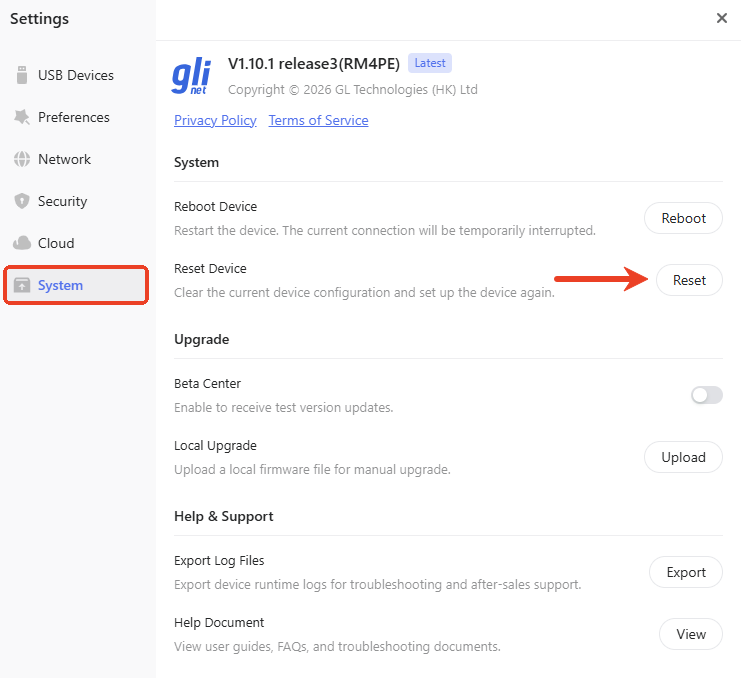
If your KVM is running firmware v1.10 or later, open Settings in the upper right corner and go to System -> Reset Device. Click Reset and confirm, then wait for the KVM to restart automatically. Do not disconnect power during the reset.
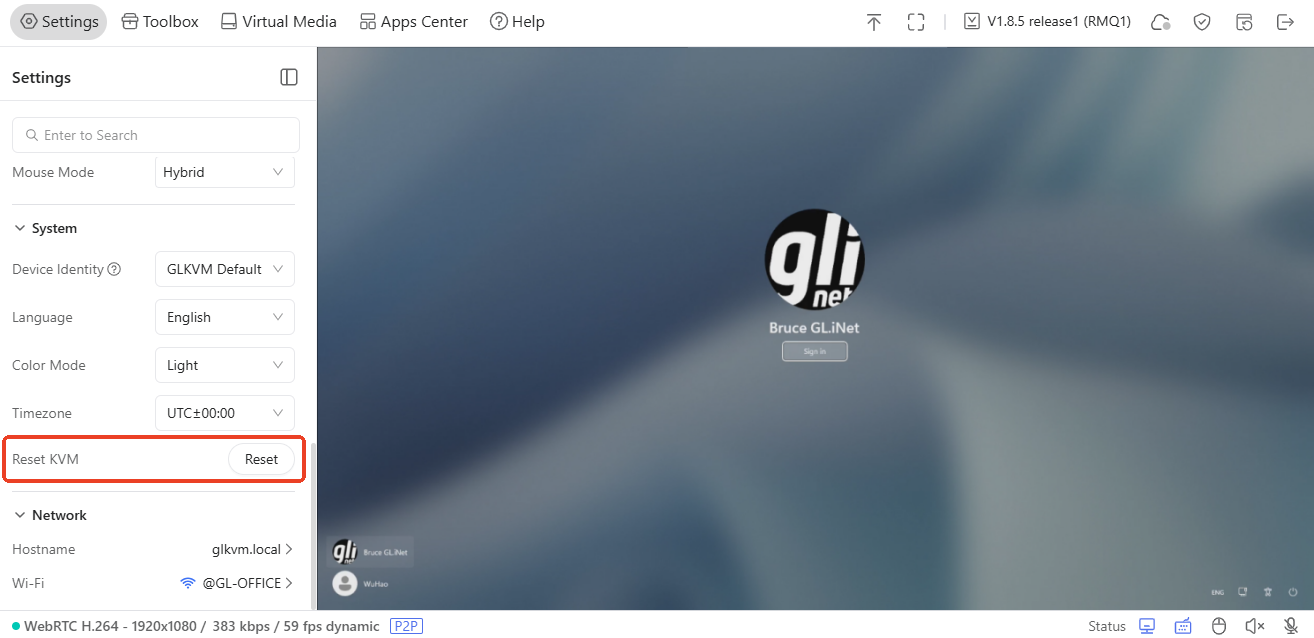
If your KVM is running firmware v1.9 or earlier, open Settings in the upper left corner and go to System -> Reset KVM. Click Reset and confirm, then wait for the KVM to restart automatically. Do not disconnect power during the reset.
After the reset
A factory reset clears the KVM's custom settings. The KVM's local IP address may change after it restarts. Open the local web interface again, follow the initial setup prompts to set an administrator password, and reconfigure the settings you need manually.
Still have questions? Visit our Community Forum or Contact us.