ExpressVPN Dashboard
Note: This guide is only applicable to GL.iNet x ExpressVPN co-branded router Fortify (GL-MT6000).
ExpressVPN is one of the world's leading premium VPN services designed to protect your online privacy, secure your internet connection, and unlock global content. It offers lightning-fast speeds, military-grade encryption, and access to servers in over 100+ countries. Whether you want to stream, browse privately, or protect your data on public Wi-Fi, ExpressVPN gives you a fast & secure experience.
Fortify (GL-MT6000) is a co-branded router jointly released by GL.iNet and ExpressVPN. Every unit comes with a complimentary one-year ExpressVPN subscription. Users can redeem the subscription and bind their accounts directly on the router's web Admin Panel. Once activated, all traffic passing through the router will leverage ExpressVPN's high-speed network and robust encryption to protect your entire network connection and online privacy.
This guide walks you through redeeming the 12-month ExpressVPN plan within the router's web Admin Panel. It also covers customizing VPN policies based on your usage scenarios and requirements, helping you effortlessly enjoy encrypted, secure and high-speed internet connectivity.
Redeem ExpressVPN Plan
Log in to the Fortify's web Admin Panel, and navigate to VPN -> VPN Client Profile.
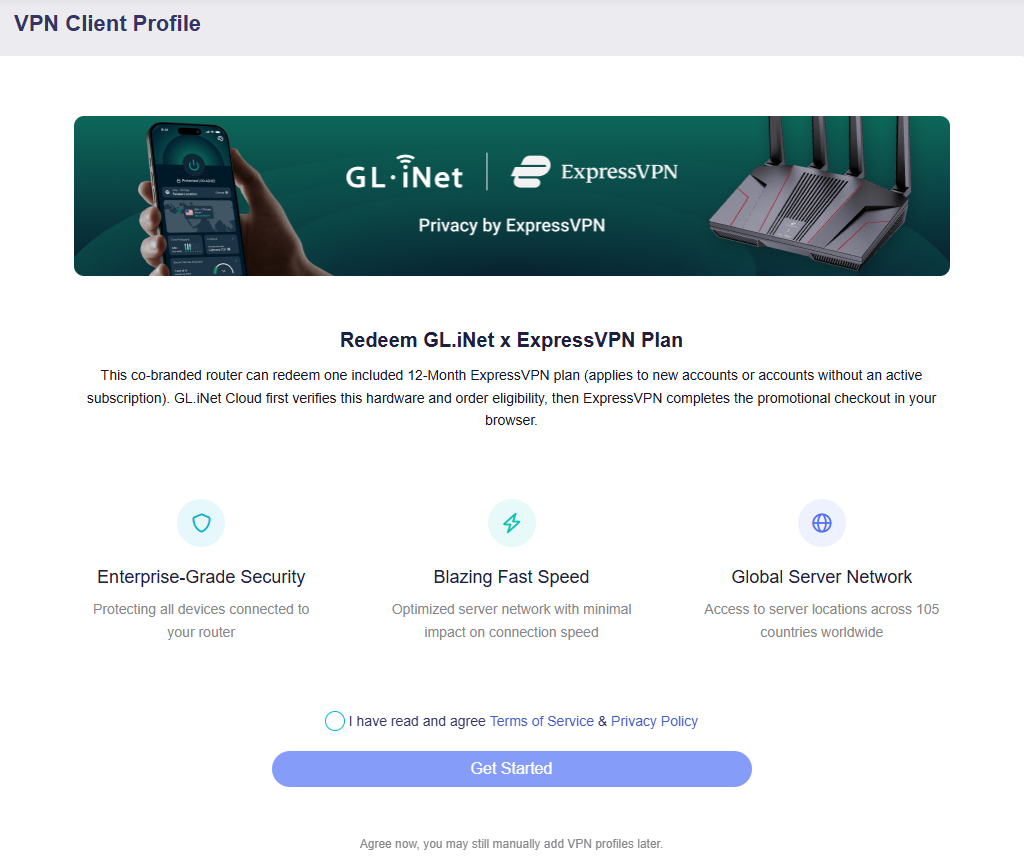
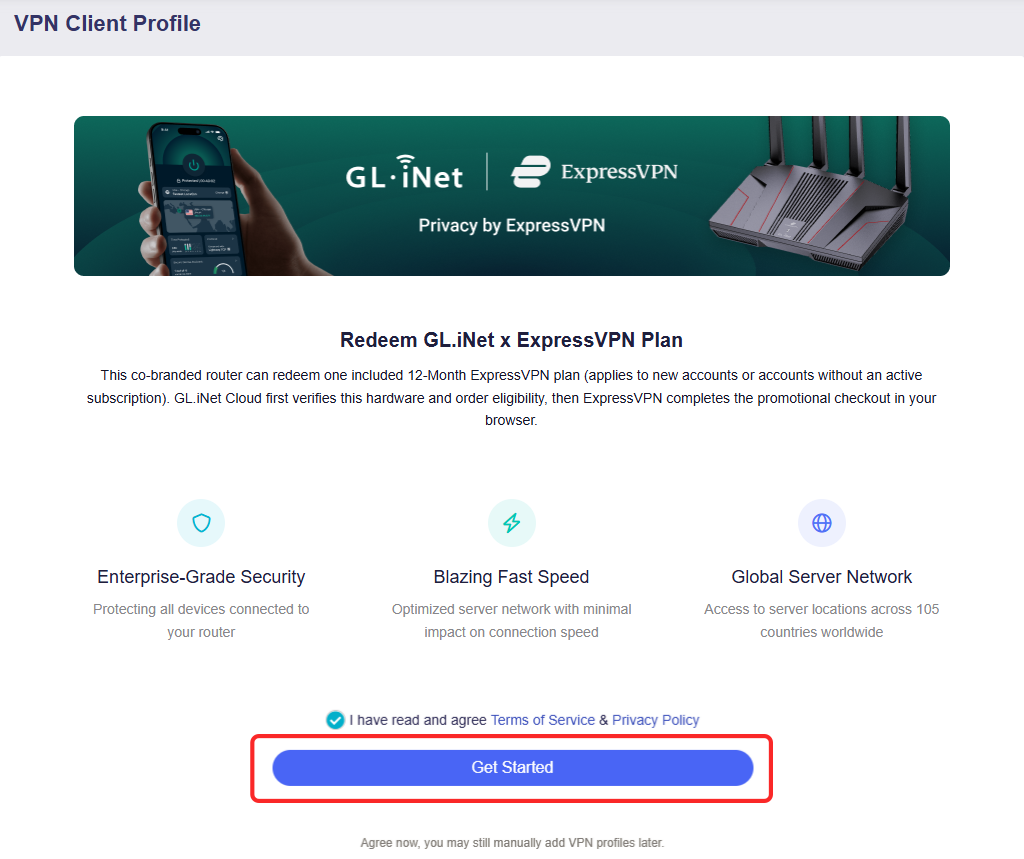
Read and agree Terms of Service & Privacy Policy, then click Get Started.
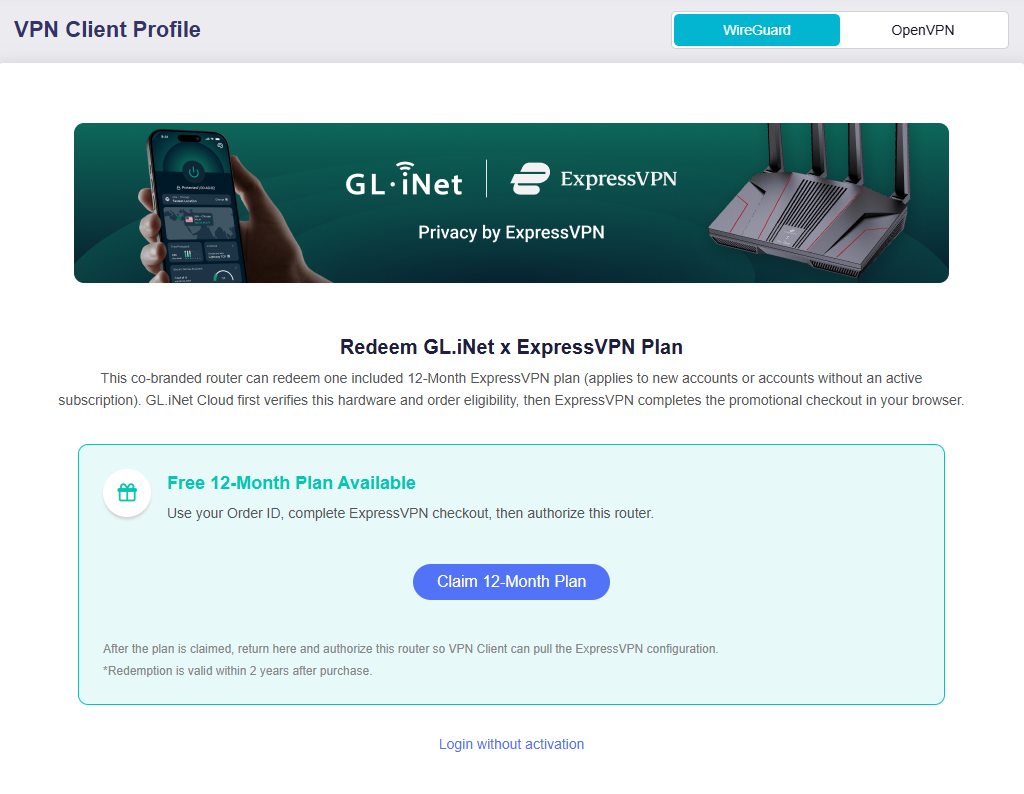
Click Claim 12-Month Plan.
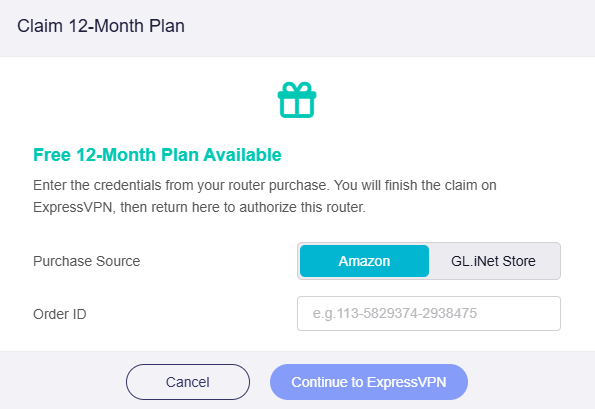
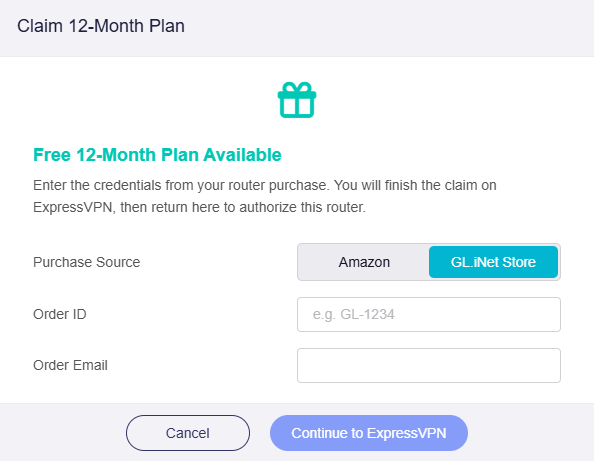
In the pop-up window, enter your Order ID. If you bought this router from GL.iNet Store, Order Email is additionally required. Then click Continue to ExpressVPN.
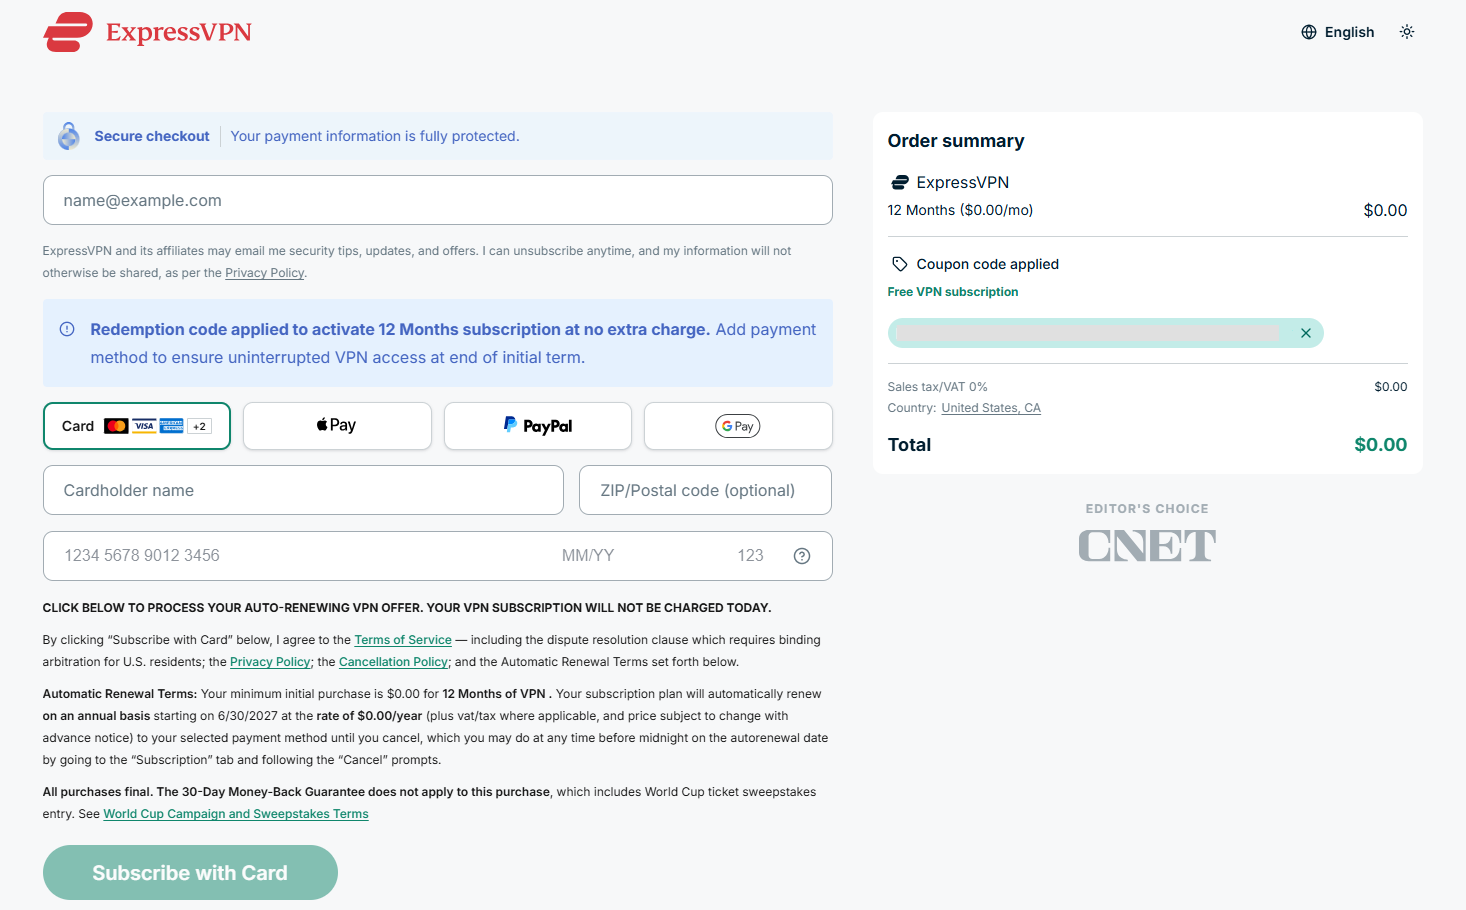
You will be redirected to the ExpressVPN Checkout. A redemption code has been applied on the right to activate 12 Months subscription at no extra charge.
Enter your email address on the top, and add payment method to ensure uninterrupted VPN access at end of initial term. Then click Subscribe with Card.
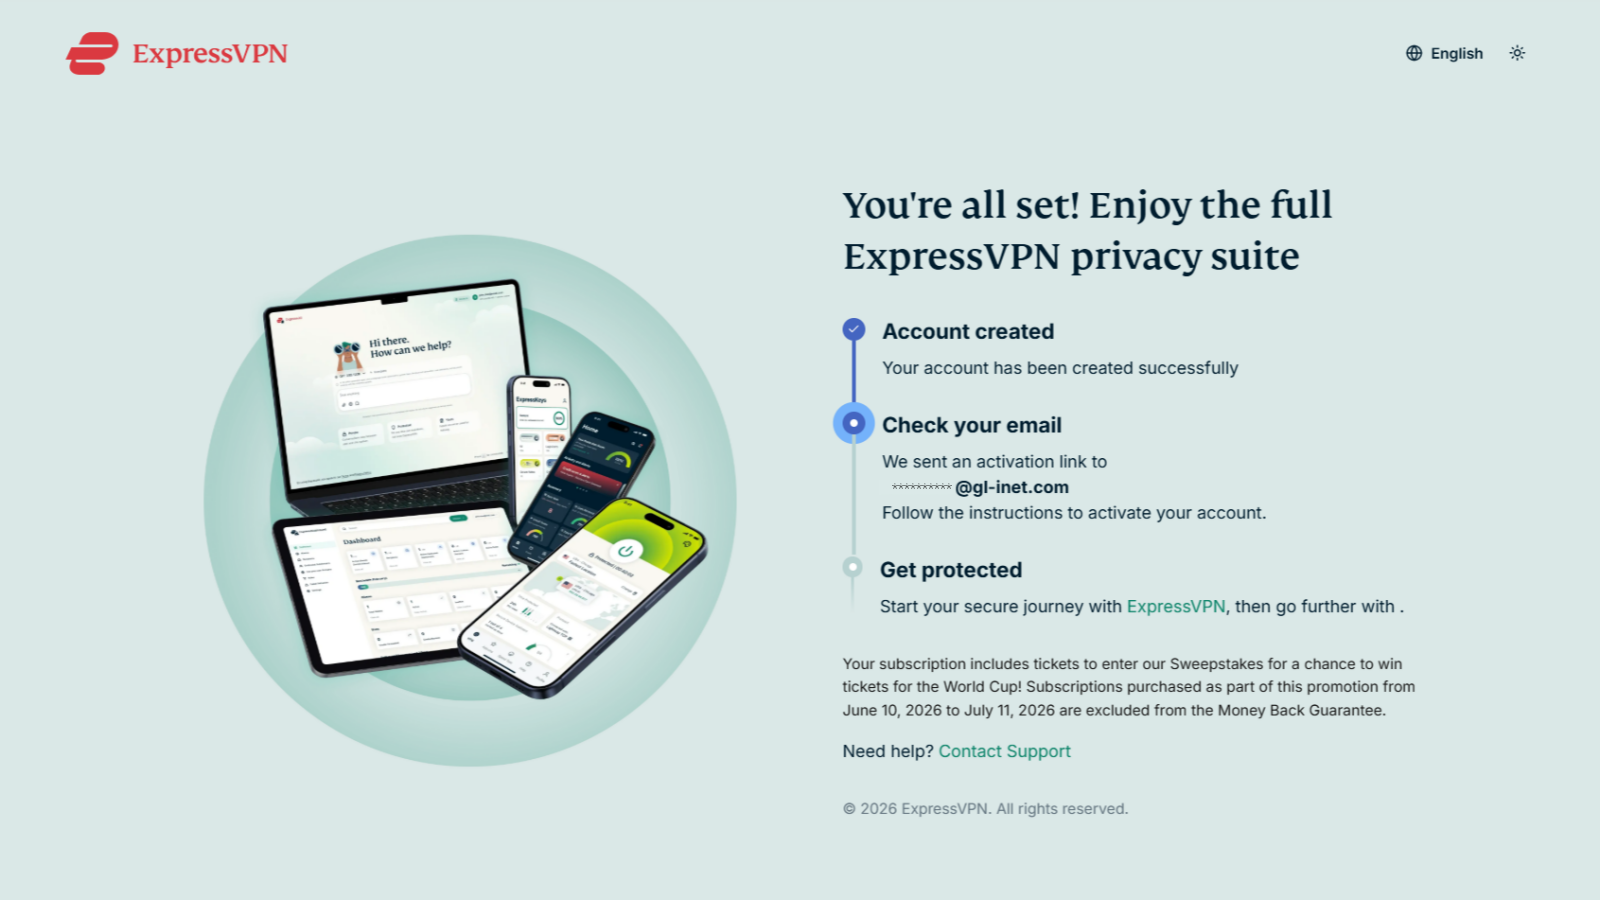
An Activation Link will be sent to your email address. Go to your inbox to activate your ExpressVPN account.
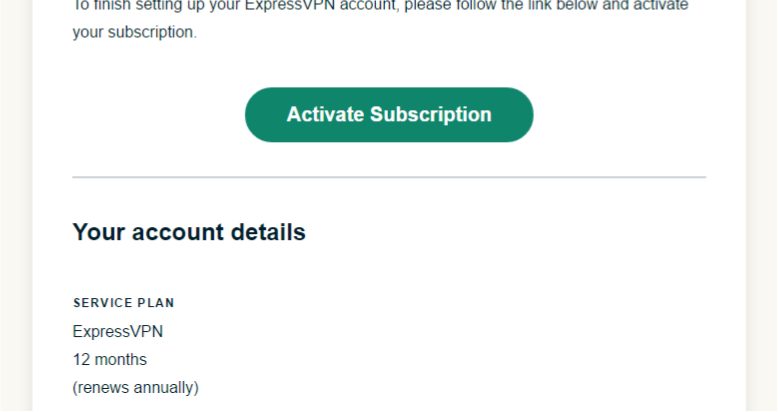
Click the Activate Subscription button in the email.
You will be directed to create your account password, then click Set Password.
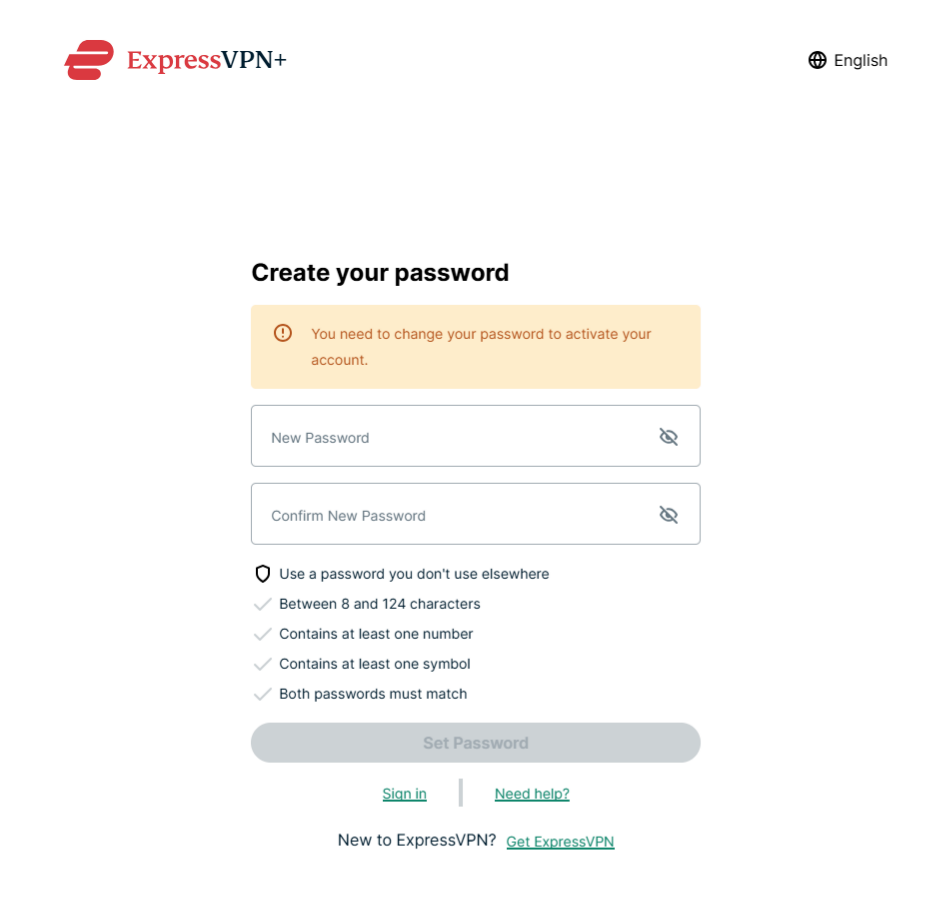
Your account is activated successfully. Please go back to your Fortify router's web Admin Panel to log in with your account.
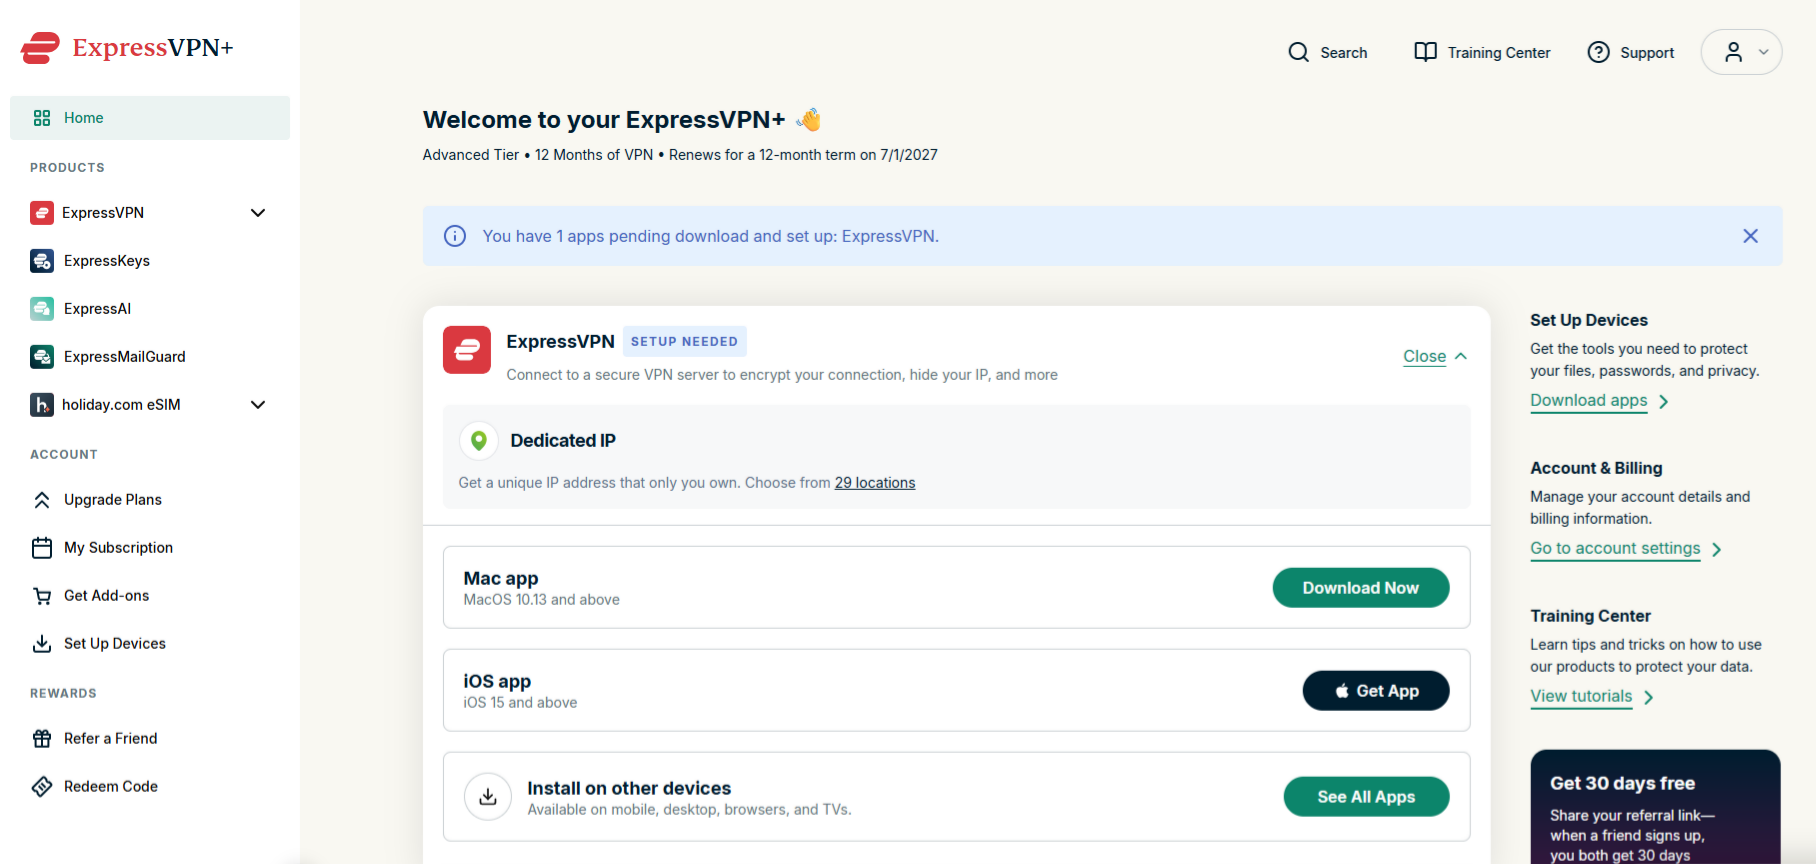
Log in to ExpressVPN
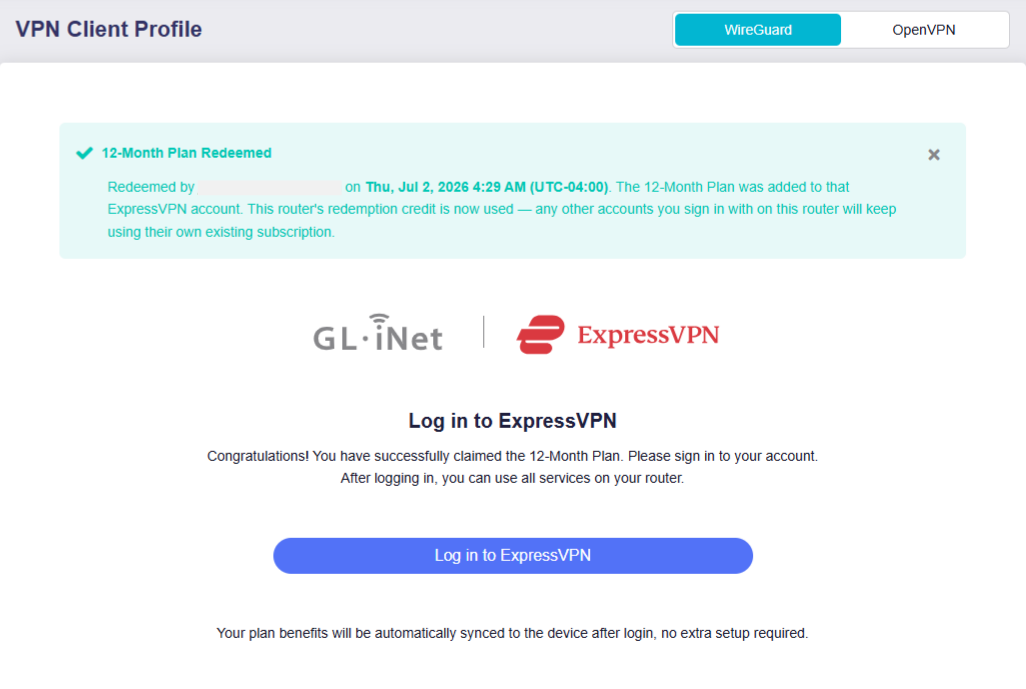
On your Fortify's web Admin Panel, go to VPN -> VPN Client Profile. Click Log in to ExpressVPN.
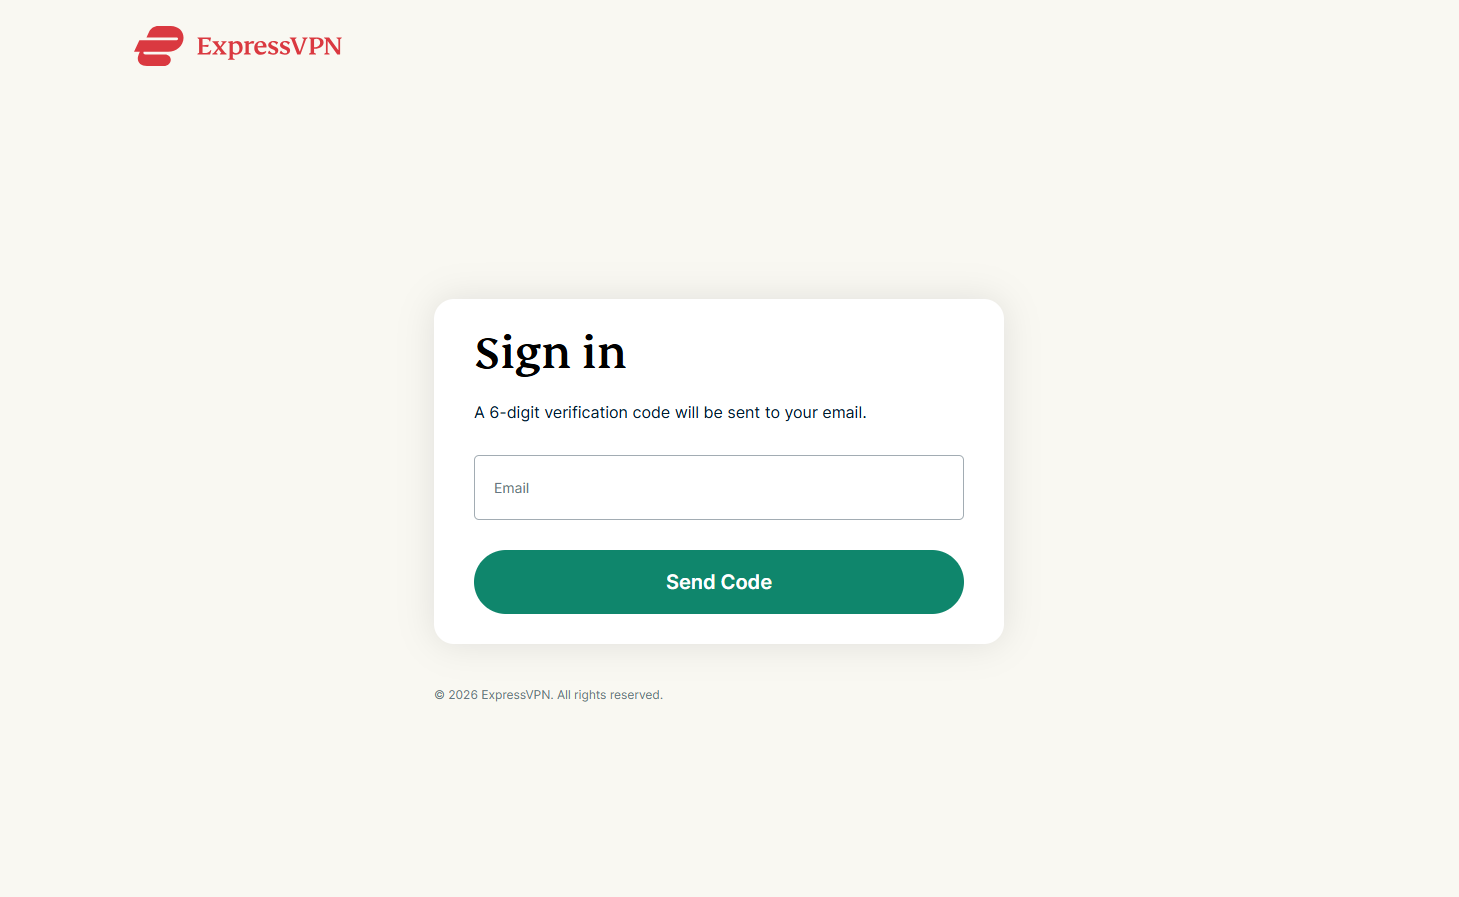
Enter your email and click Send Code. A 6-digit verification code will be sent to your email.
Enter the verification code and click Continue.
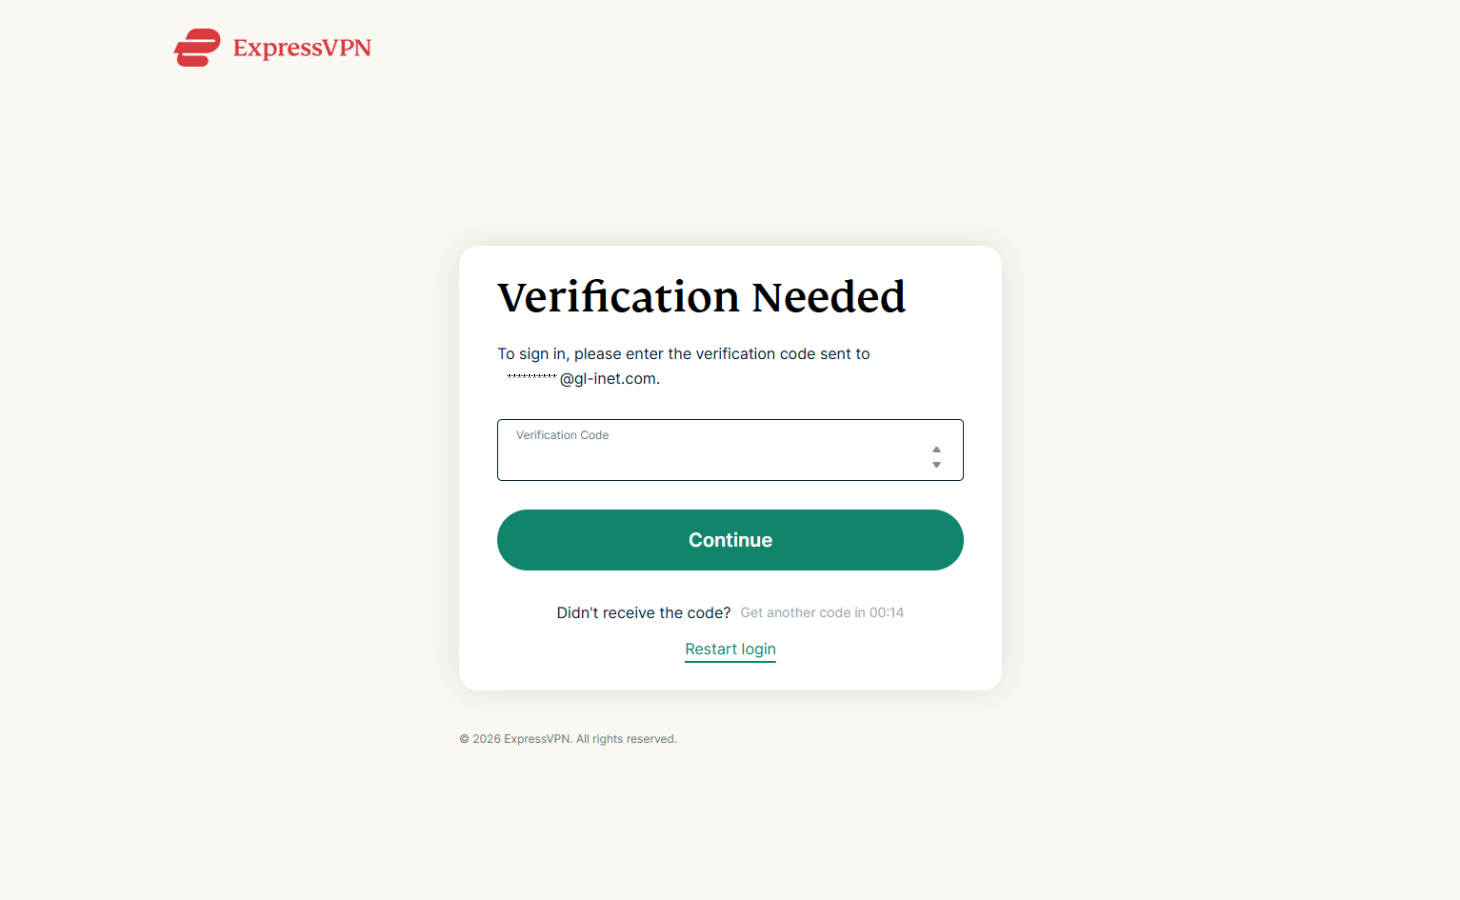
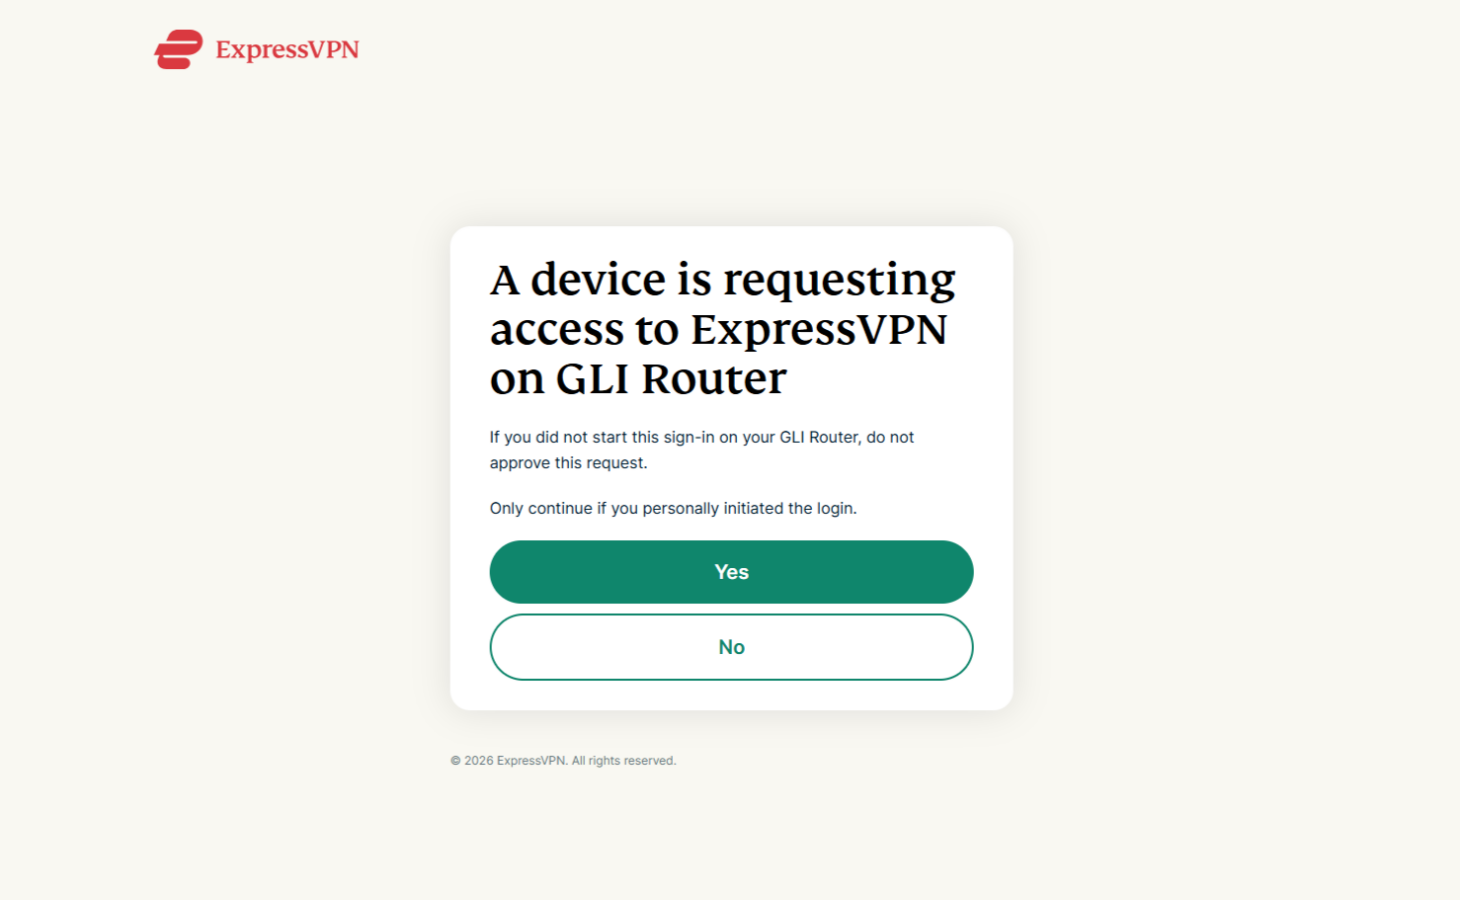
Click Yes to authorize access to ExpressVPN on your router.
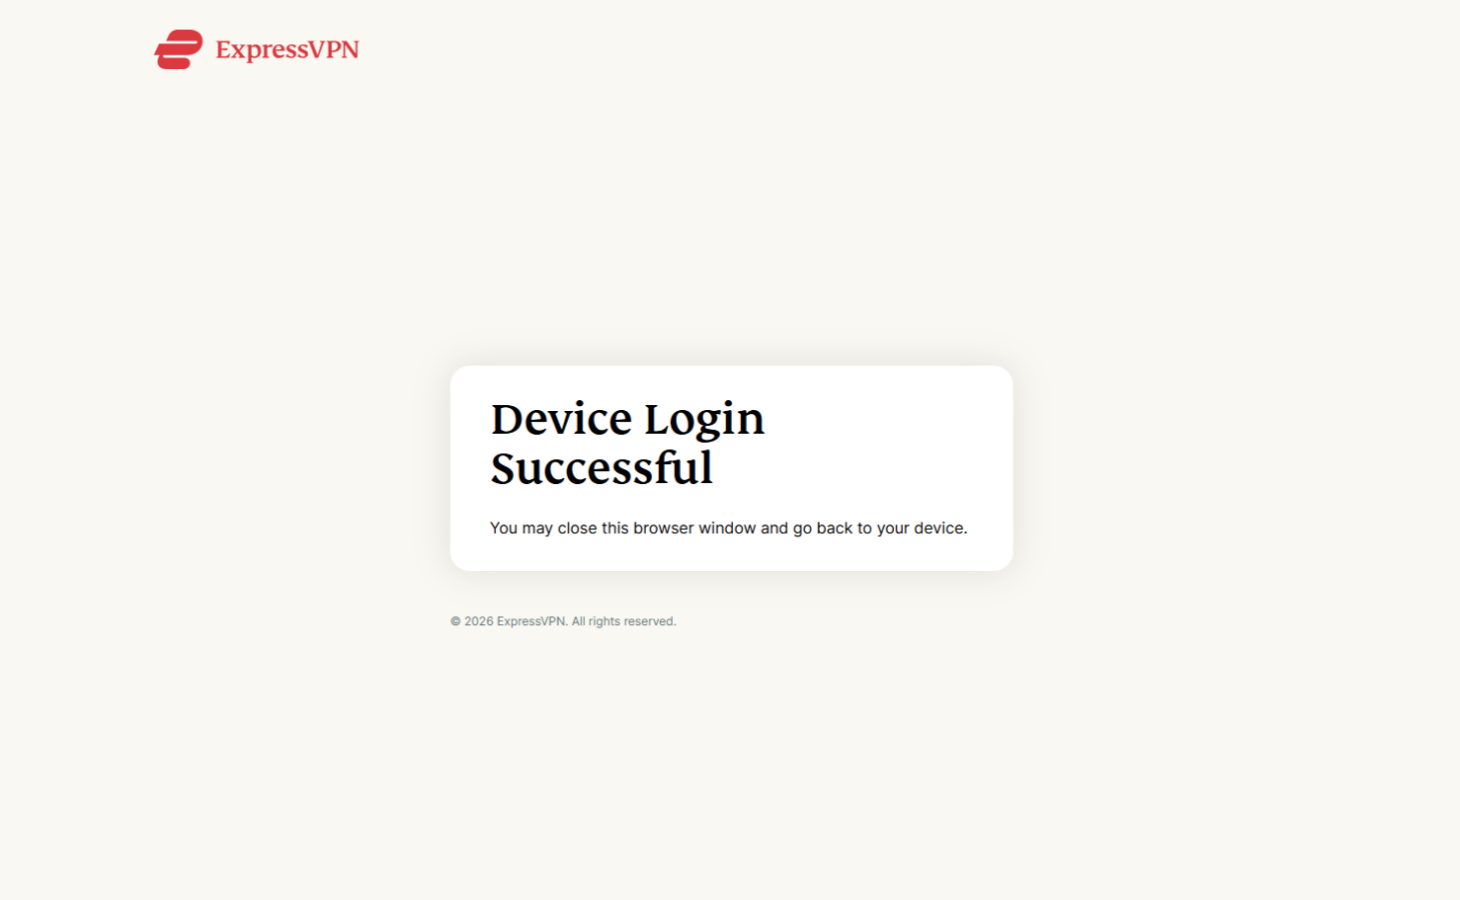
Login successful. You may close this window.
On your Fortify's web Admin Panel, go to VPN -> VPN Client Profile. You are signed in ExpressVPN on this router. Click Go to ExpressVPN Dashboard.
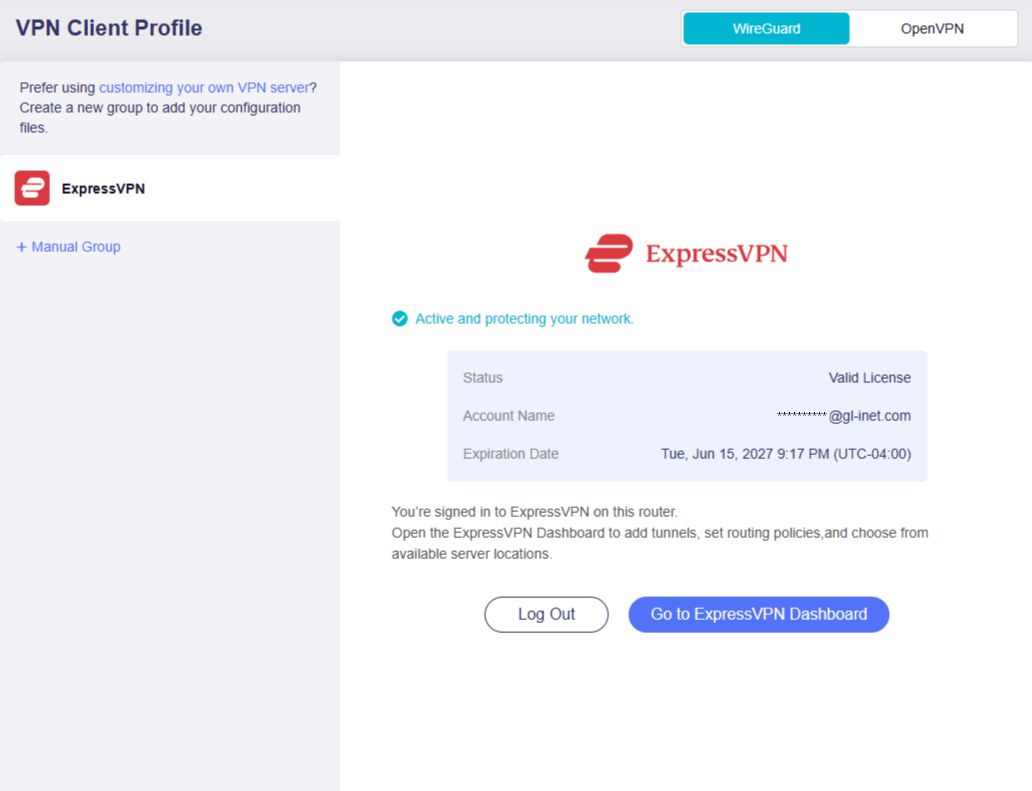
Now you can add VPN tunnels and configure VPN policies according to your needs.
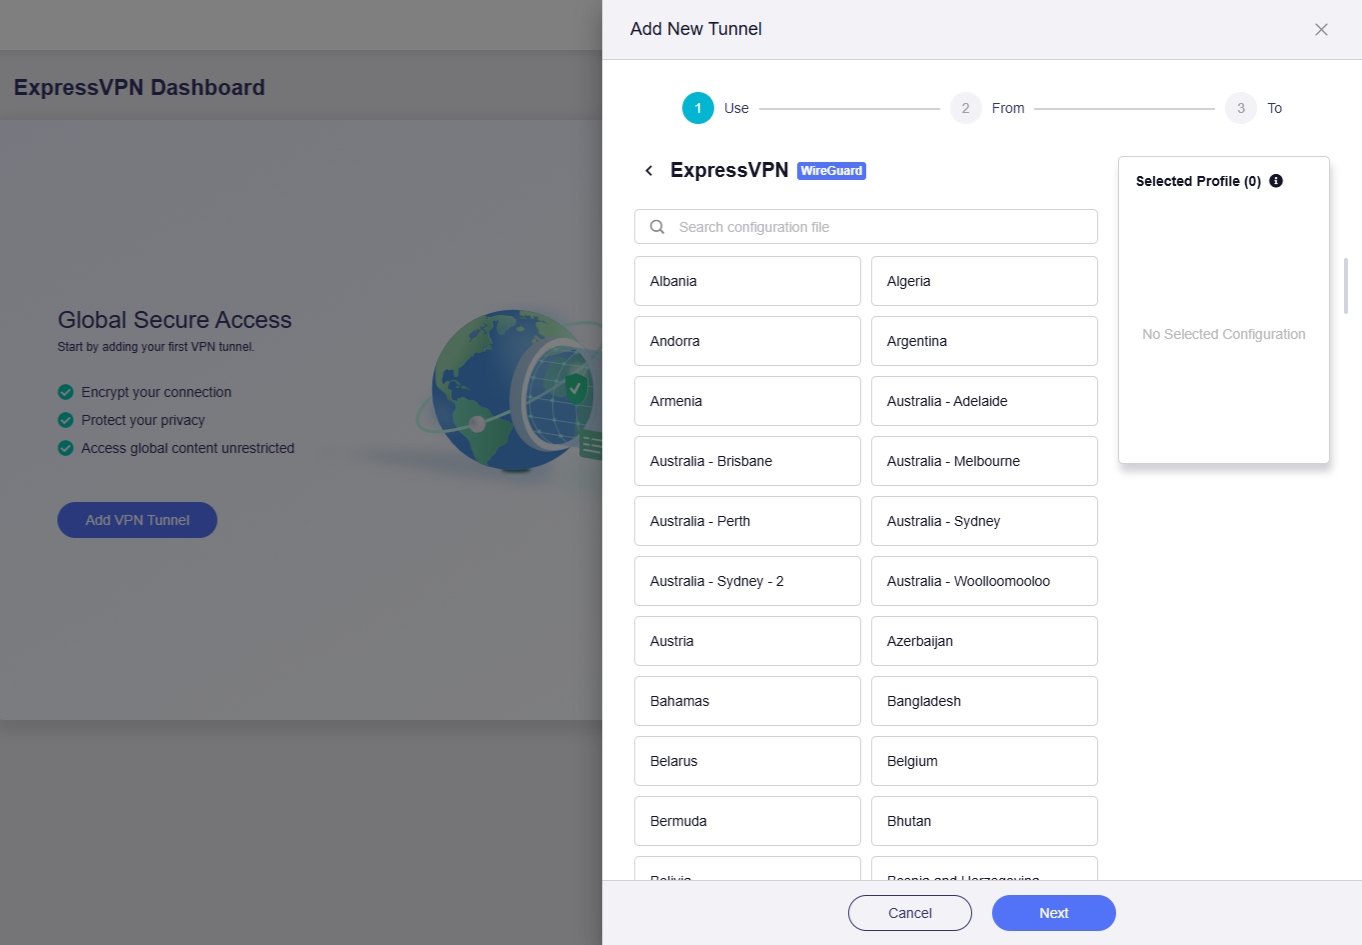
Add VPN Tunnel
General Steps
Follow the steps below to add your VPN tunnel and configure VPN policies. See Case Reference if necessary.
-
On your Fortify's web Admin Panel, go to VPN -> ExpressVPN Dashboard. Click Add VPN Tunnel.
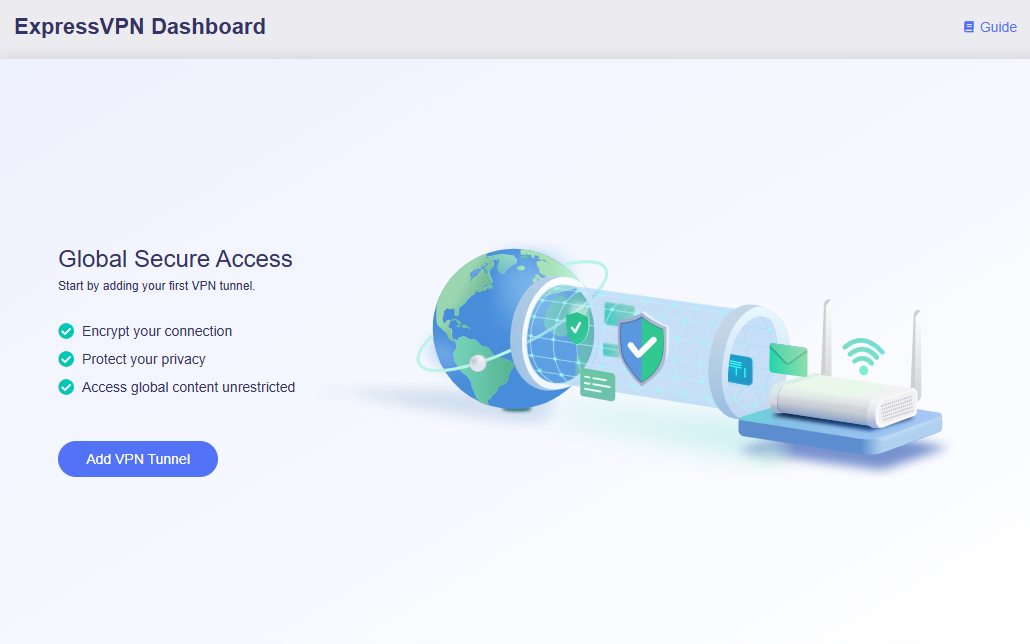
-
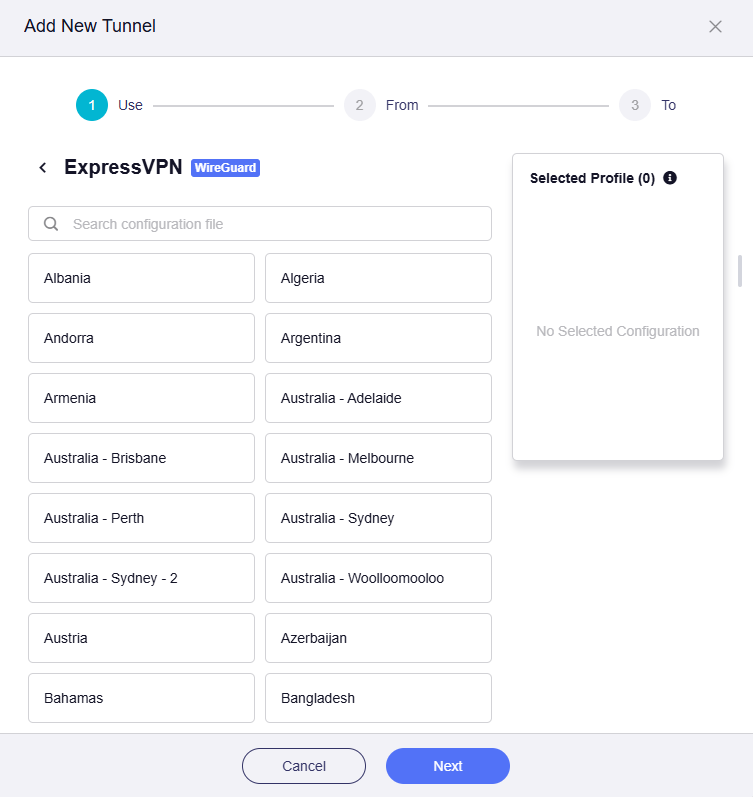
Select VPN profile, then click Next.
You will obtain a list of ExpressVPN profiles. Select one or multiple profiles, and adjust their priority on the right as needed.
Note
When multiple profiles are selected, the tunnel will attempt to connect using each profile in priority order until a connection is successfully established. If all profiles within a single tunnel fail to connect, the system will determine whether to switch to the router's local network (WAN) based on the status of the Kill Switch in the Tunnel Options and All Other Traffic settings.
-
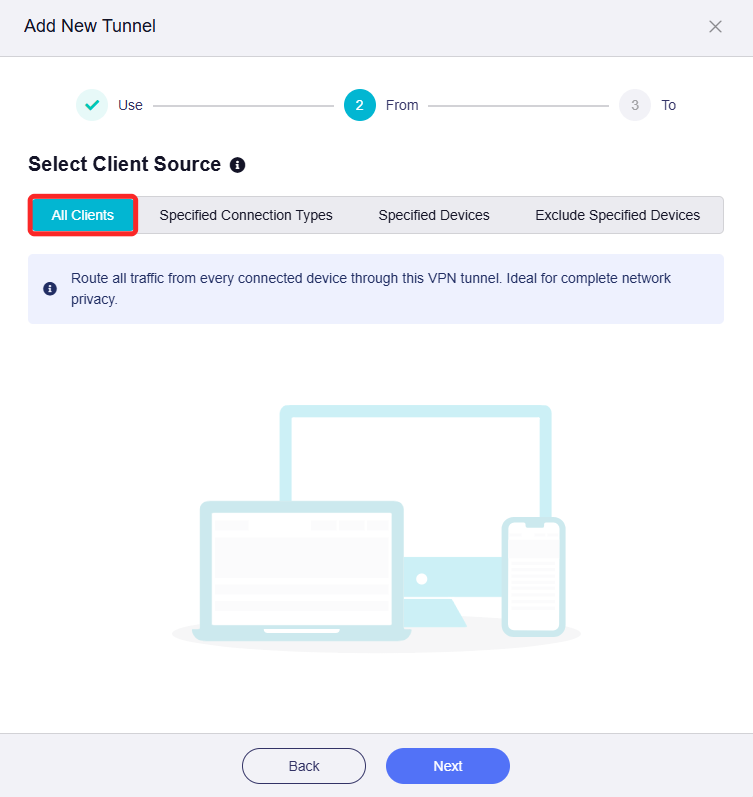
Select client source, then click Next.
There are four options:
-
All Clients: If selected, traffic from all devices will match this rule.
-
Specified Connection Types: If selected, traffic from specified connection types (e.g., LAN subnet, Drop-in Gateway, Guest Network) will match this rule.
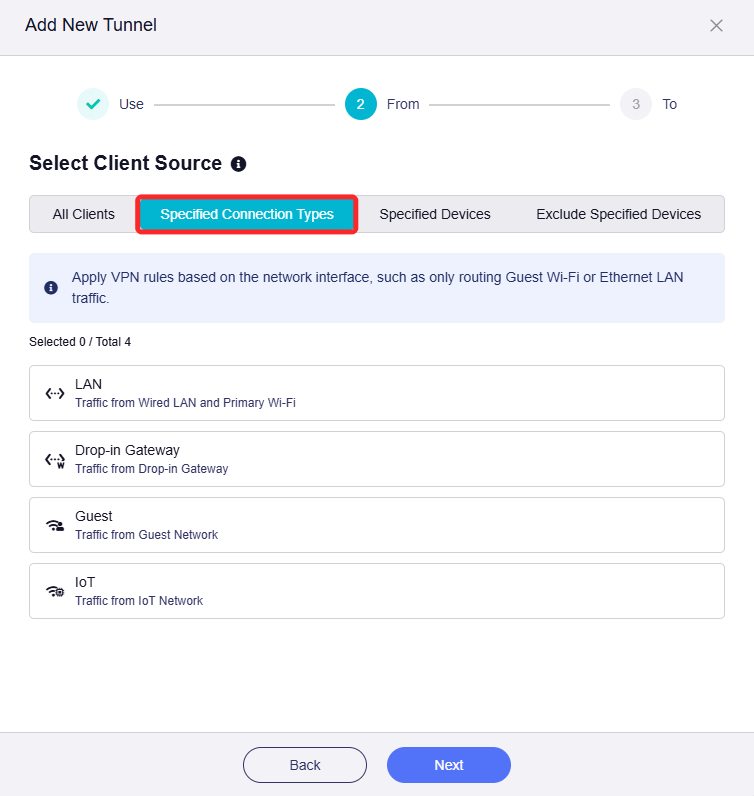
-
Specified Devices: If selected, traffic from specified devices (identified by MAC address) will match this rule.
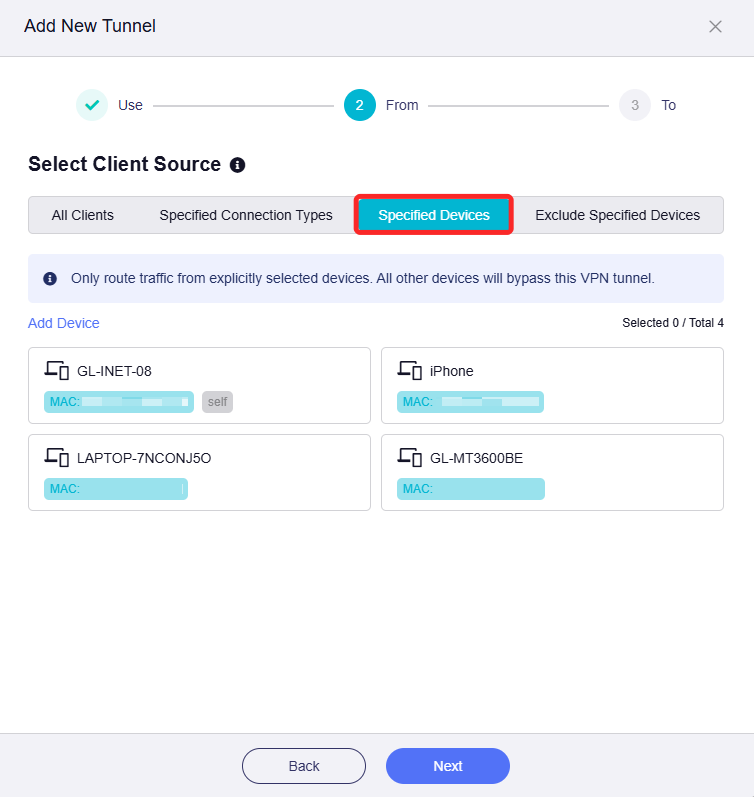
-
Exclude Specified Devices: If selected, traffic from specified devices (identified by MAC address) will not match this rule.
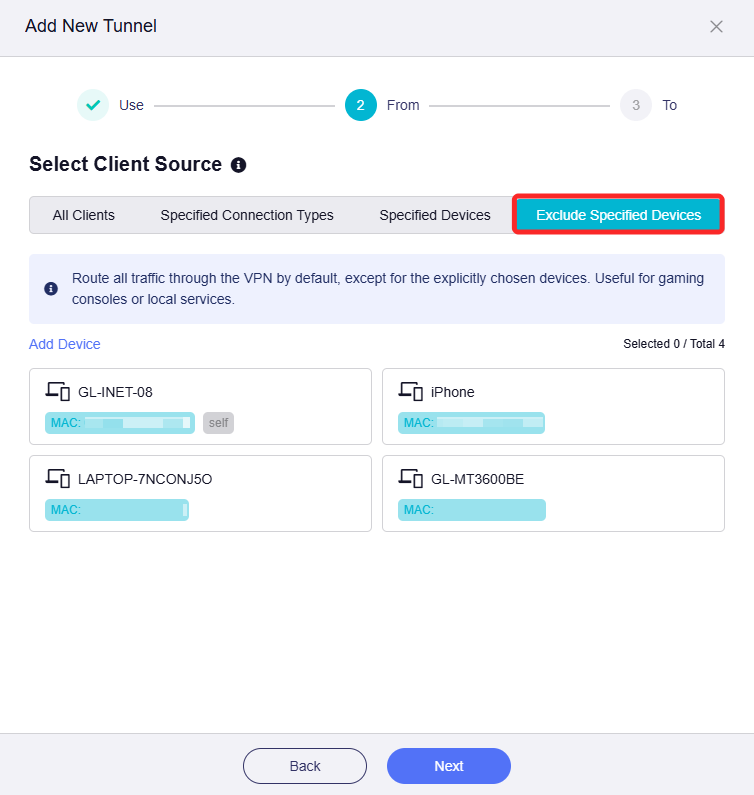
-
-
Select target destination, then click Apply.
There are three options:
-
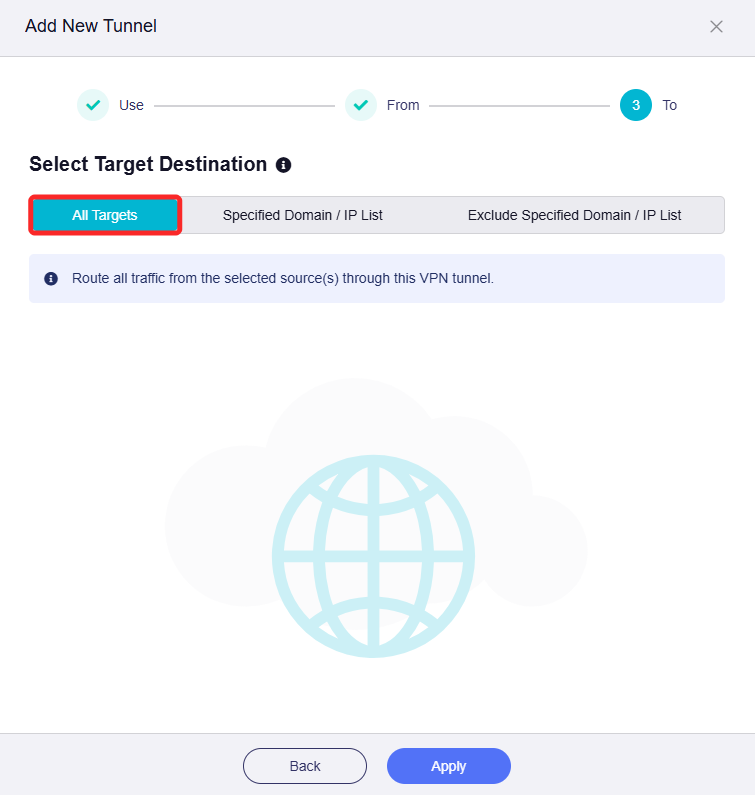
All Targets: If selected, traffic matching this rule will be routed to all targets.
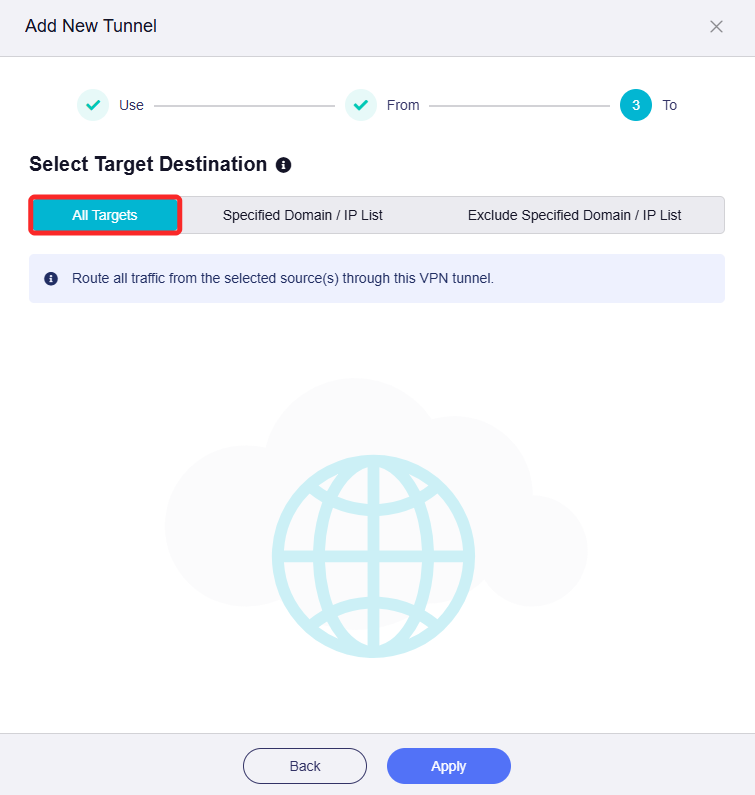
-
Specified Domain / IP List: If selected, traffic matching this rule will be routed to specified domains or IP addresses. You need to enter them manually.
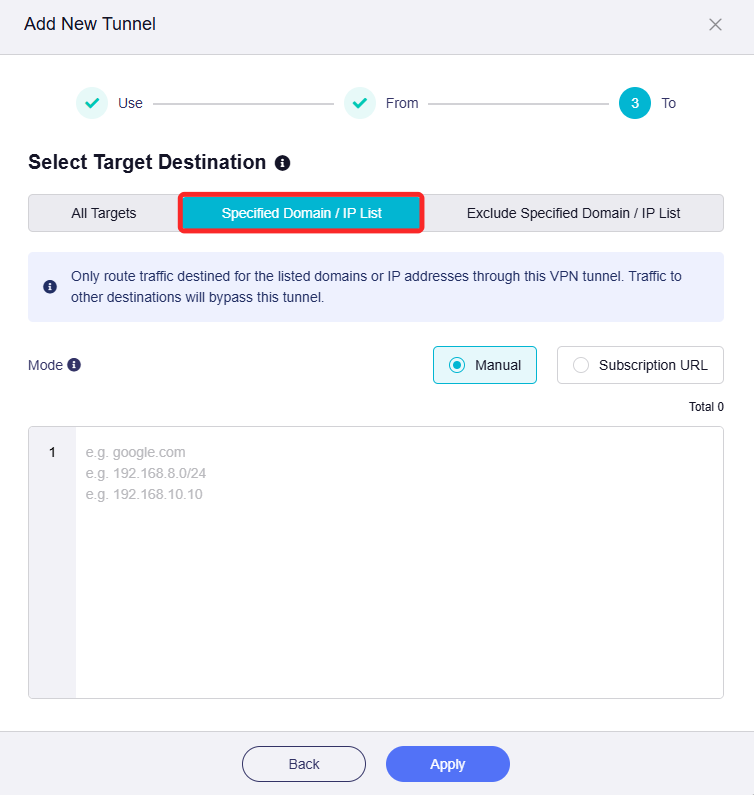
-
Exclude specified Domain / IP List: If selected, traffic matching this rule will not be routed to specified domains or IP addresses. You need to enter them manually.
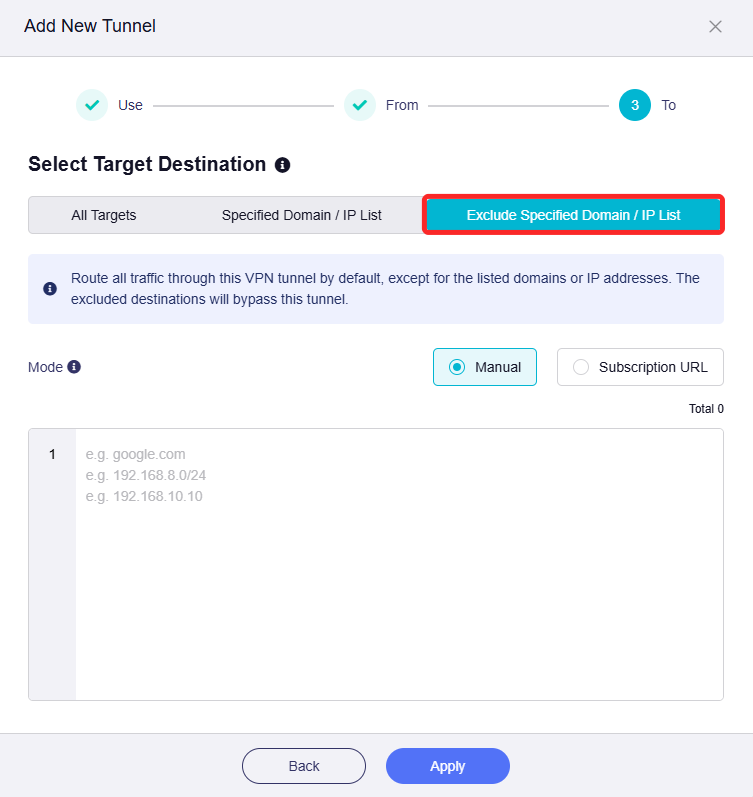
-
-
A VPN tunnel is added successfully. You will be directed to the ExpressVPN Dashboard. Add more VPN tunnels if needed.
Case Reference
Here are two typical VPN policy configuration cases with step-by-step setup instructions for your reference.
Case 1: Route only specified devices over VPN.
Requirements:
-
Only specific devices connected to this router access the Internet through the VPN. All other devices access the Internet through the local WAN.
-
The selected devices must use the VPN connection only. If the VPN disconnects unexpectedly, Internet access for these devices will be blocked to prevent DNS leaks and IP tracking.
Configuration Steps:
-
Select VPN profile.
Select one or multiple profiles, and adjust their priority on the right as needed, then click Next.
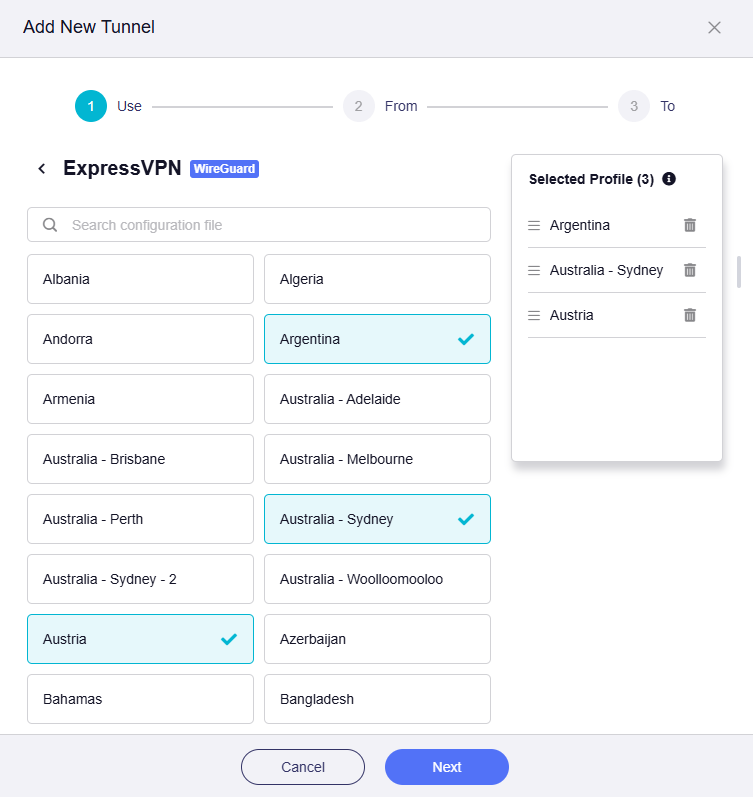
-
Select client source.
Click the Specified Devices tab, select the devices that you want to use the VPN, then click Next.
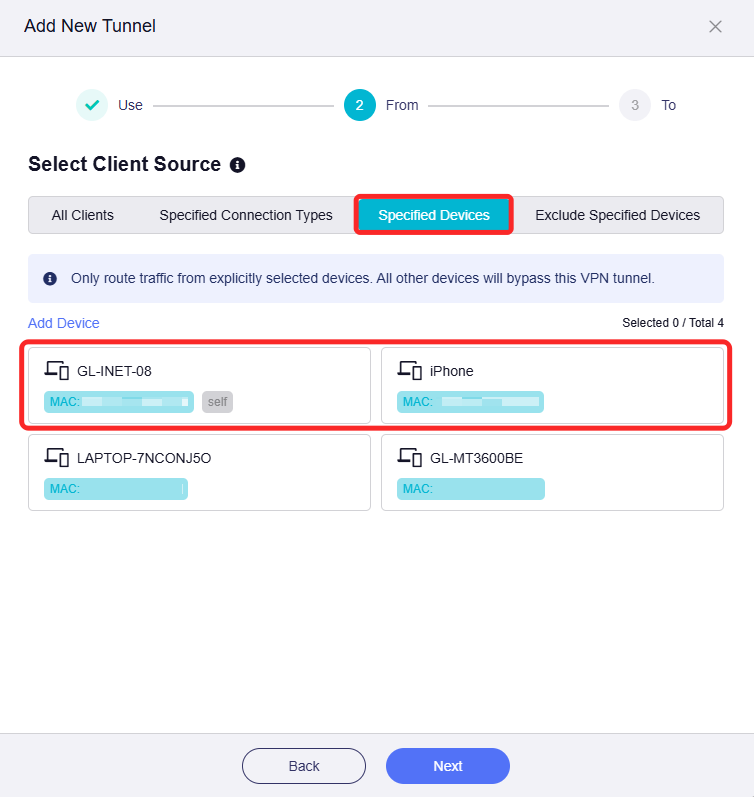
-
Select target destination.
Click the All Targets tab, set it as the traffic destination, then click Apply.
-
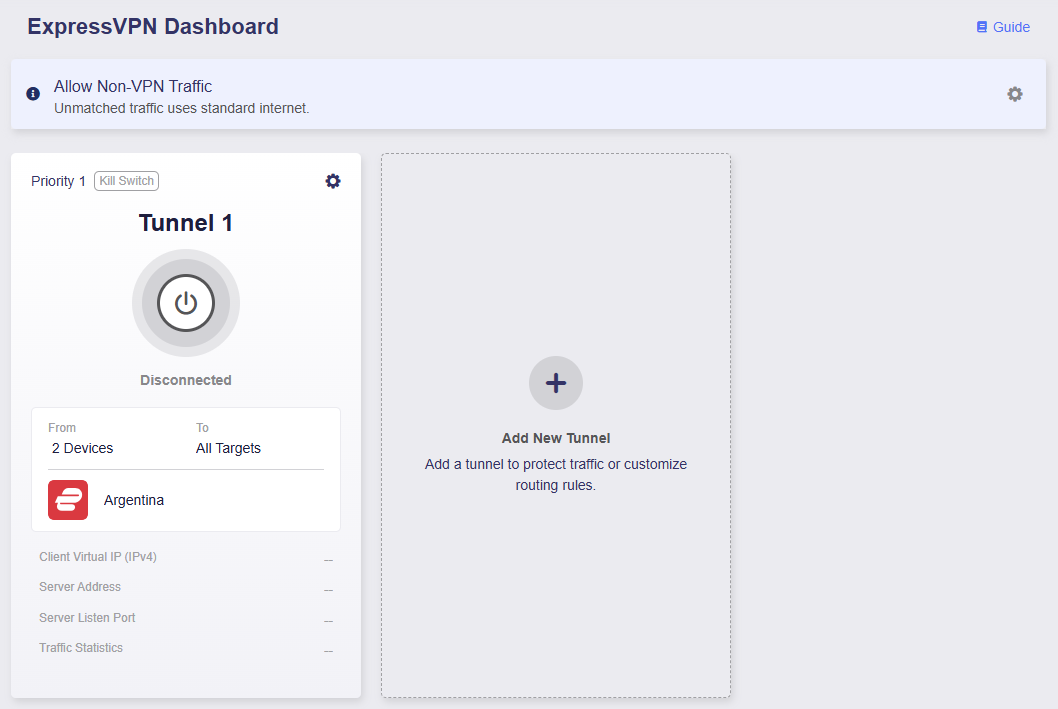
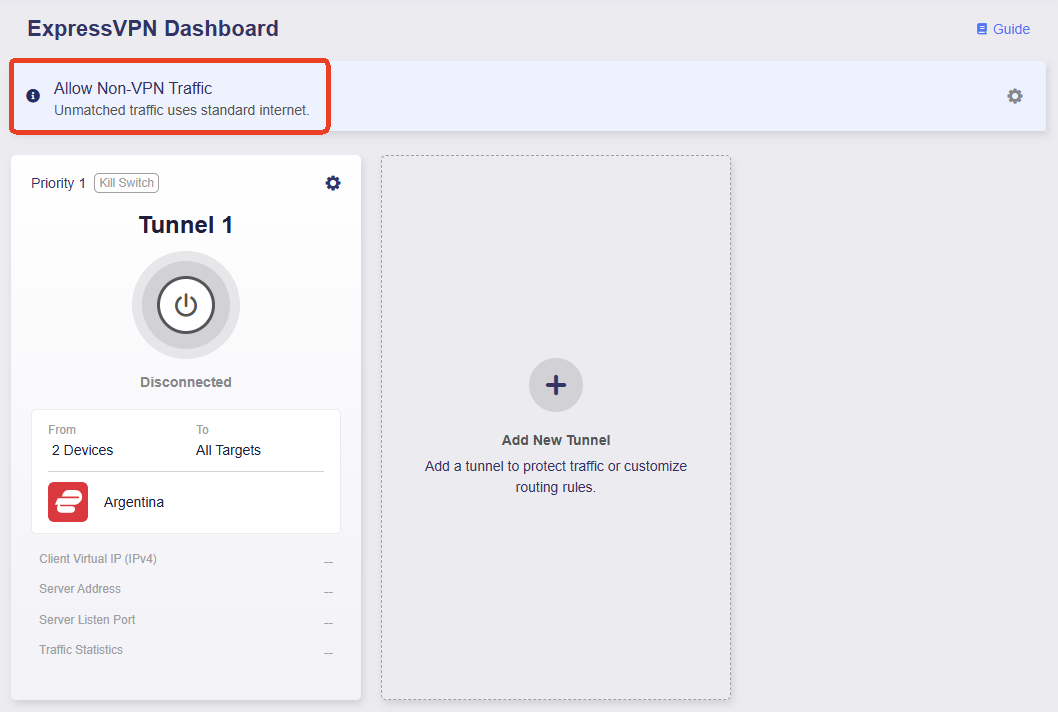
You will be directed to the ExpressVPN Dashboard. Now a VPN tunnel has been added successfully, as shown below.
-
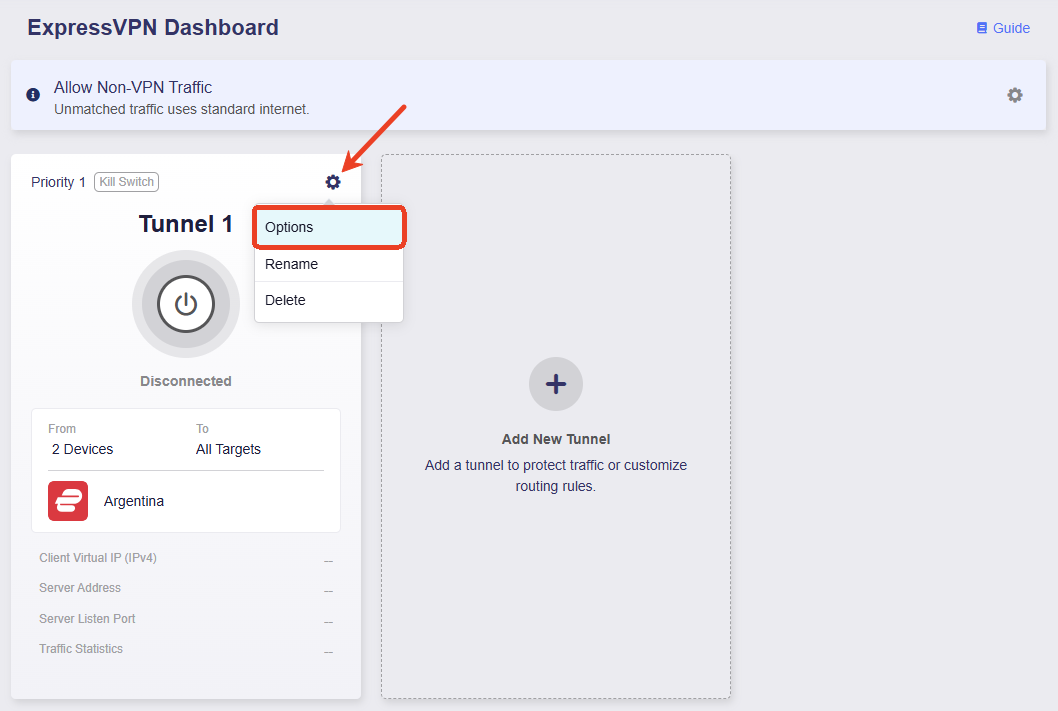
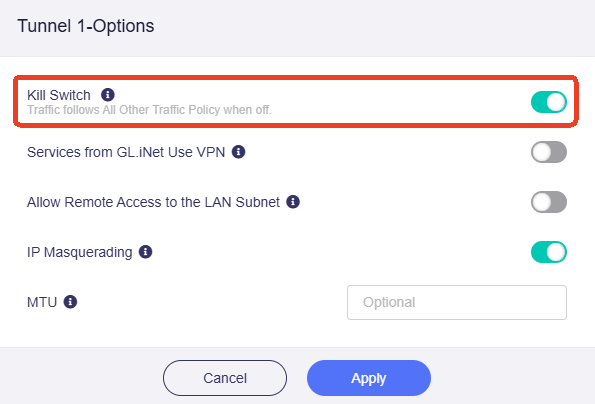
Make sure the Kill Switch for this tunnel is enabled. If the VPN disconnects unexpectedly, Internet access for traffic matching this tunnel will be blocked to prevent DNS leaks and IP tracking.
-
Make sure the Allow Non-VPN Traffic is enabled. This is enabled by default to ensure that traffic not matching the VPN tunnel can still access the Internet through the local WAN network.
-
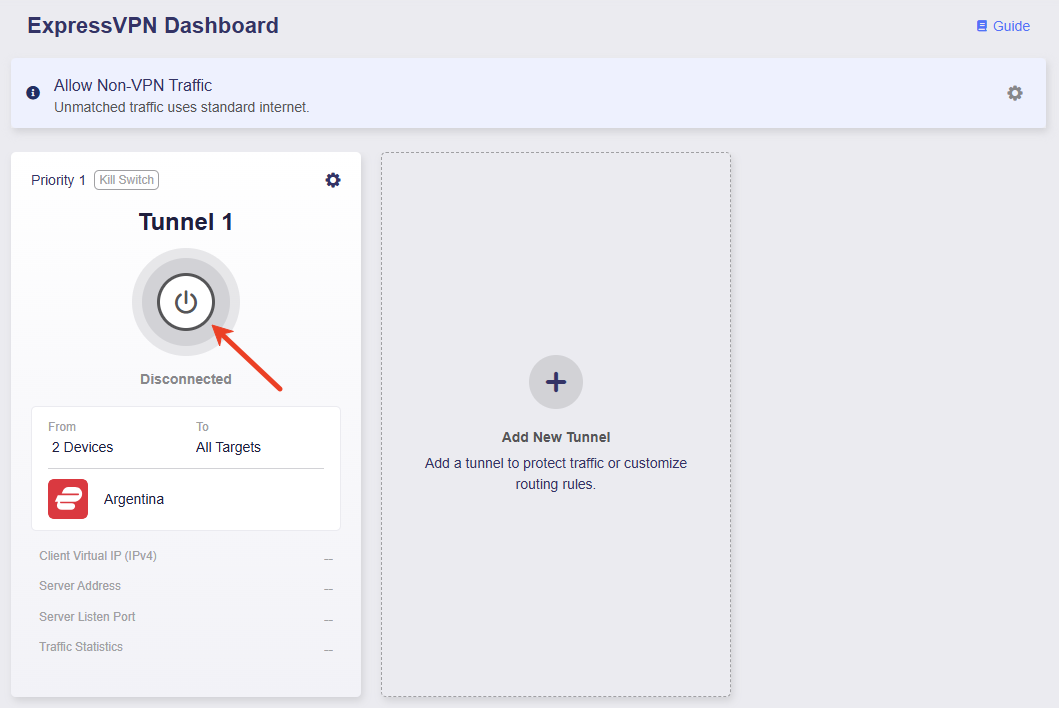
Click the middle button to activate this tunnel.
-
Once connected, the page will display the VPN connection details, including VPN policy, client virtual IP, server address, listen port, and traffic statistics.
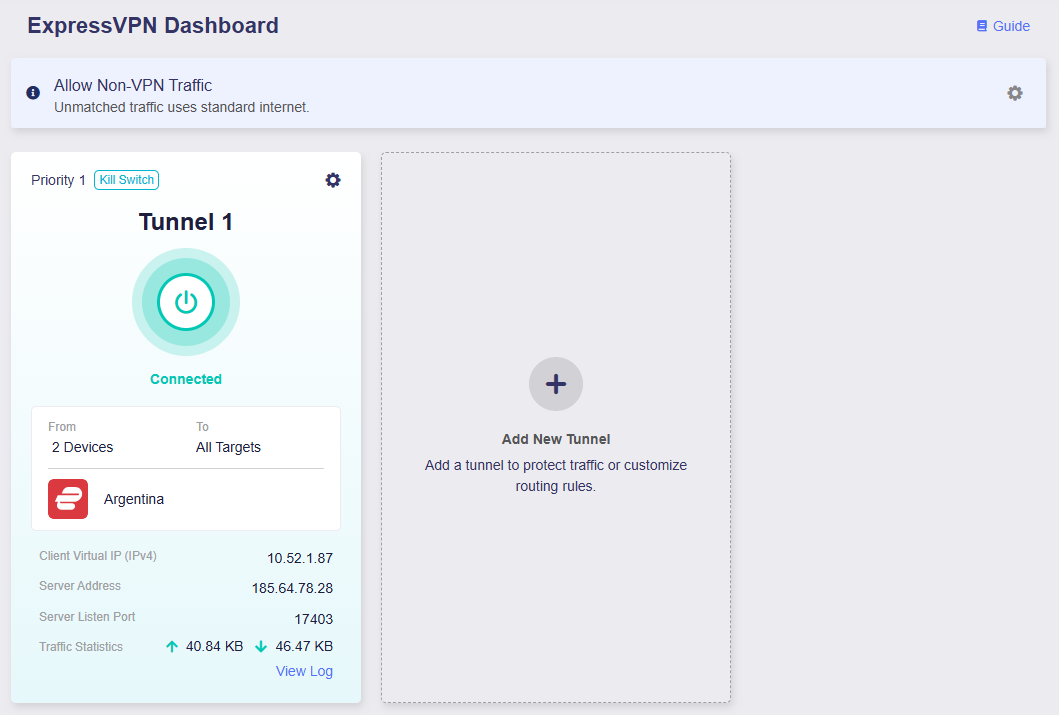
Now, only two specified devices access the Internet through VPN. If the VPN disconnects unexpectedly, Internet access for these devices will be blocked to prevent DNS leaks and IP tracking. All other devices will access the Internet through the local WAN network instead.
Case 2: Route all devices over VPN 1 for specific websites, and route all remaining traffic over VPN 2.
Requirements:
-
All devices use VPN Tunnel 1 when accessing websites of specific social media and streaming services, and use VPN Tunnel 2 for all remaining Internet access.
-
If the VPN tunnels disconnect unexpectedly, Internet access for all devices will be blocked to prevent DNS leaks and IP tracking.
Configuration Steps:
-
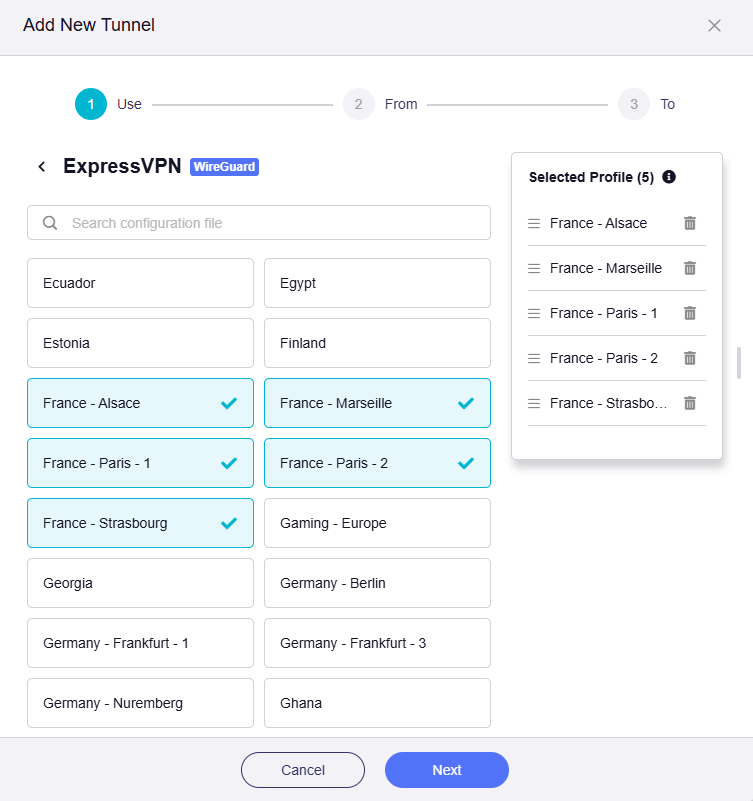
Select VPN profile for Tunnel 1.
Select one or multiple profiles, and adjust their priority on the right as needed, then click Next.
-
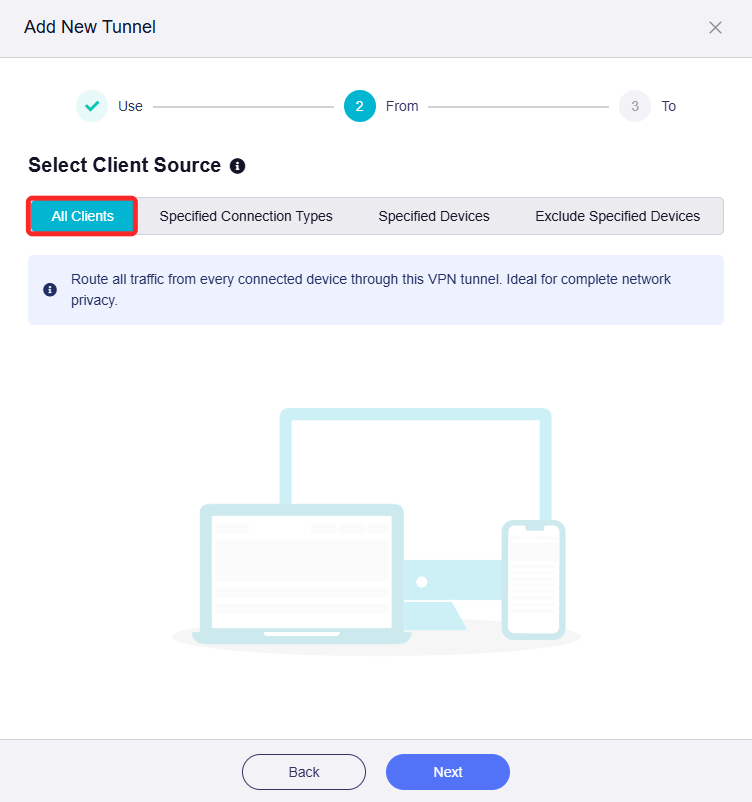
Select client source.
Click the All Clients tab, set it as the client source for Tunnel 1, then click Next.
-
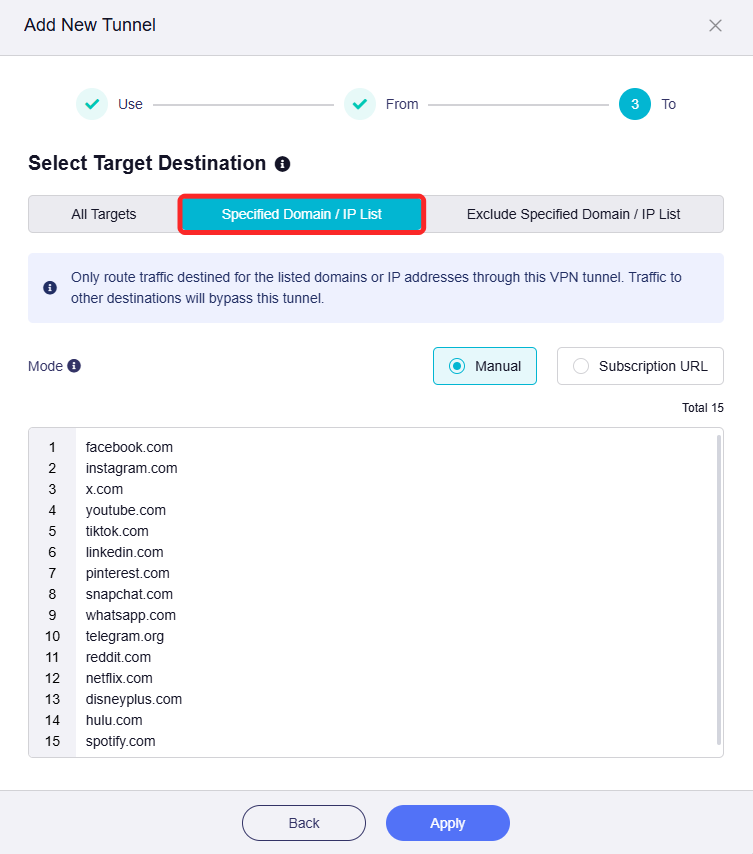
Select target destination.
Click the Specified Domain / IP List tab, enter domains of specific social media and streaming services, as shown below, then click Apply.
-
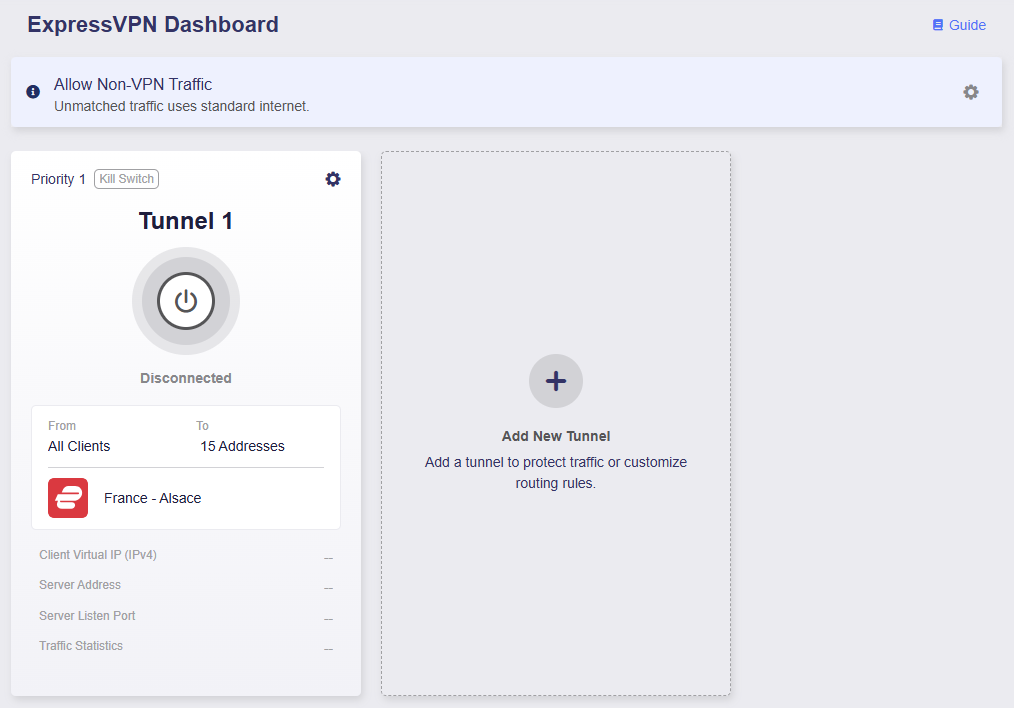
You will be directed to the ExpressVPN Dashboard. Now the VPN tunnel 1 has been added successfully.
-
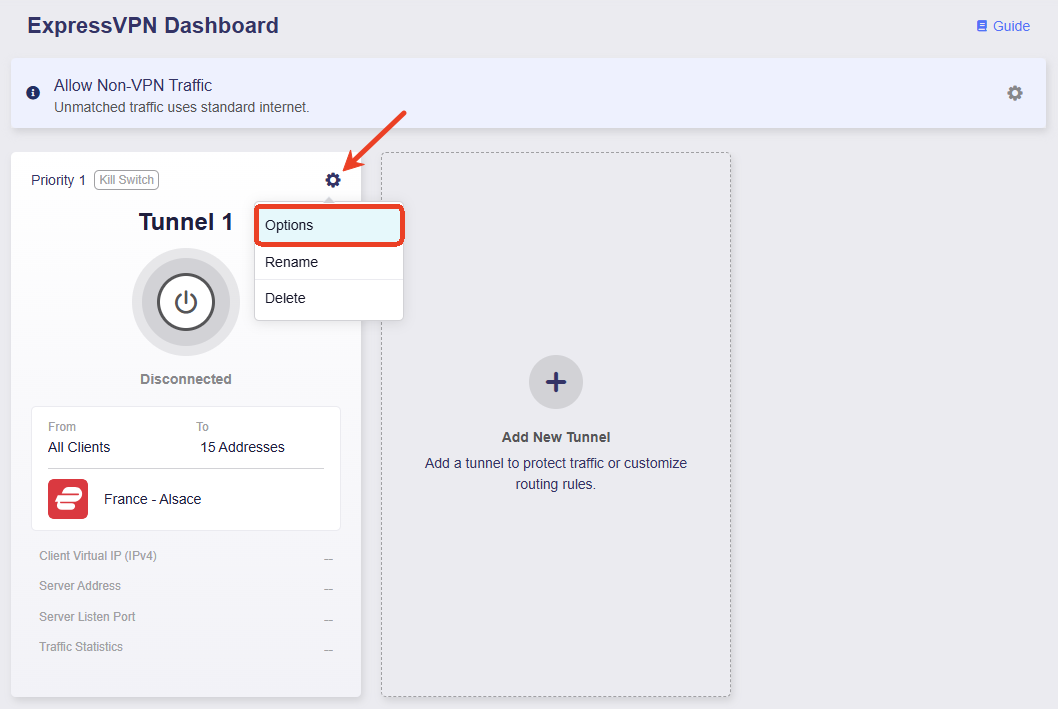
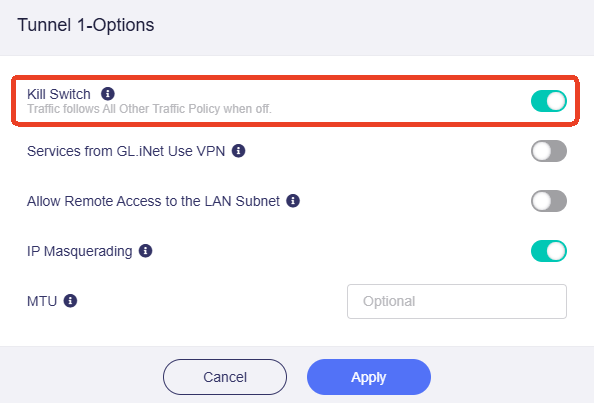
Make sure the Kill Switch for Tunnel 1 is enabled. If the VPN disconnects unexpectedly, Internet access for traffic matching this tunnel will be blocked to prevent DNS leaks and IP tracking.
-
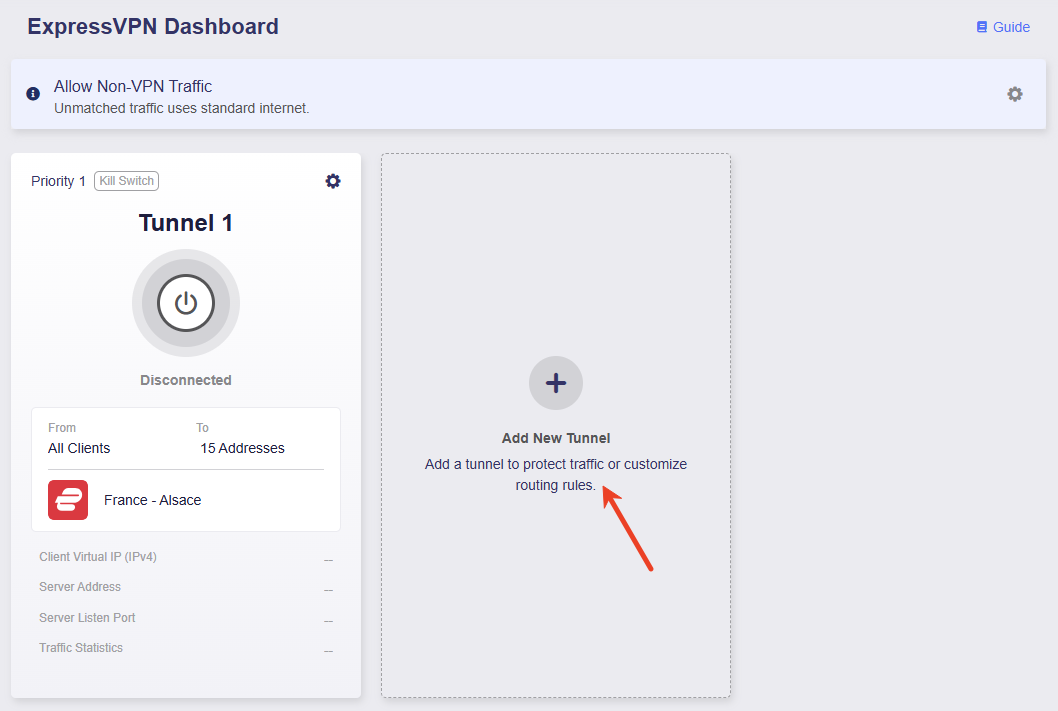
Click Add New Tunnel to add Tunnel 2.
-
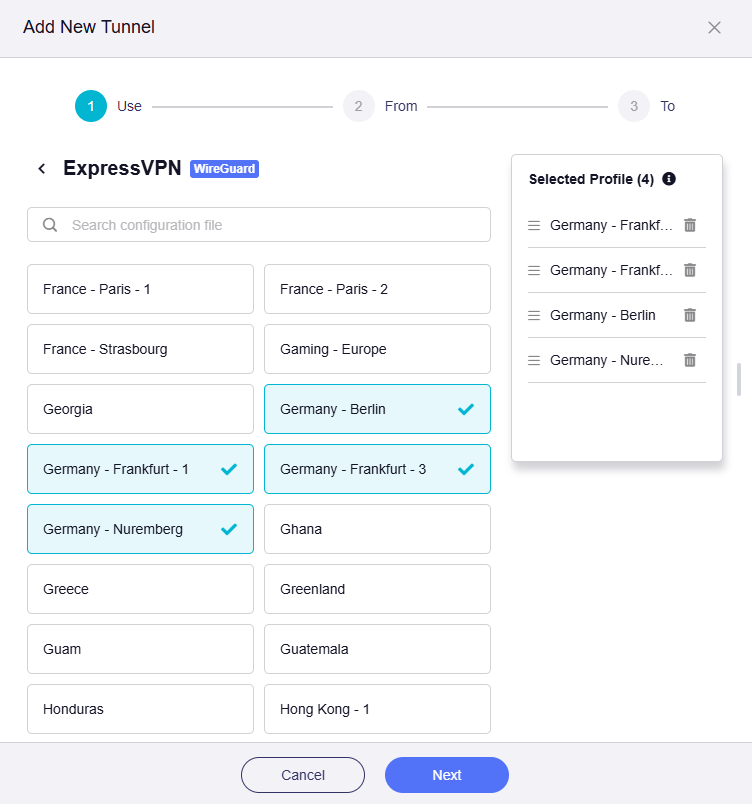
Select VPN profile for Tunnel 2.
Select one or multiple profiles, and adjust their priority on the right as needed, then click Next.
-
Select client source.
Click the All Clients tab, set it as the client source for Tunnel 2, then click Next.
-
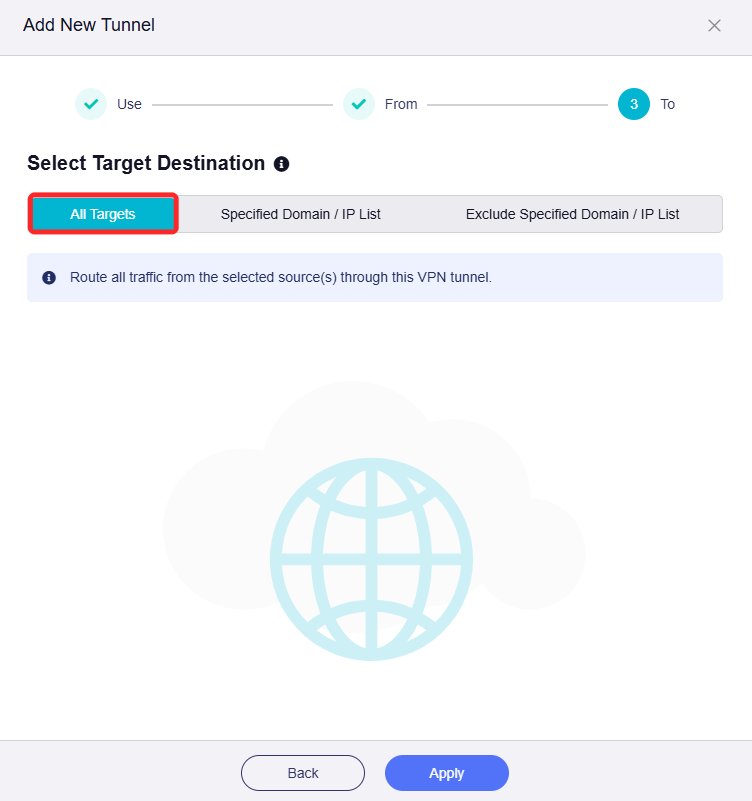
Select target destination.
Click the All Targets tab, set it as the traffic destination for Tunnel 2, then click Apply.
-
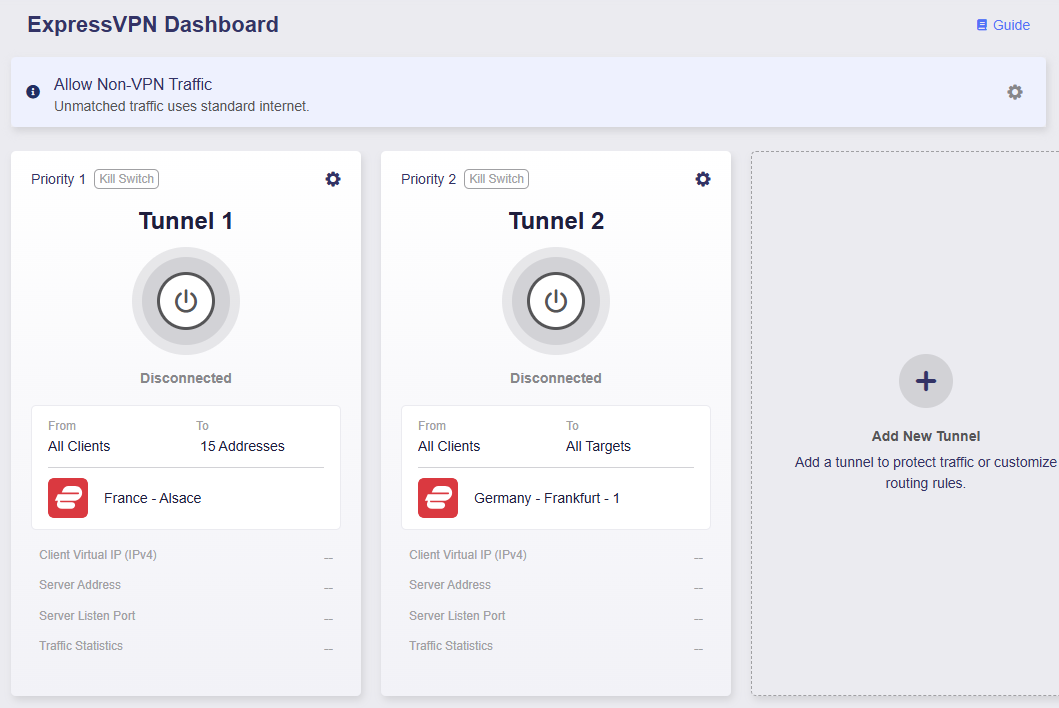
You will be directed to the VPN Dashboard. Now the VPN tunnel 2 has been added successfully.
-
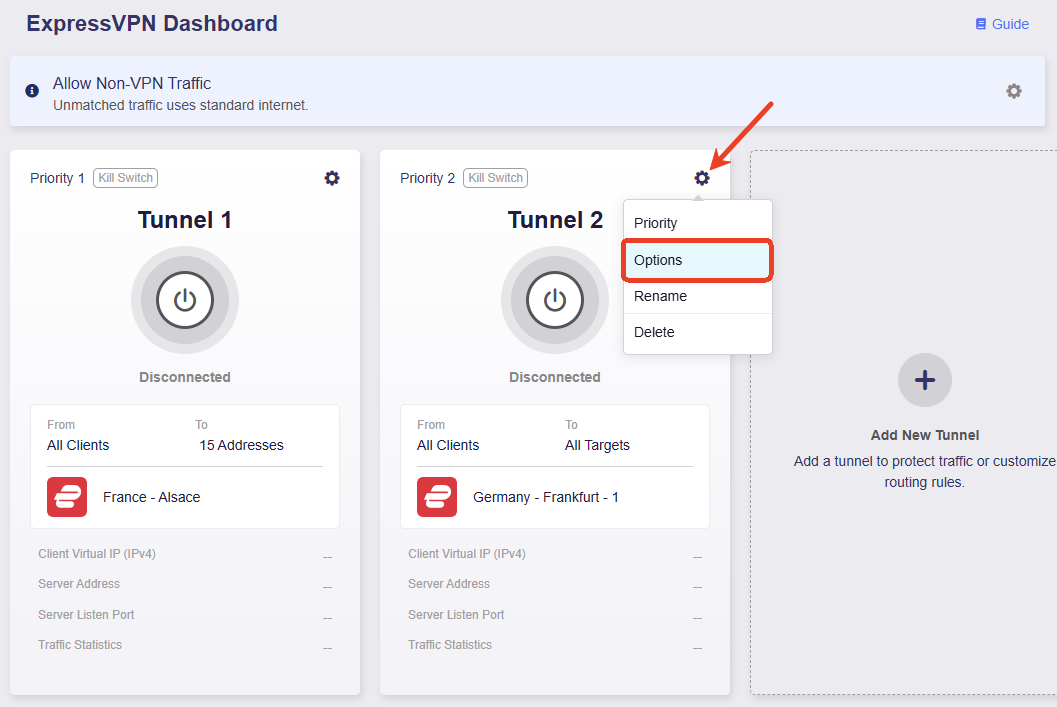
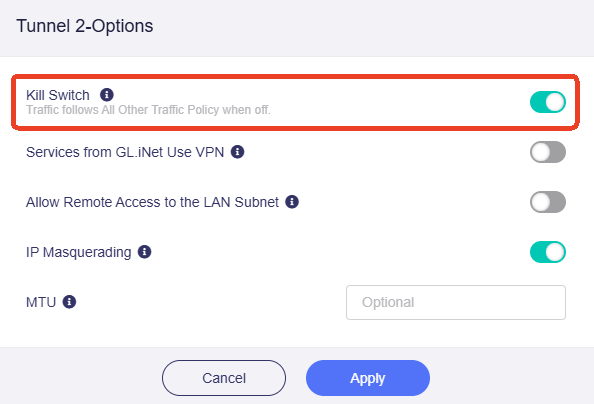
Make sure the Kill Switch for Tunnel 2 is enabled. If the VPN disconnects unexpectedly, Internet access for traffic matching this tunnel will be blocked to prevent DNS leaks and IP tracking.
-
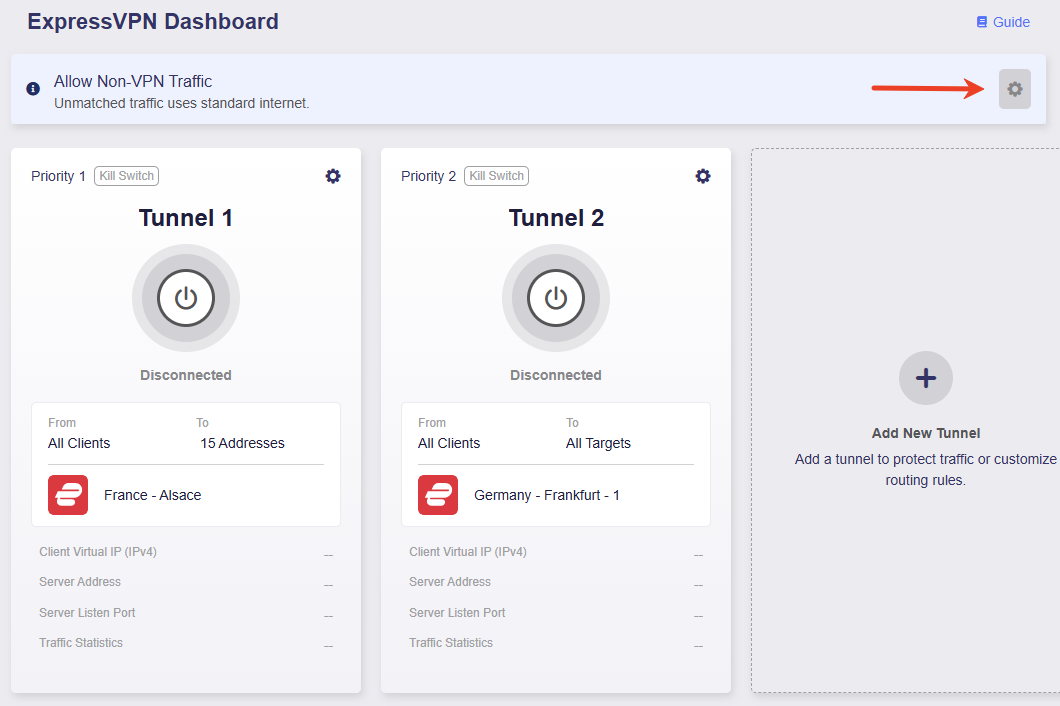
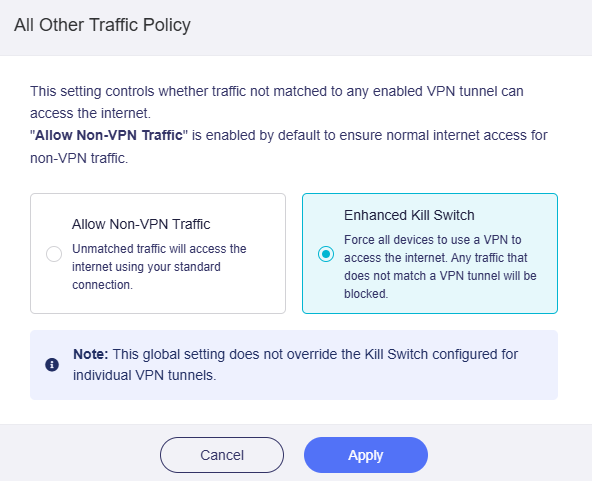
Click the gear icon at the upper right, enable Enhanced Kill Switch and click Apply. This ensures that all traffic must access Internet via the VPN.
-
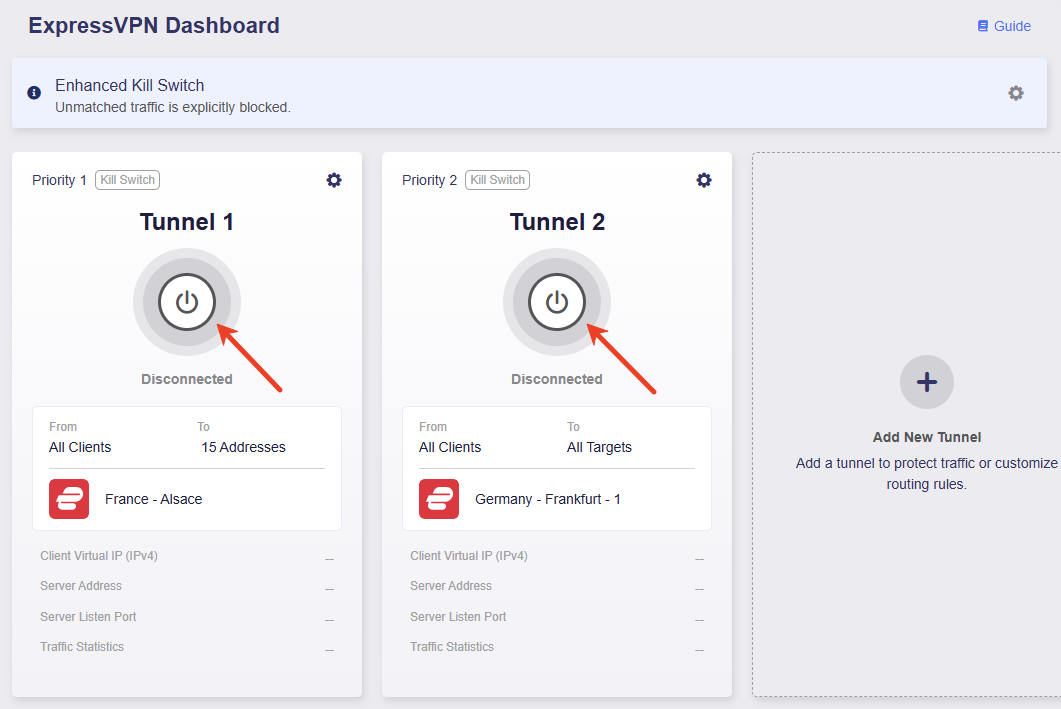
Click the middle button to activate Tunnel 1 and Tunnel 2.
-
Once connected, the page will display the VPN connection details, including VPN policy, client virtual IP, server address, listen port, and traffic statistics.
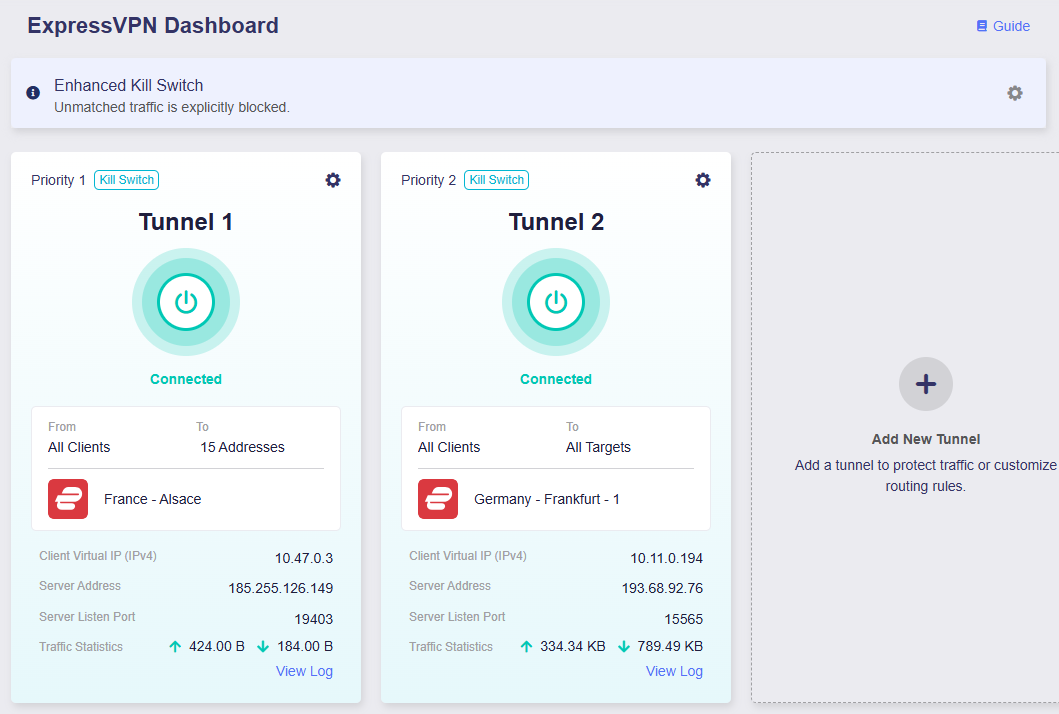
Now, all devices will use VPN Tunnel 1 when accessing specified domains, and use VPN Tunnel 2 for all remaining Internet access. If the VPN tunnels disconnect unexpectedly, Internet access for all devices will be blocked to prevent DNS leaks and IP tracking.
Kill Switch
Kill Switch is a security feature for VPN connections. It automatically cuts off all internet access for your local network if the VPN connection drops unexpectedly, preventing your real IP address and online data from being exposed and ensuring continuous privacy and security. This feature is particularly useful for maintaining secure, anonymous internet access, such as when using public networks, processing sensitive data, or hiding your real IP address.
When enabled, it blocks any client traffic that attempts to bypass the VPN tunnel, effectively stopping VPN leaks caused by DNS configuration issues, unexpected disconnections, direct IP requests, and other similar scenarios.
Fortify supports Kill Switch configuration for the global VPN connection, as well as for each individual VPN tunnel.
-
To set up Kill Switch for the global VPN connection (i.e., Enhanced Kill Switch), refer to All Other Traffic.
-
To set up Kill Switch for each individual VPN tunnel, refer to Tunnel Options.
All Other Traffic
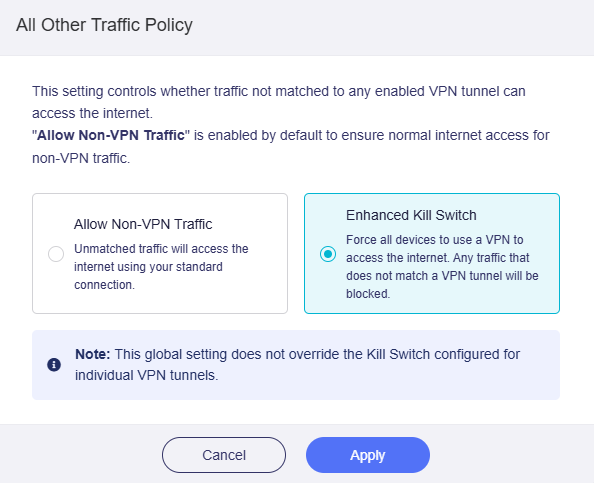
Click the gear icon at the upper right to set up policy for those traffic not matching VPN tunnel.

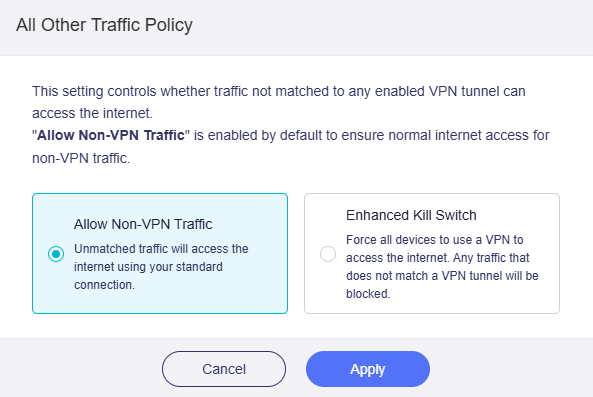
This policy controls whether traffic that does not match any of your VPN tunnel groups can access the Internet or not. Two options available: Allow Non-VPN Traffic and Enhanced Kill Switch.
-
Allow Non-VPN Traffic: Enabled by default to ensure normal internet access for non-VPN traffic.
-
Enhanced Kill Switch: Forces all devices to access the Internet through a VPN. Any traffic that does not match a VPN tunnel will be blocked. This global setting does not override the Kill Switch configured for individual VPN tunnels.
Tunnel Options
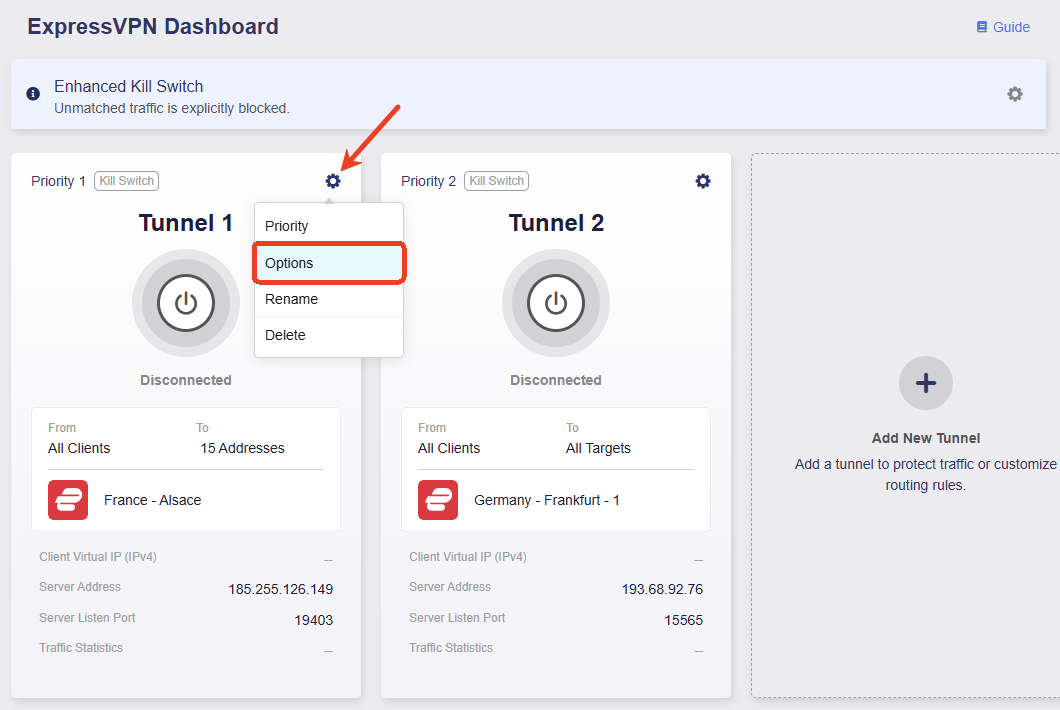
You can configure advanced settings for each VPN tunnel, such as the VPN Kill Switch, IP Masquerading, and MTU.
Click the gear icon in a tunnel group, and select Options.
-
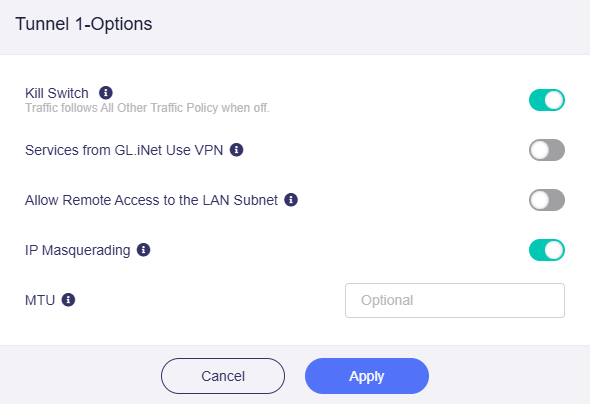
Kill Switch: If enabled, traffic matching this VPN tunnel will be blocked if the VPN connection fails unexpectedly. If disabled, such traffic will fail over to the All Other Traffic tunnel.
-
Services from GL.iNet Use VPN: If enabled, GoodCloud, DDNS, and rtty services will transmit packets through VPN tunnels. This option is disabled by default, as these services normally require the device's real IP address to work properly.
-
Allow Remote Access to the LAN Subnet: If enabled, remote access to this router and its LAN devices through the VPN will be allowed. It requires the VPN server to advertise a route back to its LAN subnet.
-
IP Masquerading: If enabled, the source IP addresses of LAN clients will be rewritten to the router's VPN tunnel IP. Disable this only for Site-to-Site setups where the remote peer knows your LAN subnets.
-
MTU: The MTU value you set for the tunnel will override the MTU settings in the configuration file.
Tunnel Priority
To adjust tunnel priority, click the gear icon in a tunnel group and select Priority.
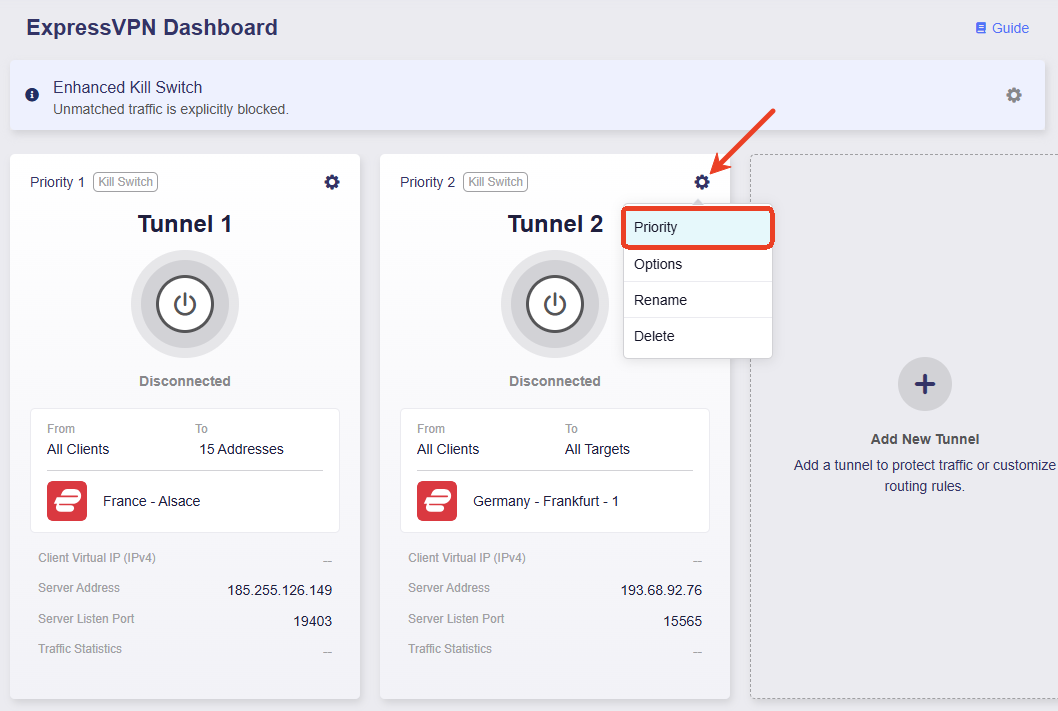
Click and hold the three-line icon on the right to reorder the tunnels, then click Apply.
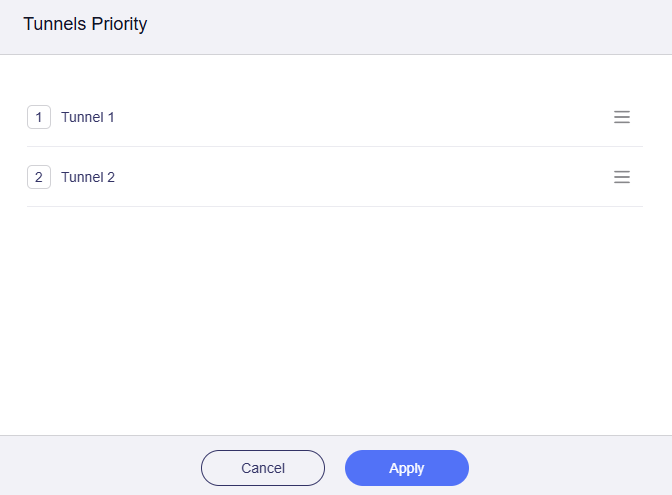
When multiple tunnels are enabled, the router routes traffic according to the following rules:
-
Traffic will first attempt to match the highest-priority tunnel rule. If matched, it will be routed through that tunnel; otherwise, it will try the next priority tunnel, and so on.
-
Each tunnel group operates independently. Once traffic matches a tunnel rule, it will be routed through that tunnel and will not fail over between tunnel groups.
-
Multiple profiles can be selected within each tunnel group to enable intra-tunnel failover. When the highest-priority profile in a tunnel group goes down, the tunnel will automatically connect using the second-highest priority profile, and so on.
-
If a VPN tunnel disconnects unexpectedly, the system will determine whether to fail over the traffic to the All Other Traffic tunnel based on whether this tunnel's Kill Switch is enabled.
- If the Kill Switch is enabled, traffic will be blocked and will not fail over to the All Other Traffic tunnel.
- If the Kill Switch is disabled, traffic will fail over to the All Other Traffic tunnel.
-
In the All Other Traffic tunnel, different modes determine whether the traffic that does not match the VPN tunnel can access the Internet.
-
Allow Non-VPN Traffic: It is enabled by default to ensure that traffic not matching the VPN tunnels can still access the Internet via local WAN.
-
Enhanced Kill Switch: It forces all devices to access the Internet through a VPN. Any traffic that does not match a VPN tunnel will be blocked. This global setting does not override the Kill Switch configured for individual VPN tunnels. In short, it strengthens the Kill Switch and blocks regular Internet access to prevent IP leaks.
-
Still have questions? Visit our Community Forum or Contact us.