Mesh
Note: This feature was introduced in firmware v4.10.
Mango 2 (GL-MG1300) and Mudi 7 (GL-E5800) do not support Mesh even with firmware v4.10 or later. Please refer to Supported Models for details.
On the left side of the web Admin Panel, go to MESH.
Mesh is a feature based on the Wi-Fi EasyMesh™ standard that extends whole-home Wi‑Fi coverage and enables seamless roaming. If you have multiple GL.iNet routers, set one as the main router and the rest as mesh nodes for seamless Wi-Fi roaming around your home.
Mesh vs. Extender vs. Access Point Mode
All three modes can extend Wi-Fi coverage. The main differences are how they connect to the main router and how the devices are configured and managed. Backhaul is the connection between the main router and an extender, access point, or Mesh node.
This table compares GL.iNet’s standalone Extender and Access Point modes with its Mesh implementation.
| Feature | Extender Mode | Access Point Mode | Mesh Mode |
|---|---|---|---|
| Wireless backhaul | ✅ Supported | ❌ Not used | ✅ Supported |
| Ethernet backhaul | ❌ Not used in this mode | ✅ Supported | ✅ Supported |
| Full-duplex backhaul | ❌ Wi-Fi is half-duplex | ✅ Ethernet | ✅ Ethernet only; wireless backhaul remains half-duplex |
| 2.4/5 GHz wireless backhaul | ⚠️ Available bands depend on model and firmware | ❌ Not applicable | ⚠️ Available bands depend on model and firmware |
| 6 GHz wireless backhaul | ⚠️ Model and firmware dependent | ❌ Not applicable | 🔜 Coming soon |
| Wi-Fi roaming | ✅ Client-controlled | ✅ Client-controlled | ✅ Client-controlled, with 802.11k/v assistance |
| Automatic Wi-Fi settings synchronization | ❌ Configure separately | ❌ Configure separately | ✅ From the main router |
| Centralized node management | ❌ Configure separately | ❌ Configure separately | ✅ Through the main router |
| Network topology and client overview | ❌ No Mesh-wide overview | ❌ No Mesh-wide overview | ✅ Available on the main router |
| Centrally managed expansion | ❌ Independent extenders | ❌ Independent access points | ✅ One main router and up to eight nodes |
| Centrally managed wireless hops | ❌ Not Mesh-managed | ❌ Not applicable | ✅ Up to three wireless hops |
| Automatic wired/wireless backhaul switching | ❌ No Mesh-managed switching | ❌ No Mesh-managed switching | ✅ Prioritizes Ethernet |
| Best suited for | Simple wireless coverage extension | Extending coverage where Ethernet is available | Coordinated coverage with wired, wireless, or mixed connections |
✅ Supported · ❌ Not supported or not applicable in this mode · ⚠️ Depends on hardware, firmware, or configuration · 🔜 Planned feature
Mesh synchronizes supported main, guest, IoT, and MLO Wi-Fi settings. It also provides centralized node management, including restarting, removing, and updating supported GL.iNet nodes. Nodes can be added through Wi-Fi scanning, an Ethernet connection, or a Mesh/WPS button where supported. Backhaul management includes Ethernet priority, wired/wireless switching, and loop prevention.
Understanding Performance Differences
Extender Mode
The device connects to an existing Wi-Fi network. The radio used for that upstream connection follows the main router’s channel. Clients using the same radio also use that channel, so upstream and client traffic share airtime.
On supported multi-band models, separate radios can still serve clients on other bands. For example, an extender may connect upstream over 2.4 GHz while serving clients through its separate 5 GHz radio. Those two connections do not compete for the same channel’s airtime. Available combinations depend on the model and firmware; Extender mode is not inherently restricted to single-band operation.
The same upstream-channel requirement applies to GL.iNet’s Repeater connection feature, although Repeater operation and the standalone Extender network mode differ in other respects.
Wireless Mesh
In the tested tri-band Mesh configuration, the node uses 5 GHz for wireless backhaul. The node’s 5 GHz channel follows the main router and cannot be changed independently, while its separate 2.4 GHz and 6 GHz channel settings remain independently configurable. These are channel settings, not a statement about which bands client devices can connect to. Changing a client-facing channel does not change the backhaul band.
The performance impact therefore depends on how the client connects:
- Devices connected over 5 GHz: If a phone, laptop, or other device connects to the Mesh node's 5 GHz Wi-Fi while that same radio carries wireless backhaul, the connections share airtime. The node's 5 GHz channel being locked does not necessarily prevent client devices from connecting on that band.
- Devices connected over 2.4 GHz or 6 GHz: When these clients use a separate radio from the 5 GHz wireless backhaul, the two links do not share the same-channel forwarding penalty.
This describes the tested configuration, not every supported Mesh model. Separate-radio forwarding is not exclusive to Mesh, and switching from Extender to Mesh does not automatically provide a throughput improvement.
Access Point Mode and Wired Mesh
Both use Ethernet for the connection to the main router. Ethernet backhaul operates in full-duplex and avoids transmitting backhaul traffic over Wi-Fi. Client Wi-Fi connections remain half-duplex. With otherwise comparable hardware and conditions, Access Point mode and wired Mesh can provide similar throughput; Mesh adds coordinated configuration and management.
Mesh prioritizes Ethernet backhaul and supports switching to wireless when a suitable wireless connection is available. In the tested configuration, the node’s 5 GHz channel remains aligned with the main router even while Ethernet backhaul is active. This does not mean wireless backhaul is carrying the traffic. Ethernet removes the wireless data-backhaul hop, but nearby nodes and clients using the same Wi-Fi channel can still compete for airtime.
6 GHz Mesh backhaul — Coming soon
6 GHz Mesh backhaul will require compatible 6 GHz hardware at both the main router and the Mesh node, together with supporting firmware. Do not assume that all Mesh-capable models will support this feature.
This is different from connecting a client to a node’s existing 6 GHz Wi-Fi network. With 6 GHz backhaul, a separate 5 GHz radio could serve clients without sharing the backhaul channel’s airtime. A radio is only dedicated to backhaul when it is reserved for that purpose rather than also serving clients.
Separate radios do not make Wi-Fi full-duplex
Each Wi-Fi link remains half-duplex. Separate-radio forwarding avoids sharing one channel between the backhaul and client links, but it does not remove other interference, contention, or multi-hop limitations. End-to-end throughput is still limited by the slower link and network conditions.
Supported Models
Supported Models
- GL-BE9300 (Flint 3)
- GL-BE3600 (Slate 7)
- GL-MT6000 (Flint 2)
- GL-MT3000 (Beryl AX)
Unsupported Models
- GL-MT6000 (Fortify)
- GL-MG1300 (Mango 2)
- GL-BE14000 (Flint 4)
- GL-BE10000 (Slate 7 Pro)
- GL-E5800 (Mudi 7)
- GL-MT5000 (Brume 3)
- GL-MT3600BE (Beryl 7)
- GL-BE6500 (Flint 3e)
- GL-X2000 (Spitz Plus)
- GL-X3000 (Spitz AX)
- GL-XE3000 (Puli AX)
- GL-B3000 (Marble)
- GL-AX1800 (Flint)
- GL-AXT1800 (Slate AX)
- GL-SFT1200 (Opal)
- GL-MT1300 (Beryl)
- GL-E750/E750V2 (Mudi)
- GL-AR750S (Slate)
- GL-XE300 (Puli)
- GL-X750 (Spitz)
- GL-MT300N-V2 (Mango)
- GL-AR300M Series (Shadow)
- GL-B1300 (Convexa-B)
- GL-X300B (Collie)
- GL-A1300 (Slate Plus)
- GL-MT2500/GL-MT2500A (Brume 2)
- GL-AP1300 (Cirrus)
- GL-S1300 (Convexa-S)
Quick Setup
The following example uses Flint 3 (GL‑BE9300) and Slate 7 (GL‑BE3600) to build a Mesh network.
Flint 3 is the main router that connects to the Internet and manages all Mesh nodes.
Slate 7 is the Mesh node that extends the main router's Wi-Fi coverage.
-
Power on your Mesh node and place it near the main router.
During first-time setup, keep the Mesh node next to the main router for quick scanning. After setup completes, you may relocate it midway between the main router and the Wi-Fi dead zone to extend Wi-Fi coverage.
-
Log in to the Mesh node's web Admin Panel and go to MESH. Click Mesh Node.
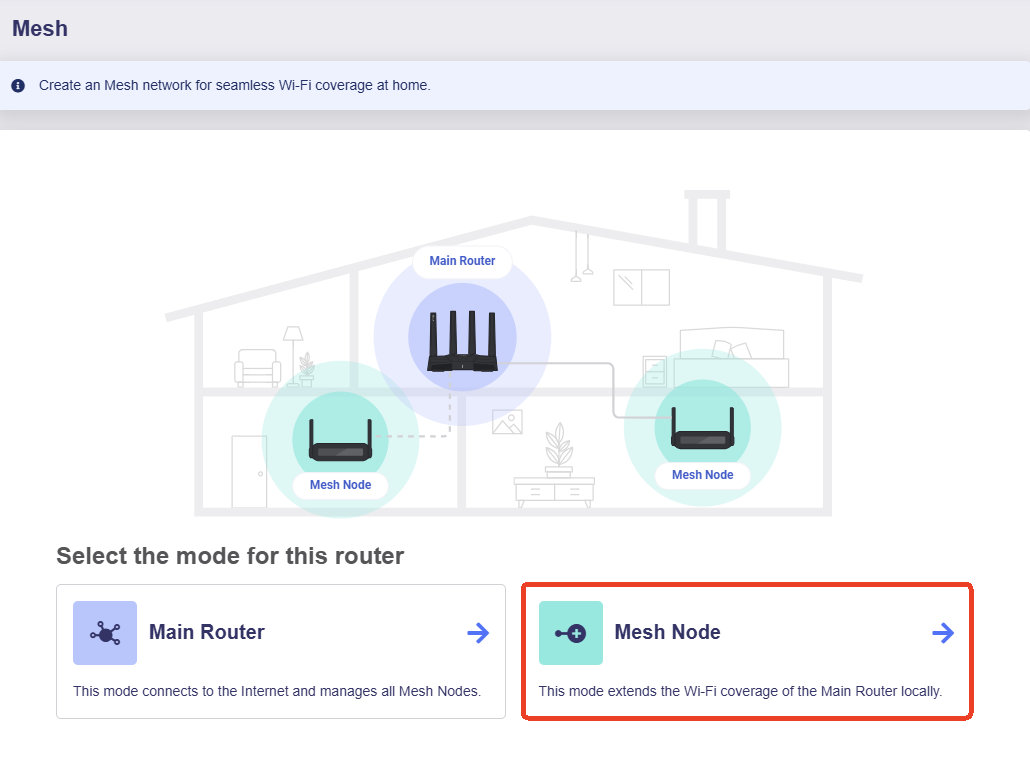
It becomes discoverable, and has no network connection before being added to the Mesh network.
-
Log in to the main router's web Admin Panel and go to INTERNET. Connect it to the Internet via any supported connection type: Ethernet, Repeater, Tethering, or Cellular.
-
After Internet setup, go to MESH and click Main Router.
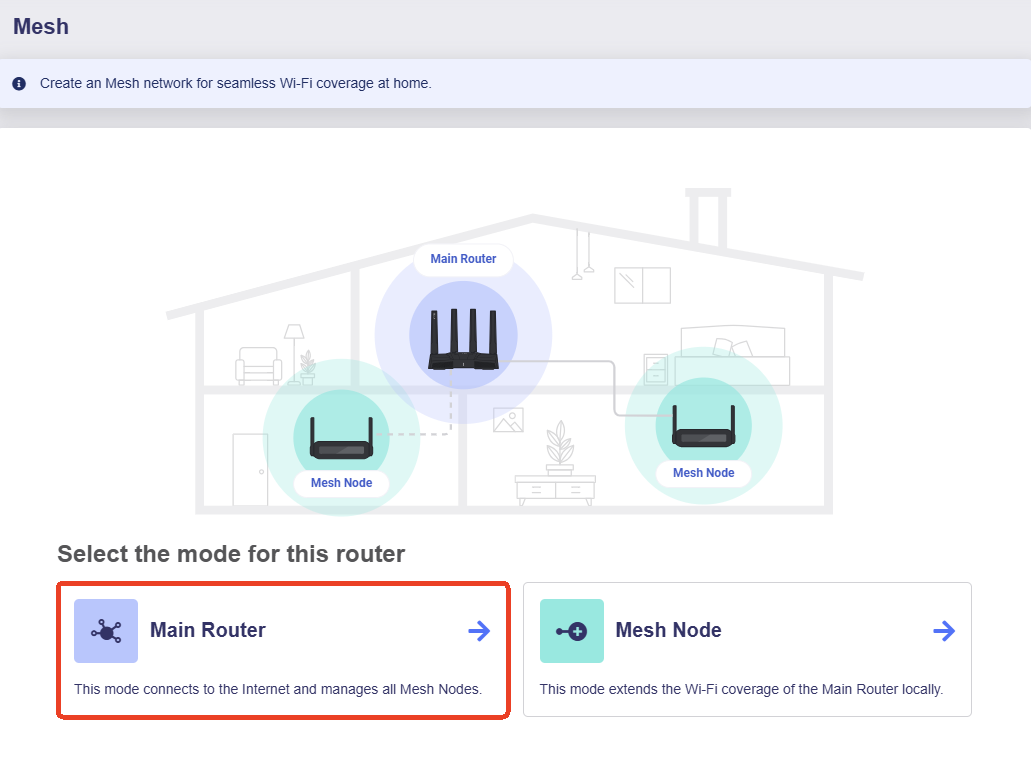
-
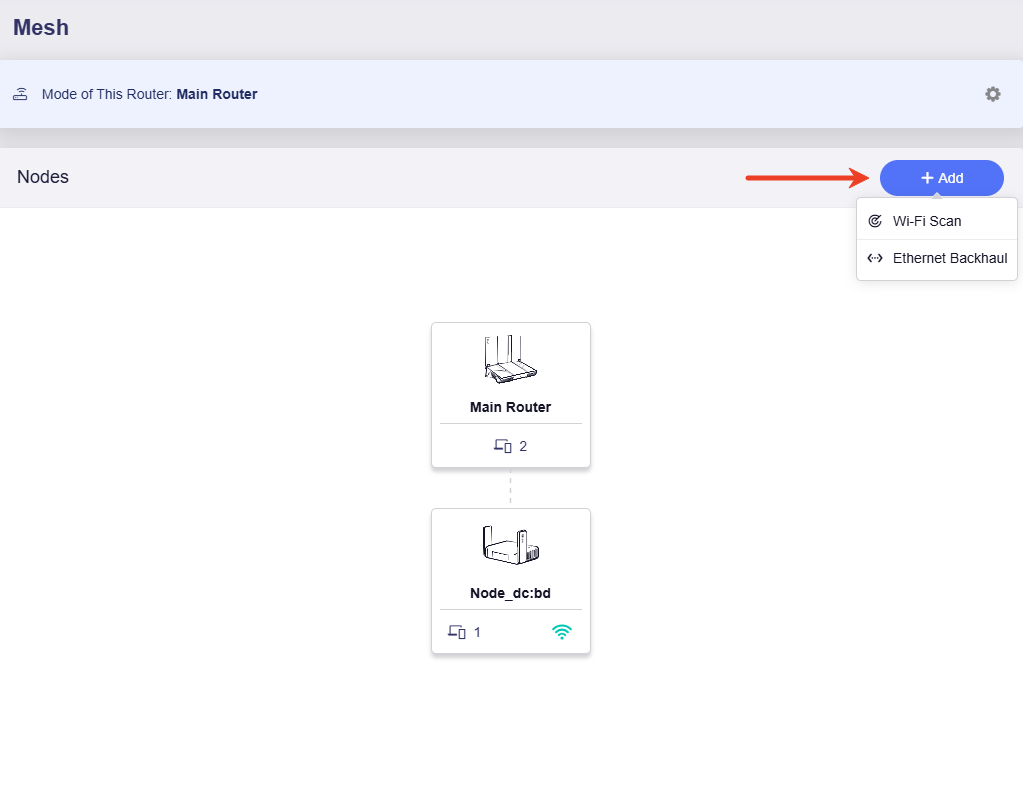
The page indicates two ways to add Mesh nodes: Wi-Fi Scan and Ethernet Backhaul.
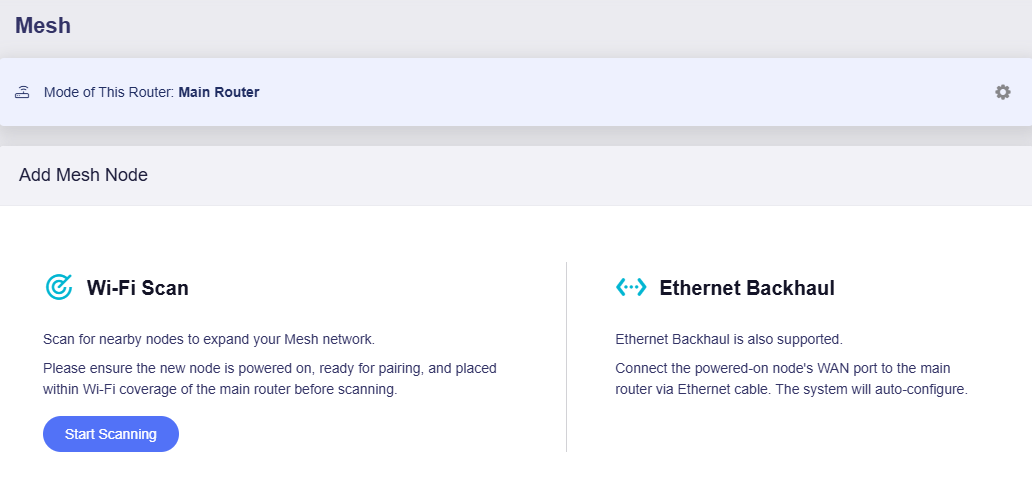
Select the corresponding tutorial below to add your Mesh nodes.
Wi-Fi Scan
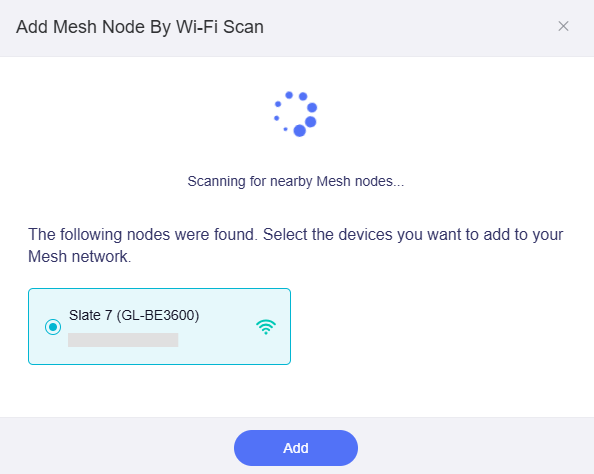
Click Start Scanning.
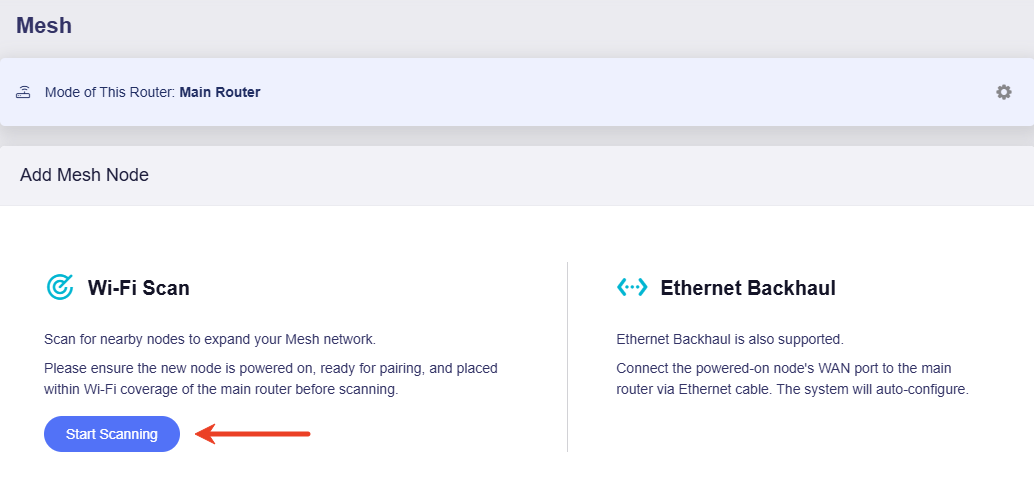
It will start scanning for nearby Mesh nodes through Wi-Fi. Select the devices you want to add and click Add.
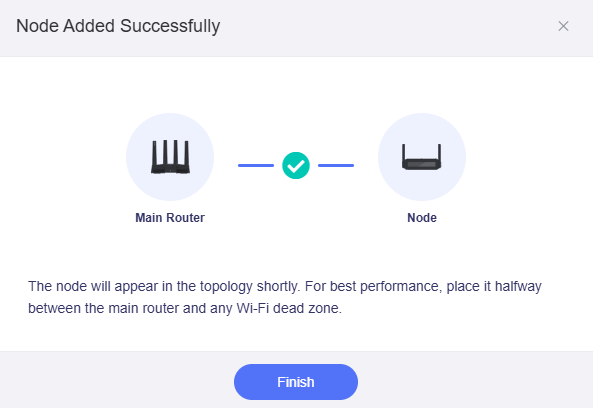
The Mesh node will then be added to your Mesh network. Click Finish.
Ethernet Backhaul
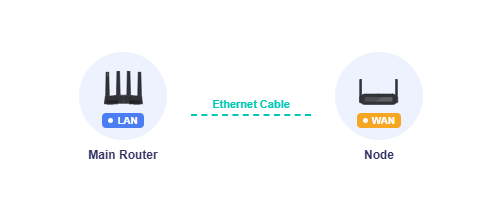
Connect the Mesh node's WAN port to the main router's LAN port via an Ethernet cable, then an Ethernet Backhaul network will be automatically configured.
-
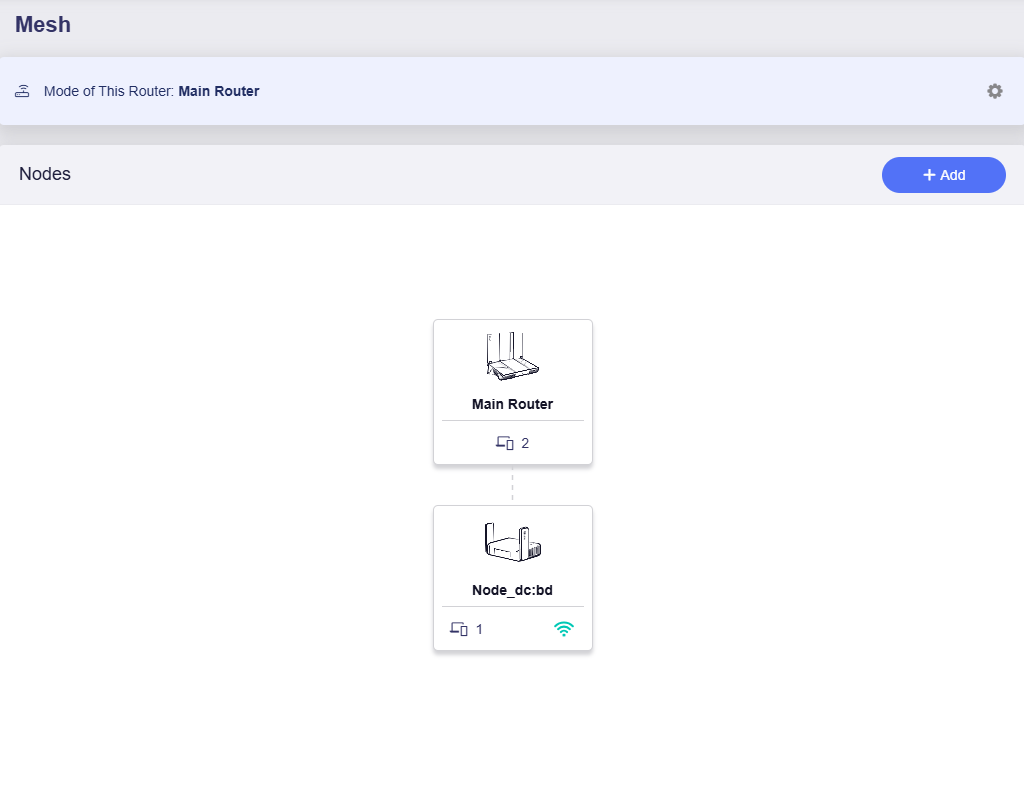
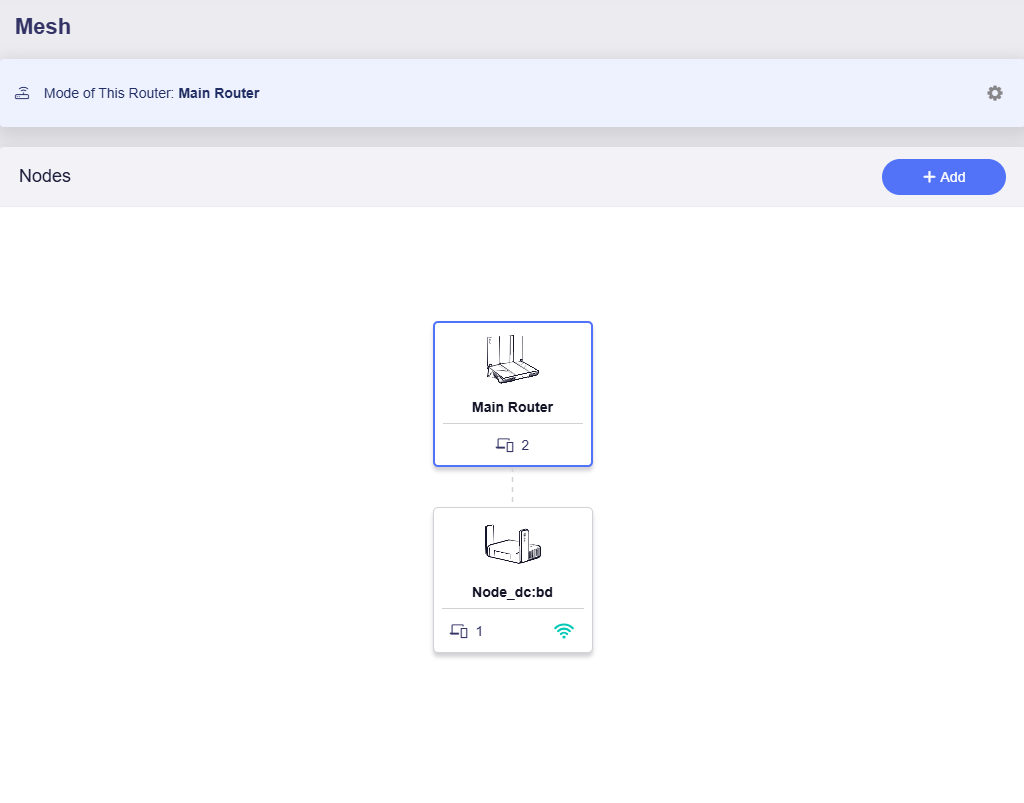
Once the Mesh node is added, the topology appears in the main router's Admin Panel.
Manage Nodes
Once setup is complete, the Mesh node will no longer be accessible via its original IP address. You can manage the main router and all Mesh nodes through the main router's Admin Panel.
View Node Details
In the main router's Admin Panel, go to MESH and click the Main Router on the topology.
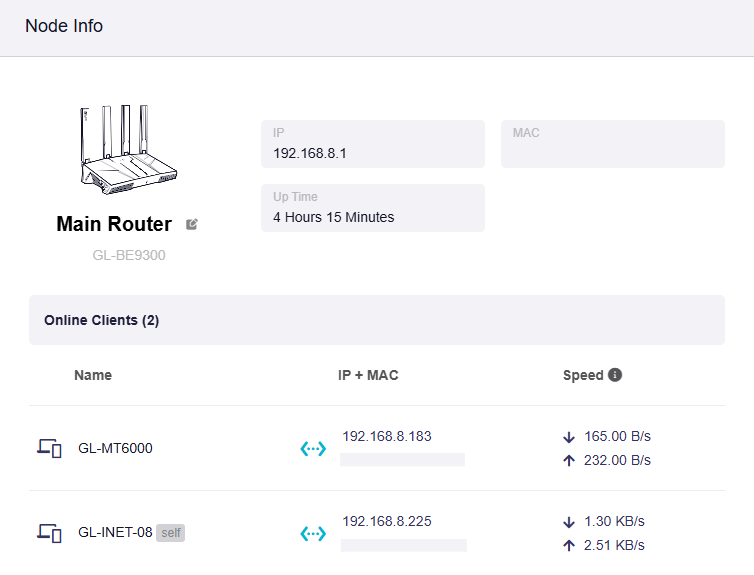
You can view the main router details, including model, IP & MAC address, up time, and connected clients.
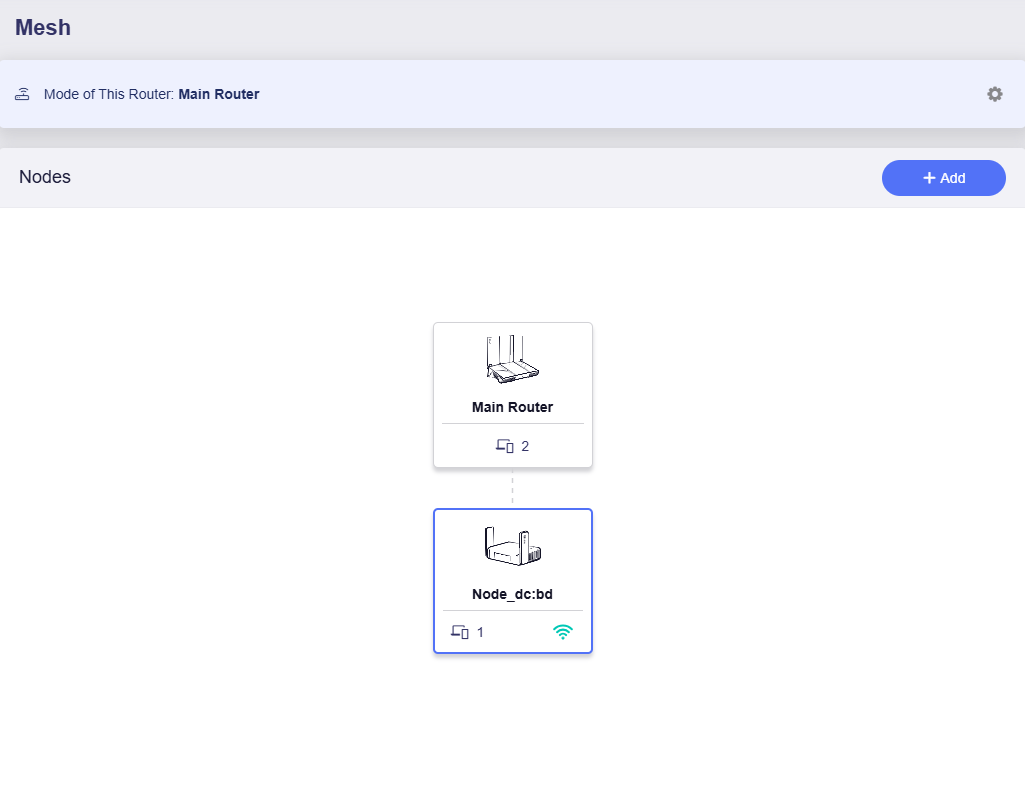
Click the Mesh Node on the topology.
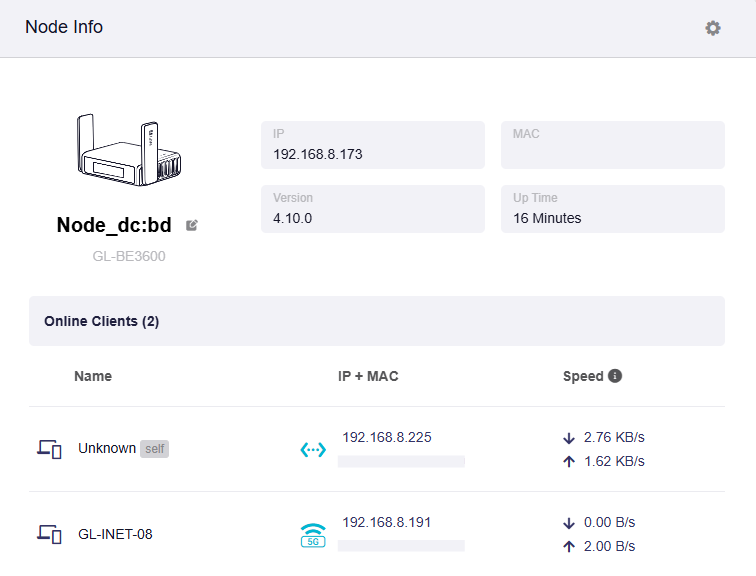
You can view the Mesh node details, including model, IP & MAC address, firmware version, up time, and connected clients.
Edit Mesh Node
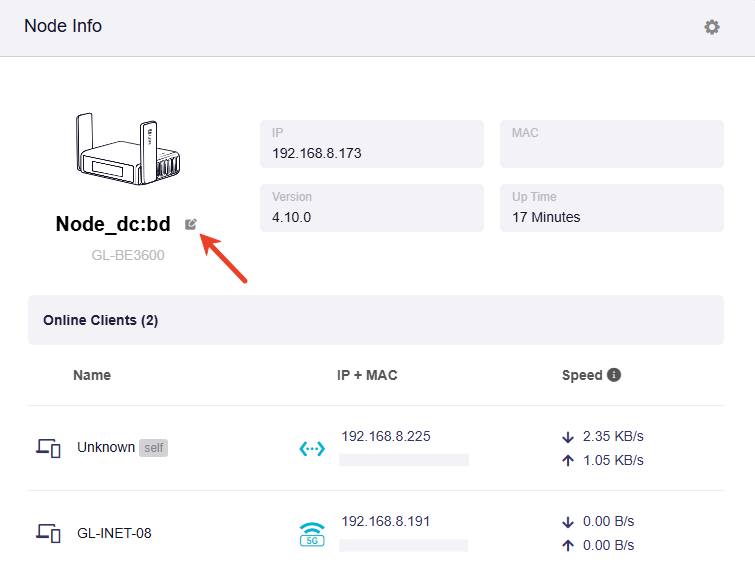
In the main router's Admin Panel, go to MESH and click the Mesh Node on the topology.
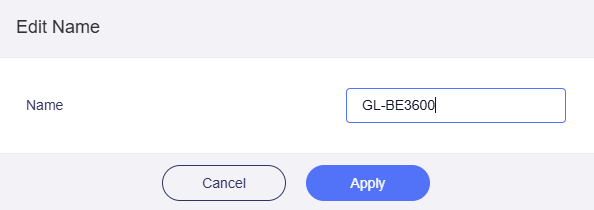
Each Mesh node is named "Node" followed by the last four digits of its MAC address by default. Click the edit icon to rename your Mesh node.
Access Mesh Node
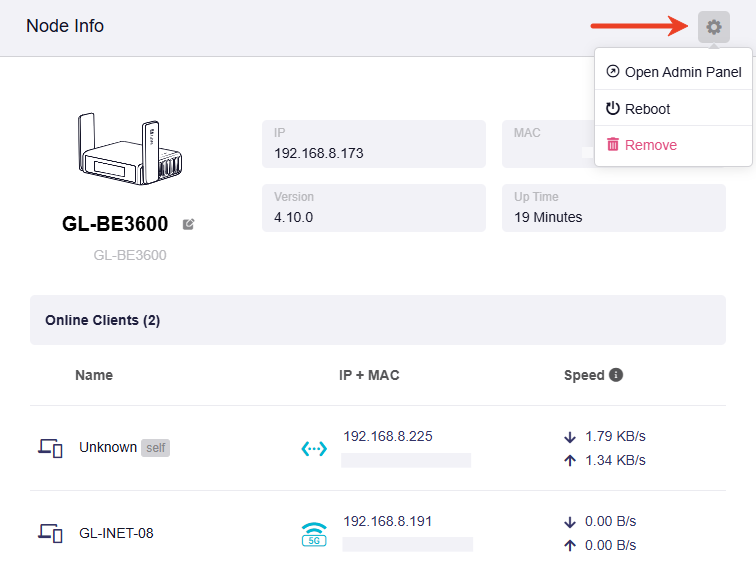
In the main router's Admin Panel, go to MESH and click the Mesh Node on the topology.
Click the gear icon in the upper-right corner and select Open Admin Panel.
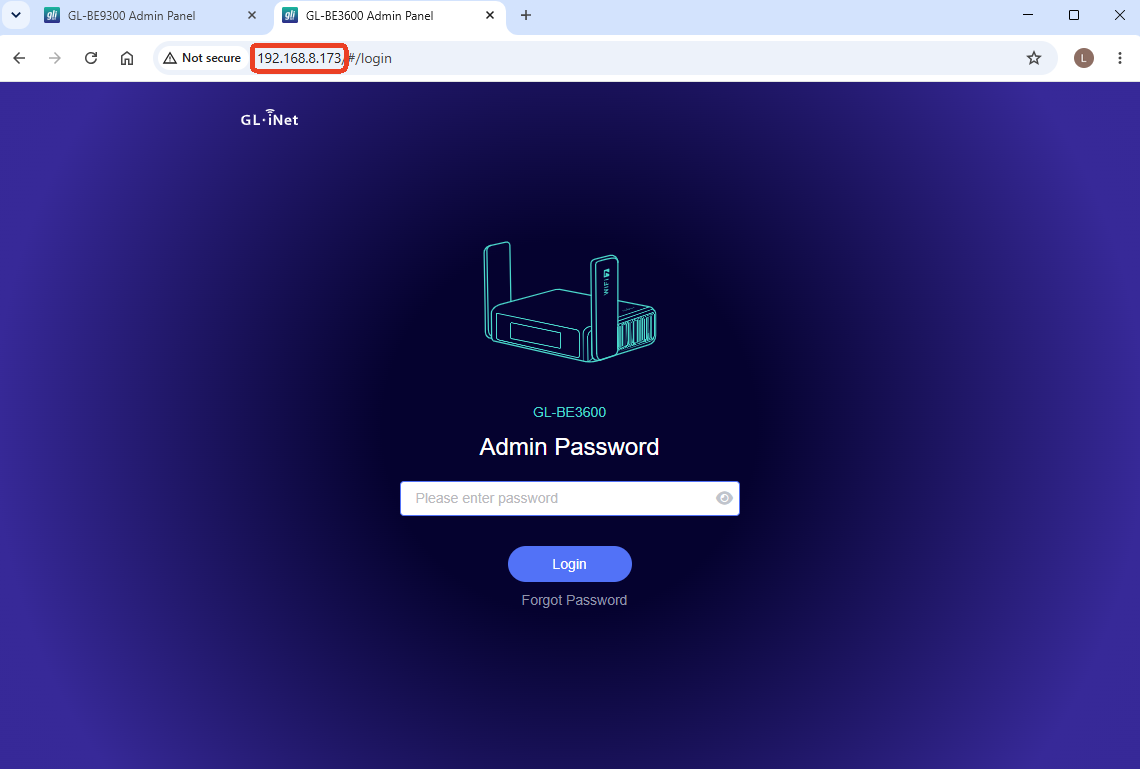
You will be redirected to the Mesh node's login page at the IP address assigned by the main router. Now you can log in to the Mesh node.
Add More Nodes
Click Add in the upper-right corner of the topology to add more nodes if needed.
Still have questions? Visit our Community Forum or Contact us.