Connect to the Internet via cellular (v4.10)
The content on this page is based on firmware versions v4.10 and above. If your device is running a different firmware version, use the selector below to switch to the corresponding guide.
Most GL.iNet routers support cellular connectivity. This guide introduces cellular connections for two types of routers:
-
Cellular routers
GL.iNet cellular routers come with a built-in 4G/5G module, and one or two SIM card slots, such as the Spitz AX (GL-X3000) and Mudi 7 (GL-E5800). The cellular settings in the web Admin Panel may differ slightly due to models and firmware versions. To set up cellular connection for these models, please refer to Cellular routers.
-
Non-cellular routers
Non-cellular routers refer to other types of routers, such as home/travel/mini routers and security gateway. They usually have a USB port, which can accept a USB dongle (not included) for cellular connectivity. To set up cellular connection for these models, please refer to Non-cellular routers.
Note: Some SIM cards require activation before first use. To ensure compatibility, activate your SIM card in a smartphone before inserting it into the router.
Cellular Routers
This section takes Mudi 7 (GL-E5800) as an example to introduce the cellular setup steps and related features.
Since Mudi 7 has a built-in eSIM and dual Nano‑SIM slots, supporting Dual SIM Dual Standby, its web Admin Panel may differ slightly from other cellular routers, especially those with a single SIM slot.
Network Setup
Log in to the router's web Admin Panel and navigate to INTERNET -> Cellular.
-
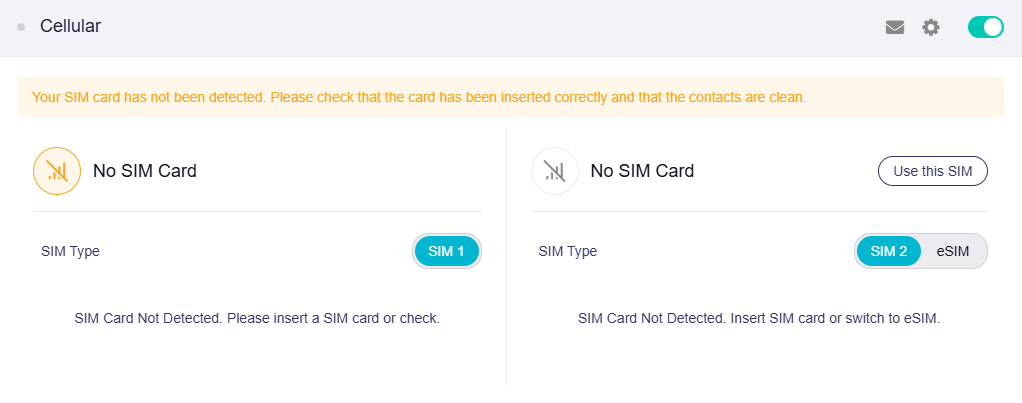
When no SIM card is inserted, the page indicates "Your SIM card has not been detected".
-
Insert a SIM card, and the router will start connecting automatically. Once connected, the page displays your SIM carrier, signal strength, band, data usage, and more options.
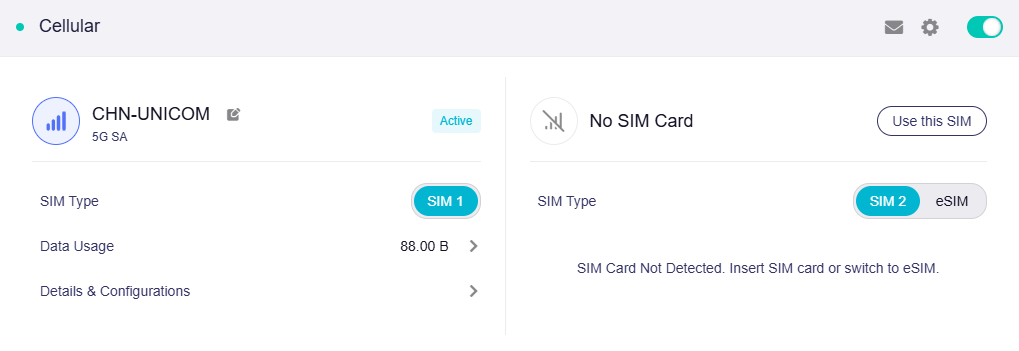
If your SIM card is not detected, re-insert it to the router, or restart the router and try again.
-
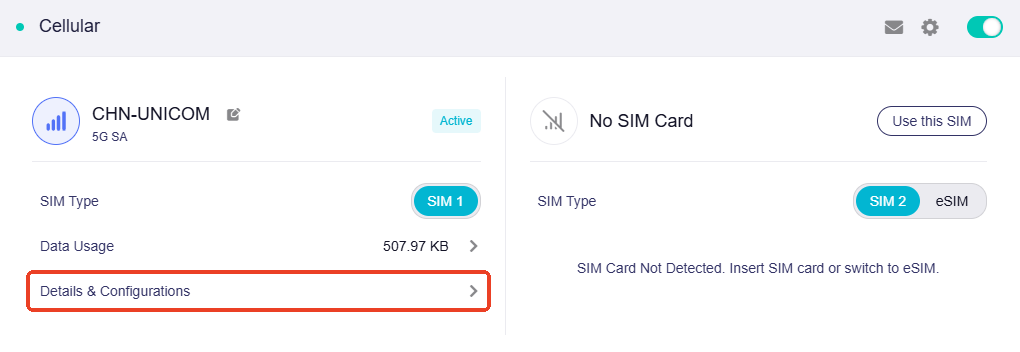
To view your network details, click Details & Configuration.
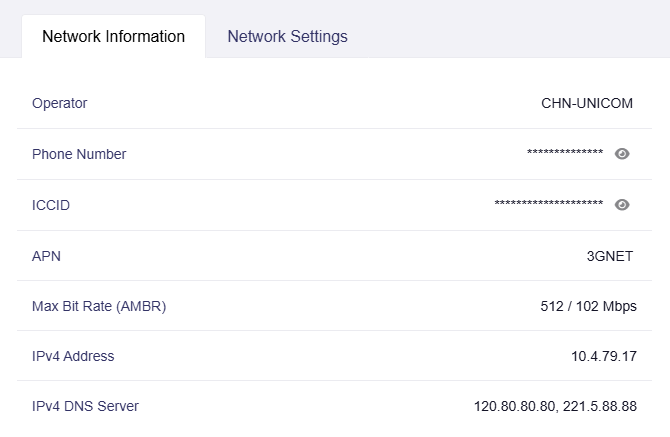
In the Network Information, you can see the SIM Operator, Phone Number, ICCID, APN, Max Bit Rate, IPv4 Address, and IPv4 DNS Server.
What is Max Bit Rate (AMBR)?
Max Bit Rate (AMBR):Aggregate Maximum Bit Rate. It defines the aggregated upper‑limit bit rate for all non‑GBR bearers from your carrier. This parameter is provisioned by your mobile network operator.
-
To configure your network manually, click Details & Configuration.
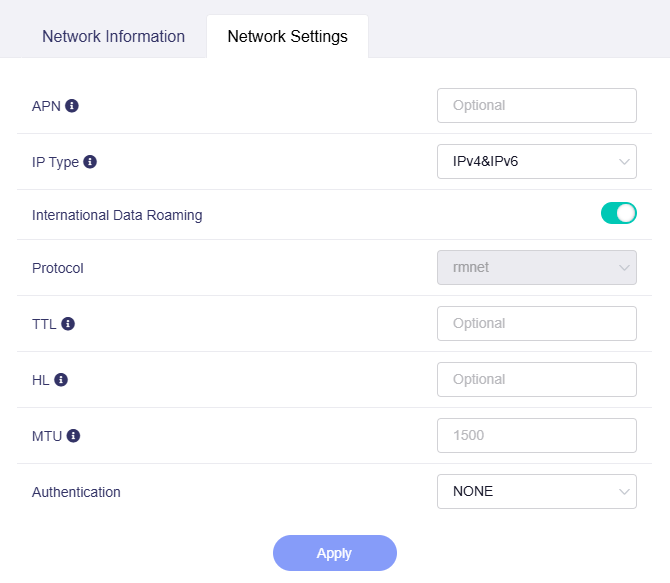
In the Network Settings, you can configure some network parameters, such as APN.
-
APN: APN settings are generally fetched automatically from your SIM card. Some SIM cards require a specific APN. If you don't know the correct APN, please ask your network operator.
-
IP Type: It is auto-detected. You may customize the IP type as IPv4, IPv6, or both. Make sure the selected option matches the IP type supported by your SIM card. If the SIM card does not support the current IP type, or if IPv6 is selected here but IPv6 is disabled on your router, it may result in dialing issues.
-
International Data Roaming: It is enabled by default to facilitate data usage when travelling internationally. You may disable this feature if it is not required, or to prevent high‑cost roaming charges from your carrier.
-
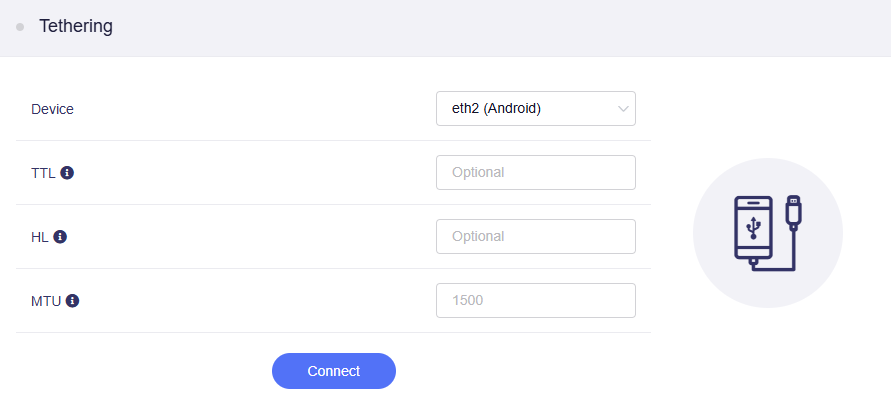
TTL: Some network operators will determine whether the SIM card is used by the router by reading the TTL value. If your SIM card cannot be used on the router, you could try to set the TTL to a value other than 64 and 128 (for example, 65).
-
HL: In IPv6, the HL (Hop Limit) field is used to limit the number of transmission hops of data packets in the network, which is equivalent to the TTL in IPv4.
-
MTU: Set the MTU value according to your usage scenario .Incorrect settings may cause internet disconnection. If MTU is modified, please reboot the device for it to take effect.
-
Authentication: This is usually set to NONE if no credentials are required. You may set the authentication to PAP, CHAP, or PAP/CHAP.
-
Traffic Statistics
To view the traffic statistics, click Data Usage.
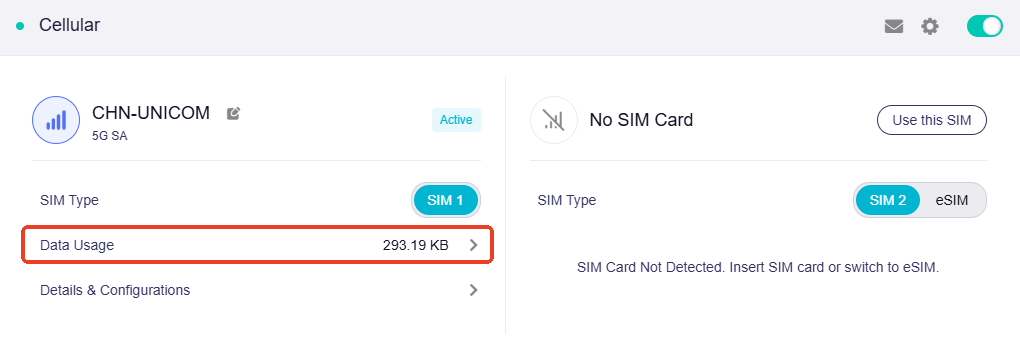
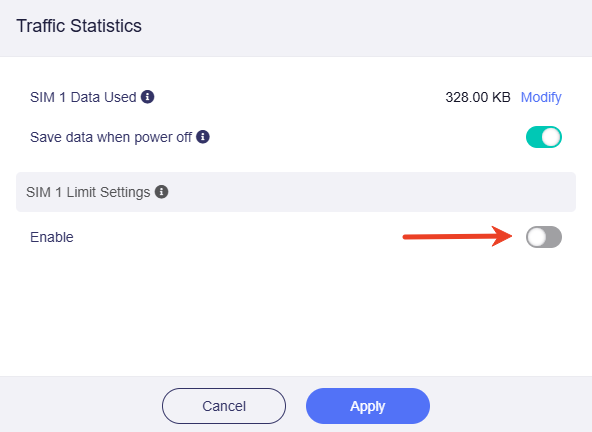
If you want to set the Data Cap Amount for your SIM, or set a schedule to reset SIM data periodically, enable SIM Limit Settings
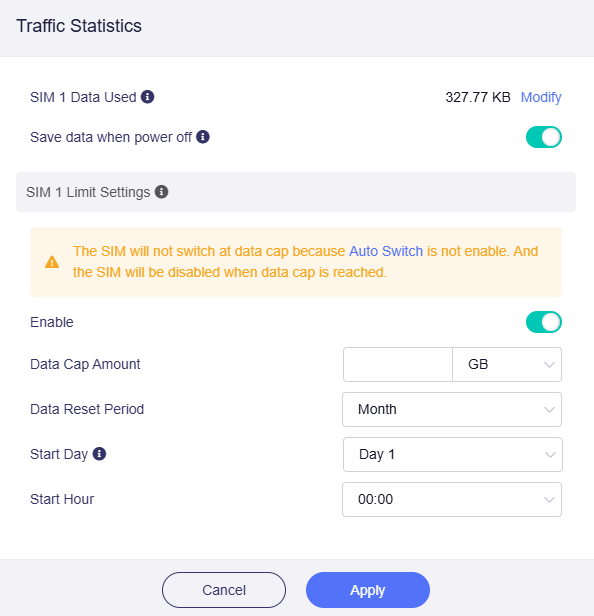
Set the Data Cap Amount, Data Reset Period, Start Day and Start Hour, then click Apply.
Note:
-
If the Data Used exceeds the Data Cap Amount, please modify the Data Cap Amount or the Data Used. Otherwise, the network may be disconnected, or the router may switch to another SIM (only if SIM Failover is enabled).
-
If the SIM 1 Data Cap Amount is set and the SIM Auto Switch is enabled, SIM 1 will automatically switch to SIM 2 when it's data exceeds the Data Cap Amount and SIM 1 will be disabled.
-
Start Day: The maximum number of days takes the value of the actual maximum number of days in the current month.
Cellular Details
To view your cellular details, click Details & Configuration.
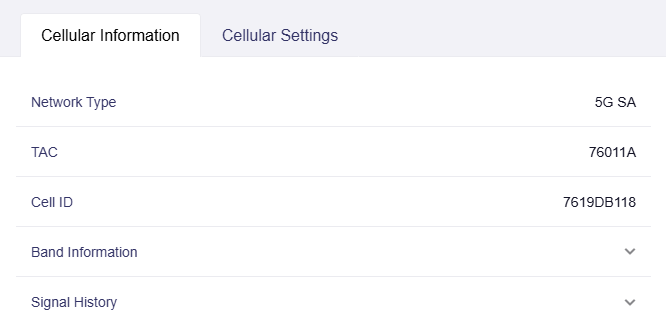
In the Cellular Information, you can see the Network Type, TAC, Cell ID, Band, and Signal History.
-
Network Type: It is auto-detected. If you want to specify it, switch to Cellular Settings tab and select the network type from the drop-down list.
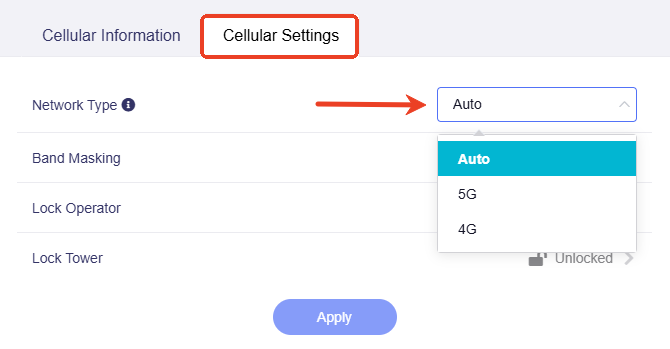
Select 5G for faster speed (5G signal required) or 4G for stability.
If you lock the tower, the network type will be fixed and cannot be changed.
-
TAC: Short for Tracking Area Code, a network‑assigned identifier that represents a tracking area for mobility management within the cellular network. It is auto‑detected from the cellular base station.
-
Cell ID: A unique identifier used to distinguish an individual cellular base station cell. It is also auto‑detected from the cellular base station.
-
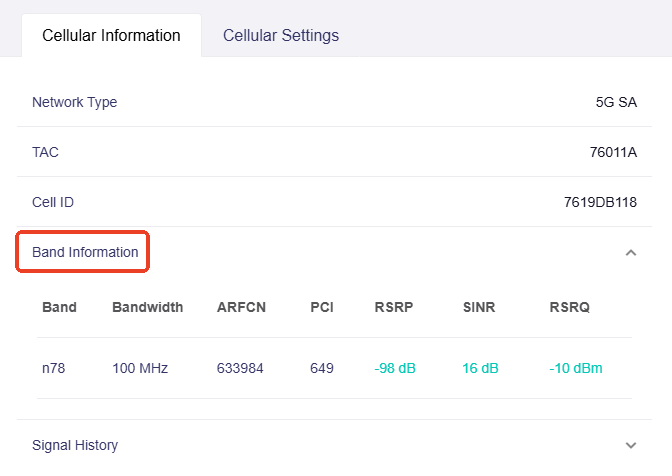
Band Information: Click it to view more parameters related to your cellular band.
-
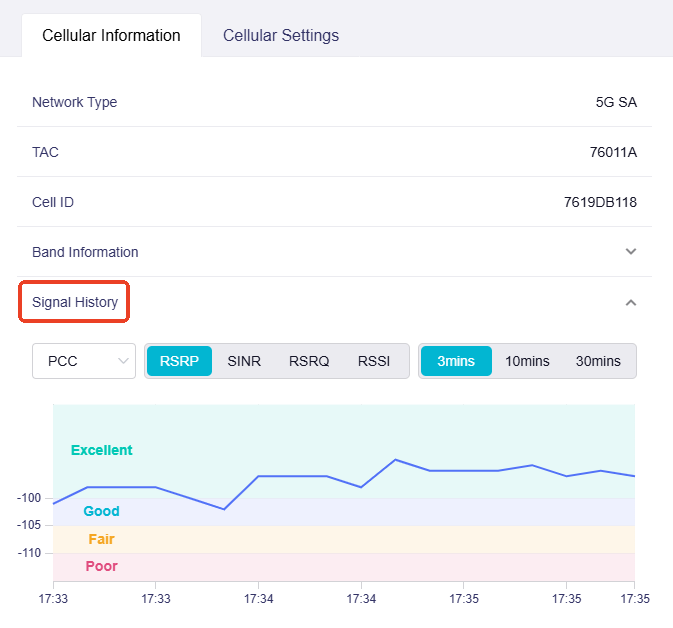
Signal History: Click it to view the signal strength history. You may use it to monitor the quality of your cellular connection.
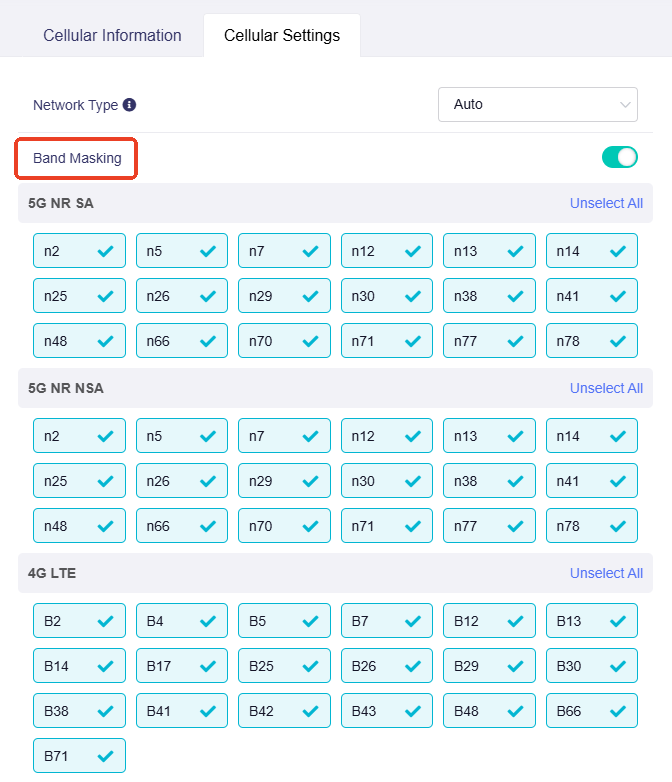
Band Masking
Band Masking allows you to use specific cellular bands to improve cellular signal.
To enable Band Masking, click Details & Configuration.
In the Cellular Settings, enable Band Masking, select the bands you want to use, then click Apply.
Lock Operator
Supported Models
- GL-E5800 (Mudi 7)
- GL-X3000 (Spitz AX)
- GL-XE3000 (Puli AX)
- GL-X2000 (Spitz Plus)*
*The GL-X2000 (Spitz Plus) supports this feature on firmware v4.8 or later.
By locking to a specific mobile operator, the router will only use that operator's network, ensuring a stable connection and avoiding unintended roaming charges — especially in border areas where the device may otherwise connect to foreign networks.
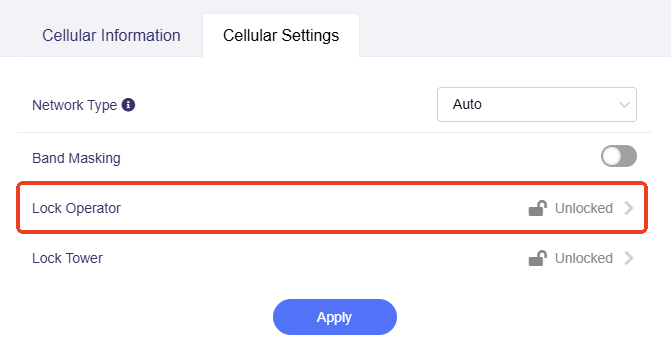
To lock operator, click Details & Configuration.
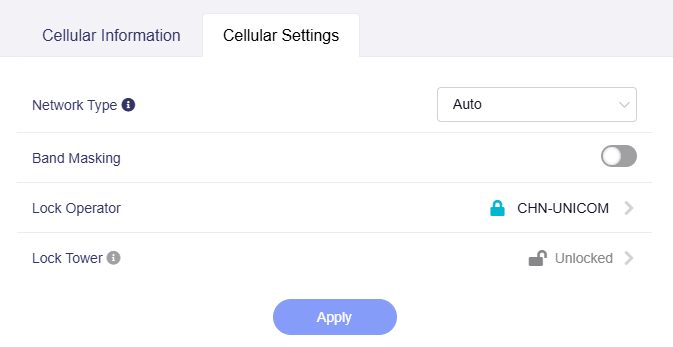
In the Cellular Settings, click Lock Operator.
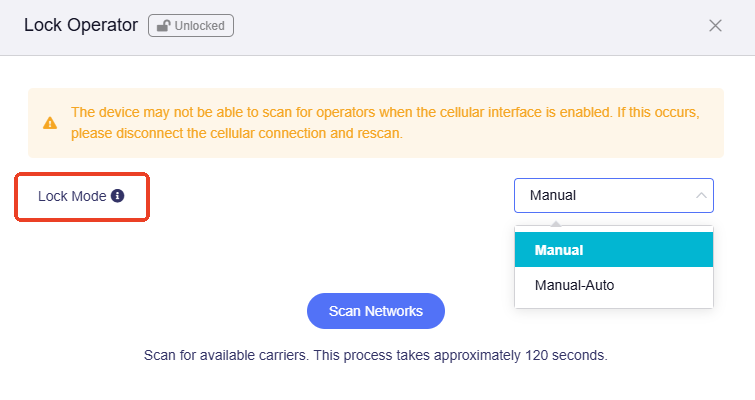
Before scanning networks, you may select the Lock Mode.
-
Manual: Lock to a specific operator manually.
-
Manual-Auto: Switch to an available operator network automatically when manual locking fails.
Then click Scan Networks.
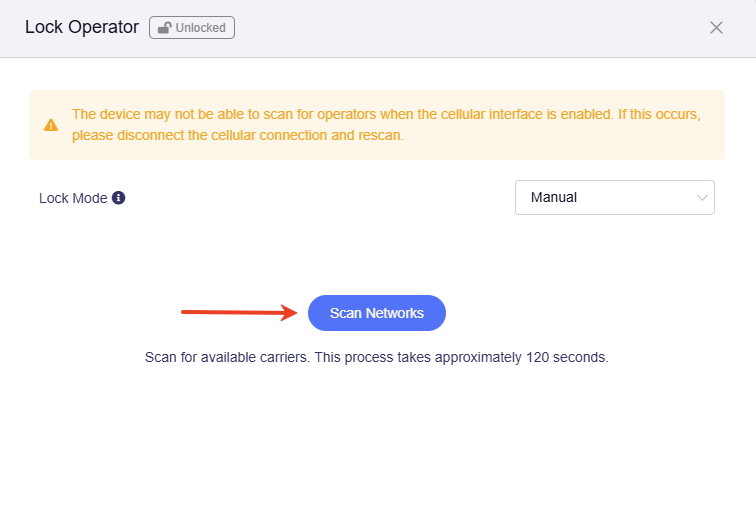
Wait a minite, then you will see the available operators. Select one and click Lock.
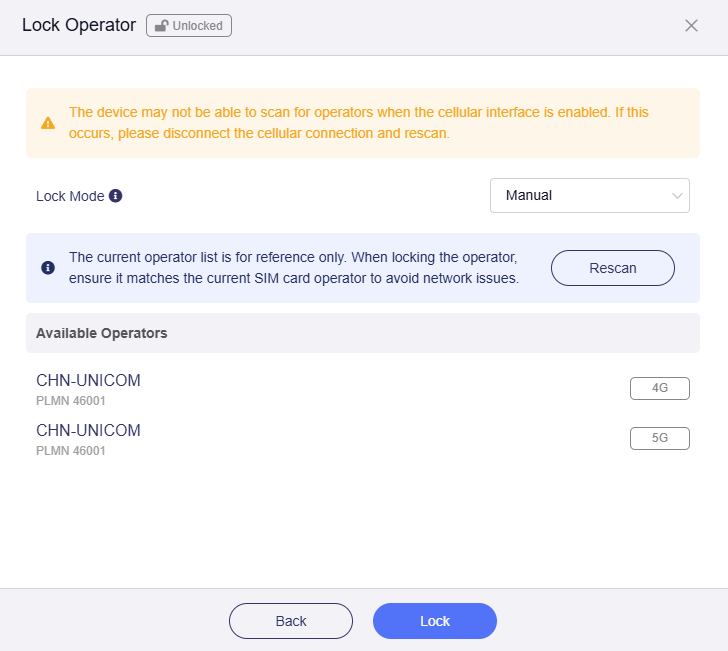
Your cellular signal will then be locked to the selected operator.
Lock Tower
Supported Models
- GL-E5800 (Mudi 7)
- GL-X3000 (Spitz AX)
- GL-XE3000 (Puli AX)
- GL-X2000 (Spitz Plus)*
*The GL-X2000 (Spitz Plus) supports this feature on firmware v4.7 or later.
If you want to receive a high-quality signal and ensure a stable cellular connection, you can try locking tower. However, the locked tower must match the frequency bands supported by your carrier and device; otherwise, the connection may fail.
To lock a tower, click Details & Configuration.
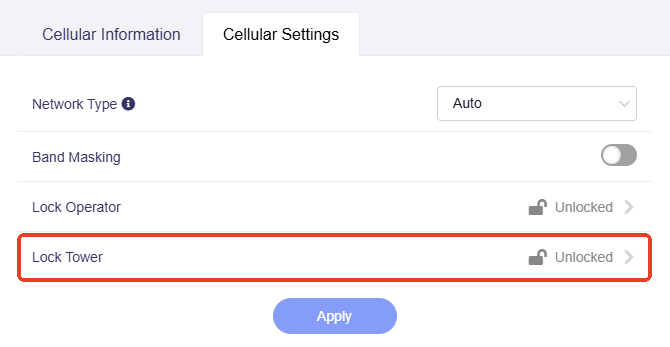
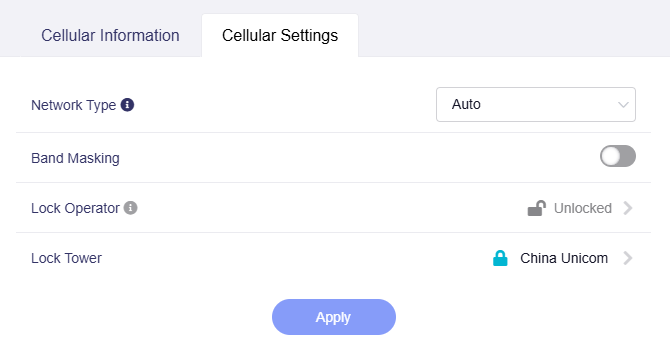
In the Cellular Settings, click Lock Tower.
In the pop-up window, click Scan Networks.
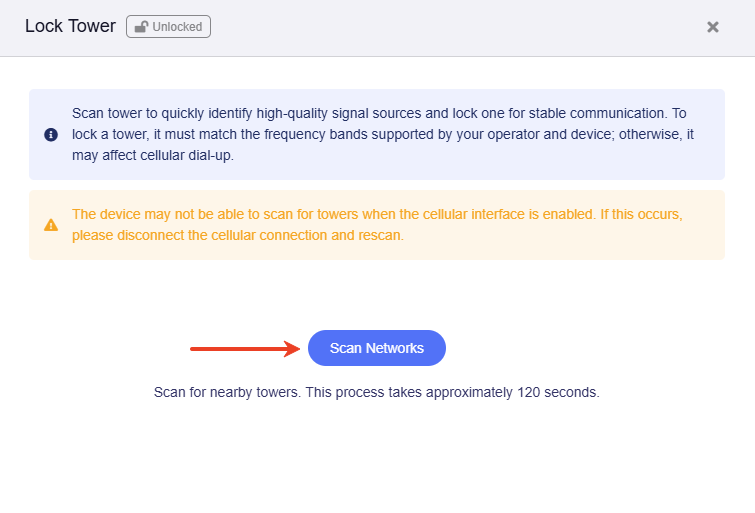
Wait a minite, then you will see the available towers.
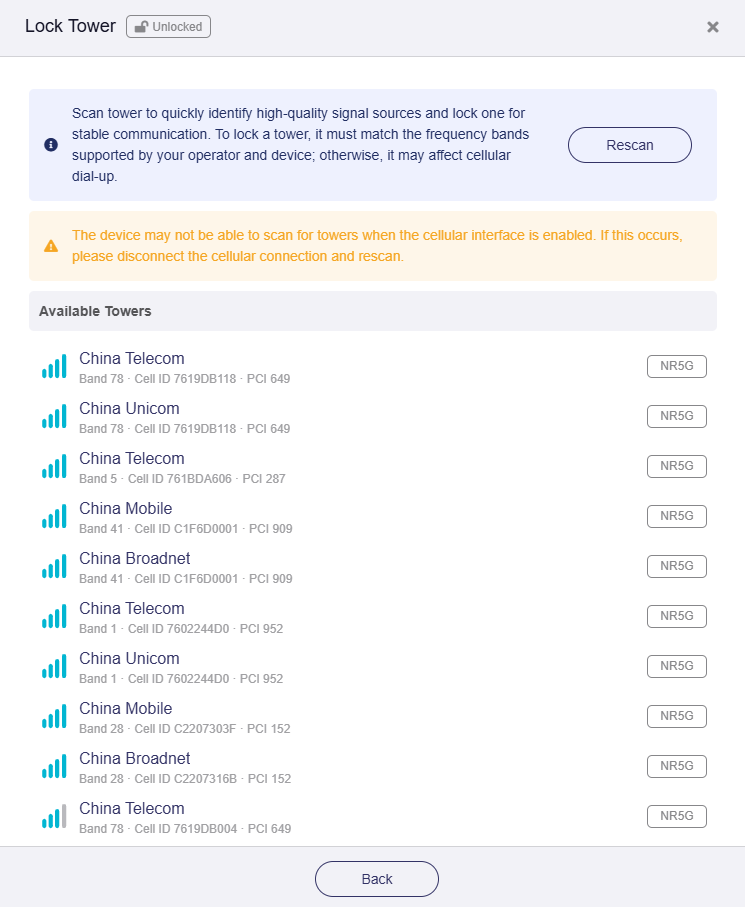
Select one to view details, then click Lock.
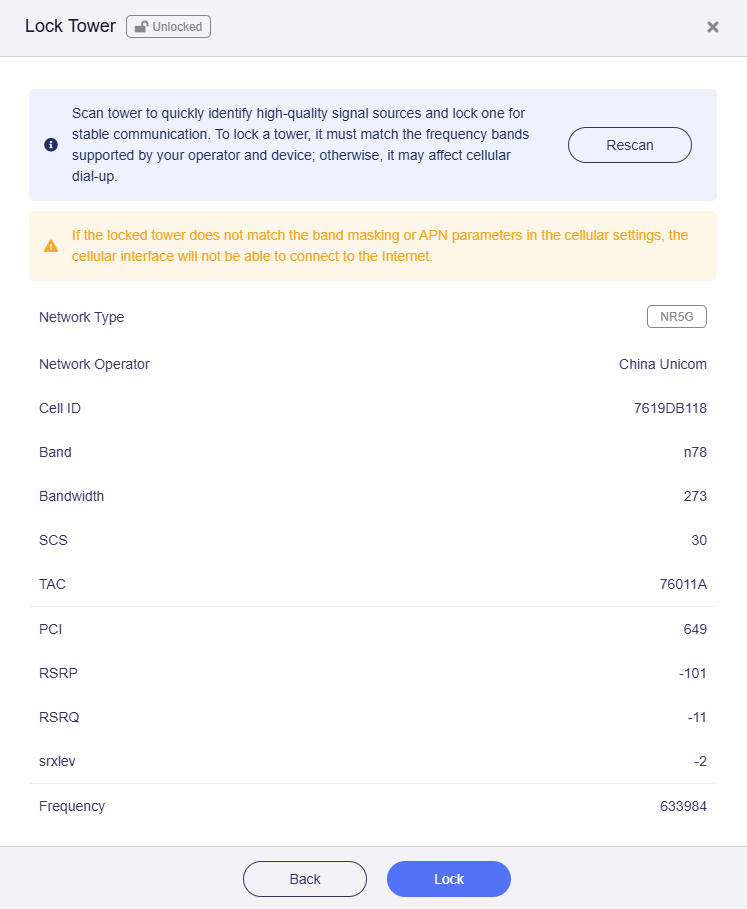
Your cellular signal will then be locked to the selected tower.
Note:
-
The device may not be able to scan all towers when the Cellular interface is enabled.
-
If the locked tower does not match the band masking (if enabled) or APN parameters in your cellular settings, the router will fail to connect to the cellular network.
-
After locking a cell tower, if you move the router to another location, it will still attempt to reconnect to the locked tower after rebooting. This may prevent the router from connecting to the cellular network automatically at the new location. In this case, you need to either unlock the current cell tower, or manually lock it to a new tower.
SMS
Please refer to SMS.
SMS Forwarding
Please refer to SMS Forwarding.
Airplane Mode
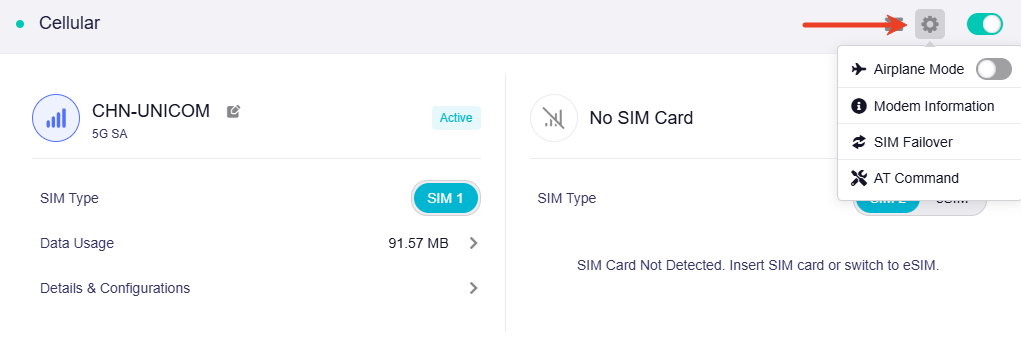
To enable Airplane Mode, click the gear icon in the upper‑right corner and toggle on Airplane Mode.
Modem Information
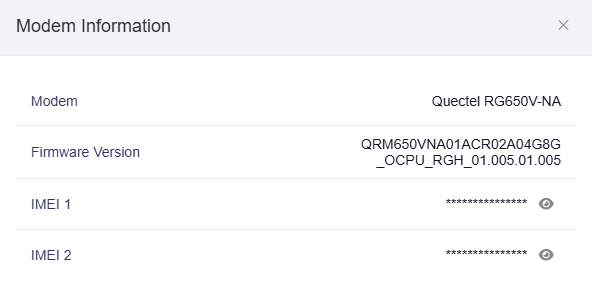
To view modem details, click the gear icon in the upper-right corner and select Modem Information.
SIM Failover
This feature is available only on cellular routers that support Dual-SIM.
SIM Failover enables the router to automatically switch between SIM 1 and SIM 2. When the top‑priority SIM's data usage exceeds the Data Cap Amount or it fails to connect to the Internet, the router will switch to the backup SIM to ensure a seamless network experience.
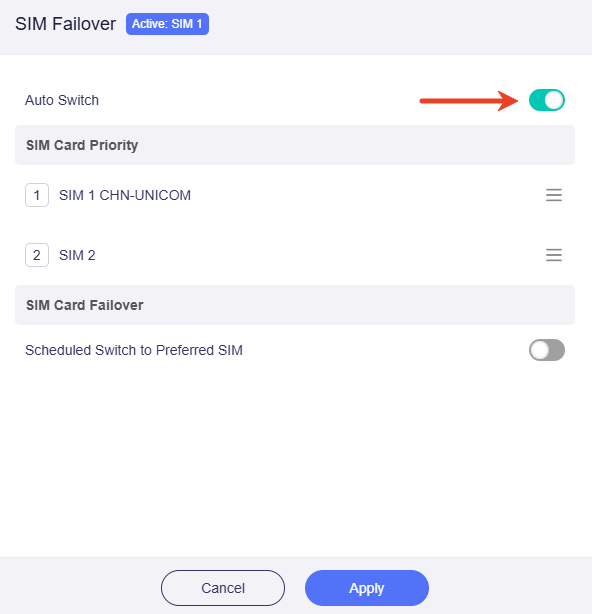
To enable SIM Failover, click the gear icon in the upper-right corner and select SIM Failover.
In the pop-up window, enable Auto Switch. You may drag the button on the right to adjust the SIM priority.
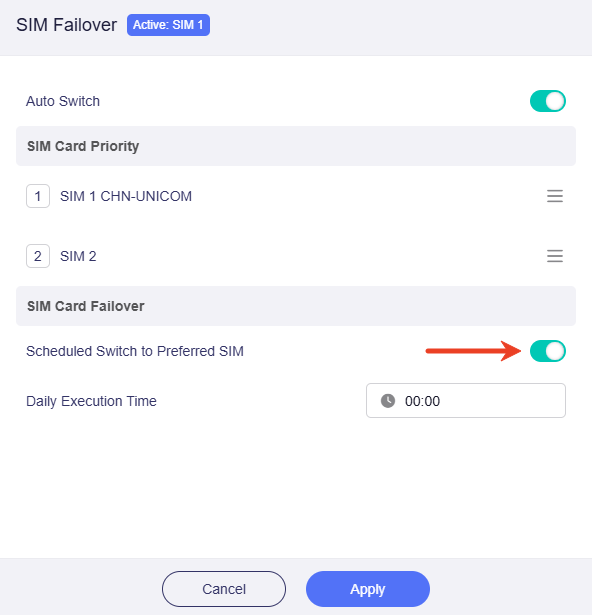
If you want the router to switch back to the preferred SIM at a certain time of the day, enable Scheduled Switch to Preferred SIM and set the Daily Execution Time, then click Apply.
AT Command
AT commands are standard instructions used to communicate with the cellular modem. With this feature, you can send commands and check the modem status.
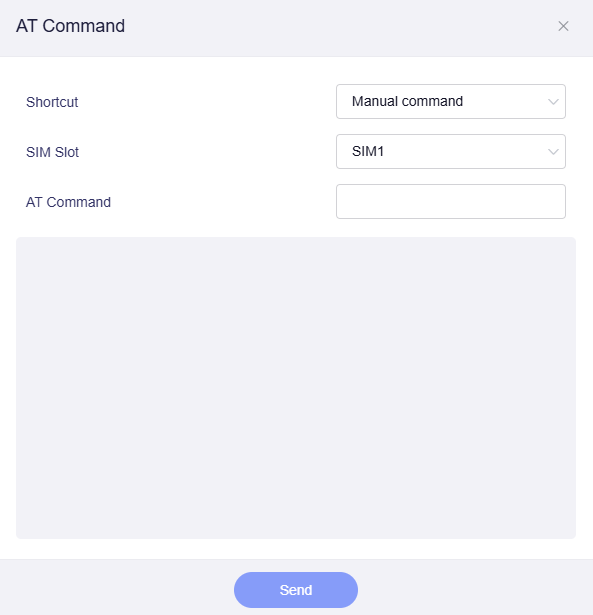
Click the gear icon in the upper-right corner and select AT Command.
-
Shortcut: When Shortcut is set to Manual command, enter your desired command in the AT Command field and click Send at the bottom. The system will return the result in the output box below.
You can also click the box and select a preset command from the drop-down list.
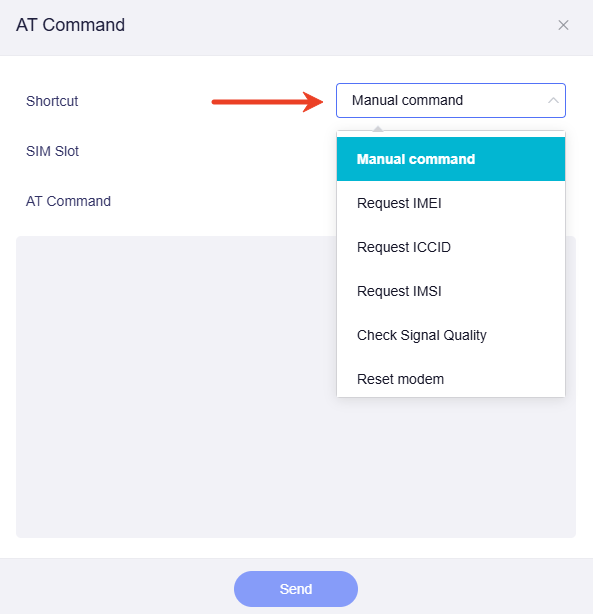
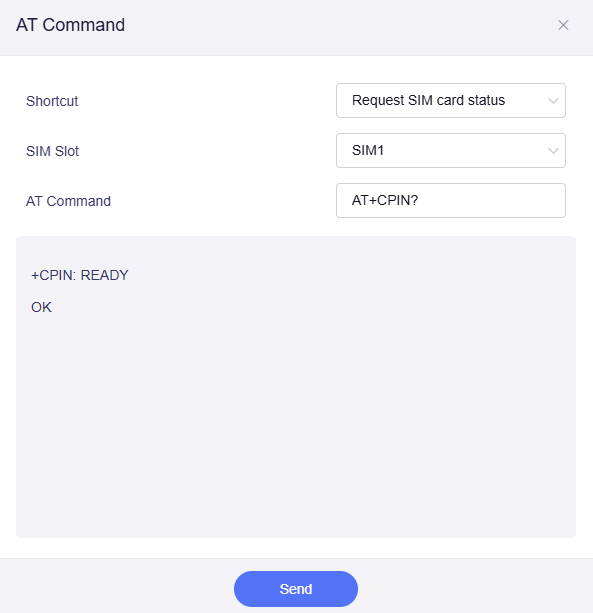
For example, if you select a shortcut "Request SIM card status" and select the SIM slot as SIM1, simply click "Send" and you will get the result as shown below.
-
SIM Slot: Choose whether the command applies to SIM1 or SIM2.
-
AT Command: Enter your desired command in this field when the Shortcut is "Manual command".
Non-cellular Routers
This section takes Flint 3 (GL-BE9300) and an external USB dongle SIMPoYo uFi as an example to introduce the cellular setup steps.
Note:
-
Some USB cellular dongles, including SIMPoYo uFi, operate in host‑less mode. In this mode, the dongle performs internal cellular dial‑up and exposes a virtual USB Ethernet interface to the router. The router treats it as a tethered WAN instead of a controllable cellular modem, so the connection will be established through the Tethering interface instead of the Cellular interface.
-
Under host‑less tethering mode, the router cannot access low‑level cellular metrics such as signal strength, Cell ID and TAC, nor can it control APN or SIM‑related parameters. Configure these settings via the dongle's own built‑in web‑UI.
Follow the steps below to set up cellular connection.
-
Plug the USB dongle into your router's USB port.
-
Log in to your router's web Admin Panel, navigate to INTERNET -> Tethering, then click Connect.
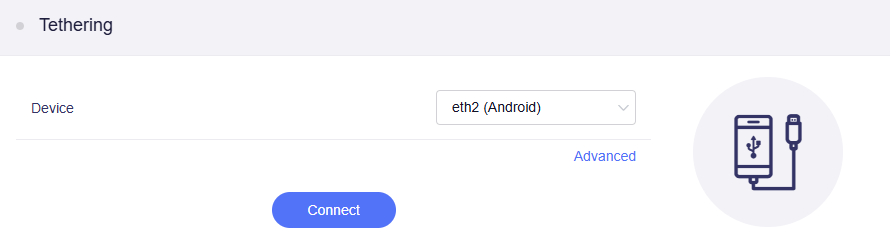
If you need to set advanced settings (e.g., TTL, HL, and MTU), click Advanced to customize your settings before you click Connect.
-
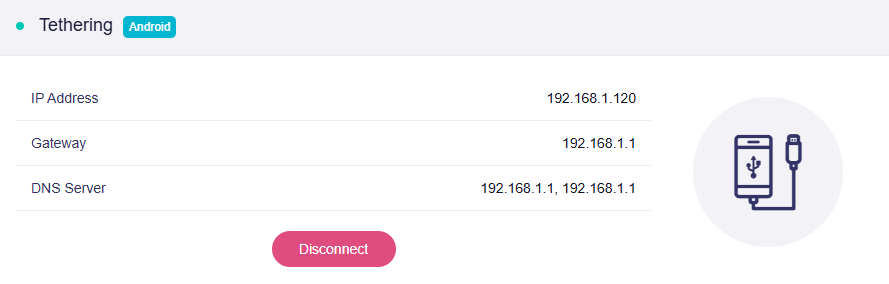
Once connected, the page displays the network details and a green dot, indicating a successful connection.
After initial setup, if you restart the router with the USB modem plugged in, or replug the modem, it will be recognized automatically, and the network connection will be established without clicking the connect button again.